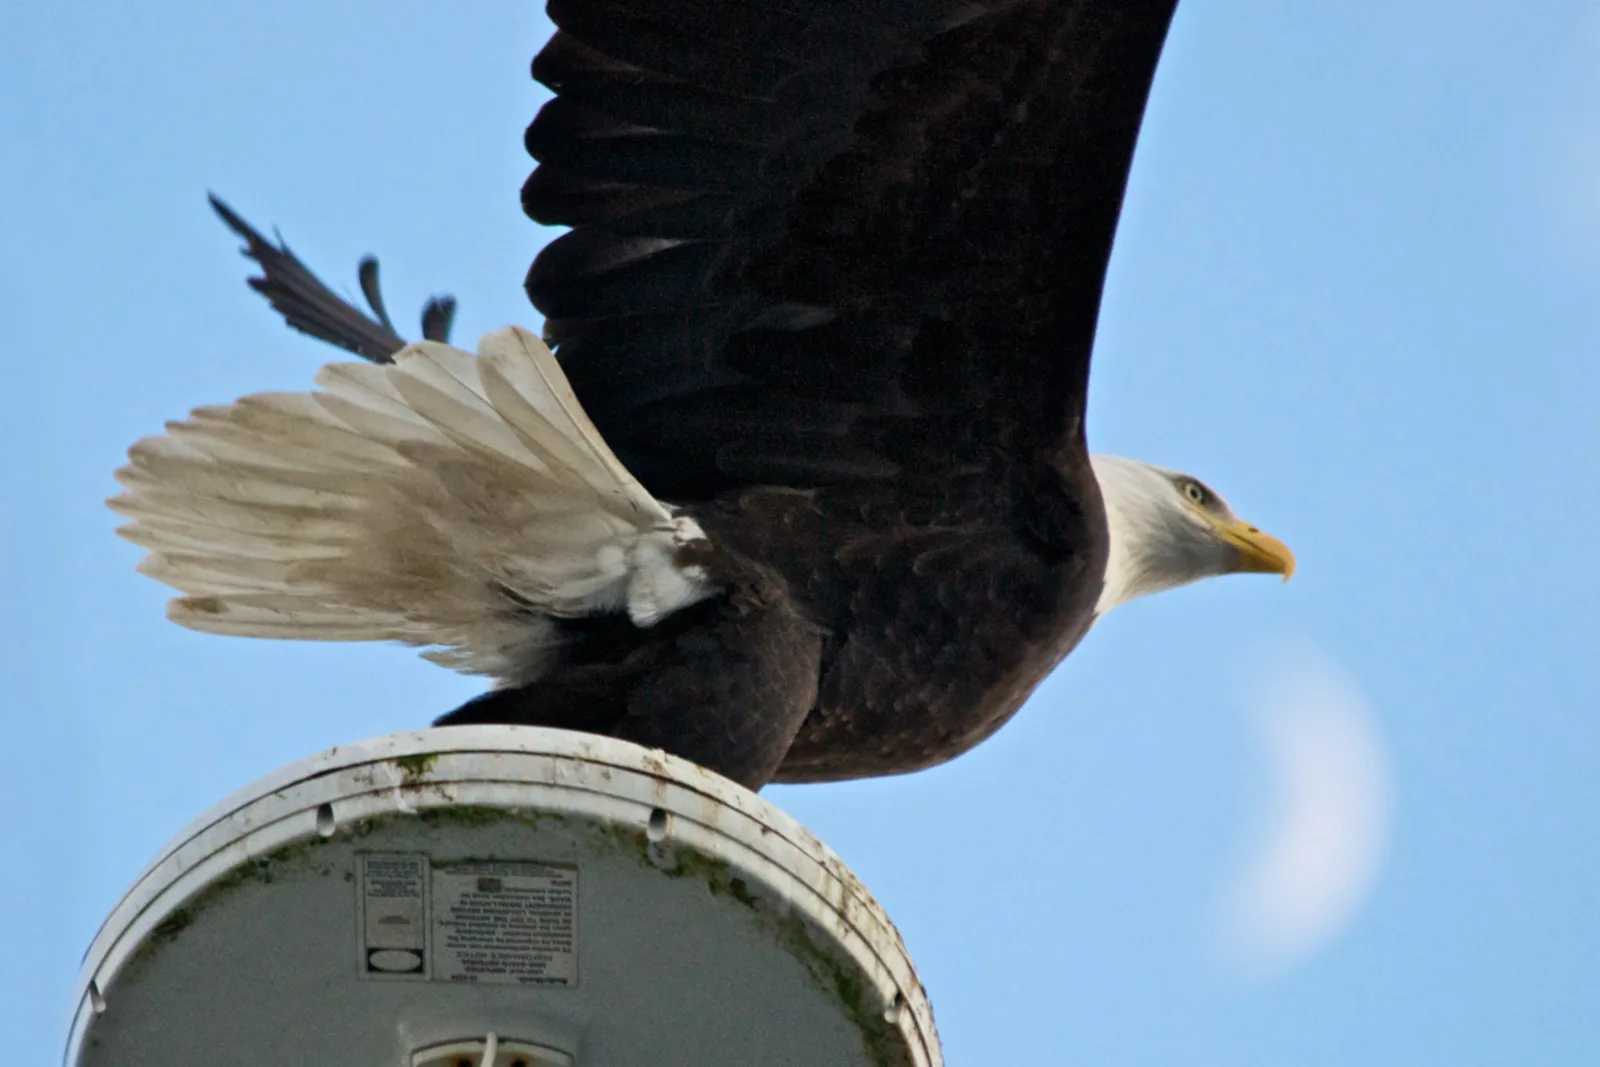
Eagles, hawks, falcons, ospreys and owls are some of the most thrilling birds a photographer can meet. Their sharp eyes, hooked beaks, powerful talons and wide wings give them a presence few other animals can match. Birds of prey are also wary, fast and often far away, so photographing them well takes patience, fieldcraft and a respectful approach. The reward is a picture that captures wildness and power in a single frame.
This beginner guide covers where to find birds of prey, reading their behavior, ethics, perched portraits, birds in flight, hunting and fishing, owls, light and backgrounds, settings, lenses, phones, editing, common mistakes and a simple practice routine. For general bird technique, see the guide to how to photograph birds.
Why birds of prey are special subjects
Birds of prey, also called raptors, sit at the top of their food chains. They hunt with their eyes and feet, and their bodies are built for it.
- Intense eyes. Forward facing eyes give raptors a fierce, focused gaze that makes powerful portraits.
- Bold markings. White heads, barred chests, speckled backs and banded tails make striking patterns.
- Wide wings. Spread wings in flight show every feather in dramatic shape.
- Action. Dives, catches and takeoffs are some of the most exciting moments in nature.
- Character. Each species has its own personality, from the calm stare of an owl to the restless energy of a falcon.
Because raptors are wary and usually far away, every good picture feels earned. That challenge is part of the appeal.
Species to start with
Some birds of prey are easier for beginners than others, either because they are common, large or tolerant of people.
- Eagles. Large, slow to take off and often perched in the open near water, eagles make excellent first subjects.
- Ospreys. These fish hawks nest on tall platforms and poles near water and often fly the same routes each day.
- Red tailed and similar hawks. Common along roads and fields, they perch on posts and wires for long periods.
- Kestrels. Small, colorful falcons that hover over grassy fields.
- Vultures. Often overlooked, they soar slowly and gather in groups, which makes them easy flight practice.
- Owls. Wonderful but secretive. Start with captive owls at raptor centers before seeking wild ones.
A good field guide or bird app helps you identify what you see, and knowing the species tells you how it behaves and where it hunts.
Where to find birds of prey
Raptors live almost everywhere, from wild coasts to city parks, once you know where to look.
- Coasts, rivers and lakes. Eagles and ospreys hunt fish and often perch on tall trees, poles and masts near water.
- Open fields. Hawks and kestrels hunt over farmland and grassy roadsides, often from fence posts and wires.
- Cliffs and city towers. Falcons nest on ledges, including tall buildings and bridges in many cities.
- Woods. Owls roost quietly in dense trees and hunt at dusk and night.
- Migration lookouts. Ridges and coastlines where raptors gather during migration can show dozens of birds in a day.
- Raptor centers. Rehabilitation centers and bird of prey shows let you photograph birds up close safely.
Local birding groups, nature centers and park rangers often know where eagles winter, where hawks hunt and which trees owls use. Visiting the same spots repeatedly teaches you the birds’ routines.
Raptor centers and shows
Rehabilitation centers and bird of prey shows care for injured or trained birds and often welcome photographers. They offer close, calm views in good light, which is perfect for learning portraits, feather detail and focusing on the eye. Some centers hold photography days with birds flying between handlers, which gives safe flight practice. Be honest when sharing these pictures, and note that the bird was photographed at a center. Supporting these places with a visit or donation helps the birds they care for.
Reading behavior
Raptors follow patterns, and understanding them is the key to getting close to the action.
- Favorite perches. Many birds use the same lookout post, tree or pole day after day.
- Takeoff signals. A bird often leans forward, lifts its tail, drops waste or crouches slightly before flying.
- Wind direction. Birds usually take off and land into the wind, so set up with the wind at your back to see them fly toward you.
- Hunting time. Many raptors hunt most actively in the early morning and late afternoon.
- Weather. After rain or on windy days, hawks often hover or soar more, giving flight chances.
Spend time simply watching before you photograph. Knowing what a bird is likely to do next lets you be ready when it happens.
Ethics and respect
Birds of prey are sensitive, and many are protected by law. Their welfare always comes before a picture.
- Keep your distance. If a bird stops what it was doing to watch you, you are too close.
- Never bait. Throwing food or using lures changes behavior and can harm birds.
- Protect nests. Stay well away from nests, especially in spring, and never trim branches for a clearer view.
- Be careful sharing locations. Owl roosts and nests can attract crowds that stress the birds.
- No calling or flushing. Do not use recorded calls or chase a bird into flight.
Patient, quiet observation usually produces better pictures anyway, since a relaxed bird behaves naturally. The guide to photography ethics covers these ideas more broadly.
Perched portraits
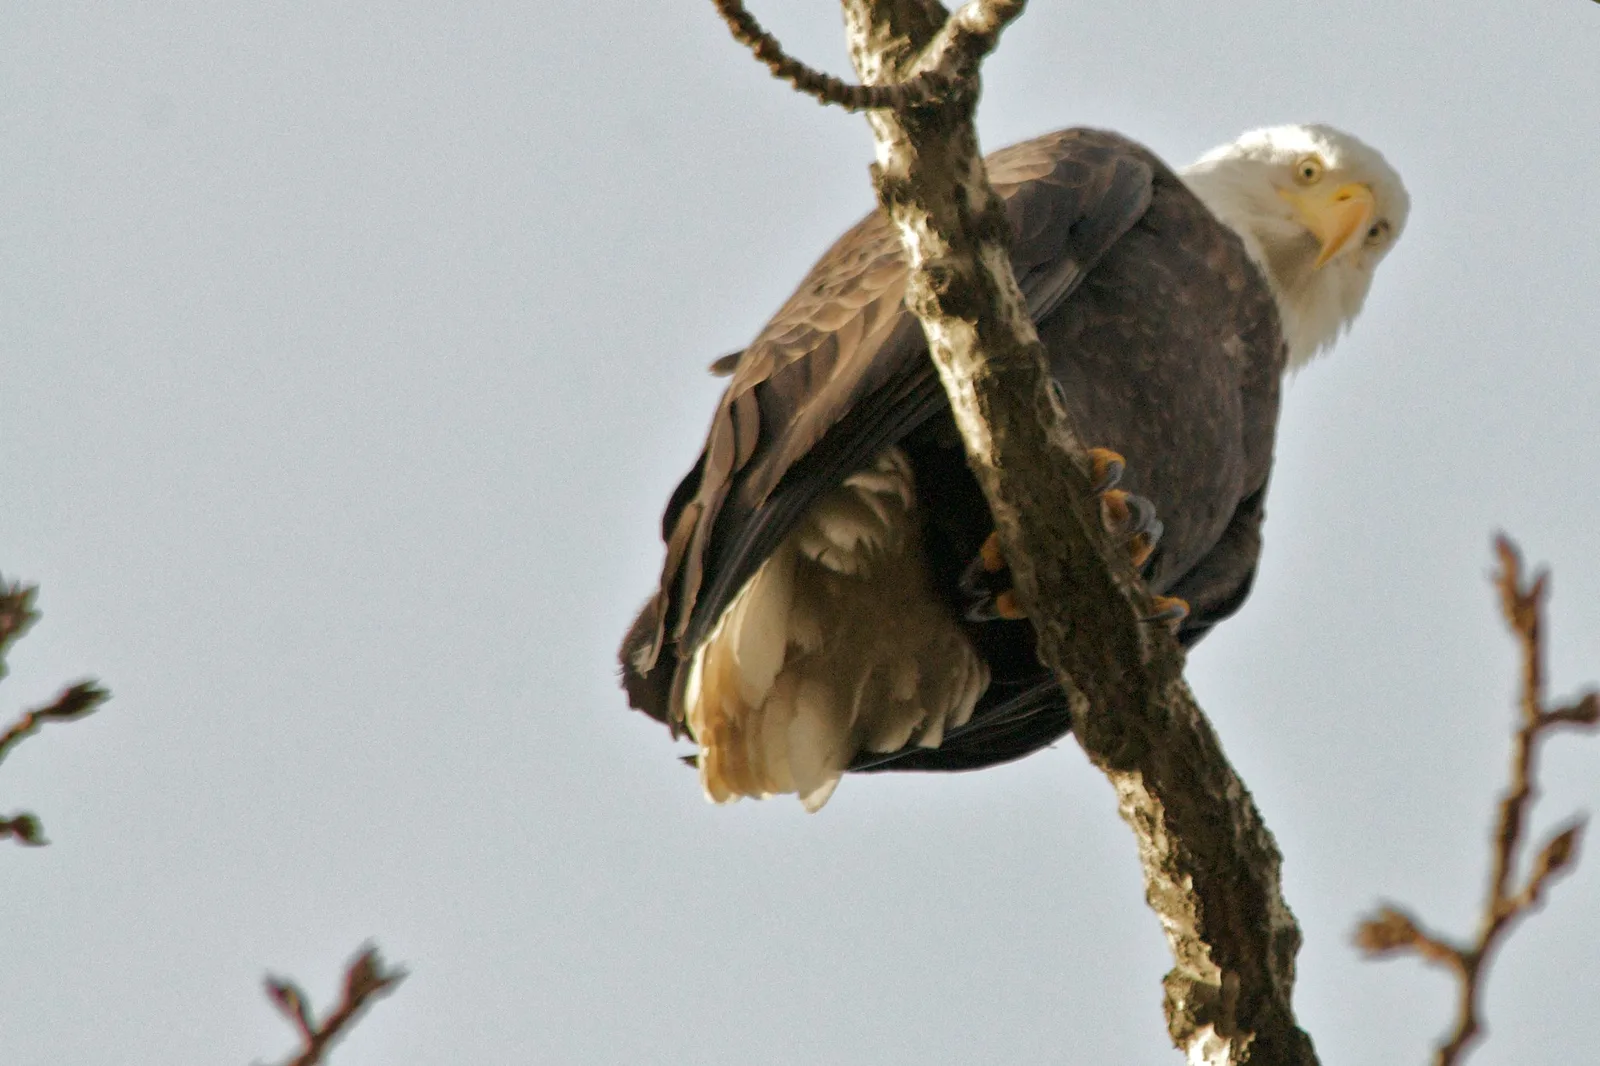
A raptor on a perch is the best place to start. You have time to compose, focus and wait for an expression.
- Focus on the eye. A sharp eye with a small catchlight brings the portrait to life.
- Wait for the head turn. A bird looking toward the camera or along the frame feels more engaging.
- Get level. Shooting from lower ground or a hillside reduces the steep upward angle.
- Clean perches. A natural branch or rock reads better than wires, though poles and masts can add context.
- Leave room. Give space in the direction the bird is looking or likely to fly.
Keep shooting as the bird stretches, preens, shakes or calls. These small moments show personality.
Composition ideas
Try a few different ways of framing the same bird. A tight head portrait shows the eye, beak and feather detail. A full body portrait on its perch shows posture and markings. A wider view with the bird small on a tall tree, cliff or mast shows its habitat and how it watches over its territory. Vertical frames suit perched birds, while horizontal frames suit flight. Placing the bird off center, using the rule of thirds, leaves room for it to look or fly into the frame.
Birds in flight
Flight pictures are the hardest and most rewarding part of raptor photography.
- Fast shutter speed. Use at least 1/2000 second to freeze wings, and faster for falcons.
- Continuous autofocus. Track the bird with continuous focus and a group or zone of points.
- Burst mode. Shoot short bursts through takeoffs, landings and passes. See the guide to burst mode.
- Find it first. Locate the bird with your eyes, then raise the camera to your eye along the same line.
- Pre focus. Focus on a perch or a spot in the sky at the right distance before the bird arrives.
Takeoffs are easier than random flight, because you know where the bird will start. Watch for the takeoff signals, and start a burst the moment it leans forward. Soaring birds circling overhead also give repeated chances.
Wing positions
Wing shape changes the whole feel of a flight picture. Wings raised high above the body look dramatic and powerful. Wings pushed down show the full span and feathers. A glide with wings flat and spread looks calm and graceful. In a burst of frames, pick the one where the wing shape is strongest and the eye is visible. A head turned toward the camera makes almost any flight picture better.
Hunting and fishing
Catching a raptor hunting is a special moment that needs patience and preparation.
- Ospreys and eagles. Watch for birds circling over water, then hovering or folding before a dive.
- Hawks. Hovering hawks over fields often drop straight down onto prey.
- Kestrels. These small falcons hover in place, which gives a fine chance for a sharp picture.
- Owls. Barn owls and short eared owls quarter low over meadows at dusk.
Set a fast shutter speed in advance, keep the camera ready and track the bird through the whole dive. Many catches happen in a fraction of a second, so expect many misses before a keeper.
Prey in the talons can be upsetting to some viewers, so think about how you share these images. Many photographers find the moments just before and after a catch, such as the dive, the splash or the bird lifting away with a fish, tell the story powerfully while staying graceful and respectful of the animal.
Photographing owls
Owls are among the most loved birds of prey, and they need extra care.
- Roosting owls. Owls rest by day in dense trees. Keep well back and keep your visit short.
- Dusk light. Many owls become active as light fades, so a lens with a wide aperture and a higher ISO help.
- Never use flash. Bright flash can disturb owls and affect their night vision.
- Respect roosts. Share owl locations rarely and carefully.
Raptor centers often have owls you can photograph in good light, which is a wonderful way to practice portraits and learn their faces.
Light and backgrounds
- Sun at your back. Front light lights the eye and feathers evenly.
- Golden hour. Warm, low light makes feathers glow and adds catchlights.
- Bright skies. A bird against a white sky turns dark. Add plus exposure compensation. See the guide to exposure compensation.
- Blue skies. A clear blue sky makes a clean, graphic backdrop for flight.
- Distant backgrounds. Trees or hills far behind the bird blur into soft color.
Backlight can create beautiful silhouettes and glowing rims on wings. Try it on purpose when a bird crosses the sun, and expose for the bright sky.
Winter and weather
Winter is an excellent season for many raptors. Eagles gather near open water and fish runs, hawks perch in bare trees where they are easier to see and snow makes a clean, bright background. Cold weather drains batteries quickly, so carry spares in a warm pocket. Falling snow and frost on feathers add mood to portraits. On gray days, raise the ISO and keep the shutter fast, since soft light is lovely but dim.
Curious how a long lens shapes your pictures? The telephoto photography guide explains reach, compression and steady technique.
Settings and lenses
- Lens. Long telephoto lenses help most. Use whatever reach you have and crop if needed.
- Mode. Shutter priority or manual with auto ISO keeps the shutter fast while the camera handles exposure.
- Shutter speed. At least 1/1000 second for perched birds that may move, 1/2000 or faster for flight.
- Aperture. Wide open or one stop down to keep shutter speed high and background soft.
- Focus. Continuous autofocus. Many photographers like back button focus for tracking.
- Support. A monopod or beanbag on a car window helps with heavy lenses.
Using a phone
Phones struggle with distant raptors, but they can still capture birds at raptor centers, birds in their landscape and close perched birds in parks. Use the longest built in lens, tap to focus on the bird and avoid heavy digital zoom. Some birders hold a phone to a spotting scope or binoculars, which is called digiscoping.
Editing bird of prey photos
Crop to strengthen the composition, keeping space in front of the bird. Brighten the eye slightly, lower highlights to save white feathers and lift shadows under the wings. Use noise reduction for high ISO images, and add only gentle sharpening to feathers. Remove a small distracting twig if needed, but keep the scene honest.
Common mistakes
- Getting too close. Disturbing a bird ruins the moment and can harm it.
- Slow shutter speeds. Soft wings and blurred heads. Keep it fast.
- Dark birds on bright skies. Add exposure compensation.
- Missing the eye. Focus on the eye whenever possible.
- Cutting off wings. Leave extra room in flight shots, and crop later.
- Giving up early. Raptors reward long, patient sessions.
Try this: a 10-minute raptor watch
Find a spot where hawks or eagles perch, such as a waterfront, a farm road or a park, and spend ten minutes watching one bird.
- Set a fast shutter speed and continuous focus before you begin.
- Make a portrait of the bird on its perch, focusing on the eye.
- Note which way the wind blows and where the bird is likely to fly.
- Watch for takeoff signals and be ready with a burst.
- Review your frames and pick the one with the best wing shape and eye.
Repeat the routine on different days, and you will soon learn each bird’s habits.
Want to meet other water birds near raptor country? The guide to heron photography covers patient wading birds.
Frequently asked questions
What shutter speed is best for birds of prey in flight?
Start at 1/2000 second, and go faster for small, quick falcons.
How close should I get to a bird of prey?
Only as close as the bird stays relaxed. If it watches you or shifts, step back.
Where can beginners photograph eagles and hawks?
Waterfronts, farm country, migration lookouts and raptor centers are great places to start.
Can I photograph owls with flash?
Avoid flash with wild owls. Use natural light, a wide aperture and higher ISO instead.
Do I need a very expensive lens to photograph eagles?
No. Start with the longest lens you have, get to know the birds and crop carefully.
How do I tell when a hawk is about to fly?
Watch for leaning forward, crouching, lifting the tail or dropping waste just before takeoff.
Want more animals in their wild homes? The guide to wildlife photography covers fieldcraft for every kind of animal.
For terms such as catchlight, burst mode and continuous autofocus, see the photography glossary.