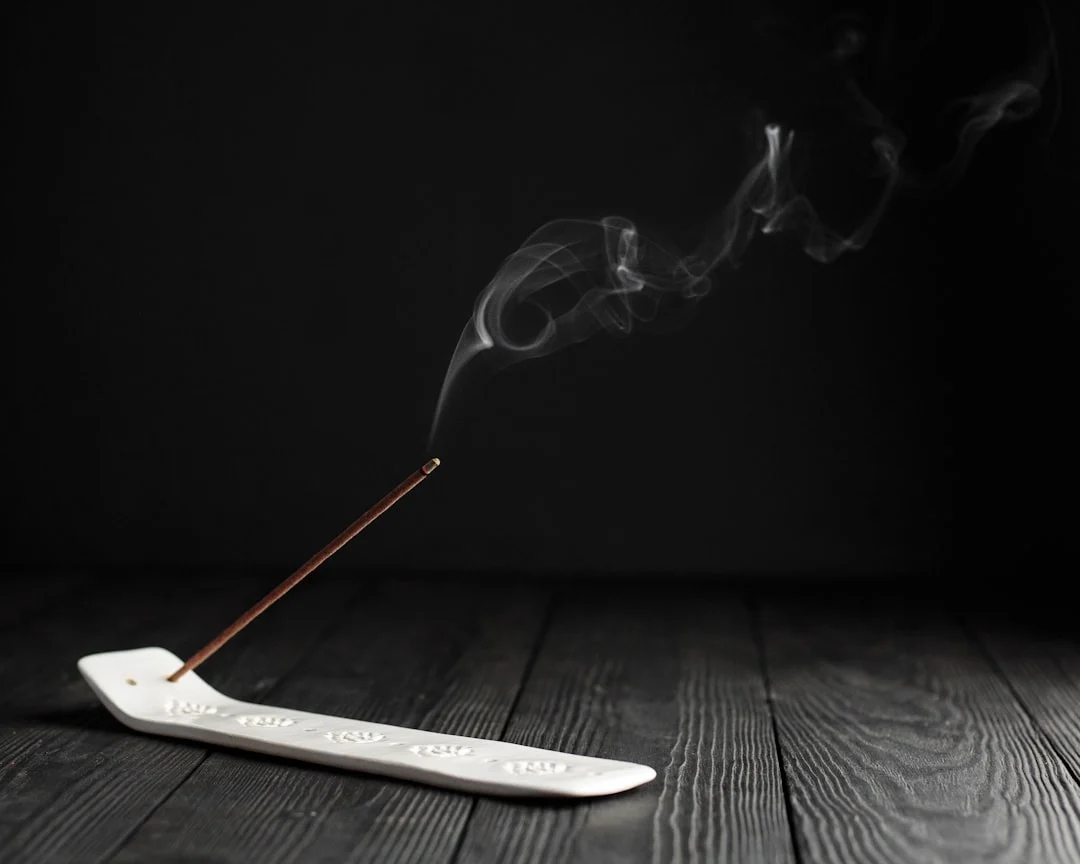
Smoke art photography captures the delicate, ever-changing patterns of rising smoke and transforms them into ethereal, abstract images. Lit from the side against a dark background, a wisp of incense smoke reveals intricate swirls, curves, and layers that exist for only a moment before dissolving into the air. The results look like they belong in a fine art gallery, yet the setup requires nothing more than a stick of incense, a dark room, and a single light source.
What makes smoke photography compelling is its unpredictability. You can guide the smoke with gentle air currents, but you cannot control the exact shapes it forms. Every exposure captures a unique, unrepeatable pattern. Combined with post-processing techniques like color inversion, selective colorizing, and mirroring, simple smoke captures become complex, vivid abstract art.
This guide walks through the complete process, from building your setup to mastering the camera settings and post-processing techniques that turn smoke into art.
Setting Up Your Smoke Photography Station
The setup is simple in concept but requires attention to each element.
Smoke source
Incense sticks are the standard smoke source. They produce a consistent, thin stream of smoke that photographs beautifully. Choose unscented or lightly scented sticks to minimize the intensity of the smell during extended sessions. Incense cones work too but produce thicker, denser smoke that is harder to photograph as delicate wisps.
Background
A completely black background is essential. The smoke must be the only bright element in the frame. Use black fabric (velvet absorbs light best), black poster board, or simply shoot in a dark room with the background far enough from the smoke that no light reaches it. Any light spill on the background will reduce contrast and make the smoke appear washed out.
Lighting
Side lighting is the key to smoke photography. Position a single light source to the side of the smoke (90 degrees from the camera), aimed directly at the smoke stream. The light should not hit the background or point toward the camera.
- Use a snoot or narrow modifier. A rolled piece of cardboard or a commercial snoot restricts the light beam to only illuminate the smoke, keeping the background dark.
- Position the light 1 to 3 feet from the smoke. Closer produces brighter, harder illumination. Farther produces softer, more diffused lighting.
- A single speedlight or flash is ideal. Flash Photography freezes the smoke’s motion crisply. Continuous lights work but require faster shutter speeds.
Camera Settings
These settings give you a starting point. Adjust based on your specific setup.
| Setting | Recommended | Why |
|---|---|---|
| Aperture | f/8 to f/11 | Provides enough Depth Of Field to keep the three-dimensional smoke shapes sharp from front to back |
| Shutter speed | 1/200 to 1/250 (flash sync) | Fast enough to freeze smoke motion, and at flash sync speed if using a speedlight |
| ISO | 100 to 200 | Low Iso for clean, noise-free images. The flash provides plenty of light |
| Focus mode | Manual | Autofocus struggles with translucent smoke. Pre-focus on the incense stick or a marker at the smoke’s location |
| White balance | Flash or daylight | White Balance set to match your light source. Auto may shift between frames |
Shoot in Manual Mode for full control. Review your Camera Histogram to ensure the smoke is bright but not blown out, and the background is pure black.
Flash vs Continuous Lighting
Both work, but they produce different results.
| Feature | Flash | Continuous Light |
|---|---|---|
| Smoke sharpness | Extremely sharp (freezes motion) | Depends on shutter speed; may show motion blur |
| Ease of use | Requires flash sync knowledge | What you see is what you get |
| Heat concern | None (brief burst) | Hot lights near incense require caution |
| Versatility | Harder to preview the exact effect | Easy to adjust and see results in real time |
| Recommended for | Crisp, detailed smoke captures | Flowing, slightly soft artistic effects |
For the crispest, most detailed smoke images, an off-camera Flash Photography unit fired through a snoot is the standard approach.
Ventilation and Safety
Burning incense in a closed room for extended periods raises legitimate health and safety concerns.
- Work in a room with a door you can open periodically to air out the space.
- Take breaks every 15 to 20 minutes to let the air clear.
- Use a fan to clear the room between shooting sessions, but turn it off during shooting (air currents disrupt the smoke patterns).
- Keep the incense in a stable, fire-safe holder on a non-flammable surface.
- Have a cup of water nearby to extinguish the incense when you are done.
- If you have respiratory sensitivities, consider using a smoke machine with theatrical fluid instead of incense. The smoke is less irritating.
Capturing Basic Smoke Images
Start with straightforward single-stream captures to learn how your setup behaves.
- Light a single incense stick and let it stabilize for 30 seconds until the smoke stream is consistent.
- Pre-focus on the incense stick or a pencil held where the smoke will be.
- Frame the smoke stream with some space around it for the swirls to develop.
- Take a test shot and check the result. Adjust your light position and power until the smoke is bright against a pure black background.
- Shoot continuously as the smoke rises. Gently wave your hand near the smoke (without disturbing the camera) to create more complex patterns.
- Different incense sticks produce different smoke densities and behaviors. Experiment with multiple types.
Advanced Techniques
Colored gels
Place colored gels over your light source to illuminate the smoke in vivid colors. Use two lights with different colored gels (one on each side) to create multicolored smoke where the colors blend in the middle.
Mirroring
In post-processing, duplicate the image, flip it horizontally, and blend the two halves together. This creates symmetrical, ink-blot-like patterns that transform organic smoke into something that resembles alien life forms, faces, or abstract sculptures.
Multiple smoke sources
Two or three incense sticks positioned close together create intertwining smoke streams. The interaction between the streams produces complex, layered patterns.
Guiding the smoke
A straw or cardboard tube lets you gently blow air to redirect the smoke. A cold surface (a chilled glass or metal plate) placed above the smoke causes it to curl and swirl in interesting ways as the warm smoke hits the cold surface.
Combining Smoke with Subjects
While pure smoke abstract art is compelling, combining smoke with subjects opens additional creative possibilities.
- Smoke and portraits. Position a subject behind or beside a smoke stream. The smoke wraps around the face or body, creating a mysterious, atmospheric Portrait Photography effect. Use Flash Photography to freeze both the subject and the smoke sharply.
- Smoke and still life. A wine glass, bottle, musical instrument, or other object partially obscured by smoke gains drama and intrigue. The object provides a focal point while the smoke adds atmosphere.
- Smoke and macro. Use Macro Photography techniques to photograph tiny wisps of smoke at extreme close range. At macro distances, individual swirls and eddies become vast, cloud-like formations.
- Smoke and colored backgrounds. While black is the standard background, try colored paper or gels on a background light. Colored smoke against a complementary colored background creates striking color relationships.
Building a Dedicated Smoke Photography Setup
If you plan to practice smoke photography regularly, a dedicated station saves setup time and improves consistency.
- A small table (two feet deep is sufficient) with a black velvet backdrop on a stand behind it.
- A clamp or stand to hold the incense stick in a consistent position. This keeps the smoke stream at the same height for every session.
- A speedlight on a small light stand with a DIY snoot (a rolled piece of black cardboard taped into a tube). Position it permanently to the side.
- A wireless flash trigger so you do not need to cable the flash to the camera.
- A small desk fan positioned behind you (not near the smoke) that you can turn on between sessions to clear the air.
- A cup of water on the table to quickly extinguish the incense when you want fresh smoke or need to end the session.
Understanding How Smoke Behaves
Smoke is a fluid, governed by the same physics as water currents and air movement. Understanding its behavior helps you predict and influence the shapes it creates.
Warm smoke rises because it is less dense than the surrounding air. As it rises, it cools and slows, becoming more susceptible to air currents. This is why the most interesting shapes typically form 6 to 12 inches above the incense tip, where the initial momentum has slowed but the smoke has not yet dispersed.
Laminar flow (smooth, parallel streams) occurs closest to the source. Turbulent flow (swirls, vortices, and chaotic patterns) develops as the smoke rises and interacts with still air. The transition from laminar to turbulent is where the most photogenic shapes emerge. Your lighting, camera position, and Photography Composition should typically frame this transition zone.
Temperature differences in the room affect smoke behavior significantly. A warm room produces slower, more spread-out smoke. A cool room produces faster-rising, more concentrated streams. Air conditioning vents, even distant ones, can create invisible currents that scatter the smoke unpredictably. Survey your shooting space for air movement before setting up.
Post-Processing Smoke Images
Post-processing is where smoke captures become art. Start with Photo Editing For Beginners adjustments, then apply these specialized techniques.
- Increase contrast. Push the blacks to pure black and the whites to bright white. The background should be absolute black with no gray.
- Invert colors. Inverting the entire image (Ctrl/Cmd+I in Photoshop) turns the black background white and the white smoke dark, creating a completely different aesthetic that resembles ink in water.
- Colorize. Use Hue/Saturation, Gradient Map, or Color Balance to add color to the smoke. With the smoke isolated against a black background, colorizing is straightforward and dramatic.
- Composite multiple shots. Combine the best smoke shapes from different captures into a single composition. Use Screen blending mode in Photoshop For Photographers to automatically drop out the black background.
- Selective adjustments. Use Dodging And Burning to brighten or darken specific parts of the smoke, adding depth and emphasis to the most interesting shapes.
Common Mistakes
- Light hitting the background. Even a small amount of light on the background reduces the contrast that makes smoke photography work. Use flags, barn doors, or cardboard to block light from reaching the background.
- Focusing on the wrong plane. Smoke is three-dimensional. If you focus too far forward or backward, the most interesting part of the smoke may be soft. Pre-focus carefully and use f/8 to f/11 for adequate depth.
- Room too drafty. Air currents scatter the smoke unpredictably. Close windows and doors, turn off fans and HVAC during shooting.
- Over-processing. Heavy HDR effects, excessive saturation, and over-sharpening turn elegant smoke into garish noise. The beauty of smoke photography is in its delicacy.
- Not shooting enough frames. Smoke changes constantly. The best shapes last less than a second. Shoot hundreds of frames per session and curate aggressively.
- Giving up too quickly. The first 10 minutes of smoke photography often produce mediocre results. As you learn your setup and the smoke patterns, the quality improves dramatically. Plan for at least a one-hour session.
Try This: Practical Exercises
- Basic setup exercise. Set up a single incense stick in a dark room with one light source (speedlight or desk lamp with a cardboard snoot) pointed at the smoke from the side. Shoot 50 frames at f/8, ISO 200, and select your best 5. Focus on getting pure black backgrounds and bright, sharp smoke.
- Inversion exercise. Take your best smoke image, duplicate it, and invert the colors. Compare the original (white smoke on black) with the inverted (dark smoke on white). Notice how the mood changes completely.
- Colorizing exercise. Take one strong smoke image and create three different versions: one with warm tones (reds and oranges), one with cool tones (blues and teals), and one with a gradient from warm to cool. Compare how color changes the emotional impact.
- Mirror symmetry exercise. Take a smoke image with an interesting one-sided shape. Duplicate it, flip horizontally, and blend the two halves to create a symmetrical composition. Often the mirrored version reveals shapes and patterns that were not visible in the original.
Frequently Asked Questions
What kind of incense works best?
Standard stick incense (the type that burns along a thin wooden stick) works best. It produces a thin, consistent stream of smoke. Avoid heavily perfumed varieties if the scent bothers you. Japanese-style incense (without the bamboo core) also produces clean, thin smoke streams.
Can I use a desk lamp instead of a flash?
Yes, but you will need a faster Shutter Speed to freeze the smoke’s motion. A desk lamp provides continuous light, which makes it easier to see and compose the smoke, but the smoke may have slight motion blur. Use the highest shutter speed your exposure allows.
How do I get more complex smoke shapes?
Gently blow on the smoke from below or the side using a straw. Place a cold object (a chilled spoon) above the stream to cause the smoke to curl and swirl. Use two incense sticks close together so the streams interact. Patience produces the best shapes since complex patterns often develop naturally after the smoke has been rising for several minutes.
Is smoke photography safe for cameras?
Incense smoke can leave a residue on lenses and camera bodies if you shoot in heavy smoke for extended periods. Use a UV filter on your lens as protection, and clean your equipment after each session. The amounts involved in typical sessions are minimal and pose no real risk to your gear.
What file format should I shoot in?
Always shoot Raw Vs Jpeg RAW for smoke photography. The extensive post-processing involved (contrast adjustments, color grading, compositing) benefits enormously from RAW’s wider Dynamic Range and editing latitude.
Can I do smoke photography outdoors?
It is extremely difficult outdoors because even the slightest breeze scatters the smoke instantly. If you want to try, choose a perfectly calm evening, use a sheltered location (between buildings, in a doorway), and use a more robust smoke source than incense. The advantage of outdoor smoke photography is the ability to incorporate Natural Light Photography and real-world backgrounds. The disadvantage is almost complete lack of control over the smoke behavior.
How do I create smoke images suitable for printing?
For prints, shoot at the highest resolution your camera allows and keep Iso as low as possible for clean files. Process the images at 16-bit in Photoshop For Photographers for smooth color gradients. When Preparing Photos For Print, consider that smoke images on black backgrounds use very little ink, while inverted versions (dark smoke on white) use significantly more. Both can produce stunning prints, but the visual impact differs dramatically depending on the print medium. Metallic photo papers work especially well for smoke art because the reflective surface adds depth to the dark backgrounds.
What are some creative uses for smoke photography beyond standalone art?
Smoke images make excellent background textures and overlays. Use the Screen blending mode in Photoshop For Photographers to overlay smoke onto portraits, product shots, or Landscape Photography images. Colored smoke overlays add atmosphere and mood to any image. Book covers, album art, poster designs, and website headers all benefit from smoke art elements. You can also use smoke photos as the basis for abstract patterns: mirror, tile, and distort them to create unique textures for graphic design work. Building a library of high-quality smoke captures gives you a reusable creative resource for multiple projects.