Triangles in composition are three points, lines or shapes in a photo that the eye connects into a triangle. They can be real shapes, like a mountain peak or a roof, or implied, like three faces in a group or three bright spots in a scene. Triangles feel stable when they sit on a wide base, dynamic when they tip or point, and they guide the eye around the frame. Look for them, arrange people and objects to form them, and use their points to lead attention to your subject.
Once you start looking for triangles, you will see them everywhere: in mountains, rooftops, bridges, staircases, the way people stand together, and even in the space between a person’s arm and body. Painters have used triangles for centuries to make pictures feel organised and balanced. Photographers can use the same idea, and it is one of the simplest ways to make a photo feel well put together.
This guide explains what triangles in composition are, the difference between real and implied triangles, how different triangles feel, where to find them, how to create them with people and objects, and the common mistakes beginners make. There is a 10-minute exercise and an FAQ at the end.
What triangles in composition are
Composition means how you arrange things inside the frame. The full guide to composition covers the basics. Triangles are one of the most useful tools, because the human eye naturally connects points into shapes. If a photo has three important things, the eye jumps between them and draws an invisible triangle.
There are two kinds:
- Real triangles are actual triangular shapes: a mountain, a gable roof, a tent, a slice of cake, a sail, a pyramid of fruit.
- Implied triangles are formed by three separate points that the eye connects: three people’s faces, three lights, a subject and two objects around it, or lines that meet.
Both work. Real triangles add strong geometric shape. Implied triangles quietly organise a scene and move the eye around it. The guide to shape in photography explains how shapes of all kinds affect a picture.
Why triangles work
- They connect elements. A triangle links three parts of a photo into one group, which makes the picture feel unified rather than scattered.
- They guide the eye. The eye travels along the sides of a triangle, from point to point, and keeps circling inside the frame instead of drifting out.
- They create stability or tension. Depending on how a triangle sits, it can feel solid and calm or exciting and off balance.
- They point. The tip of a triangle acts like an arrow, drawing attention to whatever is there.
- They work with odd numbers. Three is an odd number, and odd groups tend to look more natural than even ones. See the rule of odds.
How different triangles feel
Upright triangle on a wide base
A triangle with a wide flat base and a point at the top, like a mountain, feels stable, strong and calm. It is the most restful kind. Use it for landscapes, solid buildings and formal group portraits.
Upside down triangle
A triangle standing on its point, with the wide side at the top, feels unstable and tense, as if it could tip over. It adds drama and energy. Examples include a person with arms raised wide, a funnel shape, or a V of trees seen from below.
Tilted triangle
A triangle leaning to one side feels like movement. Its long sides form diagonal lines, which add energy. The guide to lines in photography explains why diagonals feel dynamic.
Tall, thin triangle
A narrow triangle, like a church spire or a tree, points sharply upward and emphasises height.
Flat, wide triangle
A low triangle, like a gentle hill, feels calm and spacious.
You do not need to memorise these. Just notice how a triangle sits in your frame and ask whether that feeling matches your subject. A peaceful lake scene suits a calm, wide triangle. A dancer leaping or a skateboarder in the air suits a tilted or upside down triangle full of energy. Matching the shape to the mood is what makes the composition feel right.
Where to find triangles
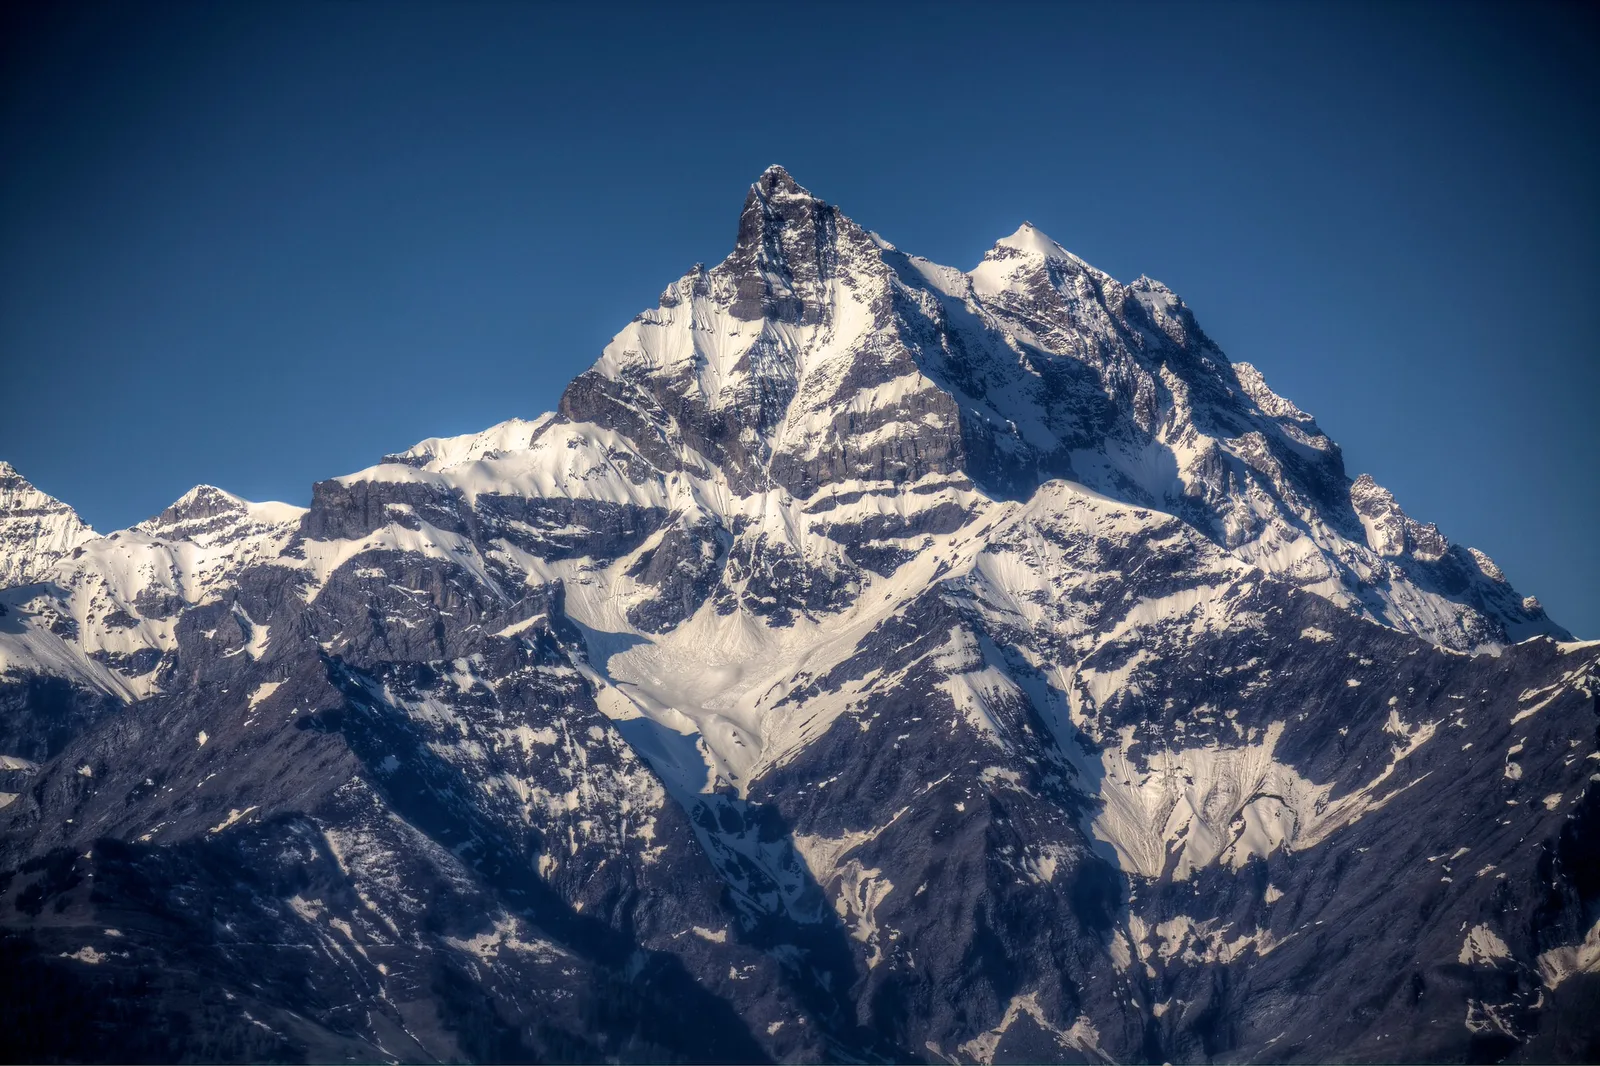
- Mountains and hills. The classic upright triangle, like the peak at the top of this page.
- Buildings. Roofs, gables, spires, arches, pediments above columns and the angles of modern architecture.
- Bridges and structures. Trusses, cables and supports often form repeating triangles.
- Staircases and railings. Steps seen from the side form triangles with walls and rails.
- Roads and paths. A road narrowing into the distance forms a triangle with its point on the horizon. See vanishing point photography.
- Shadows. Late light casts triangular shadows from buildings, poles and fences.
- Nature. Pine trees, leaves, flower petals, birds in flight and waves.
- Food and objects. Slices, folded napkins, stacks of fruit, a cone.
Triangles with people
Triangles are a powerful tool for photographing people, both individuals and groups.
Group portraits
For three people, avoid lining them up at the same height. Instead, arrange faces at different heights so they form a triangle: one person standing, two sitting, or one in front with two behind. This looks more natural and connected. For larger groups, build several overlapping triangles. The guide to group photography covers this in detail.
Single people
Triangles appear in a single pose too:
- A hand on the hip creates a triangle of space between the arm and body, which shapes the figure.
- Bent knees when sitting create triangles with the legs.
- A head tilted with a hand near the face forms a small triangle that frames the eyes.
- The whole body, wide at the shoulders or feet and narrow at the top or bottom, can form a triangle.
See posing hands for more ways to use arms and hands well.
Subject and surroundings
Place a person so that they form a triangle with two other elements, like two trees, two lights, or two other people in the background. The eye travels between all three and the photo feels complete.
Creating triangles on purpose
You do not always have to find triangles. You can make them.
- Arrange objects in threes. In still life and product photos, place three items at different heights and distances to form a triangle. The guide to still life photography uses this often.
- Move your position. Stepping left, right, up or down changes how points line up. Three objects in a row may form a triangle from a different angle.
- Change your height. Shooting from low or high can turn rectangles into triangles, like the sides of a tall building converging toward the sky. See photography angles.
- Use light. Three bright areas, like windows, lamps or sunlit patches, create an implied triangle.
- Use colour. Three spots of the same colour, like red in three places, form a triangle the eye follows.
Triangles and other composition tools
- Rule of thirds. Placing the points of a triangle on or near the third lines combines two strong tools. See the rule of thirds.
- Leading lines. The sides of a triangle are lines that lead the eye, often to the tip.
- Visual weight. A triangle with a wide base at the bottom feels grounded. Weight at the top feels heavy and unstable. See visual weight.
- Depth. A triangle with points in the foreground, middle and background adds depth. See foreground, midground and background.
Training your eye for triangles
Many beginners find triangles hard to see at first, because implied triangles are invisible until you look for them. A few habits help:
- Count the important things. Before you press the shutter, ask what the three most important elements in the scene are. Then look at where they sit. Do they form a triangle, or a straight line?
- Squint. Squinting blurs detail and shows the main bright and dark shapes. Triangles in light and shadow become easier to see.
- Study paintings. Many classical paintings arrange figures in a triangle. Looking at them trains your eye. The guide to learning from the masters has more ways to study great pictures.
- Draw on your photos. After a shoot, sketch lines between the main points of your favourite photos. You may find triangles you did not plan.
Triangles in different kinds of photography
Landscape
Mountains, hills and trees give natural triangles. Combine a triangular peak with a foreground rock and a tree to form a second, implied triangle. The guide to landscape photography covers more.
Architecture
Look up at roof lines, spires and modern angles. Use a wide lens and a low angle to turn walls into converging triangles.
Portraits
Use triangles in the pose: hands, arms and legs. In groups, arrange heads in triangles. The portrait photography guide has more posing ideas.
Product and still life
Group three items in a triangle, varying their heights, to make arrangements feel natural and balanced.
Street
Wait for three people to form a triangle in the frame, or for a person to stand at the tip of a triangular shadow.
Looking closely at the photos on this page
The mountain at the top of this page is a simple real triangle. Its wide base fills the bottom of the frame and its sharp peak rises toward the top, so it feels solid and strong. The peak also acts like an arrow, pulling the eye upward to the highest point. The deep blue sky around it is plain, so nothing competes with the shape. If the peak had been cut off by the top edge, the triangle would lose its power.
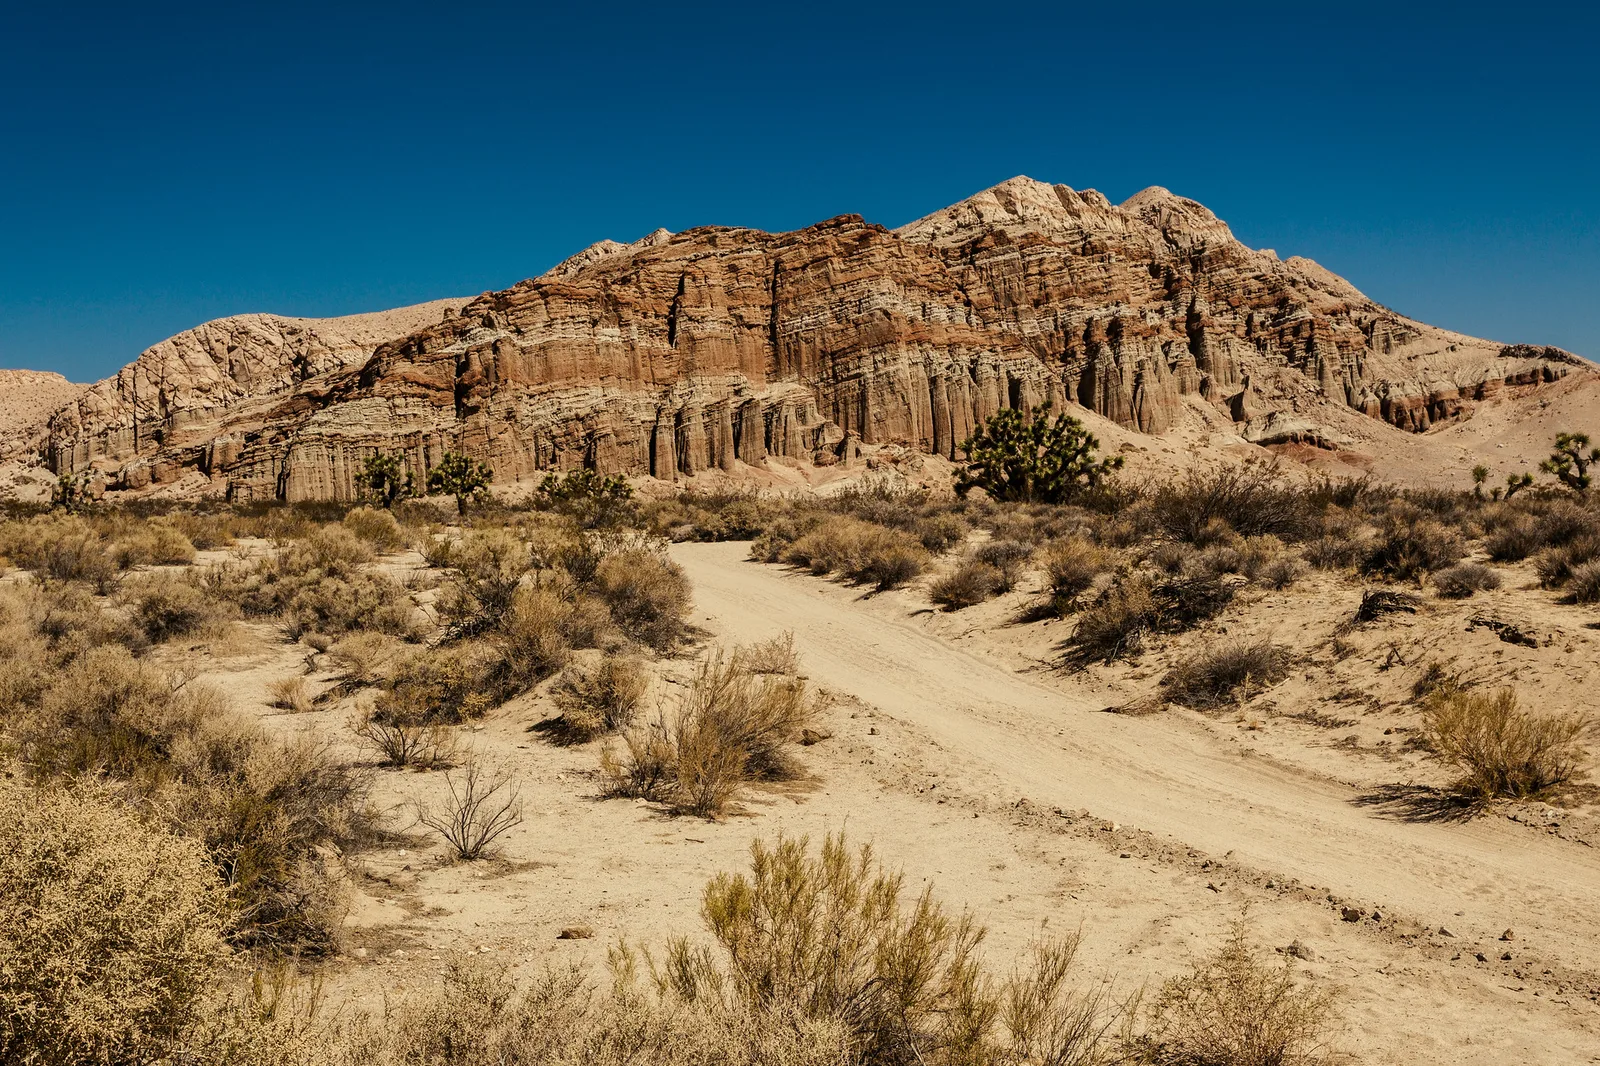
The desert photo uses two triangles working together. The rock hill forms a broad triangle on the horizon, wide and calm. The sandy path in the foreground widens toward the camera and narrows into the distance, forming a second triangle with its point near the hill. The path leads the eye up into the scene, and the hill gives it somewhere to rest. That combination of a leading triangle and a resting triangle is a useful pattern to look for in landscapes.
Strengthening triangles when editing
Editing will not create a triangle that is not there, but it can make one clearer.
- Crop to include the whole shape. Give the tip of a triangle a little space so it does not touch the edge. The guide to cropping explains how to crop without losing quality.
- Straighten the base. A stable triangle looks best when its base is level. A slightly crooked base looks like a mistake.
- Brighten the points. If an implied triangle is made of three faces or objects, brightening them slightly helps the eye find them.
- Quiet the distractions. Darken or soften bright spots that pull the eye away from the triangle.
- Try black and white. Removing colour often makes shapes stand out, because the eye reads light and dark instead.
Triangles on a phone
You do not need special gear to use triangles. A phone works perfectly well. Turn on the camera grid so you can see where the points of a triangle fall. Move the phone slowly left and right, and up and down, and watch how three objects change their arrangement on the screen. Small moves of your body often turn a straight row into a pleasing triangle. Use the main lens for the best quality, and tap on the most important point of the triangle to set focus and brightness there.
Because a phone is small and light, it is also easy to get very low or very high, which is one of the quickest ways to turn ordinary walls, roads and roofs into strong converging triangles.
Common mistakes
- Lining everything up. Three people or objects in a straight row at the same height look stiff. Stagger them into a triangle.
- Forcing triangles everywhere. Not every photo needs one. Use them when they help the subject.
- Weak tips. If a triangle points to something, make sure the thing at the tip is interesting. A triangle pointing at nothing wastes attention.
- Triangles pointing out of the frame. A sharp point aimed at the edge can lead the eye away. Leave space or turn the triangle inward.
- Cutting triangles off. Cropping the tip of a mountain or a roof weakens the shape. Include the whole shape or crop clearly through it.
- Too many shapes. Several competing triangles can feel busy. Keep one main triangle.
- Ignoring implied triangles. Beginners often look only for real shapes. Look for three points too.
Try this: a 10-minute triangle hunt
- Minute 1 to 2: Look around your room or street and find three real triangles: a roof, a shadow, a folded object. Photograph one.
- Minute 3 to 4: Take three small objects, like cups or fruit. Place them in a straight row and take a photo. Then arrange them in a triangle at different distances and take another.
- Minute 5 to 6: Find three bright spots or three spots of the same colour and frame them so they form a triangle.
- Minute 7 to 8: Find a triangle and shoot it upright, tilted and, if you can, upside down by changing your angle.
- Minute 9: If someone is willing, ask them to put a hand on their hip and take a photo. Notice the triangle of space.
- Minute 10: Compare. Which triangles made the photo feel more organised? Which felt calm and which felt energetic?
Frequently asked questions
What is triangle composition in photography?
Arranging three points, lines or shapes so the eye connects them into a triangle, which organises the photo and guides attention.
What is an implied triangle?
A triangle formed by three separate elements, such as three faces or three lights, that the eye joins together.
Why do triangles work in photos?
They connect elements, guide the eye around the frame, and add stability or energy depending on how they sit.
How do I use triangles in group photos?
Place faces at different heights so they form triangles instead of a straight line. For larger groups, build several overlapping triangles.
Does the direction of the triangle matter?
Yes. A wide base at the bottom feels stable, a point at the bottom feels tense, and a tilted triangle feels like movement.
Do I need a triangle in every photo?
No. Triangles are one tool among many. Use them when they help the subject and the story.
Curious how triangles relate to other shapes in a photo? Read the guide to shape in photography.
Want to know why three items often look better than two or four? Try the rule of odds.