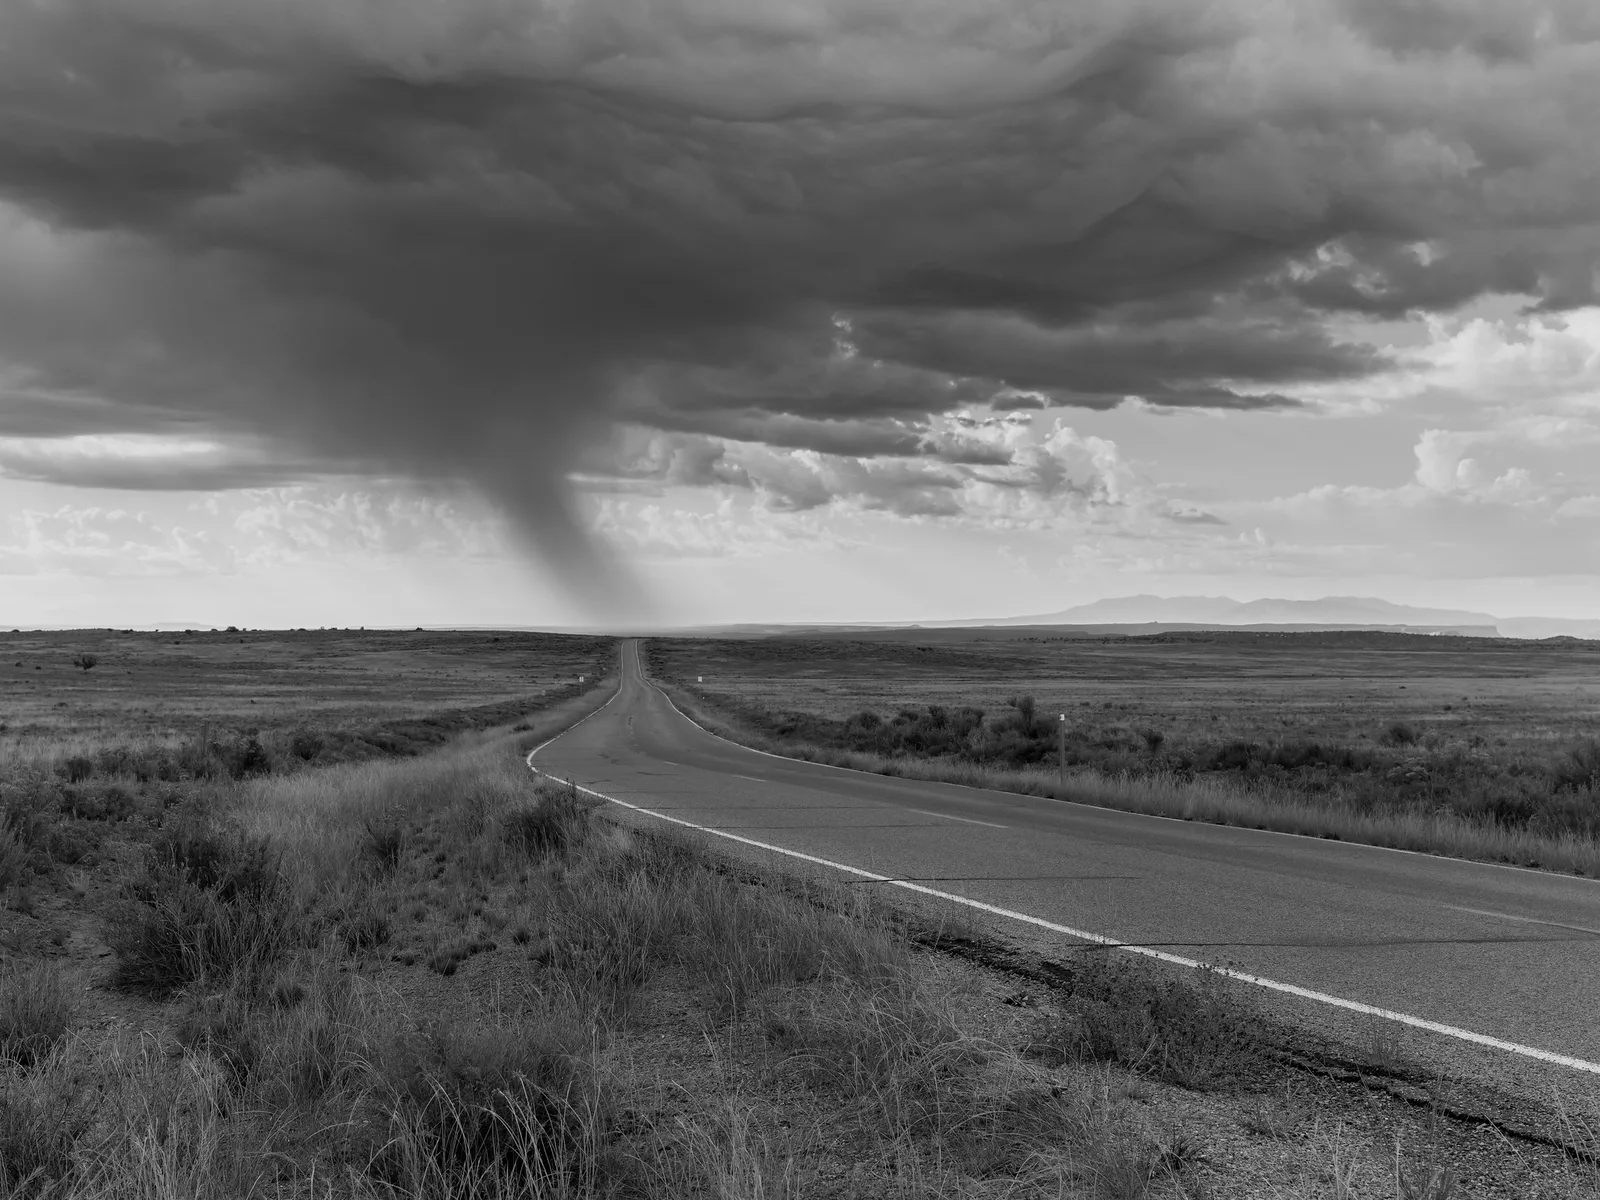
A vanishing point is the spot in a photo where parallel lines, such as the edges of a road, railway tracks or a corridor, appear to meet in the distance. It creates a strong sense of depth and pulls the viewer’s eye deep into the picture. To use it, find long straight lines that run away from you, stand in line with them, choose a wide or normal lens, decide where in the frame the point should sit (centre for calm and symmetry, off-centre for energy), and keep the area around the point clean so it does not compete with clutter.
Stand in the middle of a straight road and look along it. The two edges of the road are parallel, the same distance apart all the way along, yet they seem to come closer and closer until they meet at a tiny point far away. That point is the vanishing point.
Artists have used vanishing points for centuries to make flat paintings look deep. Photographers get the effect for free, because a camera lens sees perspective the same way your eye does. Once you learn to spot vanishing points, you will find them everywhere: in streets, piers, bridges, hallways, fences, rows of trees and train platforms.
This guide is for beginners. It explains what a vanishing point is, why it works, where to find one, how to compose with it, which lens and settings to use, and the most common mistakes. There is a 10-minute exercise and an FAQ at the end.
What a vanishing point is
Things look smaller the further away they are. A car next to you looks big; the same car a kilometre away looks tiny. This is called perspective.
Lines that are parallel in real life, like the two rails of a train track, stay the same distance apart. But because the far part of the track looks smaller, the gap between the rails looks smaller too. The further you look, the smaller the gap, until it shrinks to nothing. The point where the lines seem to touch is the vanishing point.
In a photo, that point usually sits on or near the horizon, the line where the land or sea meets the sky. The guide to the horizon in photography explains why that line matters so much.
Why vanishing points make strong photos
- They create depth. A photo is flat, but converging lines trick the brain into seeing distance. The scene feels like it goes back for miles.
- They guide the eye. The lines act like arrows. The viewer’s eye slides along them toward the point. This is closely related to leading lines.
- They create a destination. The point itself becomes a place to rest. If you put something interesting there, such as a person, a building or the setting sun, it gets lots of attention.
- They tell a story. A road vanishing into the distance suggests a journey, freedom or the unknown. A long corridor can feel lonely or mysterious.
If you want to understand depth more broadly, the guide to depth in photography covers other ways to create it, such as layering and overlapping.
Where to find vanishing points
Look for long, straight, parallel lines that run away from you. Some reliable places:
- Roads and paths. Straight roads in flat country are the classic example, like the desert road at the top of this page.
- Railway tracks. Rails, sleepers and overhead wires all converge. Only photograph tracks from a safe, legal spot, never on active lines.
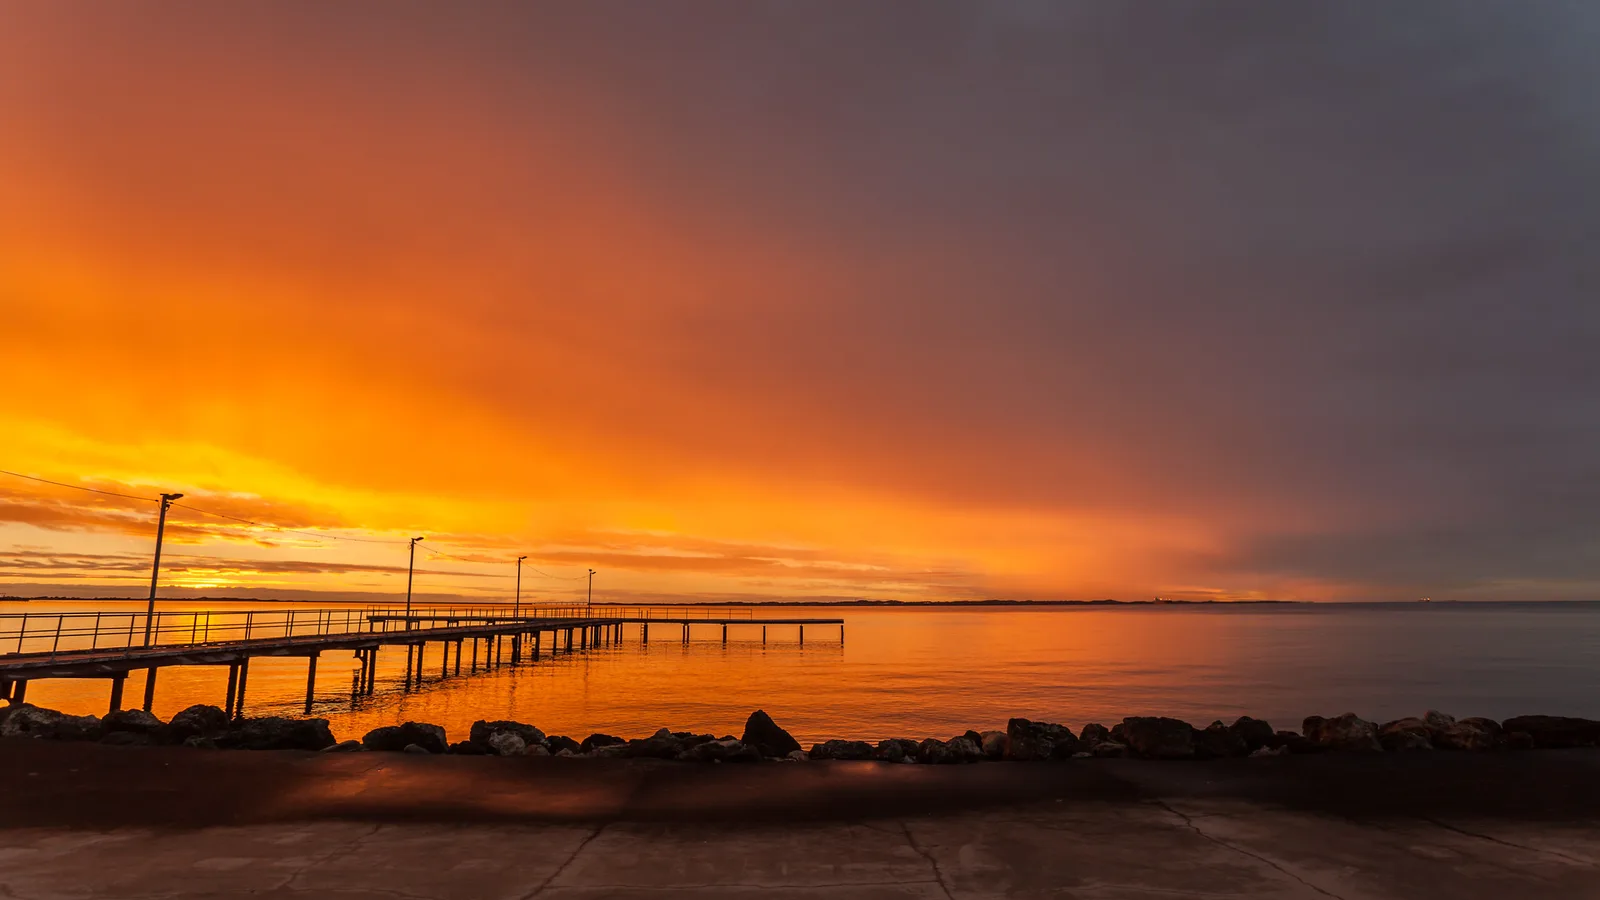
- Piers and jetties. Boards and railings run straight out to sea.
- Bridges. Railings, cables and lane markings converge toward the far end.
- Corridors and hallways. Walls, ceiling lights and floor tiles all point to one spot.
- City streets. Rows of buildings, kerbs and street lights.
- Avenues of trees. Two rows of trees create natural converging lines.
- Fences, walls and rows of crops. Farm fields with straight rows are great after harvest or planting.
- Staircases and escalators seen from the top or bottom.
One, two or three vanishing points
Artists describe three kinds of perspective. You do not need the theory to take good photos, but it helps you notice what is going on.
One-point perspective
You face straight down the lines, and they all meet at one point. Roads, corridors and piers shot head-on are one-point perspective. It looks calm, balanced and very deep.
Two-point perspective
You stand at the corner of a building. One wall’s lines run toward a point on the left; the other wall’s lines run toward a point on the right. Both points sit on the horizon, often outside the frame. This looks more dynamic and three-dimensional.
Three-point perspective
You tilt the camera up at a tall building or down from a high place. Now vertical lines also converge, toward a third point high in the sky or deep below. This is the “looking up at skyscrapers” effect. The guide to perspective distortion explains when that looks dramatic and when it looks like a mistake.
How to compose with a vanishing point
Get in line
For a strong one-point look, stand directly in line with the lines, ideally in the middle. If you stand off to one side, the lines still converge, but less evenly. Walk side to side and watch the screen until the lines look balanced.
Decide where the point goes
- Centre. A vanishing point in the middle of the frame feels calm, still and symmetrical. It is a classic choice for corridors, piers and tunnels. See symmetry.
- Off-centre. Placing the point on a third, as described in the rule of thirds, adds movement and feels more natural for landscapes and roads.
- Near the edge. A point close to one side creates tension and a strong sense of direction, but can push the eye out of the frame.
Change your height
Camera height changes where the horizon, and so the vanishing point, sits in the frame. Crouching low puts the point lower and makes the foreground road or boards huge and dramatic. Standing tall or using a step raises the point and shows more of the ground. The guide to photography angles covers this in more detail.
Put something at the point
A vanishing point is a natural target. A small figure walking away, a car, a lone tree or a lighthouse at the point makes the picture feel complete. Without anything there, the eye can travel to the point and find nothing to rest on. That can work for an empty, lonely mood, but it is a choice to make on purpose.
Keep it clean
Busy signs, bright cars or bins near the vanishing point steal attention. Wait for traffic to clear, move a little, or crop to keep the area around the point simple.
Use the edges
Lines are strongest when they start near the corners of the frame and run inward. Lines that start in the middle of the edges, or that are cut off early, feel weaker.
Lens choice
Your focal length changes how strong the effect looks.
- Wide-angle lenses exaggerate perspective. Nearby lines look huge and spread wide, and they rush toward the point. This gives very dramatic depth. The guide to the wide-angle lens explains more.
- Normal lenses, around the view of your eye, give a natural look.
- Telephoto lenses appear to compress distance, so the lines converge more gently and the scene feels flatter, with distant objects stacked close together. See lens compression.
Strictly speaking, perspective depends on where you stand, not on the lens. A wide lens simply lets you include very close foreground lines, which is what makes the effect feel so strong.
Camera settings
Vanishing point photos usually need sharpness from front to back.
- Aperture: f/8 to f/11 for landscapes and streets, so both near and far details are sharp. See depth of field.
- Focus: about a third of the way into the scene is a safe general rule, or on your subject if one stands at the point.
- Shutter speed: fast enough to avoid shake when handheld, or use a tripod in low light.
- Grid display: turn on your camera or phone grid to check that lines and horizon are straight and the point sits where you want it.
Vanishing points in different kinds of photography
Landscapes
Roads, fences, rivers and rows of trees all work. Combine a vanishing point with good light, such as low sun casting long shadows along the lines. The landscape photography guide has more ideas.
Street and city
Streets lined with buildings, arcades and tram lines create strong points. Wait for a person to walk into the right spot. The street photography guide covers patience and timing.
Architecture and interiors
Corridors, stairwells, colonnades and long halls are perfect for centred, symmetrical vanishing points. Keep the camera level so vertical lines stay straight.
Night
Street lights along a road, or light trails from cars in a long exposure, make glowing lines that lead to the point.
Travel
A road or path vanishing into new country is one of the most evocative travel photos. It says “journey” without any words.
Breaking the rules on purpose
Once you are comfortable with classic vanishing points, try variations:
- Hide the point. Let a curve, hill or fog swallow the lines before they meet. The viewer imagines where they go.
- Curving lines. A winding road gives a softer journey to the point.
- Tilt for drama. A tilted camera makes the lines feel off balance and energetic. Do it clearly, not slightly, so it looks deliberate.
- Look up or down. Shoot straight up a stairwell or down from a tall building for a three-point view.
Editing vanishing point photos
- Straighten. A slightly tilted horizon is very noticeable when lines meet at a point. Use the straighten or level tool.
- Crop to balance. Small crops can move the point to a better spot.
- Fix converging verticals in architecture if they look accidental, using the perspective or transform tool.
- Darken the edges slightly. A light vignette, darkening the corners, keeps the eye moving toward the point.
- Keep it natural. Strong distortion corrections can stretch the image strangely.
Training your eye to see vanishing points
At first, vanishing points can be hard to notice, because your brain is used to reading the world in three dimensions. A few habits help you see them as a photographer does.
- Squint. Half-closing your eyes hides small details and shows the big lines and shapes in a scene.
- Trace the lines with a finger. Hold your finger up and follow a kerb, a railing or a wall edge into the distance. Where your two fingers meet is the point.
- Look at the screen, not the scene. On a camera or phone screen, the scene is already flat, so converging lines are much easier to see.
- Walk the middle. When you find a straight path or corridor, walk down its centre and stop every few steps to look back and forward.
- Look behind you. A road that vanishes ahead also vanishes behind. Sometimes the light is better in the other direction.
- Study photos you like. Find vanishing points in favourite photos and notice where the photographer placed them and what sits there.
After a week or two of looking, you will spot them without trying, and your photos will gain depth almost automatically.
Vanishing points with a phone
Phones are excellent for this kind of photo. Their main and wide lenses show strong perspective, and their screens make lines easy to see.
- Turn on the grid in camera settings.
- Hold the phone level; many phones show a small level indicator when you hold them flat or straight.
- Try the ultra-wide lens for exaggerated, dramatic lines, but keep it level to avoid curved edges.
- Lower the phone close to the ground for a dramatic, low view of a path or pier.
- Tap to set focus partway into the scene.
Common mistakes
- Standing off-centre by accident. Lines look uneven and awkward. Move until they look balanced, or go clearly off-centre on purpose.
- A crooked horizon. Use the grid and level the camera.
- Nothing at the point when it needs something. Wait for a person, car or other subject, or choose a mood that suits emptiness.
- Clutter near the point. Bright objects there compete for attention.
- Using a telephoto when you want drama. Long lenses flatten the effect. Step closer with a wider lens.
- Cutting the lines off. Lines that start halfway into the frame feel weak. Let them begin near the corners.
- Unsafe positions. Never stand on active roads or railway tracks for a photo. Use a pavement, bridge or crossing point legally and safely.
Try this: a 10-minute vanishing point hunt
- Minute 1 to 2: Find any long, straight lines that run away from you: a hallway, a path, a fence or a pavement.
- Minute 3: Turn on your grid. Stand in the middle and take one photo with the point in the centre.
- Minute 4: Move until the point sits on a third. Take another photo.
- Minute 5: Crouch low and take a photo. Then stand tall and take another.
- Minute 6 to 7: Zoom wide and take one, then zoom in and take one from the same spot. Notice how the lines change.
- Minute 8 to 9: Wait for something to appear at the point: a person, a pet, a car. Or place an object there yourself.
- Minute 10: Compare all the photos. Which has the strongest depth? Which leads your eye best?
After this exercise, you will start noticing vanishing points on every walk.
Frequently asked questions
What is a vanishing point in photography?
The point where parallel lines, such as road edges or railway tracks, appear to meet in the distance. It creates depth and leads the eye.
How do I find a vanishing point?
Look for long, straight, parallel lines running away from you, then stand in line with them. The point is where they seem to converge.
Should the vanishing point be in the centre?
It can be. Centred points feel calm and symmetrical; off-centre points feel more dynamic. Choose based on the mood you want.
What lens is best for vanishing point photos?
A wide-angle lens gives the most dramatic effect. A normal lens looks natural. A telephoto flattens the lines.
What is the difference between leading lines and a vanishing point?
Leading lines are any lines that guide the eye. A vanishing point is where converging lines meet. Many vanishing point photos use leading lines.
Can I use vanishing points with a phone?
Yes. Turn on the grid, use the main or wide lens, and tap to focus partway into the scene.
Want more ways to guide the eye through a photo? Read about leading lines.
Curious how to make a photo feel deep without converging lines? Try depth in photography.