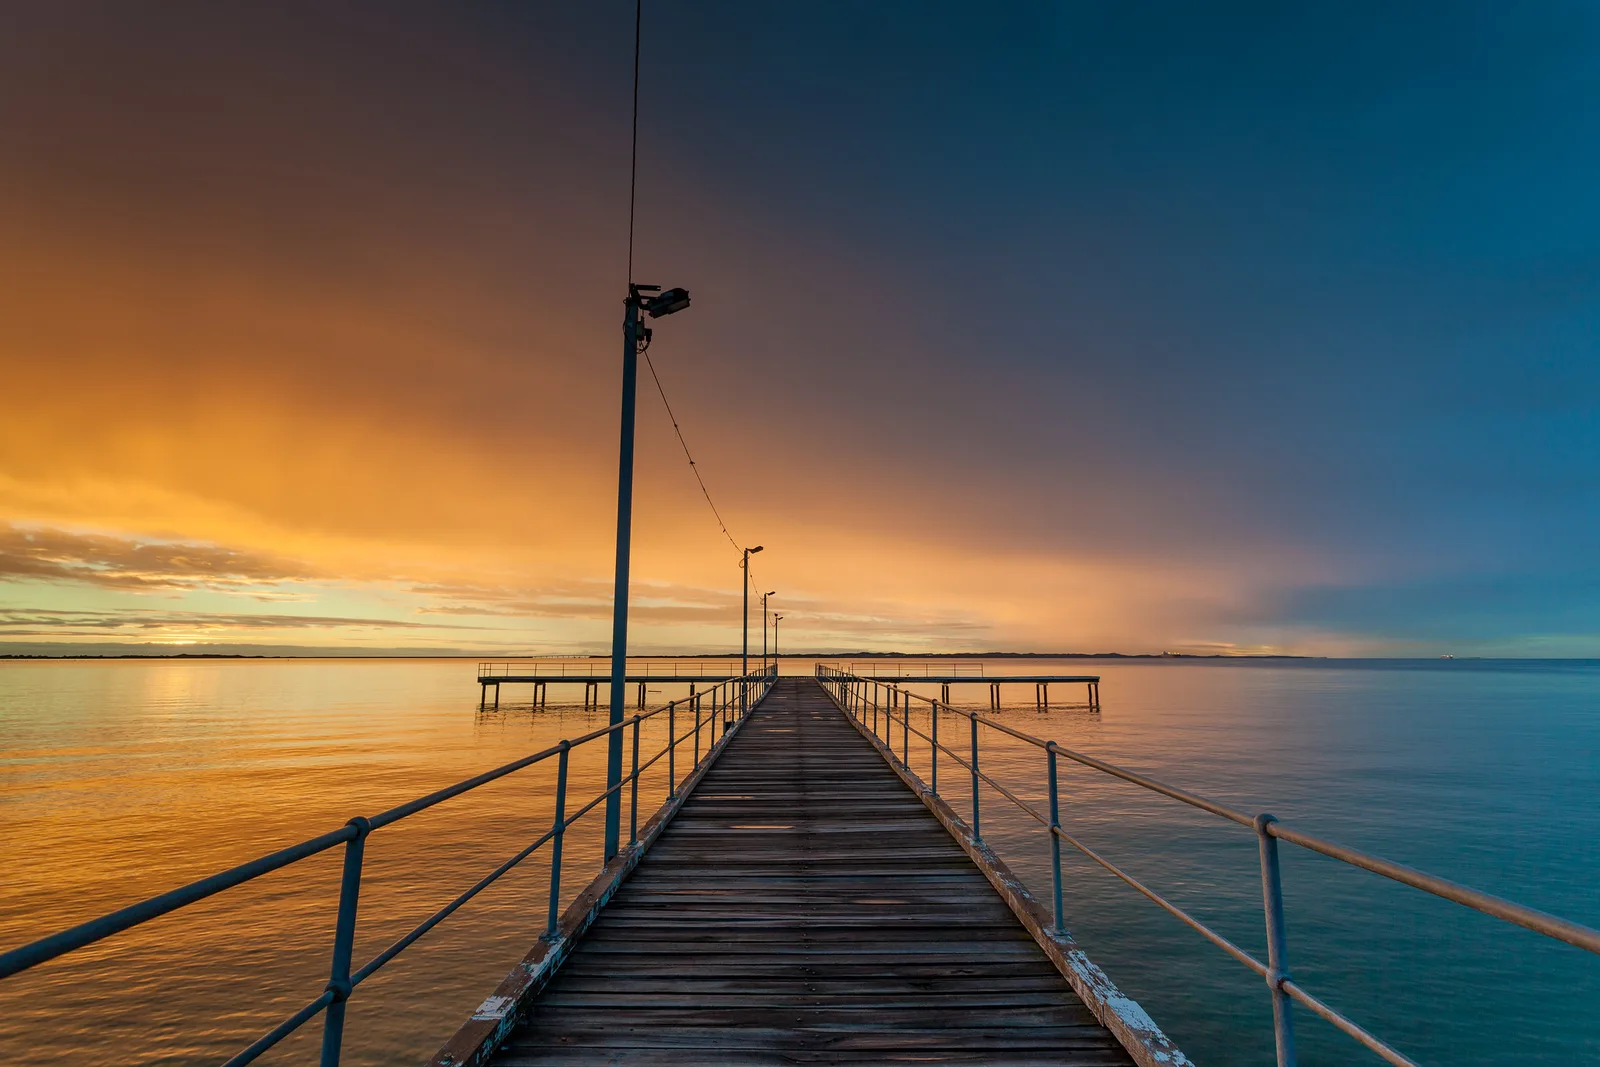
To get the horizon right in a photo, do two things: keep it straight, and put it in a deliberate place. Use the grid or the electronic level in your camera or phone to make it level, and straighten it in editing if you miss. Then decide where it goes. Put it low, about a third of the way up, when the sky is the interesting part; put it high when the land or water in front is more interesting; and put it in the middle only when you want calm balance, such as a reflection. Avoid cutting through a person’s head or neck with it.
The horizon is the line where the land or sea meets the sky. It sounds like a small detail, but it is one of the strongest lines in any outdoor photo. Get it right and the picture feels calm and intentional. Get it slightly wrong and viewers sense that something is off, even if they cannot say what.
The good news is that fixing horizons is one of the easiest ways to improve your landscapes, beach shots and travel photos. This page explains how to keep the horizon straight, where to place it, when to break the rules and how to fix it afterward.
Why the horizon matters so much
People expect the world to be level. When you look at a lake or the ocean, you know the water is flat. So when a photo shows the sea tilting a little to one side, it feels as if the water is about to drain out of the frame. A tilt of even a couple of degrees is enough to notice.
The horizon also divides the photo into two parts: sky and ground. How much space you give each part tells the viewer what you think is important. That is a big decision to leave to chance.
How to keep the horizon straight
Turn on the grid
Almost every camera and phone can show grid lines over the screen. They split the view into nine boxes with two horizontal and two vertical lines. Find the setting in your camera’s display menu or your phone’s camera settings, and leave it on. Line the horizon up with one of the horizontal lines, and it will be level. The grid also helps with placement, as you will see below.
Use the electronic level
Many cameras have a built-in level, sometimes called a virtual horizon or electronic level. It shows a line or a pair of markers that turn green when the camera is perfectly level. Some phones show a small level line when you hold them flat or near level. This is more accurate than your eye, especially when there is no clear horizon, like in a forest or hills.
Watch out for tricky horizons
Sometimes the line you see is not the true horizon:
- Sloping hills or shorelines are not level, even if they look like a horizon. Level the camera using the level indicator rather than lining up the slope.
- Wide-angle lenses can bend straight lines near the edges of the frame, especially if the horizon is near the top or bottom. This is called lens distortion. Keeping the horizon nearer the middle reduces it, and most editing apps have a “lens correction” button that fixes it.
- Tilting the camera up or down can make buildings lean even when the horizon is level. That is perspective distortion, a different problem with its own fixes.
Stand steady or use a tripod
It is easy to tilt the camera when you press the shutter button. Hold the camera with both hands, stand with your feet apart and take a breath before you shoot. For sunsets and seascapes, a tripod makes it very easy to keep everything level, and many tripods have a small bubble level built in. The guide on how to use a tripod covers the basics.
Where to put the horizon
Once the horizon is straight, the next question is where it goes in the frame. There are three main choices.
Low horizon: when the sky is the star
Put the horizon on the lower grid line, about a third of the way up from the bottom, when the sky is the most interesting part of the scene. Dramatic clouds, a colorful sunset, a storm rolling in or a starry night all deserve this. The sky then fills about two thirds of the frame.
You can go even lower. A horizon right near the bottom of the frame, with almost all sky, can look bold and dramatic, especially with a big, empty sky that gives a feeling of space. The stormy shoreline photo further down this page uses a low horizon to let the clouds do the work.
High horizon: when the ground is the star
Put the horizon on the upper grid line when the land or water in front of you is more interesting than the sky. Think of a field of flowers, patterns in sand, waves on rocks, a winding path or a reflection-free lake with interesting stones. A plain, cloudless or gray sky is often a good reason to push the horizon high, so less of that dull sky is in the photo.
A high horizon pairs very well with foreground interest, something interesting close to the camera such as a rock, a flower or a piece of driftwood. It gives the viewer a way into the scene.
Middle horizon: for balance and reflections
You may have heard that you should never put the horizon in the middle. It is good advice most of the time, because a centered horizon splits the photo into two equal halves that compete for attention. But it works beautifully when you want balance on purpose:
- Reflections in still water, where the top half mirrors the bottom half. See reflection photography.
- Calm, minimal scenes, like a flat sea meeting a flat sky, where the stillness is the point.
- Symmetrical compositions where everything is about balance. The page on symmetry explains when this works.
The rule of thumb: put the horizon in the middle only when you can say why.
Wondering where to place everything else in the frame, not just the horizon? The rule of thirds shows how the same grid lines help with subjects, eyes and moving things.
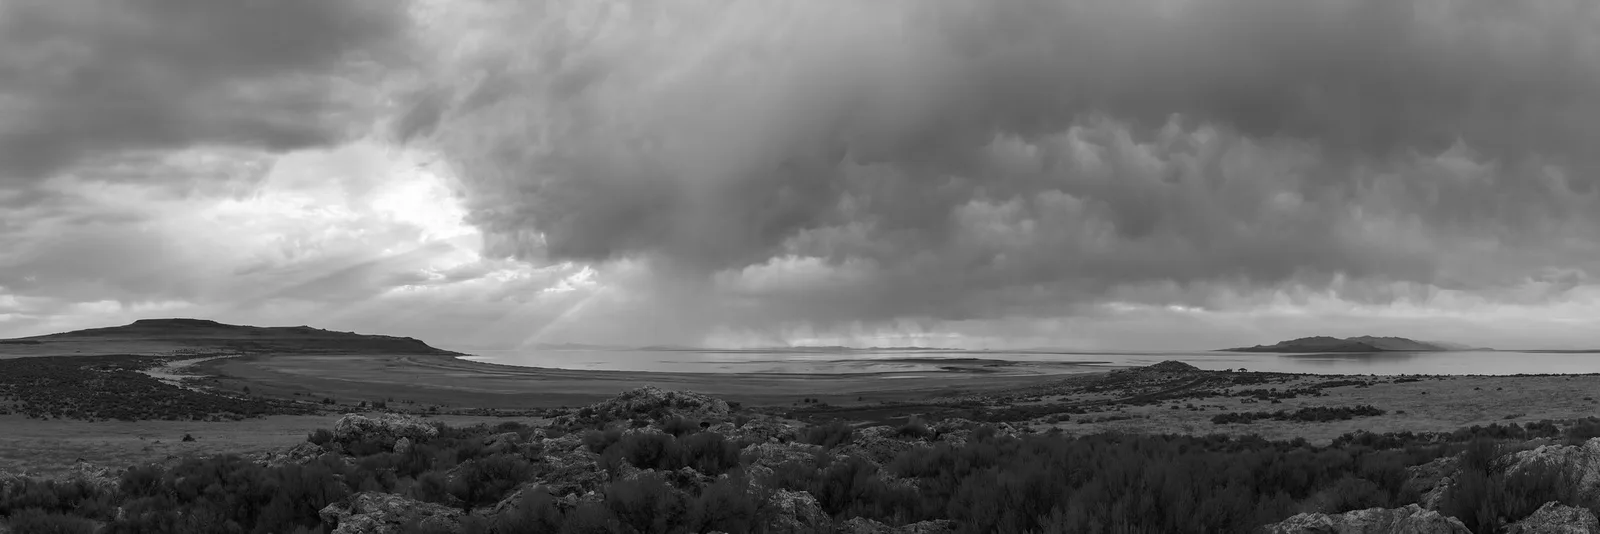
Horizons and people
When you photograph a person outdoors, the horizon behind them matters too. The most common problem is a horizon that runs straight through their head or neck. It can look as if the line is cutting them in half.
What to do:
- Crouch down so the horizon drops to their waist or below, and their head is against the sky.
- Stand on something higher so the horizon rises above their head and they are against the ground or the water.
- Move to the side until something else, like a tree or a building, breaks up the line behind them.
- Use a wider aperture (a small f-number) so the background is blurred and the line is softer. Depth of field explains how this works.
For beach and lake portraits, a low horizon at about hip height is a safe, flattering starting point.
When there is no clear horizon
In cities, forests, mountains and indoors, you may not see a horizon at all. You still want the photo to feel level. Use these as guides:
- Vertical lines: tree trunks, lamp posts and the edges of buildings should usually look upright. If they all lean the same way, the camera was tilted.
- The electronic level: this works whether or not you can see a horizon.
- Water lines: the edge of a lake, a river or a swimming pool is always level, even when the land around it is not.
Mountains are a special case. The tops of the peaks are not a horizon; they are uneven shapes. Level the camera using the base of the mountains, a lake or the level indicator, not the ridgeline. The guide on how to photograph mountains has more on framing big peaks.
Breaking the rules on purpose
Once you can keep horizons straight and place them well, you can break the rules deliberately. The key word is deliberately. A slight tilt looks like a mistake. A strong, obvious tilt looks like a choice.
- A strongly tilted horizon can add energy and movement, useful for action, playful street scenes or a feeling of unease. It is called a Dutch angle. The guide on photography angles explains when it works.
- No horizon at all, by pointing the camera down at the ground or up at the sky, can make abstract, puzzling pictures.
- An extreme low or high horizon, right at the edge of the frame, gives a bold, minimal look. See minimalist photography.
How to straighten a horizon in editing
If you get home and find a tilted horizon, do not worry. It is one of the easiest fixes in photo editing, and every app can do it.
- Open the photo and choose the crop tool.
- Look for a “straighten” or “rotate” slider, or a small level icon.
- Many apps have an automatic straighten button. Try it first; it often gets it right.
- If not, drag the slider slowly until the horizon lines up with the grid that appears over the photo.
- Some apps let you draw a line along the horizon with a straighten tool, and they rotate the photo to match.
- Accept the crop. Rotating trims a little off each edge, so leave some extra room around your subject when you shoot.
The crop tool also lets you move the horizon. If it ended up in the middle when you wanted it low, crop a little off the bottom or top to shift it toward a third. For more on simple edits, see photo editing for beginners.
Horizon placement by type of scene
Here are some easy starting points for scenes beginners photograph most. Treat them as a first try, then take a second version with the horizon somewhere else and compare.
- Sunsets and sunrises: usually a low horizon, so the colors in the sky fill the frame. If the sky is clear with no clouds, try a higher horizon and include a silhouette or a reflection instead. See how to photograph sunsets.
- Beaches and the sea: keep the horizon perfectly level, because water makes any tilt obvious. A low horizon suits big skies; a high one suits waves, rocks and patterns in wet sand. The guides to beach photography and seascapes go further.
- Fields and open country: a high horizon shows off flowers, crops or a path; a low one shows off weather. A lone tree or barn on the horizon line makes a strong, simple picture.
- Lakes with reflections: try the middle, so the reflection mirrors the scene above.
- Cities and skylines: the “horizon” is the line where buildings meet the sky. Place it low when the sky is colorful at dusk and higher when the streets and lights are the story. See cityscape photography.
The light changes the answer too. At golden hour the sky is often the most beautiful part of the scene, so a lower horizon makes sense. At midday, when the sky is pale and flat, give more room to the ground.
Common mistakes
- A slight tilt. The most common horizon mistake of all. Turn on the grid or the level and check every time.
- Always putting the horizon in the middle. Decide whether the sky or the ground is more interesting and give it more space.
- Giving lots of space to a boring sky. A plain white or gray sky rarely deserves two thirds of the frame.
- A horizon through someone’s head or neck. Move up or down so it sits at their waist or above their head.
- Leveling a slope instead of the camera. Hillsides and beaches can slope. Use the level, not the land.
- Cropping so tight after straightening that the subject is cut off. Leave some room at the edges when you shoot.
Try this: a 10-minute horizon exercise
Go somewhere with a clear horizon: a beach, a lake, a field or even a long, flat street.
- Minute 1: Turn on the grid in your camera or phone. Turn on the level if you have one.
- Minutes 2 to 4: Take three photos of the same view: one with the horizon on the bottom grid line, one in the middle and one on the top grid line.
- Minutes 5 to 6: Look at the three side by side. Which tells the story of the scene best? Is the sky or the ground more interesting right now?
- Minutes 7 to 8: Find something interesting close to you, such as a rock, a post or a plant. Take a photo with a high horizon and that object near the bottom of the frame.
- Minutes 9 to 10: Take one photo with the camera deliberately tilted a lot, and one tilted just slightly. Compare them. Notice how the slight tilt looks like a mistake while the strong one looks like a choice.
Frequently asked questions
Where should the horizon be in a photo?
Usually about a third of the way up or down the frame. Put it low when the sky is interesting and high when the foreground is interesting.
Is it bad to put the horizon in the middle?
Not always. It works well for reflections, symmetry and calm, minimal scenes. Just make it a choice, not a habit.
How do I keep the horizon straight on my phone?
Turn on the grid in the camera settings, and use the level indicator if your phone has one. Line the horizon up with a grid line before you take the photo.
Why does my horizon look curved?
Wide-angle lenses can bend lines near the edges of the frame. Keep the horizon nearer the center or use the lens correction option in your editing app.
How do I fix a crooked horizon?
Use the crop tool’s straighten slider or auto straighten button in any editing app. It rotates the photo and trims the edges.
Should the horizon be level in portraits?
Yes, in most cases. Also make sure it does not cut through the person’s head or neck. Move up or down so it sits lower or higher.
Ready to put your new horizons to work? Landscape photography covers light, lenses and composition for outdoor scenes.