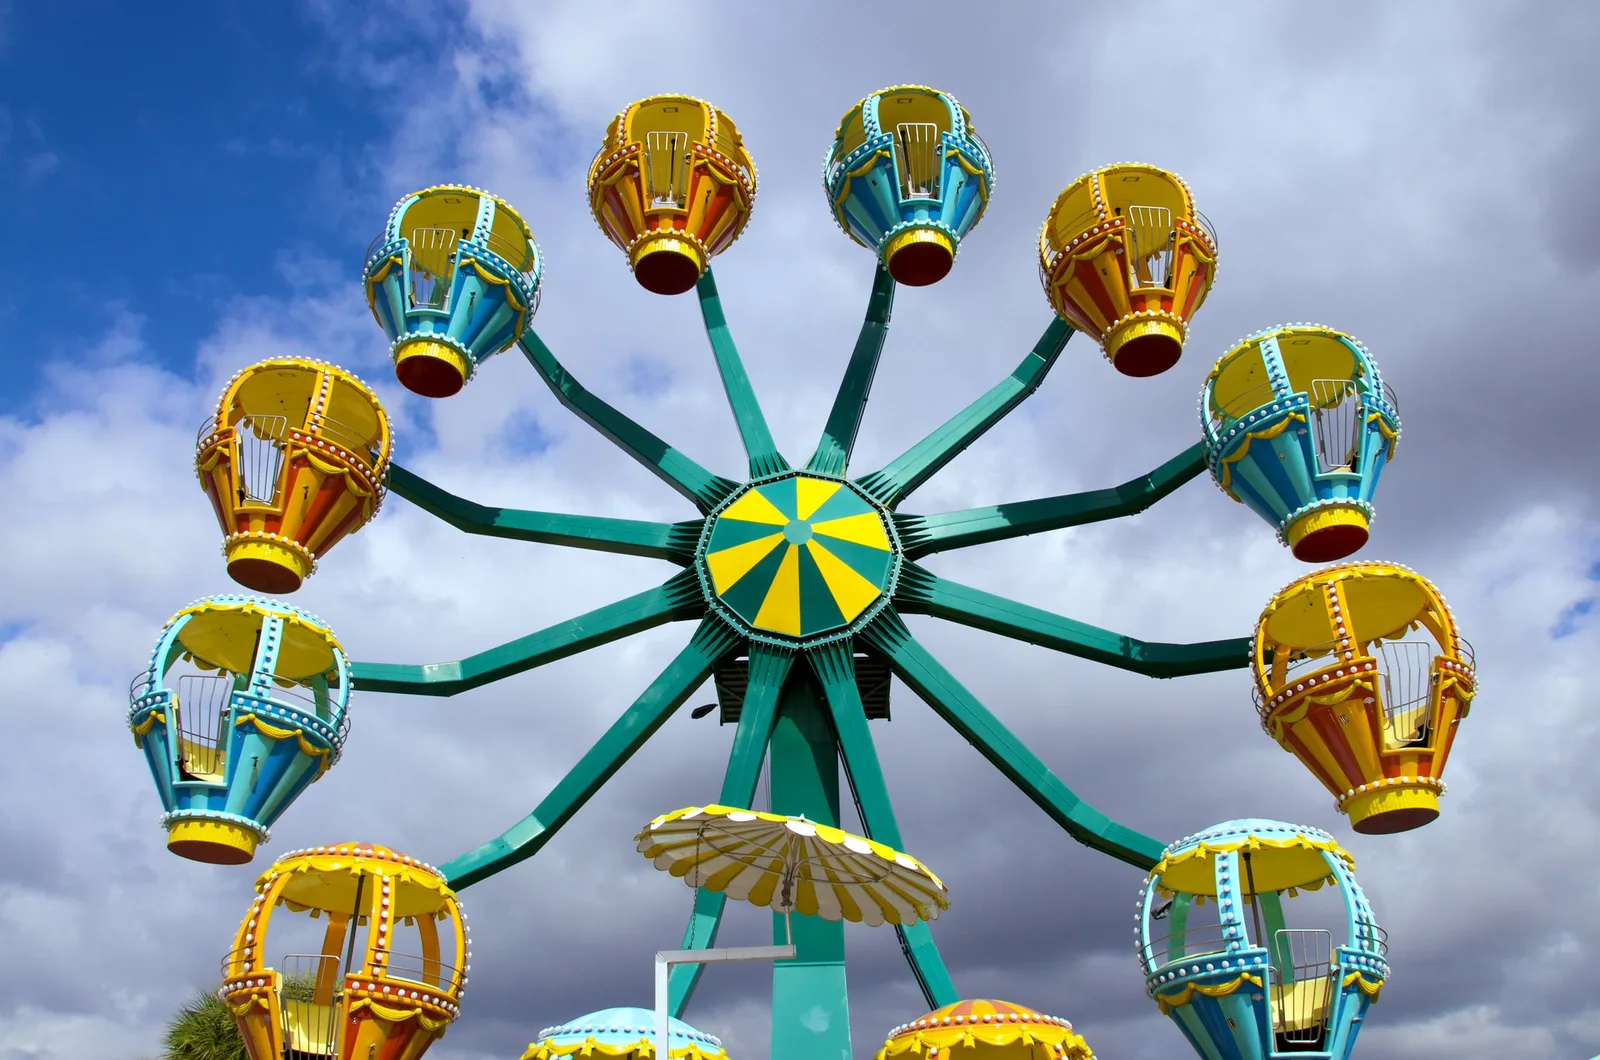
Amusement parks, fairs and carnivals are some of the most colorful places you can bring a camera. Ferris wheels turn against the sky, carousels glow with hundreds of bulbs, roller coasters roar overhead, and the midway is a riot of painted signs, prizes and treats. As evening falls, the rides light up and spin into ribbons of color. It is a place made for fun, and pictures from a day at the park can capture that joy in a way few other subjects can.
This guide covers why amusement parks are great to photograph, planning a visit, Ferris wheels, carousels, roller coasters and thrill rides, ride lights at night, the midway, people and candid fun, details and abstracts, settings, phones and editing. For spinning lights after dark, the guide to light trails goes deeper, and for street scenes full of people, see the guide to candid photography.
Why amusement parks are great to photograph
Few places pack so much color, motion and emotion into such a small space.
- Bold color everywhere. Rides, signs, flags, balloons and prizes are painted in bright reds, yellows and blues.
- Motion. Spinning, swinging and plunging rides give endless chances to freeze or blur movement.
- Lights. At dusk, thousands of bulbs and colored lights turn the whole park into a glowing playground.
- Strong shapes. Circles of Ferris wheels, curves of coaster tracks and the repeating horses of a carousel make striking compositions.
- Emotion. Laughter, screams, wide eyes and sticky smiles make wonderful candid pictures.
Amusement parks also carry nostalgia. Many people remember the first ride on a carousel or the view from the top of a Ferris wheel, and pictures of these classic rides tap into those memories. That sense of warmth and fun is what the best amusement park pictures share.
Planning your visit
A little planning makes a big difference at a busy park.
- Check the rules. Some parks limit tripods, large bags or selfie sticks, and many do not allow loose items on rides. Read the rules before you go.
- Arrive early or stay late. Mornings are quieter for clean pictures of rides, and evenings bring the lights.
- Plan for golden and blue hour. Note when the sun sets, and be in place near your favorite ride as the lights come on.
- Pack light. A small camera or phone, a spare battery and a strap are enough for most visits. A small bag that zips closed keeps gear safe in crowds.
- Look at the map. Find spots with clear views of the big rides, such as bridges, open lawns and paths along a lake or fence.
Local fairs and traveling carnivals are often easier to photograph than large theme parks, with fewer crowds, classic rides and a friendly small town feel. They usually run for only a few days, so check the dates and plan around the sunset.
Ferris wheels
The Ferris wheel is the classic symbol of the fair, and its round shape is endlessly photogenic.
- From a distance. Show the whole wheel against the sky, with the park below for context.
- From below. Stand near the base and look up to show its size, with the spokes reaching out like a giant flower.
- Fill the frame. Get close to the cars and let color and pattern take over.
- From the top. Ride it, and photograph the park, the crowds and the horizon from above.
Plain blue sky or soft clouds make a clean background that lets the colors pop. At sunset, place the wheel against a glowing sky, and at night, use a longer exposure to turn the lit spokes into a glowing circle. Centering the wheel works well, since its symmetry is part of its charm. Try a few frames with the wheel off to one side as well, leaving space for the sky or a setting sun.
Photographing from the top
A ride on the Ferris wheel gives a rare high view of the whole park. Keep the camera strap around your wrist or neck, and never lean out. Shoot through gaps or open sides when safe, or press the lens close to a window to cut reflections. Look for patterns of paths, tents and rides below, the edge of the park meeting the town and the sunset over the horizon. The wheel moves slowly, so you have time to compose at the top.
Carousels
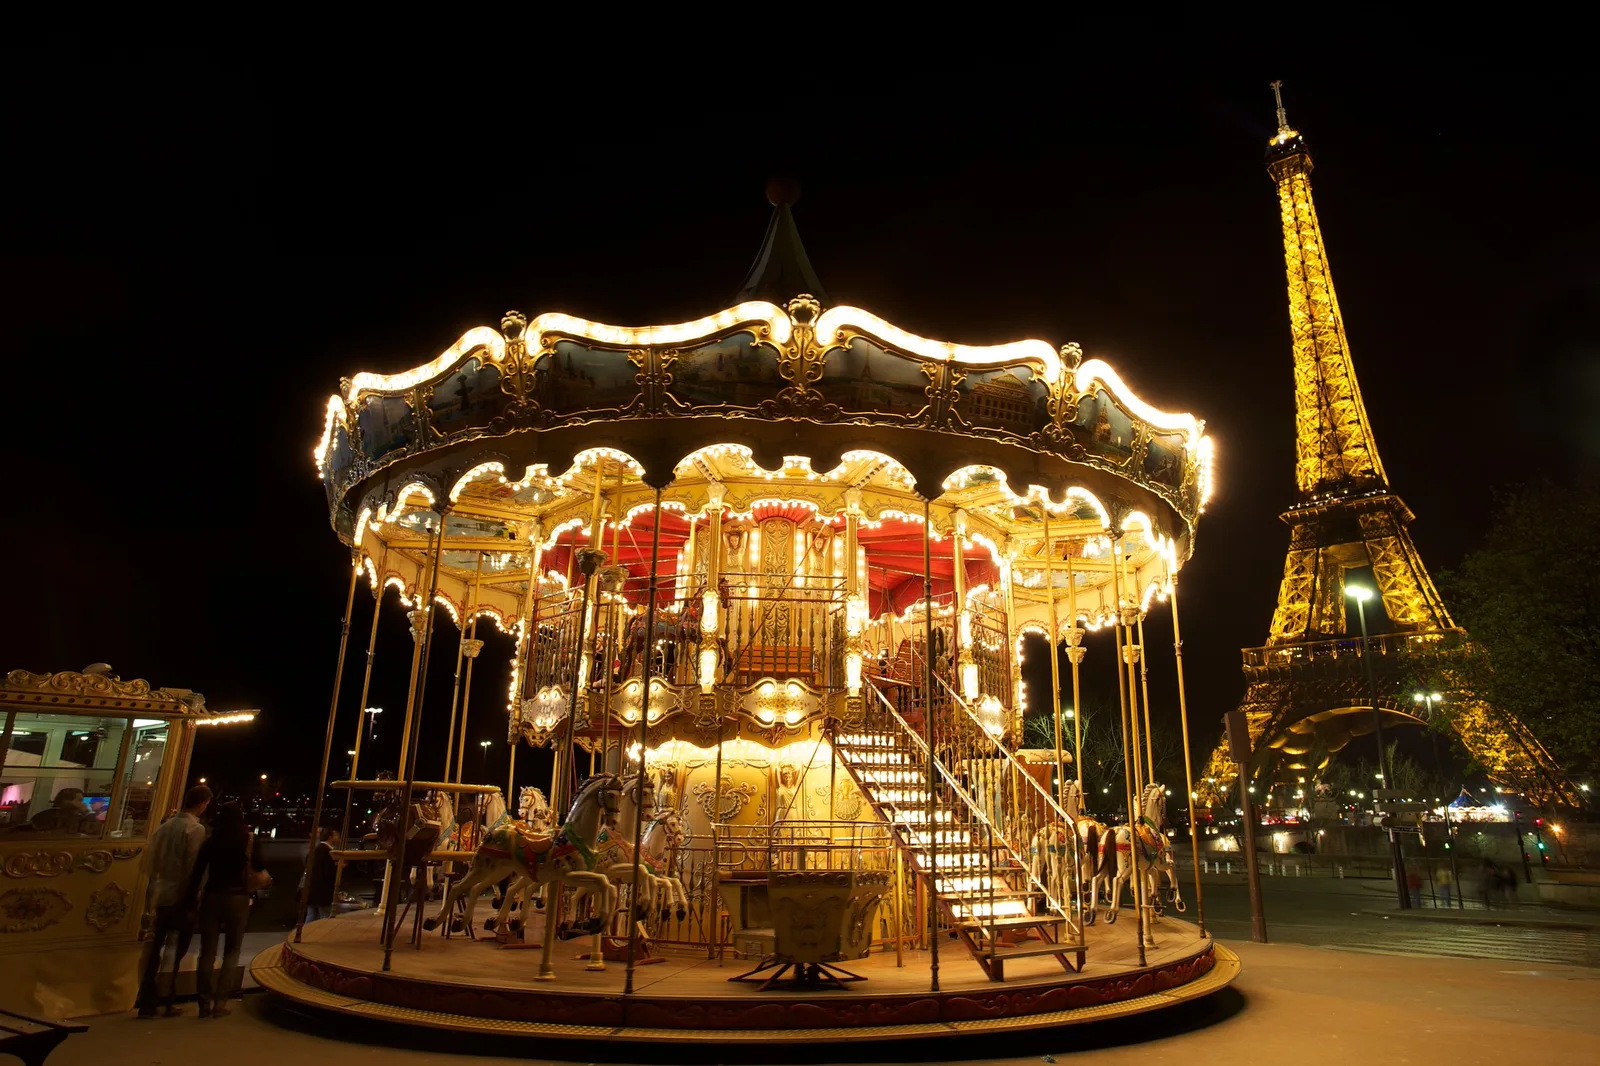
Carousels are full of detail and charm. Painted horses, gilded mirrors, carved scrollwork and rows of bulbs make them a treasure for close pictures.
- The whole ride. Photograph the carousel from a distance, ideally at dusk when its lights glow warmly.
- The horses. Get close to a single horse and fill the frame with its painted mane, bright saddle and flowing tail.
- Motion. Use a slower shutter speed while the carousel turns to blur the horses into a swirl of color, with the center column sharp.
- Repetition. Line up a row of horses so they repeat across the frame.
Carousels are lovely at night, when their warm bulbs light up the painted details. Expose for the bright lights so they keep their color rather than turning white. On a quiet morning, when the ride is still, walk slowly around it and look for one horse with especially lovely paint or a face that seems full of character.
Roller coasters and thrill rides
Roller coasters bring speed and drama. Their swooping tracks make bold lines, and riders with arms raised make great action moments.
- Freeze the action. Use a fast shutter speed, such as 1/1000 of a second, to freeze a coaster car as it crests a hill or plunges down a drop.
- Pan with the train. Use a slower speed, such as 1/60, and pan by following the cars with the camera to keep them sharp while the background blurs.
- Use the track. Loops, twists and lattice supports make strong patterns and leading lines, even without a train.
- Catch the peak. Wait for the moment the train pauses at the top of the first hill, or the instant it starts to drop.
Burst mode helps catch the best moment when the train races past. Learn the timing of the ride by watching one or two runs, then be ready for the moment you want. Swings, drop towers and spinning rides also make great action pictures, with riders flying outward against the sky.
Ride lights at night
The magic hour for amusement parks starts as the sun goes down. Rides switch on their lights, and the sky turns deep blue. This is the best time for color and glow.
- Start at blue hour. The sky still holds color, which keeps the scene from looking black around the lights.
- Use a long exposure. With the camera on a tripod or a steady surface, an exposure of one to several seconds turns spinning rides into circles and streaks of light.
- Keep something still. A sharp building, ride base or tree anchors the frame and makes the blur look intentional.
- Try several speeds. Short exposures show the shape of the ride, and longer ones create smooth ribbons of color.
If tripods are not allowed, brace the camera on a railing, fence or bench, and use the self timer to avoid shaking it when you press the shutter.
Ready to turn spinning rides into ribbons of light? The guide to light trails explains how to set up long exposures for moving lights.
The midway, food and signs
The midway, with its game booths, food stands and painted signs, is full of color and character.
- Game booths. Rows of stuffed animal prizes, ring toss bottles and bright bulbs make colorful, busy frames.
- Signs. Hand painted and lit signs with bold letters capture the old fashioned feel of the fair.
- Treats. Cotton candy, caramel apples, popcorn and funnel cakes make fun, close pictures, especially held up against the rides.
- Lines of lights. Strings of bulbs over the midway make repeating patterns and soft bokeh in the background.
Look for scenes that tell a story without words: a giant prize carried through the crowd, a sticky hand holding a treat or a line of people waiting for a ride. Food stands with glowing menus and steam rising from the fryers make especially cozy pictures after dark.
People and candid fun
People make amusement park pictures come alive. Laughter on a ride, a couple sharing cotton candy or a friend winning a prize all show the joy of the place.
- Photograph your own group. Friends and family make the best subjects, since you can get close and catch genuine moments.
- Be ready for reactions. Catch faces as a ride takes off or as someone wins a game.
- Show scale. Small figures in front of big rides show how grand they are.
- Use silhouettes. Riders against a sunset sky become simple, striking shapes.
Be respectful of strangers, and especially of other people’s children. Ask before photographing people up close, keep crowd scenes general, and follow the park’s rules about photography. A wide view of a busy crowd shows the energy of the place without focusing on any one person.
Details and abstracts
Amusement parks are full of small details and abstract patterns once you look closely.
- Bulbs and lights. Rows of bulbs make repeating patterns, and out of focus lights turn into soft colored circles.
- Painted surfaces. Peeling paint, faded colors and hand lettering add texture and history.
- Shapes. Circles, spokes, tracks and seats make bold abstract designs when you fill the frame.
- Motion blur. A slow shutter on a spinning ride turns color into pure movement.
Details also help tell the story of a visit. A few close pictures of tickets, prizes and lights mixed with wider views make a lively set. Think of it like a short photo essay: an opening wide view, a few close details, a moment of action, a portrait of your group and a closing picture of the park glowing at night.
Want to go further with color and shape? The guide to abstract photography shows how to find abstract images in everyday scenes.
Settings for amusement parks
Settings change through the day, from bright afternoon to glowing night.
- Daytime. Use a fast shutter speed and a moderate aperture, such as f/8, for sharp, colorful scenes.
- Action. Use 1/1000 or faster to freeze coasters, or try shutter priority mode to set the speed yourself.
- Panning. Try 1/30 to 1/60 while following a moving ride.
- Night. Use a tripod or steady surface, a low ISO and an exposure of one to several seconds for light trails.
- Handheld at night. Raise the ISO and use a wide aperture to keep the shutter fast enough to avoid blur.
- White balance. Auto works well, though a slightly warmer setting suits the glow of incandescent bulbs.
Bright lights can fool the camera into overexposing. Check your pictures and use exposure compensation to darken them if the lights lose their color.
Using a phone at the park
A phone is perfect for amusement parks, since it is small, light and always at hand. Use burst mode for coasters, portrait mode for friends with treats and night mode for glowing rides. Some phones also have a long exposure or motion setting that turns moving lights into streaks. Hold the phone steady against a railing, and keep it secure on rides with a strap or a zipped pocket.
Using a phone after dark? The guide to night photography with a smartphone covers how to get clean, bright night pictures.
Editing amusement park photos
Keep edits bright and fun. Raise vibrance a little to make colors sing, but avoid oversaturating reds, which can lose detail. Lower highlights to bring back color in bright bulbs, straighten horizons and Ferris wheels, and crop to strengthen shapes. A small vignette can draw the eye to a glowing ride at night. For a nostalgic feel, a gentle warm tone or soft fade suits classic carousels and painted signs.
Common mistakes
- Arriving too late for blue hour. Once the sky goes black, lights lose their setting. Be ready as they switch on.
- Overexposed lights. Bright bulbs turn white and lose color. Darken the exposure.
- Blurry night pictures. Without support, low light causes shake. Brace the camera or raise the ISO.
- Cluttered frames. Busy parks are full of distractions. Simplify by getting closer or choosing a plain background.
- Only wide views. Mix in details, people and action for a fuller story.
- Risky shooting on rides. Never lean out or hold a camera loosely on a ride. Keep a strap on and follow the rules.
- Ignoring strangers’ privacy. Ask before close pictures of people, and be especially careful with children.
Try this: a 10-minute ride light exercise
As dusk falls, choose one spinning ride and a spot with a clear view.
- Brace the camera on a railing or tripod, and set a low ISO.
- Take one picture at 1/250 to show the ride’s shape.
- Take one at 1/4 second, then one at one second, then one at four seconds.
- Try one more with a person or sign in the foreground, kept sharp and still.
Compare the set and see how the ride changes from a clear shape to a swirl of color. Notice which shutter speed shows the ride best, and which feels most magical. The exercise works on almost any ride with lights, from a Ferris wheel to a swing ride.
Frequently asked questions
When is the best time to photograph an amusement park?
Blue hour, just after sunset, when the ride lights are on and the sky still has color. Mornings are good for quieter scenes.
How do I turn rides into streaks of light?
Steady the camera on a tripod or railing, and use an exposure of one to several seconds while the ride spins.
How do I photograph a roller coaster?
Use a fast shutter speed, burst mode and a spot with a clear view of a hill or drop, and learn the ride’s timing first.
Can I take my camera on rides?
Only on gentle rides that allow it, such as a Ferris wheel or carousel, with a strap secured. Follow park rules.
Is a phone enough for amusement park pictures?
Yes. Phones are light and easy to carry, and their burst and night modes work well for rides.
For terms such as shutter speed, panning, blue hour and long exposure, see the photography glossary.