Shutter priority mode (S on most mode dials, Tv on some) lets you pick the shutter speed while the camera picks the aperture needed for a correct exposure. Use it when the look of motion matters more than depth of field: 1/1000 second or faster to freeze sport and birds, 1/30 to 1/60 to pan with a moving car, and a quarter second or longer to smooth flowing water.
Want to try those speeds on a moving subject now? The camera simulator has a Shutter mode, and a surfer to freeze, blur or pan with.
This guide is the companion to aperture priority mode and goes well past the short section in the overview of camera modes. It explains how far the camera can actually follow your chosen speed, what the blinking aperture warning means, how Auto ISO changes the mode, and when manual exposure with Auto ISO does the same job better.
How shutter priority works (S or Tv on the dial)
Turn the mode dial to S or Tv (“time value”). On cameras with no mode dial, the same mode is reached by setting the aperture ring or aperture control to its automatic position and choosing a speed on the shutter dial. Either way the division of labor is the same:
- You set the shutter speed with the main command dial, usually in one-third stop steps (1/250, 1/320, 1/400, 1/500 and so on).
- The camera sets the aperture. It meters the scene and opens or closes the lens until the exposure matches what the meter wants.
- You or the camera set the ISO. With a fixed ISO, the aperture is the only thing the camera can move. With Auto ISO, it can move two things.
Half-press the shutter button and the aperture the camera has chosen appears beside your shutter speed in the viewfinder or on the screen. That number is worth reading every time. It tells you how much depth of field you are about to get, and how close the camera is to running out of adjustment.
The available speeds usually run from 30 seconds to the camera’s fastest speed. Exposures longer than 30 seconds are not available in shutter priority on most cameras: those need bulb mode or a timed long exposure setting.
The aperture range is your exposure budget
This is the part most explanations skip. A shutter can be set anywhere across a range of roughly 18 stops. A lens aperture cannot. A zoom that runs from f/4 to f/22 has five stops of adjustment (f/4, f/5.6, f/8, f/11, f/16, f/22). A lens that opens to f/1.8 and closes to f/16 has a little over six.
In aperture priority the camera has that huge range of shutter speeds to balance any aperture you pick, and it almost never runs out. In shutter priority at a fixed ISO it has only five or six stops of aperture to balance any speed you pick. Step outside that window and the picture comes out too dark or too bright.
A quick way to find it is the sunny 16 rule: in full sun at ISO 100, a correct exposure is about 1/100 second at f/16. Every time you halve the shutter time, the aperture must open one stop. Count it out:
- 1/100 at f/16
- 1/200 at f/11
- 1/400 at f/8
- 1/800 at f/5.6
- 1/1600 at f/4
- 1/3200 at f/2.8
With an f/4 lens at ISO 100 in full sun, 1/1600 is the fastest speed the camera can expose correctly. Ask for 1/3200 and the frame is a stop too dark. In open shade or under heavy cloud, where the light is three or four stops lower, the same lens at ISO 100 tops out somewhere between 1/100 and 1/200. That is why action photographers raise the ISO long before the light looks dim.
Shutter speeds to dial in for common subjects
The right speed depends on how fast the subject crosses the frame, not only on how fast it moves. A runner filling the frame needs a faster speed than the same runner small in a wide scene, and movement across the frame needs a faster speed than movement toward the camera. Treat these as starting points and check the result at full magnification on the rear screen.
| Subject and intent | Starting shutter speed | Notes |
|---|---|---|
| Still subject, handheld, normal lens | 1/60 to 1/125 | Go faster with longer lenses; see the reciprocal rule |
| People walking, posed groups | 1/250 | Also stops small gestures and blinking |
| Children and pets at play | 1/500 to 1/1000 | Erratic movement needs more margin |
| Field and court sports | 1/1000 | 1/2000 for balls, sticks and feet |
| Birds in flight | 1/2000 to 1/3200 | Small, fast wingbeats need the top of this range |
| Splashes and spray, frozen | 1/1000 to 1/2000 | Droplets blur before the main subject does |
| Panning with cars or cyclists | 1/30 to 1/60 | Start at 1/60 and slow down as your hit rate improves |
| Flowing water, some texture left | 1/8 to 1/2 second | Tripod needed |
| Flowing water, fully smooth | 1 to 4 seconds | Tripod, and often a filter to cut light |
The glossary pages on freezing motion and motion blur explain the two directions, and camera settings for sports breaks the fast end down sport by sport.
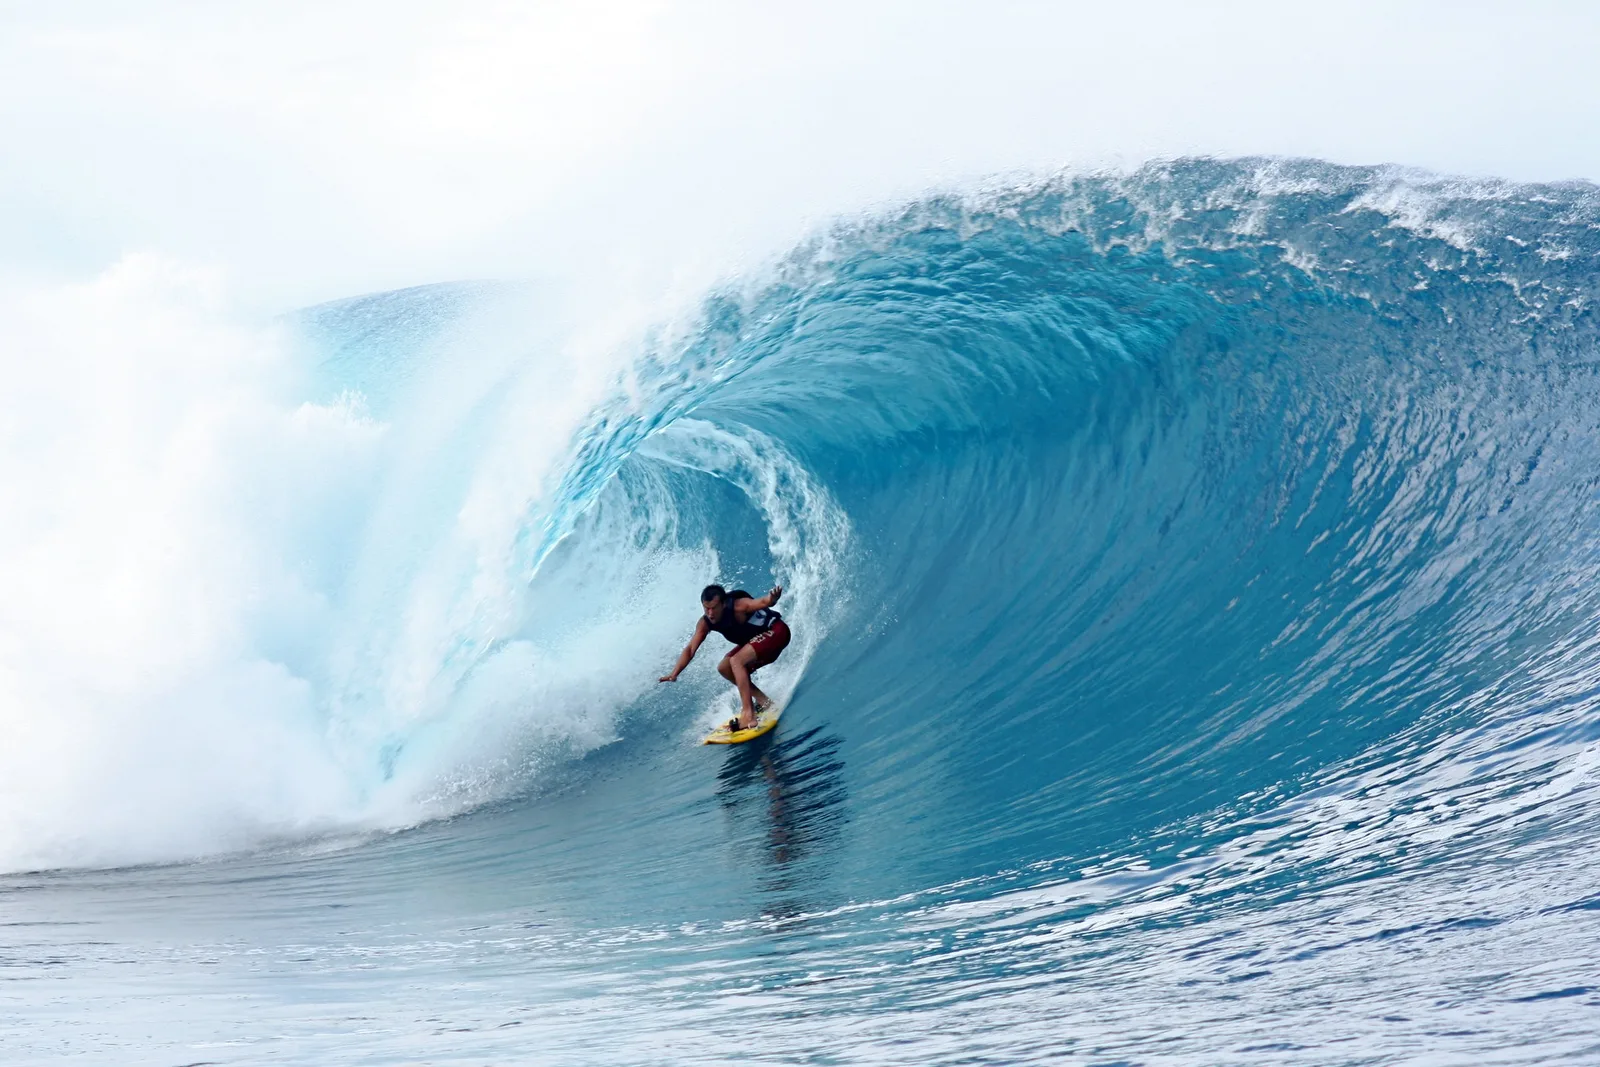
The photo above shows the frame-filling point in practice. At 1/250 the surfer is sharp because the figure is small in a wide view of the wave. Fill the frame with the same rider on a longer lens and 1/250 would show blur in the arms and the spray; 1/1000 or faster would be the safer choice.
The blinking aperture warning and how to clear it
When the speed you have chosen needs an aperture the lens does not have, the camera tells you, but quietly. Depending on the camera, the aperture number blinks, changes color, or is replaced by a short warning such as “Lo” or “Hi”. The important thing to know is that the camera will still take the picture. It simply uses the widest or smallest aperture it has and records a frame that is too dark or too bright.
| What you see | What it means | Fix, in order of preference |
|---|---|---|
| The widest aperture (for example f/4) blinks, or a low-light warning shows | Not enough light for this speed. The lens is wide open and the frame will be underexposed. | Raise the ISO or turn on Auto ISO; choose a slower speed if the subject allows; use a faster lens |
| The smallest aperture (for example f/22) blinks, or a high-light warning shows | Too much light for this speed. The lens is fully stopped down and the frame will be overexposed. | Lower the ISO to its base value; fit a neutral density filter; choose a faster speed; wait for softer light |
| No warning, but the aperture shown is f/16 or smaller | The exposure is correct, but the image will be softened by diffraction and sensor dust will show in skies. | Lower the ISO, or add a neutral density filter so the camera can use f/8 to f/11 |
The slow-speed case catches people most often. Suppose you want 1/15 second to blur a waterfall at midday. From the sunny 16 count above, 1/15 at ISO 100 in full sun needs an aperture near f/40. The lens stops at f/22, so the camera overexposes by about a stop and two thirds and blinks f/22 at you. No setting on the camera fixes this. You need less light reaching the sensor, which means a neutral density filter, deep shade or a darker time of day.
Shutter priority with Auto ISO, exposure compensation and flash
Turn on Auto ISO and shutter priority becomes far more forgiving, because the camera now has a second control to work with. The usual behavior in falling light is that the camera opens the aperture until the lens is wide open, then raises the ISO to hold the exposure. Some cameras start raising the ISO a little before the lens is fully open. In dim light the end result is the same on any camera: your chosen speed, the lens at or near its widest aperture, and whatever ISO it takes.
Three things to know about this combination:
- The minimum shutter speed setting does nothing here. That Auto ISO option exists to stop the camera choosing a slow speed in modes where the camera chooses the speed. In shutter priority you have already chosen it.
- The maximum ISO ceiling still applies. When the lens is wide open and the ISO hits the ceiling, the camera is out of options again and the underexposure warning returns. If that happens, decide which you would rather have: a slower speed, a higher ceiling, or a darker frame to lift later.
- You no longer control depth of field at all. In dim light the lens will sit wide open. With an f/1.8 lens and a close subject, that can leave only part of a face in focus. If that matters, manual exposure with Auto ISO (compared below) is the better tool.
Exposure compensation changes the aperture
The meter can be fooled in shutter priority exactly as in any other automatic mode, and the fix is the same control. Dial in +1 and the camera opens the aperture one stop; dial in -1 and it closes one stop. With Auto ISO on, the camera may change the ISO instead of, or as well as, the aperture. The full method, with starting values for snow, backlight and night scenes, is in the guide to exposure compensation.
One trap is specific to this mode. If the widest aperture is already blinking at a fixed ISO, positive compensation does nothing: the camera cannot open a lens that is already open. The picture stays dark until you raise the ISO or slow the shutter.
Flash limits the speeds you can choose
With a flash switched on, most cameras will not let you set a speed faster than the flash sync speed, typically somewhere between 1/160 and 1/250. Going faster requires high-speed sync, where the flash and camera support it.
Slow speeds on purpose: panning and moving water
Deliberate blur is where shutter priority earns its place, because the blur depends on one number and you want that number to stay put while the light changes.
Panning
In a pan, you swing the camera to follow a moving subject during the exposure, so the subject stays roughly sharp and the background streaks. The streak length is set by the shutter speed, so lock it in shutter priority and let the camera deal with brightness as the subject passes from sun into shadow.
- Set 1/60 for cars and motorbikes, 1/30 for cyclists and runners.
- Use base ISO. Slow speeds in daylight push the aperture toward f/16 or f/22, and a low ISO keeps the camera away from the overexposure limit.
- Select continuous autofocus and a burst drive mode.
- Pick up the subject early, match its speed smoothly, shoot as it passes square to you, and keep swinging after the shutter closes.
- Review. If the background is not streaked enough, go one stop slower. If nothing is sharp, go one stop faster.
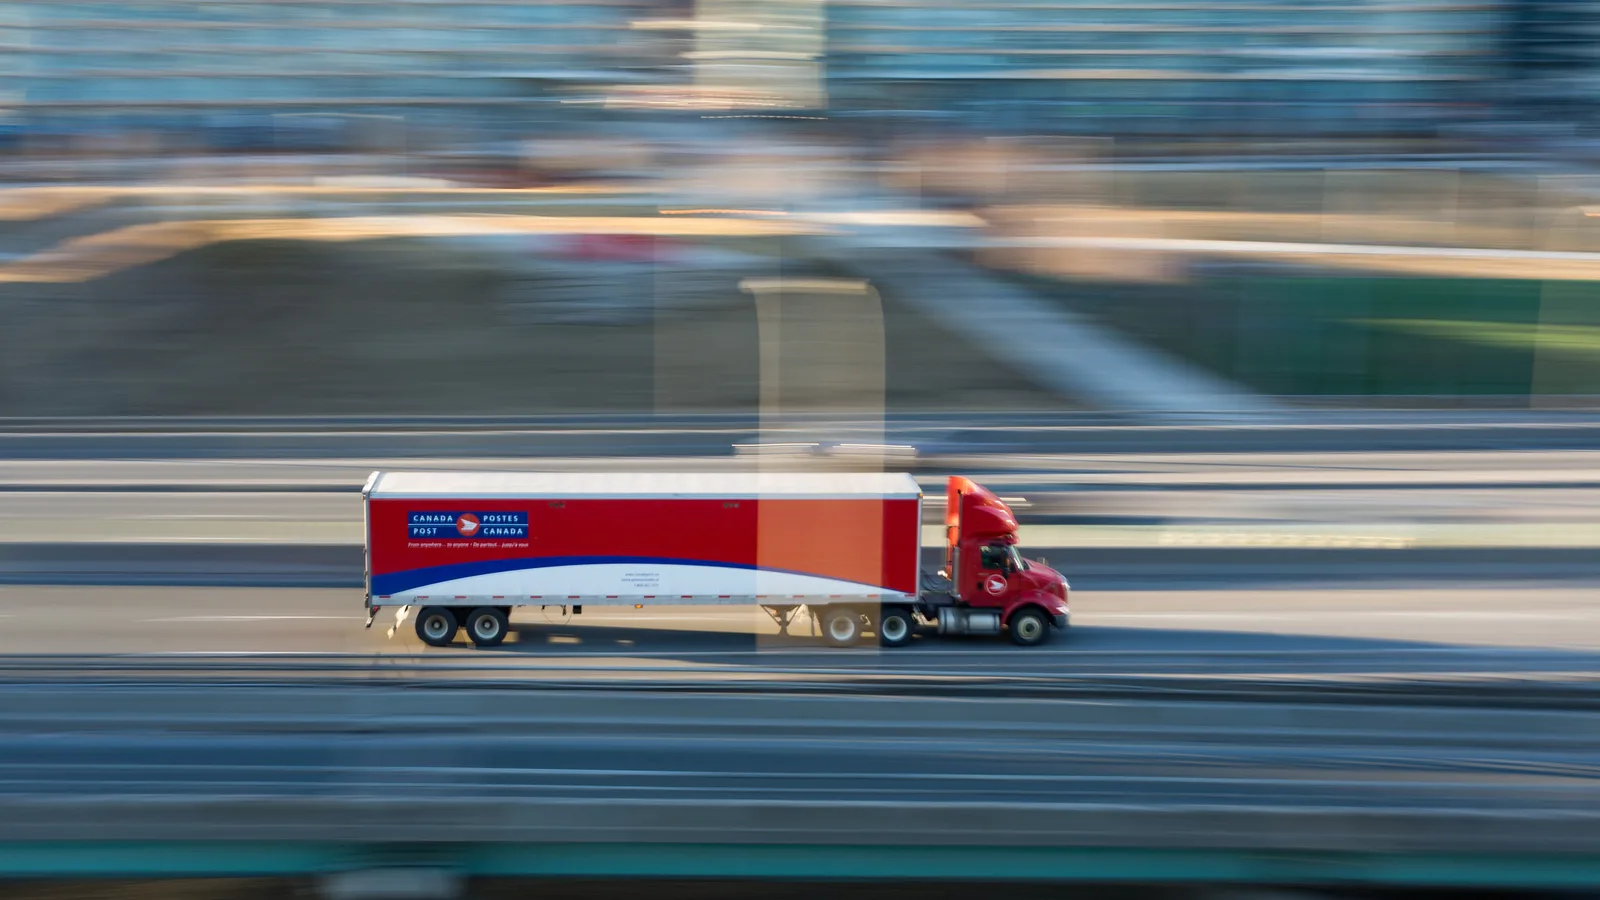
The settings under that photo show the exposure budget at work. At 1/8 second and ISO 100 the lens had to close to f/16 to avoid overexposure. In brighter light the same speed would have needed f/22 or beyond, and the warning would have started to blink. The full technique, including stance and focus settings, is in the guide to panning photography.
Moving water
For streams, waves and fountains, put the camera on a tripod, set base ISO and try half a second. Water falling fast needs less time to blur than a slow river. Check the aperture the camera picks: if it is f/16 or f/22, a neutral density filter will bring it back to the sharper middle of the range. The guide to photographing waterfalls covers filters, composition and timing.
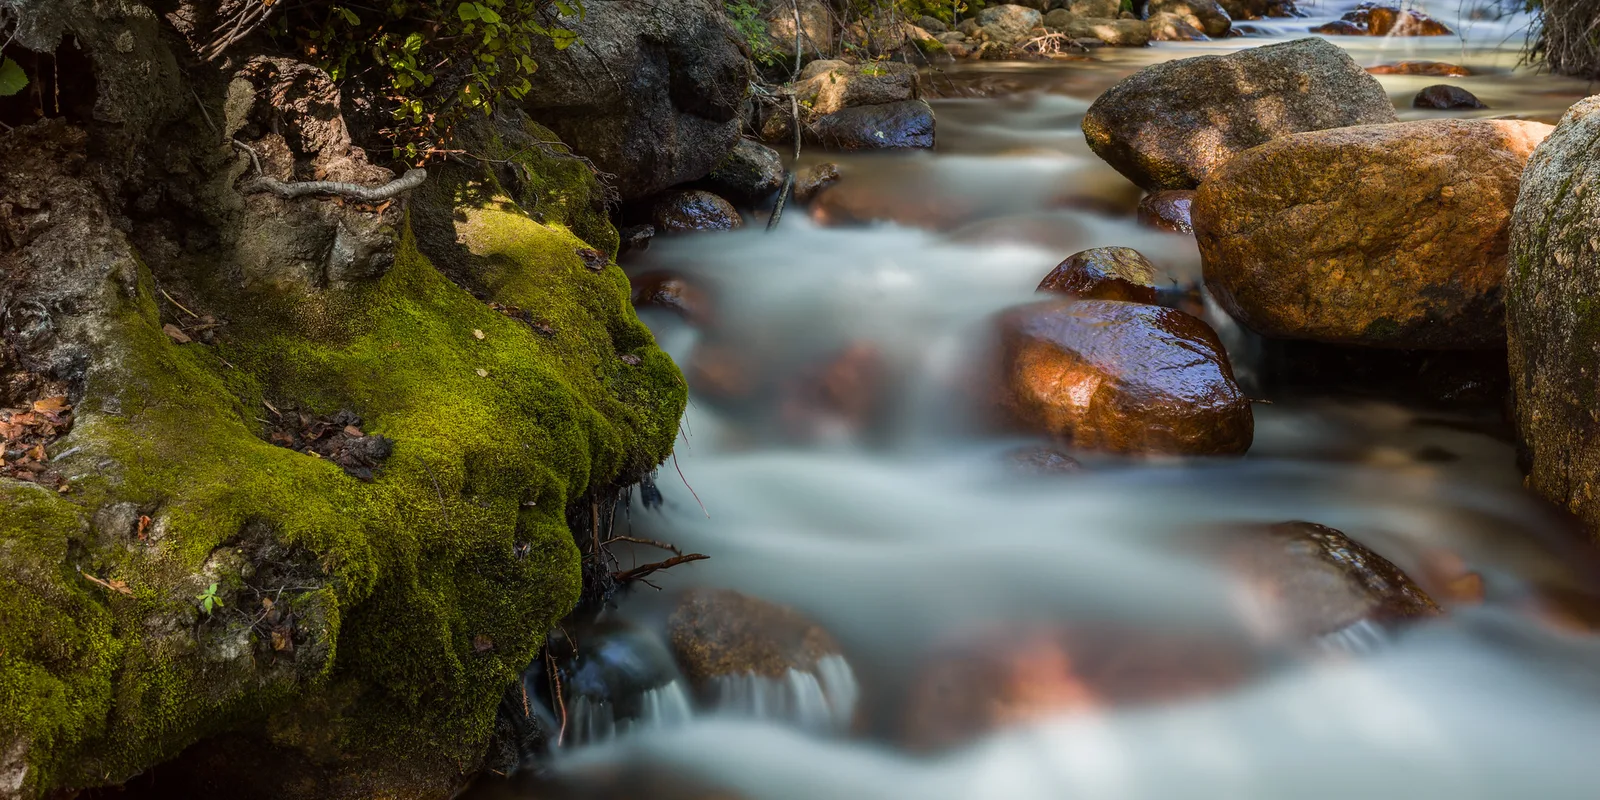
This creek shows where the mode ends. A 240 second exposure is far beyond the 30 second limit of shutter priority, so a frame like this is made in bulb mode with the aperture and ISO set by hand. Shutter priority covers the range from a fraction of a second to 30 seconds; past that, you are in manual territory.
Shutter priority vs aperture priority vs manual with Auto ISO
All three modes can produce the same exposure. They differ in which setting stays fixed and which one drifts when the light changes.
| Mode | You fix | Camera adjusts | What can go wrong |
|---|---|---|---|
| Shutter priority, fixed ISO | Shutter speed, ISO | Aperture | Runs out of aperture after five or six stops; depth of field changes from frame to frame |
| Shutter priority, Auto ISO | Shutter speed | Aperture, then ISO | Lens sits wide open in dim light; depth of field is out of your hands |
| Aperture priority with an Auto ISO minimum shutter speed | Aperture, slowest allowed speed | Shutter speed, then ISO | Speed rises above your minimum in bright light, so blur effects are not repeatable |
| Manual with Auto ISO | Shutter speed and aperture | ISO | Overexposes if the light is too bright for base ISO; noise rises in dim light |
Against aperture priority. For freezing action, aperture priority with a minimum shutter speed is often the better choice. The camera keeps the ISO at its lowest and gives you speeds faster than your minimum whenever the light allows, and faster never hurts when the aim is to freeze. Shutter priority is the better choice when you want one exact speed and no other: a pan at 1/30, a propeller or wheel that should show some blur, water at half a second. There, a camera that helpfully speeds up in bright light would ruin the effect.
Against manual with Auto ISO. In manual mode with Auto ISO you set the speed for motion and the aperture for depth of field, and the camera floats the ISO. This is shutter priority with the aperture taken back under your control, and many action photographers prefer it for that reason. Its range is also wider: from a base ISO of 100 to a ceiling of 12,800 is seven stops, more than most lenses offer in aperture. Shutter priority still wins in two cases. In bright light at slow speeds, manual with Auto ISO cannot go below base ISO, while shutter priority can keep closing the lens. And for a beginner, shutter priority has one less number to think about. How to shoot in manual mode walks through the manual approach step by step.
When shutter priority is the wrong choice
- Depth of field matters. Portraits where you want a soft background, landscapes where you want everything sharp, close-ups: pick the aperture yourself.
- A series must match. Panoramas, time-lapse frames and product sets need identical exposures. Any automatic mode will drift; use manual, or hold a reading with AE lock for a short sequence.
- Studio flash. The camera cannot meter a flash that has not fired yet. Set everything manually.
- Exposures longer than 30 seconds. Star trails and very long daylight exposures need bulb mode.
Common mistakes
Ignoring the blinking aperture. The camera fires anyway and you find dark frames later. Fix: glance at the aperture readout after every change of light or speed. If it blinks, change the ISO first.
Leaving the ISO at 100 for action. At 1/2000 with an f/5.6 lens, ISO 100 is more than a stop short even in full sun. Fix: turn on Auto ISO with a ceiling you accept, or set ISO 800 on overcast days and 3200 or more indoors.
Assuming a fast speed fixes blurry pictures. With Auto ISO in dim light the lens goes wide open, depth of field shrinks, and a slightly missed focus looks like blur. Fix: check whether anything in the frame is sharp. If something is, the problem is focus, not the shutter.
Using a far faster speed than the subject needs. 1/4000 for people walking costs four stops of ISO or aperture compared with 1/250, for no visible gain. Fix: use the slowest speed that reliably freezes the subject, then spend the rest on a lower ISO.
Slow speeds in bright sun without a filter. The camera stops down to f/22, blinks, and overexposes, or exposes correctly with soft detail and visible dust spots. Fix: carry a neutral density filter for daylight blur, or work in shade and at the ends of the day.
Try this
This takes about fifteen minutes beside a road with steady traffic, or beside a fountain. Set shutter priority and a fixed ISO of 100. Photograph the moving subject at 1/1000, 1/250, 1/60, 1/15 and 1/4 second, holding the camera still. After each frame, note the aperture the camera chose and whether it blinked. The aperture closes by the same number of stops that the speed slows, until the lens runs out. Now switch on Auto ISO and repeat the two fastest frames in shade. Compare the aperture and ISO the camera picked. Finally, look at the pictures side by side: find the slowest speed that froze the subject and the fastest speed that gave pleasing blur. Those two numbers, for that subject, are yours to keep.
Frequently asked questions
What does Tv mean on a camera dial?
Tv stands for time value. It is the same mode that other cameras label S: you set the exposure time and the camera sets the aperture. The two labels behave identically.
Is shutter priority or aperture priority better for beginners?
Aperture priority is the easier everyday mode because the camera almost never runs out of shutter speeds. Shutter priority is the better teacher for motion: it shows quickly what each speed does to a moving subject. Learn both, and use whichever fixes the setting that matters most for the picture in front of you.
Why are my shutter priority photos too dark?
The speed you chose needs more light than the lens can gather at the current ISO. The camera opened the aperture as far as it goes and still came up short, which is what the blinking aperture number was telling you. Raise the ISO, switch on Auto ISO, or choose a slower speed.
Can I use shutter priority for video?
You can, and it holds the shutter speed that gives natural-looking motion, but the camera will change the aperture during a clip as the light changes, which shows as a visible shift in brightness and depth of field. Most people filming seriously set exposure manually and control brightness with neutral density filters.
Related guides
- Aperture priority mode: the sibling mode, for when depth of field comes first.
- Camera modes explained: a short tour of every position on the mode dial.
- Auto ISO: how to set the ceiling and minimum speed that make every automatic mode safer.
- Exposure compensation: how to override the meter when the scene is unusually bright or dark.
- Camera shake: how to tell shake from subject movement and missed focus.
- Light flicker and banding: why some shutter speeds cause stripes or uneven frames under artificial light.