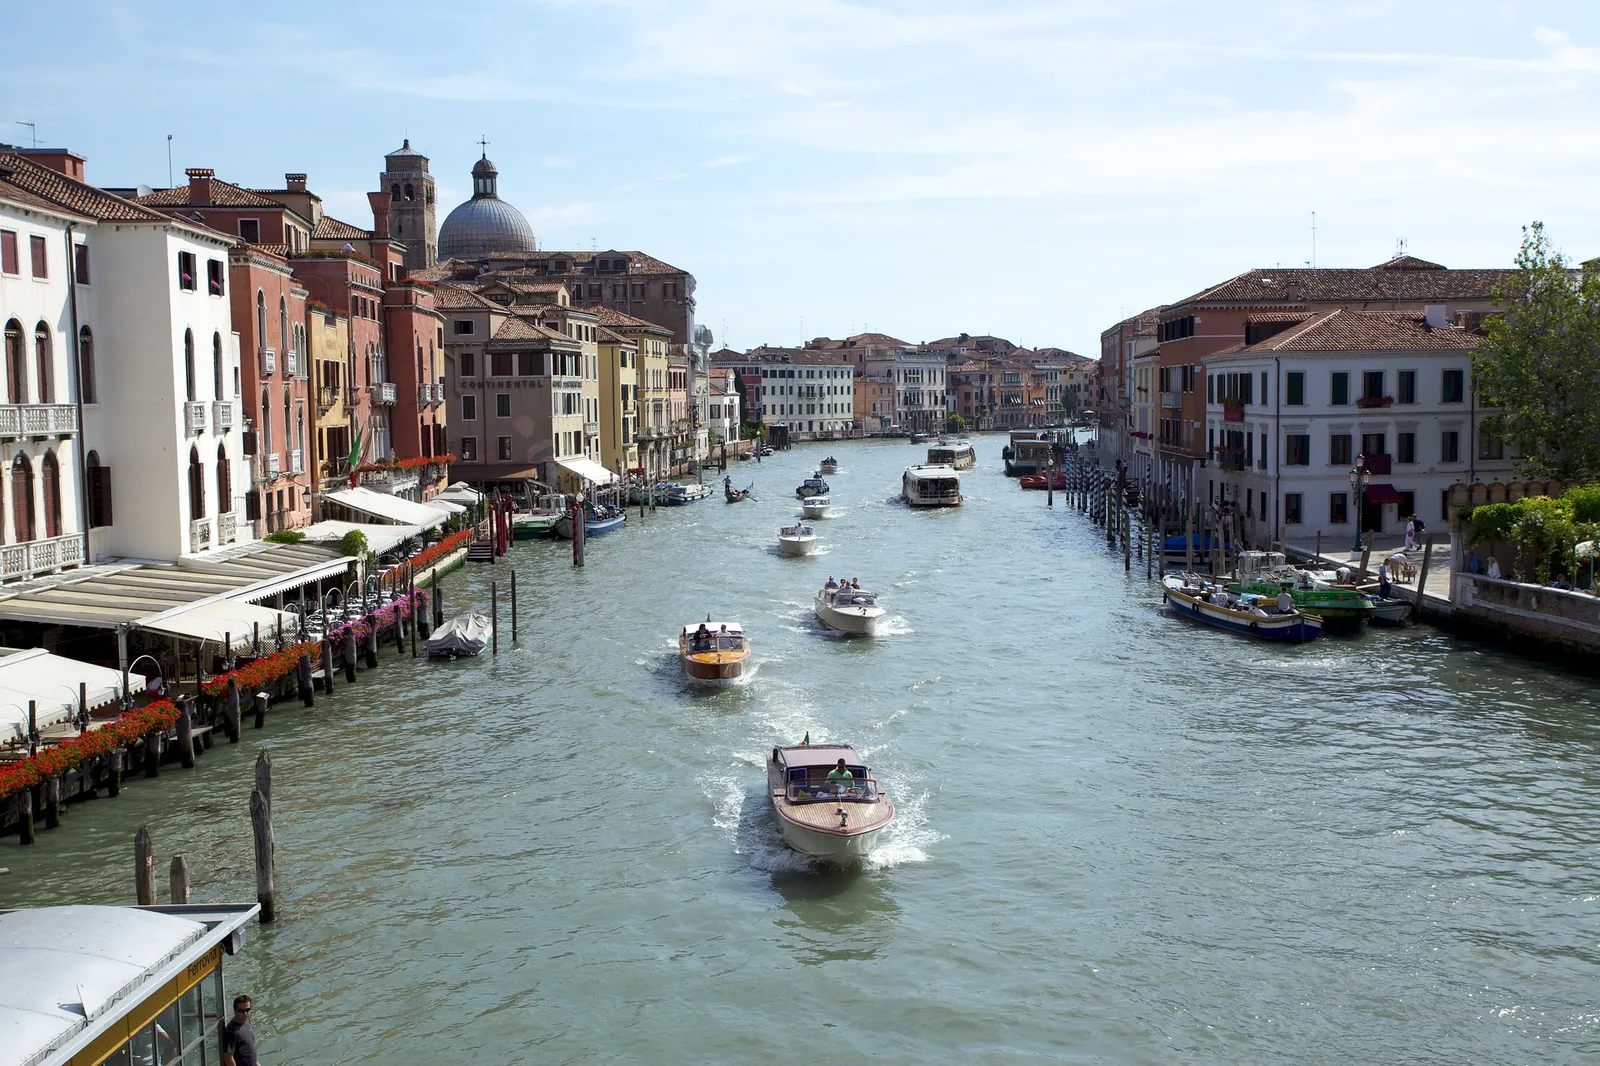
Canals are some of the most peaceful and photogenic places in any city or countryside. Still water mirrors old buildings and bridges, narrow boats rest along quiet towpaths, locks rise and fall and boats glide past colorful houses. Whether you are walking a rural canal on a misty morning or exploring a famous canal city, waterways offer reflections, lines, light and life in every direction.
This guide covers why canals make great subjects, when to go, reflections, bridges and locks, boats and boat life, towpath walks, canal cities, light and blue hour, composition, settings, editing and courtesy. For broader city skills, see the guide to cityscape photography, and for flowing water in the countryside, see the guide to river photography.
Why canals make great subjects
Canals combine the calm of still water with the interest of human life and history, which makes them rewarding for every kind of photographer.
- They reflect beautifully. Slow, sheltered water makes clean mirrors of buildings, trees and sky.
- They have strong lines. Straight banks, towpaths and rows of houses lead the eye into the frame.
- They are full of character. Old bridges, locks, moored boats, flower boxes and painted doors give endless details, so there is always something new to notice around the next bend.
- They are easy to explore. Towpaths offer flat, quiet walking routes through cities and countryside.
- They change with the light. Dawn mist, golden evenings, blue hour and night lights all transform the same stretch of water.
Canals also slow you down. A walk along a towpath, stopping at each bridge and bend, is one of the most relaxing ways to practice photography.
When to go
Early morning is often the best time. The water is calmest before the wind rises and boats start moving, so reflections are clearest. In cooler months, mist often hangs over the water at dawn, softening the scene. Streets and towpaths are quiet, which makes it easier to photograph without crowds and to set up carefully without getting in anyone’s way.
Late afternoon and evening bring warm light on buildings and long shadows across the water. Blue hour, the short time after sunset when the sky turns deep blue and lights come on, is magical along canals, with warm windows and street lamps reflected in the water. Each season adds something: spring blossoms, summer flowers on boats, autumn leaves floating on the surface and winter frost or even ice. Visiting the same stretch of canal across the year makes a lovely long project, showing how much a familiar place changes with the seasons.
Hoping to catch canals in soft morning mist? The guide to fog photography explains how to expose hazy scenes over water.
Reflections
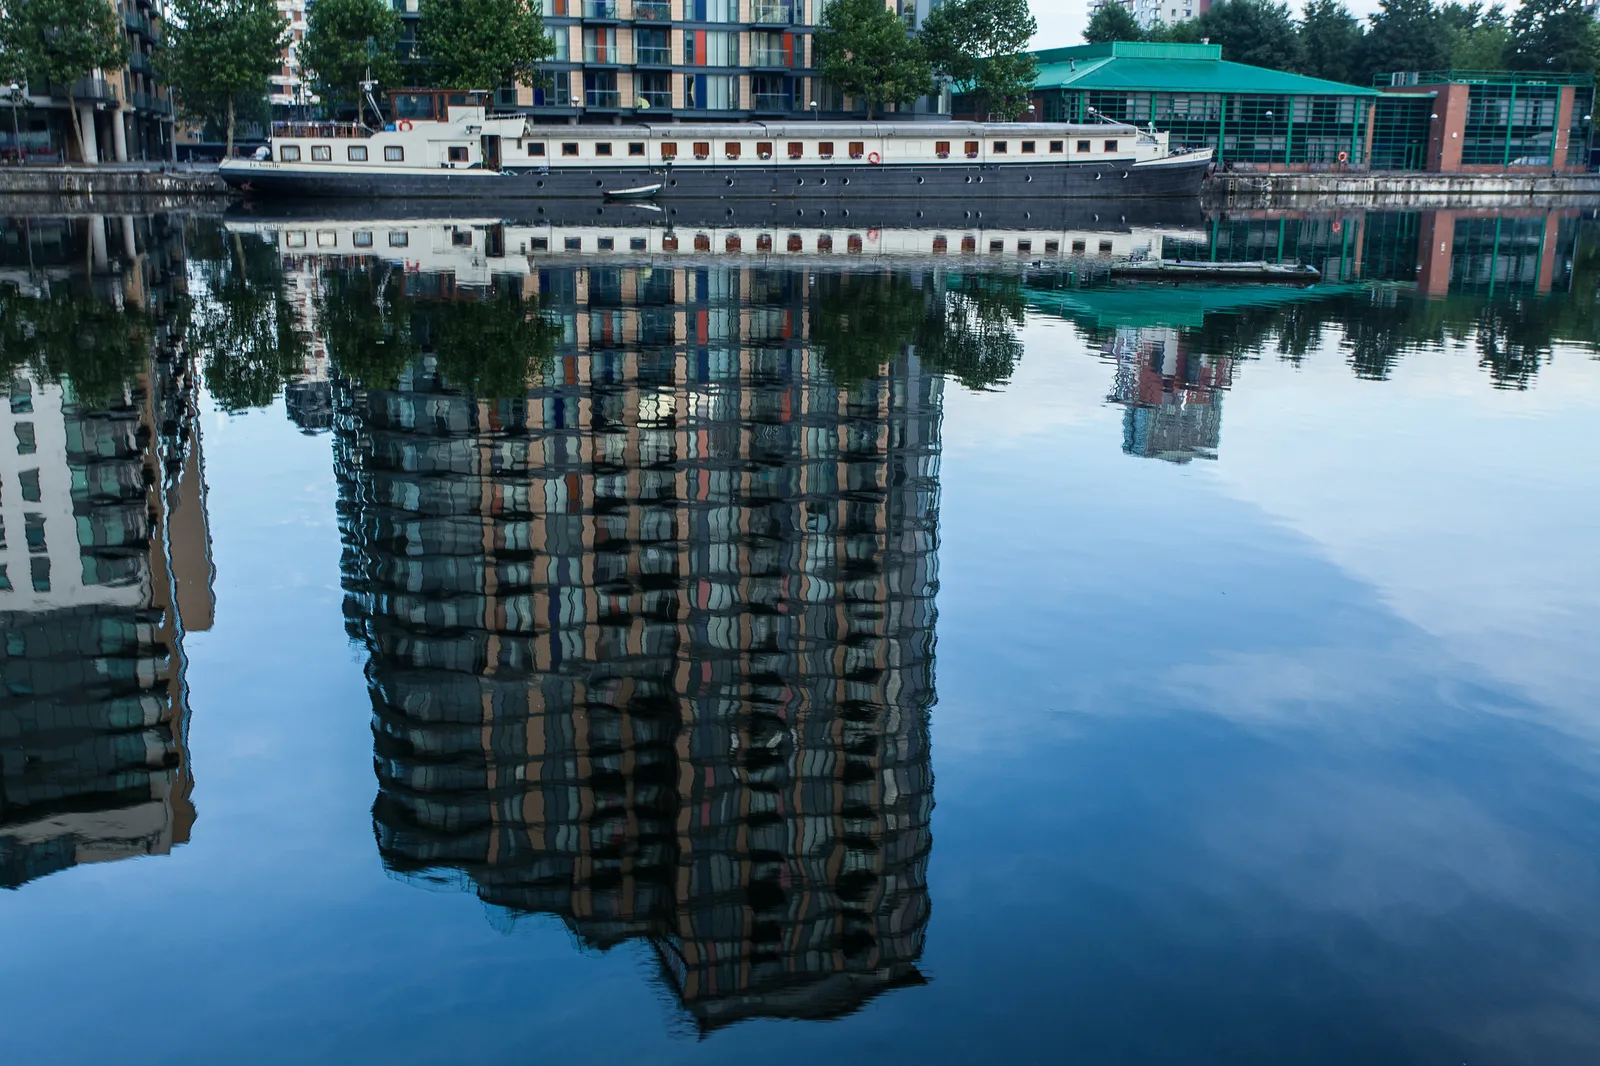
Reflections are the heart of canal photography. On a calm day, buildings, boats and bridges appear twice, once in the air and once in the water, making symmetrical scenes full of color.
- Get low. The closer the camera is to the water, the larger and more complete the reflection appears.
- Wait for stillness. Boats and wind ripple the water. Wait a minute or two after a boat passes for the surface to settle.
- Try reflections on their own. Point the camera down at the water and let the reflection fill the frame, with only a sliver of the real scene at the top. Flip it later for a dreamy, upside down effect.
- Use ripples. Gentle movement breaks reflections into abstract patterns of color, which can be just as beautiful as a perfect mirror.
A polarizing filter changes reflections, too. Rotate it to strengthen or weaken them, depending on whether you want the mirror or the water below. The guide to reflection photography has more ideas.
Bridges and locks
Bridges are natural subjects along canals. Arched bridges reflected in still water form full circles or ovals, one of the classic canal pictures. Stand on the bank and look along the canal for a bridge framed by buildings or trees, or stand on a bridge and look down the canal for a long view lined with boats.
Bridges also make good viewpoints. From the top of a bridge you can see down the center of a canal, with the banks forming leading lines toward the distance. The guide to bridge photography covers bridges in more depth.
Look underneath bridges, too. Light reflected from the water often dances on the underside of an arch, creating rippling patterns of light on old stone or brick. A low tunnel or bridge can also frame a bright stretch of canal beyond, with the dark arch acting as a natural border around the scene.
Locks
Locks are fascinating to watch and photograph. Gates open and close, water rises and falls and boats slowly change level. Look for details such as heavy wooden beams, iron gear wheels, worn stone steps and water rushing through sluices. If boaters are working the lock, ask before photographing them closely, and stay well clear of the edges and moving gates.
Boats and boat life
Boats bring color and life to canals. Painted narrow boats, small rowboats, tour boats, water taxis and houseboats each have their own character. Look for bright colors, painted names, flower pots on roofs, coiled ropes and bicycles lashed on deck.
Moving boats add energy. A boat gliding past old buildings, leaving a wake, makes a scene feel alive. Use a shutter speed of around 1/500 second to freeze a fast boat, or try a slower speed to blur the water while the boat stays fairly sharp. From a bridge, wait for a boat to pass beneath you and fill the frame with its deck and wake.
Remember that many canal boats are homes. Be respectful, avoid pointing your camera through windows and ask before photographing people on board. Many boaters are friendly and proud of their boats, and a short chat often leads to better pictures and a story to go with them.
Towpath walks
Towpaths, the paths that run alongside many canals, are made for photo walks. They are flat, quiet and full of variety: bridges, locks, boats, wildlife, old warehouses, gardens and views across fields or rooftops.
Walk slowly and look in every direction. Turn around often, since the view behind you may be better than the one ahead. Look for ducks, swans and herons on the water, flowers along the banks and old signs and mileposts. A towpath walk at dawn or dusk, with soft light and quiet water, can fill a memory card. The photo walk guide has more tips for planning a walk.
Countryside canals
Away from towns, canals wind through fields, woods and villages, often following the shape of the land. These rural stretches are quieter and wilder, with grassy banks, old stone bridges, lock keepers’ cottages and long views across open country. A narrow boat moored beside a misty field at dawn or a line of trees reflected in a still country canal makes a calm, timeless picture. Look for the canal curving away into the distance, since a gentle bend draws the eye through the frame better than a long straight line. Old industrial canals also pass mills, warehouses and brick chimneys, which add history and texture to a set of pictures.
Wildlife and nature along the water
Canals are quiet green corridors, even in the middle of cities, and they are full of wildlife. Ducks, geese and swans paddle along the banks, herons stand motionless at the water’s edge, coots and moorhens dart in and out of reeds and kingfishers flash past in a blur of blue. Dragonflies hover over the water in summer, and wildflowers and trailing willows line many banks.
Carry a lens with some reach for birds, and walk slowly so you notice them before they notice you. Waterfowl on a canal are often used to walkers, which makes them good practice subjects. A swan gliding past a painted boat or a heron perched on a lock gate combines wildlife and setting in one frame. The guides to duck and goose photography and heron photography have more tips for these birds.
Canal cities
Some cities are famous for their canals, with houses, shops and churches rising directly from the water. These places can be busy with visitors, so plan carefully.
- Go early. Morning is quieter, calmer and often has the best light.
- Explore side canals. Small canals away from the main sights are often quieter and more atmospheric.
- Use bridges as viewpoints. They give the best views along the water.
- Look for details. Doorways at water level, mooring posts, laundry lines and window boxes tell stories.
- Take a boat ride. A water taxi or tour boat gives a low, moving viewpoint from the water itself.
The guide to photographing crowded landmarks has strategies for busy famous places, and the guide to travel photography helps with photographing new places.
Light, blue hour and night
Canals are especially beautiful when the lights come on. During blue hour, the sky still holds a deep blue color while windows, street lamps and bridge lights glow warm. Reflections double every light, making scenes full of color.
Use a tripod or rest the camera on a wall or bridge rail for slower shutter speeds. A shutter speed of a few seconds smooths small ripples into glassy water and turns reflections into soft streaks of color. If boats pass during a long exposure, their lights may leave trails across the water. The guide to blue hour photography explains timing and settings.
Want to keep shooting after dark? The guide to night photography covers tripods, long exposures and city lights.
Composing canal pictures
- Use the canal as a leading line. Stand on a bridge or bank and let the water lead the eye into the distance.
- Frame with bridges and arches. Shoot through an arch to frame boats or buildings beyond.
- Balance the reflection. Place the waterline in the middle for symmetry, or lower or higher to emphasize sky or reflection.
- Find a focal point. A boat, a person on a bridge or a bright doorway gives the eye somewhere to rest.
- Include the foreground. Mooring posts, flowers or a curved bank add depth.
- Keep verticals straight. Buildings beside canals look best with straight vertical lines.
The guide to symmetry explains how to use mirrored compositions. When a scene feels flat, change your height: a picture from water level and a picture from the top of a bridge can make the same stretch of canal look completely different.
Settings for canals
- Daytime scenes: aperture f/8 to f/11 for front to back sharpness, ISO 100 to 400.
- Moving boats: 1/500 second or faster to freeze, or slower for motion blur.
- Blue hour and night: tripod, ISO 100 to 400, shutter speeds of several seconds.
- Lens: a standard zoom covers most canal scenes, with a wide angle for long views and a short telephoto for details across the water.
- Filter: a polarizer to control reflections in daylight.
Editing canal photos
Keep edits natural. Straighten horizons and verticals, balance bright skies with darker water and add a little contrast to bring out reflections. Keep the water a believable color, and avoid oversaturating painted boats and buildings. For blue hour scenes, balance the warm lights and cool sky carefully.
Need a simple editing routine? The guide to photo editing for beginners walks through the basic steps in order.
Common mistakes
- Rippled reflections. Wait for the water to settle after boats pass, or go early on calm days.
- Crooked horizons and buildings. Level the camera and keep verticals straight.
- Shooting only at eye level. Get low for reflections and high on bridges for long views.
- Midday glare. Bright sun on water can wash out colors. Use a polarizer or come back early or late.
- Intruding on boat homes. Respect privacy and ask before photographing people on board.
- Standing too close to lock edges. Stay safe and keep clear of moving gates, especially when boats are passing through.
- Missing blue hour. Stay after sunset for glowing lights and reflections.
Try this: a 10-minute canal walk
Find a canal or quiet waterway and give yourself ten minutes:
- Minutes one to three: make one picture from a bridge looking down the canal, using the water as a leading line.
- Minutes four to seven: get low at the water’s edge and make one reflection picture, waiting for the water to settle.
- Minutes eight to ten: look for one detail, such as a painted boat name, a mooring post or a lock gear wheel.
At home, put the three pictures together. They make a small story of the canal. Repeat the walk in a different light or season, and compare how the same places look on another day.
Frequently asked questions
When is the best time to photograph canals?
Early morning for calm water and quiet towpaths, and blue hour for glowing lights and reflections.
How do I get clear reflections in a canal?
Go on a calm day, get low to the water and wait for ripples from boats to settle.
What lens is best for canals?
A standard zoom covers most scenes. A wide angle helps with long views from bridges, and a short telephoto picks out details.
Can I photograph people on canal boats?
Ask first. Many boats are homes, so respect privacy and avoid photographing through windows.
Do I need a tripod for canal photography?
Not in daylight, but it helps for blue hour, night scenes and long exposures that smooth the water.
How do I photograph boats moving along a canal?
Use 1/500 second or faster to freeze a boat, or stand on a bridge and wait for it to pass beneath you. For a sense of motion, try a slower shutter speed with the camera steady.
Is it safe to photograph near locks?
Yes, if you keep well back from the edges and moving gates, watch your footing on wet stone and never climb on lock equipment.
For terms such as polarizing filter, blue hour, leading lines and long exposure, see the photography glossary.