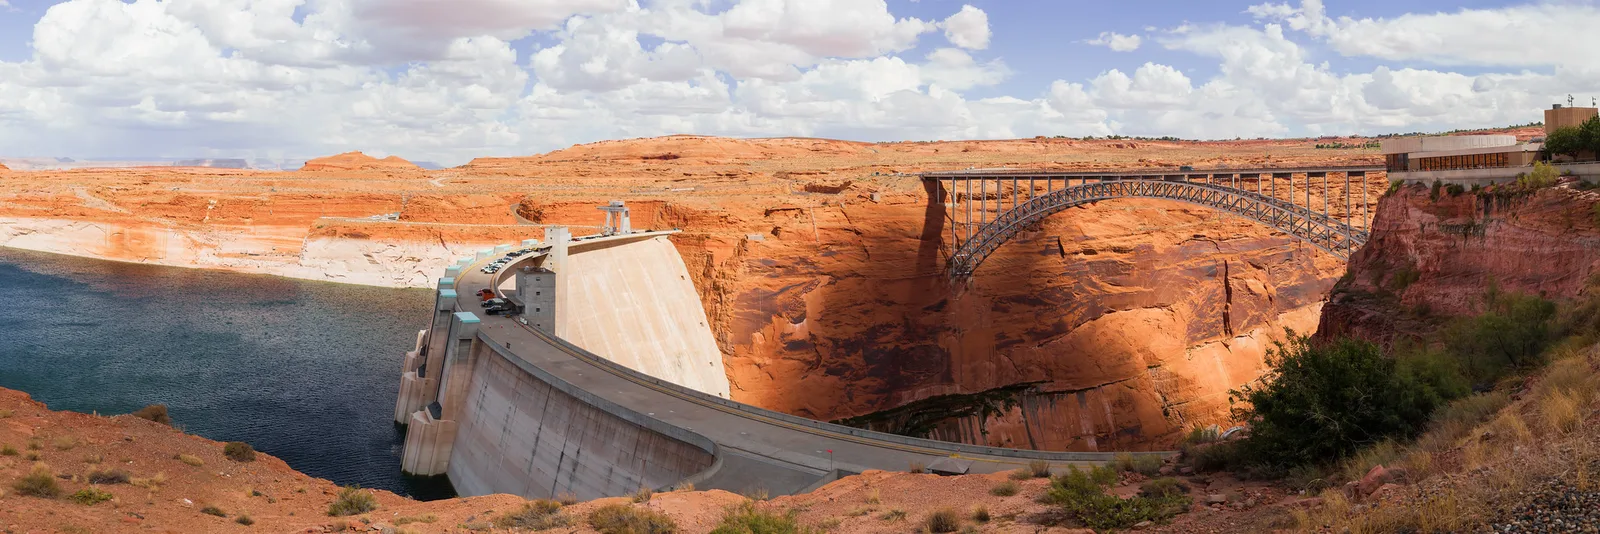
Dams are some of the most impressive structures people have ever built. A great curved wall of concrete holding back a lake in a canyon, a spillway roaring with white water after heavy rain, a small stone mill dam with a smooth curtain of water and a quiet reservoir reflecting the hills all make powerful pictures. Dams combine engineering and nature in one place, and they offer scale, pattern, water and drama all at once.
This guide covers why dams make great subjects, visiting dams safely, showing scale, the dam in its landscape, the concrete wall, spillways and rushing water, small dams and weirs, reservoirs and the water above, bridges, towers and details, light and weather, composition, settings, phones and editing. For still water above the dam, see the guide to lake photography, and for the flow below it, see the guide to river photography.
Why dams make great subjects
Dams bring together several things that make pictures strong.
- Enormous scale. Big dams dwarf people, cars and even the land around them.
- Clean shapes. Curved walls, straight crests and repeating arches make bold, graphic forms.
- Water in motion. Spillways and outflows give white water, mist and rainbows.
- Contrast. Smooth human made concrete set against rough rock, forest or desert makes a striking juxtaposition.
- Story. Dams speak of power, water, farming, towns and the changing of landscapes.
Dams come in every size, from vast concrete walls in deep canyons to small stone weirs on a village stream. Each offers something different, and many are easy to visit, with viewpoints, walkways and visitor areas built for the public.
Visiting dams safely
Dams are working structures, and many have strict rules.
- Use public viewpoints. Overlooks, walkways and visitor centers give safe, often excellent views.
- Follow signs and barriers. Never climb railings or enter restricted areas.
- Stay away from the water below. Water released from a dam can rise suddenly and without warning. Never stand in or near the riverbed below a dam.
- Check the rules. Some dams restrict tripods, drones or bags. Check before you go.
- Secure your gear. Wind can be strong on high walls. Keep straps on and never lean out over the edge.
Many large dams offer tours that take visitors inside the structure, to turbine halls and tunnels. These are wonderful chances to photograph places normally closed to the public.
Showing scale
The size of a large dam is its most powerful quality, but it is surprisingly hard to show in a picture without a reference.
- Include something familiar. A person, a car on the crest road or a boat on the reservoir shows how huge the dam is.
- Look down. From the crest, a view straight down the curved wall to the water below can feel dizzying.
- Look up. From the base, if a public viewpoint allows, the wall rises like a cliff.
- Show the whole thing. Step far back to fit the dam in its canyon or valley.
Without a sense of scale, a picture of a dam can look like a small wall. With it, the viewer feels the weight and height of the structure. The guide to scale explains why familiar objects matter so much.
The dam in its landscape
Wide pictures show how a dam fits into the land: the canyon it spans, the lake it creates and the river it feeds.
- Find a high viewpoint. Hills, overlooks and canyon rims show the dam, the reservoir and the river together.
- Use a panorama. Very wide scenes can be stitched from several frames for more detail and a wider view.
- Include the river. Show the contrast between the wide lake above and the narrow river below.
- Use juxtaposition. Smooth concrete against red rock or green forest highlights the meeting of nature and engineering.
Golden hour warms canyon walls and softens concrete, and the lake can turn deep blue against warm rock. A panorama made from the rim at sunset, with the dam small in the middle of the frame, can capture the full sweep of the scene.
Visiting a dam set in a dramatic gorge? The guide to canyon photography covers light, scale and composition in deep valleys.
The concrete wall
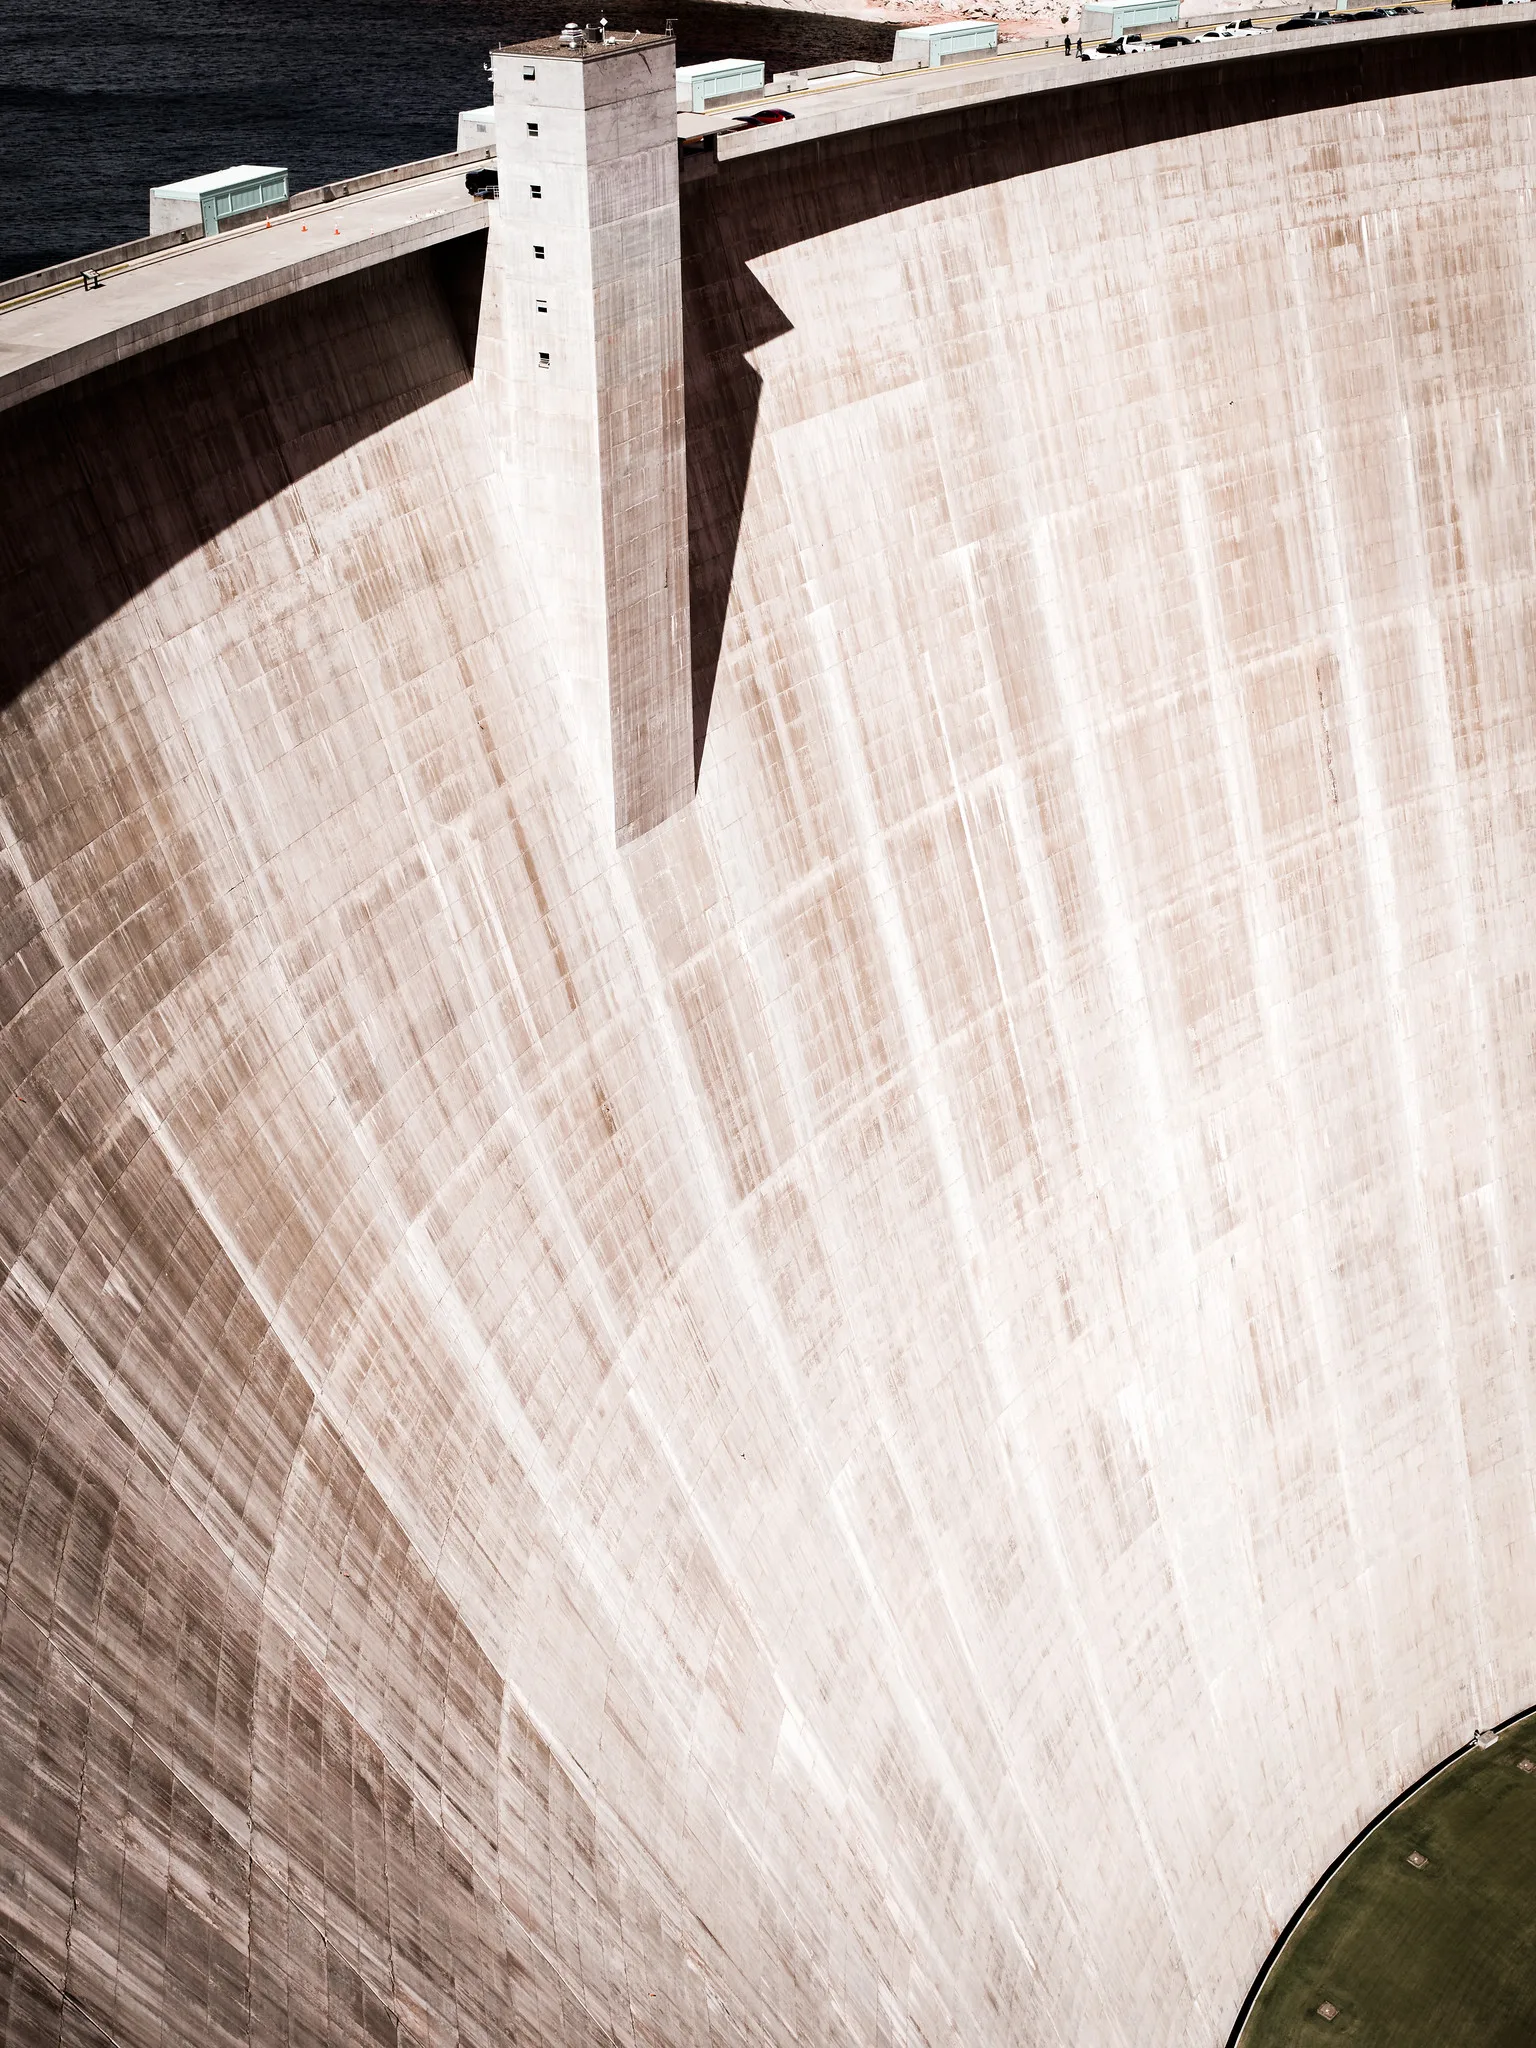
The face of a dam is a vast canvas of concrete, full of lines, curves and texture.
- Curves. Arch dams curve gracefully, and a view along the crest shows the bend.
- Lines. Horizontal pour lines and vertical streaks make patterns across the wall.
- Texture. Stains, streaks of mineral deposits and weathered surfaces add detail.
- Light and shadow. Low sun across the curved wall creates a gradient from bright to dark.
Close views of the wall can become abstract, with only concrete, light and shadow in the frame. Black and white often suits these graphic pictures, emphasizing shape and tone over color. Try a vertical frame looking down the wall, which stretches the curve from top to bottom and makes the height feel even greater.
Spillways and rushing water
When a dam releases water, it creates some of the most dramatic scenes in nature. Spillways roar with white water, outflows blast mist into the air and rainbows appear in the spray.
- Freeze the power. Use a fast shutter speed, such as 1/1000, to freeze the water in sharp detail.
- Smooth the flow. Use a slower shutter speed, such as half a second or longer on a tripod, to blur water into silky streams.
- Look for rainbows. With the sun behind you, mist from the spillway can show a rainbow.
- Protect your gear. Mist can soak the lens quickly. Wipe it often and use a lens hood.
Spillways often run only after heavy rain or snowmelt, so check local news or release schedules if available. Always stay on public viewpoints, well away from the water.
Want silky water from a spillway? The guide to long exposure photography explains slow shutter speeds and filters.
Using filters
An ND filter reduces light so you can use slow shutter speeds in daylight, which turns rushing water into smooth, misty flows. A polarizing filter cuts glare on water and wet concrete and deepens blue skies. Both are useful at dams, especially on bright days.
Small dams and weirs
Not every dam is huge. Small stone dams, old mill dams and weirs on rivers and streams have a quiet charm.
- Curtains of water. Water flowing over a weir makes a smooth, glassy curtain, lovely in long exposures.
- Old stone. Moss covered stone dams and mill races add history and texture.
- Reflections. The still pool above a weir often reflects trees and sky.
- Seasons. Autumn leaves, winter ice and spring floods change the scene.
Small dams are often found in parks and villages, with easy access and plenty of viewpoints. They are perfect for practicing water techniques before visiting larger dams, and they are often quiet enough to set up a tripod without crowds. The guide to waterfall photography has more on photographing falling water.
Reservoirs and the water above
The lake behind a dam can be as beautiful as the dam itself.
- Still water. Calm mornings give mirror reflections of hills and sky.
- Bathtub rings. In dry times, pale bands on the rock show past water levels, which tell a story about drought and water use.
- Drowned landscapes. Old trees, roads or buildings sometimes reappear when water levels drop.
- Intake towers. Towers rising from the water make strong, lonely subjects.
Reservoirs are often quiet places with wide open views, making them good for sunrise and sunset pictures. Mist often lies on the water at dawn, softening the far shore and the dam into pale shapes.
Bridges, towers and details
Dams come with many interesting structures and details.
- Crest roads and bridges. Roads along the top of the dam and nearby bridges make strong lines. The guide to bridge photography has more ideas.
- Intake towers. Tall towers rising from the reservoir make striking shapes.
- Power lines. Lines leaving the dam lead across the land.
- Railings, gauges and signs. Small details add character and a sense of engineering.
- Turbines and halls. On tours, giant turbines and halls make dramatic interior pictures.
- Gates and valves. Massive steel gates, wheels and outlet valves show the mechanics of controlling water, and they look striking through a long lens.
Many large dams have elegant design details, such as decorative railings, sculptures and lettering. Look closely for these when you visit.
Inside the dam
Tours inside large dams lead through long tunnels, down elevators and into vast turbine halls. These spaces are full of industrial beauty: rows of giant generators, polished floors, painted pipes, gauges and humming machinery under bright lights. Follow the guide’s rules on photography, keep up with the group and avoid using flash where it is not allowed. A wide lens shows the size of a turbine hall, while a longer lens picks out details like valves and dials.
Fascinated by the machinery of big structures? The guide to industrial photography covers plants, cranes and machines.
Light and weather
- Golden hour. Warm, low light softens concrete and warms the landscape.
- Midday. High sun can light deep canyons and the face of the dam evenly, though it can be harsh.
- Blue hour and night. Lit dams glow against a deep blue sky.
- Storms. Dark clouds add drama, and heavy rain may bring spillway releases.
- Fog and mist. Mist rising from the river below a dam adds mood.
Check which way the dam faces, since that decides when its face is lit. A map or a light planning app helps you arrive at the right hour. A dam facing west catches evening light, while one facing east glows in the morning.
Dams at night
Many large dams are lit after dark, with floodlights washing the face of the wall and lamps lining the crest road. From a safe viewpoint, a lit dam against a deep blue sky makes a dramatic, almost theatrical picture. Use a tripod, a low ISO and exposures of several seconds, and start at blue hour so the sky still has color. Car headlights crossing the crest road leave streaks of light along the top of the wall in long exposures.
Dams through the seasons
Seasons change dams dramatically. Spring snowmelt fills reservoirs and can bring roaring spillway releases. Summer brings bright skies and, in dry years, low water with pale rings on the rock. Autumn adds colorful trees around reservoirs and weirs. Winter can freeze small dams into curtains of ice and cover the crest with snow. Visiting the same dam through the year shows how water and weather shape the place.
Composition ideas
- Symmetry. Stand in the center of a straight dam for a balanced, formal view.
- Leading lines. Use the crest road, railings or the curve of the wall to lead the eye.
- Diagonals. Angle the camera so the wall cuts across the frame for energy.
- Foreground. Rocks, plants or railings in the foreground add depth to wide views.
- Abstracts. Fill the frame with concrete, lines and shadow.
Settings for dam photography
- Wide views. Use f/8 to f/11 and a low ISO for sharp landscapes.
- Frozen water. Use 1/1000 or faster.
- Silky water. Use half a second or longer on a tripod, with an ND filter in daylight.
- Distant details. Use a telephoto lens to isolate towers, gates and patterns.
- Panoramas. Overlap frames by about a third, and keep the exposure the same for each.
Using a phone
A phone is handy at dams. Use the wide lens for huge walls and landscapes, panorama mode for canyons and the telephoto lens for distant details. Some phones have a long exposure or motion setting that smooths water. Keep a strap or firm grip on high walkways.
Editing dam photos
Straighten horizons and verticals, and lift shadows in deep canyons. Lower highlights to keep detail in bright concrete and white water. Black and white suits graphic views of walls and spillways, while color suits red rock and blue water. Keep edits natural, since too much clarity can make concrete look gritty and harsh.
Common mistakes
- No sense of scale. Include a person, car or boat to show size.
- Ignoring safety. Stay on public viewpoints and away from the river below.
- Wet lenses. Spray from spillways blurs pictures. Wipe often.
- Blown out water. White water overexposes easily. Darken the exposure.
- Only one view. Mix wide, close, high and low views.
- Tilted horizons. Keep the camera level.
Try this: a 10-minute dam study
At a dam or weir near you, take four pictures from public viewpoints.
- A wide view showing the dam in its landscape.
- A picture with something that shows scale.
- A close abstract of concrete, lines or texture.
- A picture of flowing water, once fast and once slow.
Compare them, and notice how each one shows a different side of the same structure. Return in a different season or at night to add to the set, and you will begin to see the dam as a changing place rather than a fixed wall.
Frequently asked questions
How do I show the size of a dam?
Include something familiar for scale, such as a person, car or boat, and step back to show the whole structure.
Is it safe to photograph below a dam?
Only from official viewpoints. Water can be released suddenly, so never stand in or near the riverbed.
What shutter speed is best for spillways?
Use 1/1000 or faster to freeze the water, or half a second or longer on a tripod for silky flow.
Can I fly a drone at a dam?
Often not. Many dams restrict drones. Check local rules before flying.
What lens is best for dam photography?
A wide lens for walls and landscapes, and a telephoto lens for distant towers, gates and patterns.
When are spillways most impressive?
After heavy rain or during spring snowmelt, when more water is released. Check local information before visiting.
For terms such as scale, ND filter, panorama and long exposure, see the photography glossary.