Reflections add depth, symmetry, and visual intrigue to photographs. Whether you are working with a perfectly still lake, a rain-soaked city street, or a polished glass facade, reflections create natural compositions that draw the viewer in. The best part is that reflections are everywhere once you start looking for them.
This guide covers the techniques, settings, and creative approaches you need to capture compelling reflection photographs in any environment.
Finding Great Reflections
Reflections appear on any smooth, shiny surface. The most common sources include lakes, ponds, rivers, puddles, wet pavement, windows, mirrors, polished floors, and car surfaces. Training yourself to notice reflective surfaces is the first step toward better reflection photography.
After rain, city streets become mirrors that reflect neon signs, streetlights, and building facades. Puddles in parking lots or on sidewalks can frame a building or person in unexpected ways. Even a shallow pool of water on a flat rock can create a miniature landscape reflection.
Glass buildings in urban environments offer another rich source of reflections. Older buildings, clouds, and trees often appear in the glass facades of modern architecture, creating layered images where two worlds overlap.
Using Polarizing Filters
A circular polarizing filter is one of the most useful tools for reflection photography, and its effect works in two opposite ways depending on your goal. Rotating the filter one direction reduces or eliminates reflections on water and glass, letting you see through the surface to what lies beneath. Rotating it the other direction maximizes the reflection, making it brighter and more vivid.
When you want a clear, mirror-like reflection on a lake surface, remove the polarizer or rotate it to the position that preserves the reflection. When you want to photograph fish in a stream or see through a shop window, rotate it to cut the reflection. This single filter gives you creative control over how reflective surfaces appear in your images.
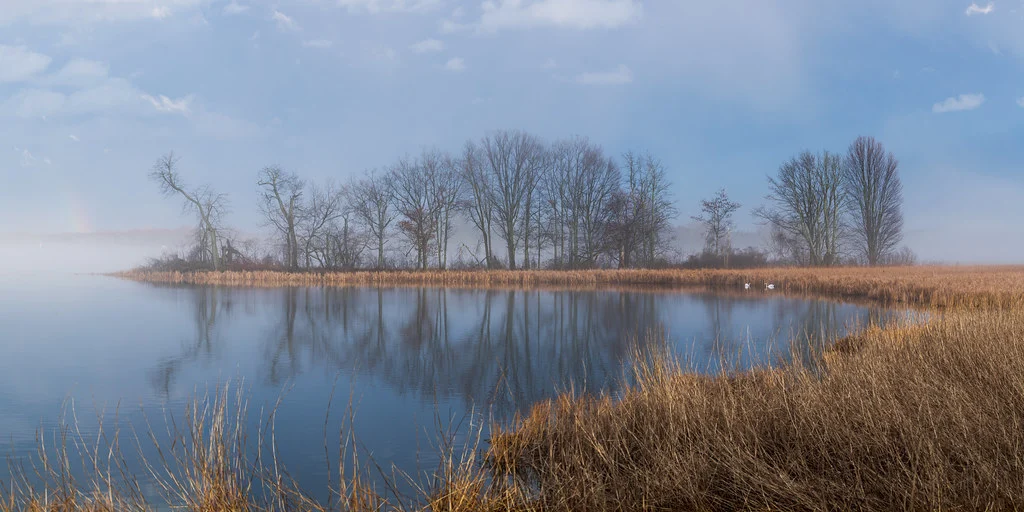
Still Water Techniques for Mirror Reflections
The calmest water produces the sharpest, most mirror-like reflections. Early morning is typically the best time for still water photography because wind tends to be lightest at dawn. Lakes and ponds sheltered by trees or hills also hold calmer surfaces throughout the day.
If the water has slight ripples, you can use a long exposure to smooth the surface. A shutter speed of several seconds or longer will blur the small waves into a glassy surface, enhancing the reflection. A neutral density filter helps achieve these long exposures in daylight.
Position yourself low to the water. Getting your camera close to the surface increases the proportion of the reflection in your frame and creates a stronger sense of symmetry. A low angle also reduces the amount of the water’s surface texture visible in the image.
Urban Reflections and Cityscapes
Cities offer an entirely different set of reflection opportunities. Wet streets after rain turn roads and sidewalks into reflective surfaces that mirror buildings, traffic lights, and neon signs. The contrast between the gritty urban environment and the dreamlike reflected world creates visually striking images.
Shoot urban reflections at night or during twilight for the most dramatic results. Artificial lights create colorful reflections on wet pavement, and the contrast between lit and unlit areas adds depth. Night photography techniques, including wider apertures and higher ISO settings, help you capture these scenes handheld.
Look for puddles at intersections, near fountains, or in plazas. Position yourself so the puddle reflects the most interesting part of the scene, whether that is a building, a person, or a light source. Some photographers carry a small water bottle to create their own puddles in the perfect spot.
Composition with Reflections
Reflections naturally create symmetry, which is one of the strongest composition tools available. Placing the line where reality meets reflection (usually the waterline or the edge of a reflective surface) in the center of the frame creates a balanced, symmetrical image.
However, perfect symmetry is not your only option. You can use the leading lines of a shoreline or the edge of a puddle to guide the viewer’s eye from the real scene into the reflected one. Placing the horizon line above or below center emphasizes either the real world or the reflection, depending on which is more interesting.
Reflections also work well as framing devices. A reflection in a window or puddle can contain an entire scene within a defined border, creating a natural frame that focuses attention on the reflected subject.
Exposure Settings for Reflections
Reflections are always dimmer than the original subject, typically one to two stops darker. This means the bright sky above a lake will be much brighter than its reflection in the water below. Your camera’s meter may be confused by this brightness difference.
For landscape reflections, a graduated neutral density filter helps balance the bright sky with the darker water. Place the transition of the filter along the horizon line. Alternatively, bracket your exposures and blend them in post-processing.
When photographing reflections in puddles or windows where the reflection is a small part of the frame, use spot metering on the reflection itself to ensure it is properly exposed. The surrounding area may be over or underexposed, but the reflection will be correctly rendered.
Focusing Through Reflective Surfaces
Autofocus can struggle with reflective surfaces because the camera may lock onto the surface itself rather than the reflected scene. When photographing a reflection in water, the focus plane for the reflected image is not at the water’s surface but at the same distance as the reflected subject would be behind the surface.
For images where both the real subject and its reflection need to be sharp, use a small aperture (f/8 to f/16) and focus roughly one-third into the scene. The resulting depth of field should keep both the real and reflected subjects acceptably sharp.
If your autofocus hunts on a reflective surface, switch to manual focus. This gives you precise control and avoids the frustration of the camera refocusing between shots.
Common Mistakes in Reflection Photography
Shooting from too high. Standing at full height and pointing the camera down at a reflection reduces the mirror effect. Get low to emphasize the reflection and create stronger symmetry.
Ignoring the quality of the reflected light. A reflection is only as interesting as what it reflects. Look for scenes with good light, strong colors, or interesting shapes before focusing on the reflective surface.
Over-relying on symmetry. While symmetry is effective, not every reflection shot needs to be perfectly centered. Experiment with asymmetrical compositions and partial reflections for variety.
Forgetting about wind. Even a gentle breeze can break up a reflection on water. If you want a sharp mirror reflection, visit during calm conditions or use a long exposure to smooth the surface.
Frequently Asked Questions
What is the best time of day for reflection photography?
Early morning is ideal for water reflections because wind is typically calmest at dawn. Golden hour and twilight provide beautiful warm or cool light that enhances reflections. For urban reflections on wet streets, nighttime produces the most colorful results.
Do I need a polarizing filter for reflection photography?
A polarizer is useful but not required. It lets you control how much reflection appears in your image. If you want to maximize reflections, you may actually want to avoid using one, since it can reduce the reflection’s intensity at certain angles.
How do I photograph reflections without getting my camera in the shot?
Angle your camera slightly rather than shooting directly perpendicular to the reflective surface. For mirror and window reflections, stand to one side and shoot at a slight angle. Wearing dark clothing also helps prevent your own reflection from appearing in the image.
Can I create interesting reflections artificially?
Yes. Placing a small mirror or a piece of glass below your lens creates a reflection effect in the foreground. Pouring water on a flat surface creates an instant puddle for reflections. These are common creative photography techniques that give you full control over the reflected scene.