Reflections add depth, symmetry, color, and visual intrigue to photographs. A puddle on a city street transforms a mundane sidewalk into a mirror of architecture and sky. A lake at dawn perfectly doubles the mountain above it. A rain-splattered window turns city lights into an abstract painting. Reflections are everywhere, and learning to see and use them is one of the most rewarding compositional skills you can develop.
What makes reflection photography compelling is the doubling effect. You are showing the viewer something they have seen before (a building, a person, a landscape) in a way they have not considered. The reflected version is slightly different, distorted by water ripples, darkened by the reflecting surface, or fragmented by glass, which creates tension between the real and the reflected. That tension is what makes these images interesting.
This guide explores every type of reflective surface, the techniques for capturing clean reflections, camera settings, Photography Composition strategies, and how to turn a rainy day from a photography obstacle into an opportunity.
Types of Reflective Surfaces
Water
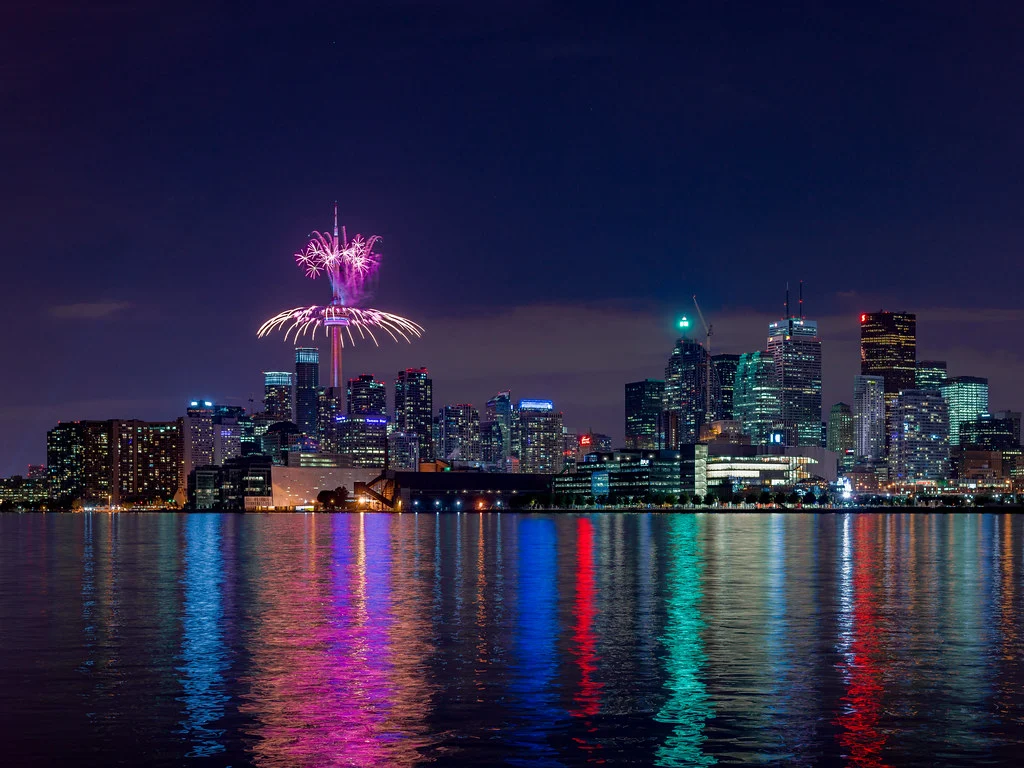
Water is the most common and versatile reflective surface. Still water produces mirror-like reflections, while moving water creates abstract, painterly distortions. Lakes, ponds, rivers, puddles, fountains, and even wet pavement all offer different qualities of reflection.
Glass
Glass buildings, windows, and storefronts reflect the environment while simultaneously showing what is behind the glass. This layering of reflected and transmitted images creates complex, often surreal compositions.
Mirrors
Actual mirrors provide perfect reflections and are popular in portrait photography and creative still life. Handheld mirrors, car mirrors, and architectural mirrors all produce clean, undistorted reflections that can be composed precisely.
Metal
Polished metal surfaces (chrome, stainless steel, brushed aluminum) produce warped, convex reflections that distort the scene in interesting ways. Car bodies, public sculptures, and kitchen appliances all create unique reflection patterns.
Wet surfaces
Any surface becomes reflective when wet. Wet roads, sidewalks, rocks, and leaves all capture reflections after rain. The reflection is less defined than standing water but adds a subtle, luminous quality to the scene.
Puddle Photography Technique
Puddle photography is the most accessible form of reflection photography. After any rain, every parking lot, sidewalk, and street becomes a potential mirror.
- Get extremely low. The most effective puddle reflections are shot with the camera at or near ground level. This maximizes the reflective surface area in the frame and creates a dramatic perspective. Lie on the ground or use a camera with a flip screen.
- Shoot close to the puddle’s edge. Position the camera just above the surface of the water, as close to the near edge of the puddle as possible. This angle makes even a small puddle appear to stretch across the entire frame.
- Wait for stillness. Even a slight breeze ripples puddle water, breaking up the reflection. Wait for calm moments, or use your body to shield the puddle from wind.
- Focus on the reflection. You can focus on the reflected image (which is at the distance of the reflected object, not the water surface) or on the water surface itself. Focusing on the reflection makes it sharp while the water’s edge goes slightly soft, which looks natural.
- Use the puddle to frame your subject. Position a person, building, or tree so its reflection appears centered and complete in the puddle. The puddle becomes a framing device, following the same principles as Photography Composition.
Using Mirrors Creatively
Mirrors are the most controllable reflective surface because you choose their position, angle, and what they reflect.
- Hidden mirror landscapes. Place a small mirror flat on the ground in an outdoor setting. Angle it to reflect the sky. The result appears to be a portal in the ground showing an inverted sky.
- Broken mirror portraits. Photograph a portrait through the fragments of a broken mirror. Each fragment shows a different angle of the subject, creating a cubist effect.
- Mirror self-portraits. Mirrors naturally facilitate self-portraits. Use the mirror to compose the frame while including yourself in it. The challenge is hiding the camera or making it part of the composition. Portrait Photography techniques apply, with the added complexity of the reflected scene.
- Infinity mirror effect. Two parallel mirrors create an infinite tunnel of reflections. Place a subject between them for a disorienting, recursive image.
- Mirror as leading line. A long mirror placed on a surface creates a Leading Lines composition where the reflection draws the eye through the frame.
Glass Building Reflections
Modern architecture with glass facades provides enormous reflective surfaces. These reflections combine the rigid geometry of buildings with the organic shapes of clouds, trees, and surrounding structures.
- Look for curved glass surfaces that distort reflections in interesting ways.
- Shoot during Golden Hour Photography when warm light on the reflected scene contrasts with cool shadows on the glass.
- Use a polarizing filter to control reflections. Rotating the polarizer lets you adjust how much reflection is visible versus how much you see through the glass.
- Compose so the reflection tells a story: clouds reflecting in a skyscraper, a historic building reflected in a modern one, or a lone person reflected in an otherwise empty facade.
- Explore the boundary where reflection and transparency overlap. The edge of a glass panel often shows both the reflected world and the interior simultaneously.
Camera Settings for Reflection Photography
- Aperture: varies by purpose. For landscape reflections where you want maximum sharpness (like a mountain reflected in a lake), use f/8 to f/11 for deep Depth Of Field. For creative reflections with blur, use f/2.8 to f/4 to isolate the reflection.
- Focus: on the reflection. When the reflection is the primary subject, focus on the reflected image, not on the surface creating it. The reflected image is at the optical distance of the reflected object.
- Metering: be careful with bright reflections. Bright sky or light reflections in water can fool your Metering Modes. Use Exposure Compensation or check your Camera Histogram to avoid blown highlights.
- Polarizing filter. A circular polarizer is the single most useful accessory for reflection photography. It allows you to dial reflections up or down. At one rotation, reflections are maximized. At 90 degrees, reflections are minimized, revealing what is beneath the water or behind the glass.
- ISO and shutter speed. Low Iso for clean images. Shutter Speed depends on the scene. For still water reflections, a tripod and slower speed are fine. For rain puddles with people walking past, a faster speed freezes the action.
Composition: Symmetry and Balance
Reflections naturally create symmetry, which is one of the most powerful compositional tools in photography.
- Split the frame. Place the reflection boundary (waterline, mirror edge) at the center of the frame, giving equal weight to the real scene and its reflection. This creates perfect bilateral symmetry.
- Break the symmetry intentionally. A single element that appears only in the real scene (a bird, a boat, a person) but not in the reflection creates visual tension and a focal point that prevents the image from feeling static.
- Rotate the image. An image of a building reflected in water, rotated 180 degrees, can become a disorienting puzzle. The viewer cannot immediately tell which way is ‘up.’ This challenges perception and creates engagement.
- Use the Rule Of Thirds with the reflection boundary. Instead of centering the waterline, place it on a third line to emphasize either the real scene or the reflection.
- Look for asymmetric reflections. Rippled water, curved glass, and uneven surfaces create imperfect reflections that are often more visually interesting than perfect mirrors.
Rain as a Photography Opportunity
Many photographers put their cameras away when it rains. That is a mistake. Rain transforms the world into a reflective playground.
- Wet streets become mirrors. After even a light rain, city streets reflect signs, buildings, and lights. Night Photography in the rain produces spectacular images because every surface multiplies the city’s light.
- Raindrops on glass. Photograph through a rain-covered window. Focus on the drops themselves for abstract patterns, or focus beyond the drops to use them as a textured foreground overlay.
- Umbrellas and rain gear. People with colorful umbrellas become natural subjects against gray, reflective backgrounds.
- Protect your gear. Use a rain cover, a plastic bag with a hole for the lens, or shoot from sheltered positions. A towel to wipe the front element periodically is essential. These precautions let you embrace the conditions that produce some of the most compelling reflection images.
- Just after the rain stops. The period immediately after rain ends often provides the best conditions: wet surfaces reflecting a breaking sky. Dramatic clouds reflected in puddles create images with incredible depth and mood.
Double Exposure with Reflections
Combining reflections with Double Exposure Photography techniques multiplies the surreal quality of both approaches.
- Use in-camera multiple exposure mode to blend a direct portrait with the subject’s reflection in water or glass.
- In post-processing, layer a reflection image over a non-reflection image using blending modes (Screen, Multiply, or Overlay).
- Photograph the same scene twice: once focused on the reflection and once on the real scene. Blend these in editing for a dreamlike image where both planes are equally prominent.
Post-Processing Reflection Photographs
Reflection photographs respond well to targeted post-processing that enhances the mirror quality of the reflective surface.
- Boost contrast in the reflection. Reflections are naturally darker and lower-contrast than the real scene. Selectively increasing contrast in the reflected area brings it closer to the reality above, strengthening the mirror effect. Use Dodging And Burning or selective adjustment brushes.
- Enhance color in the reflection. A slight increase in saturation or vibrance in the reflected portion can compensate for the natural color loss in reflections. Be subtle, as oversaturated reflections look artificial.
- Use Color Grading Photography for mood. Cool-toned reflections paired with warm real scenes create an ethereal, dreamlike quality. Split-tone editing (warm highlights, cool shadows) works especially well with reflection compositions.
- Clone out distractions. Small debris, litter, or unwanted objects in or near the reflection can be removed cleanly in Photoshop For Photographers. The reflective surface often provides natural texture for cloning.
- Consider Black And White Photography Guide conversion. Reflection images often look stunning in black and white because the removal of color focuses the viewer entirely on shape, tone, and symmetry.
When processing reflection images, always preserve the slight differences between the real scene and its reflection. Making them perfectly identical looks artificial. The natural darkening, slight color shift, and subtle distortion of reflections are what make them visually interesting.
Common Mistakes
- Shooting from too high. Standing at full height and angling down at a puddle minimizes the reflection area. Get low. The lower you go, the more reflection you capture.
- Not waiting for still water. Even tiny ripples break up reflections. Patience is essential. Wait for a lull in the wind.
- Overusing symmetry. While symmetric compositions are powerful, every reflection image in your portfolio being a centered mirror image becomes monotonous. Vary your approach.
- Forgetting to check for the polarizer angle. If you use a polarizing filter, check that it is set to maximize or minimize reflections as you intend. An accidentally rotated polarizer can kill the reflection you are trying to photograph.
- Ignoring the reflected content. A beautiful reflective surface means nothing if the reflected scene is boring. The quality of the reflection depends entirely on the quality of what is being reflected.
- Not protecting gear in wet conditions. Exciting reflections in the rain are not worth a water-damaged camera. Use proper weather protection before shooting in wet conditions.
Try This: Practical Exercises
- Puddle hunt after rain. After the next rain, spend 30 minutes walking a familiar route and looking specifically for puddle reflections. Photograph at least 10 different reflections, varying your height, angle, and what is reflected. Get the camera as low as possible for at least half of them.
- Mirror landscape portal. Take a small rectangular mirror outdoors. Place it on the ground and angle it to reflect the sky or a building. Photograph it so the mirror looks like a window or portal in the ground.
- Night rain reflections. Go out during or after rain at night in an area with neon signs, streetlights, or storefronts. Shoot the reflections of the lights in wet pavement. Use a wide Aperture for Bokeh in the lights.
- Symmetry flip challenge. Take a strong reflection image and flip it upside down. Show it to someone and see if they can tell which orientation is ‘correct.’ If they cannot, you have captured a successful symmetry composition.
Frequently Asked Questions
Do I need a polarizing filter for reflection photography?
A polarizer is not required, but it is the most valuable accessory for this genre. It lets you control the strength of reflections, making them stronger or weaker by rotating the filter. For water and glass reflections specifically, it provides creative control that is impossible to replicate in post-processing.
Why are my puddle reflections not sharp?
You may be focusing on the water surface rather than the reflected image. The reflected image is optically located at the distance of the reflected object, not at the surface of the water. If a building is 50 feet away and reflected in a puddle at your feet, focus at 50 feet, not at 3 feet.
How do I photograph reflections without including myself?
Angle yourself to the side of the reflective surface rather than standing directly in front of it. Use a longer Focal Length to narrow your field of view, making it easier to exclude yourself. A polarizing filter can also reduce the reflection enough that you disappear from the surface.
Can phone cameras capture good reflection photos?
Absolutely. Phone cameras excel at reflection photography because their small sensors provide deep Depth Of Field, keeping both the reflective surface and the reflected scene in focus. The main challenge is getting the phone low enough without getting it wet. A small phone tripod or propping the phone on its edge helps.
What time of day is best for water reflections?
Early morning is typically best for lake and pond reflections because wind is usually calmest before sunrise and shortly after. The still air means still water, which means mirror-like reflections. Golden Hour Photography adds warm color that doubles in impact when reflected.
How do I handle mixed exposure between sky reflections and land?
Reflections are always darker than the original scene (water absorbs some light), so the reflected sky is naturally closer in brightness to the foreground. A graduated ND filter can further balance the exposure. Alternatively, bracket your exposures and blend them using Hdr Photography Guide techniques.
What are some unusual reflective surfaces to look for?
Beyond the obvious surfaces, keep an eye out for unexpected reflection opportunities. Polished granite and marble building facades reflect like dark mirrors. The curved surface of a car body distorts surrounding buildings in fascinating ways. Soap bubbles create tiny, iridescent reflections of the entire scene around them. A still cup of coffee or tea reflects the window above it in miniature. Even a wet leaf can capture a tiny, sharp reflection of the sky. Training yourself to see reflective potential in everyday surfaces is a skill that transforms ordinary walks into productive Street Photography sessions.