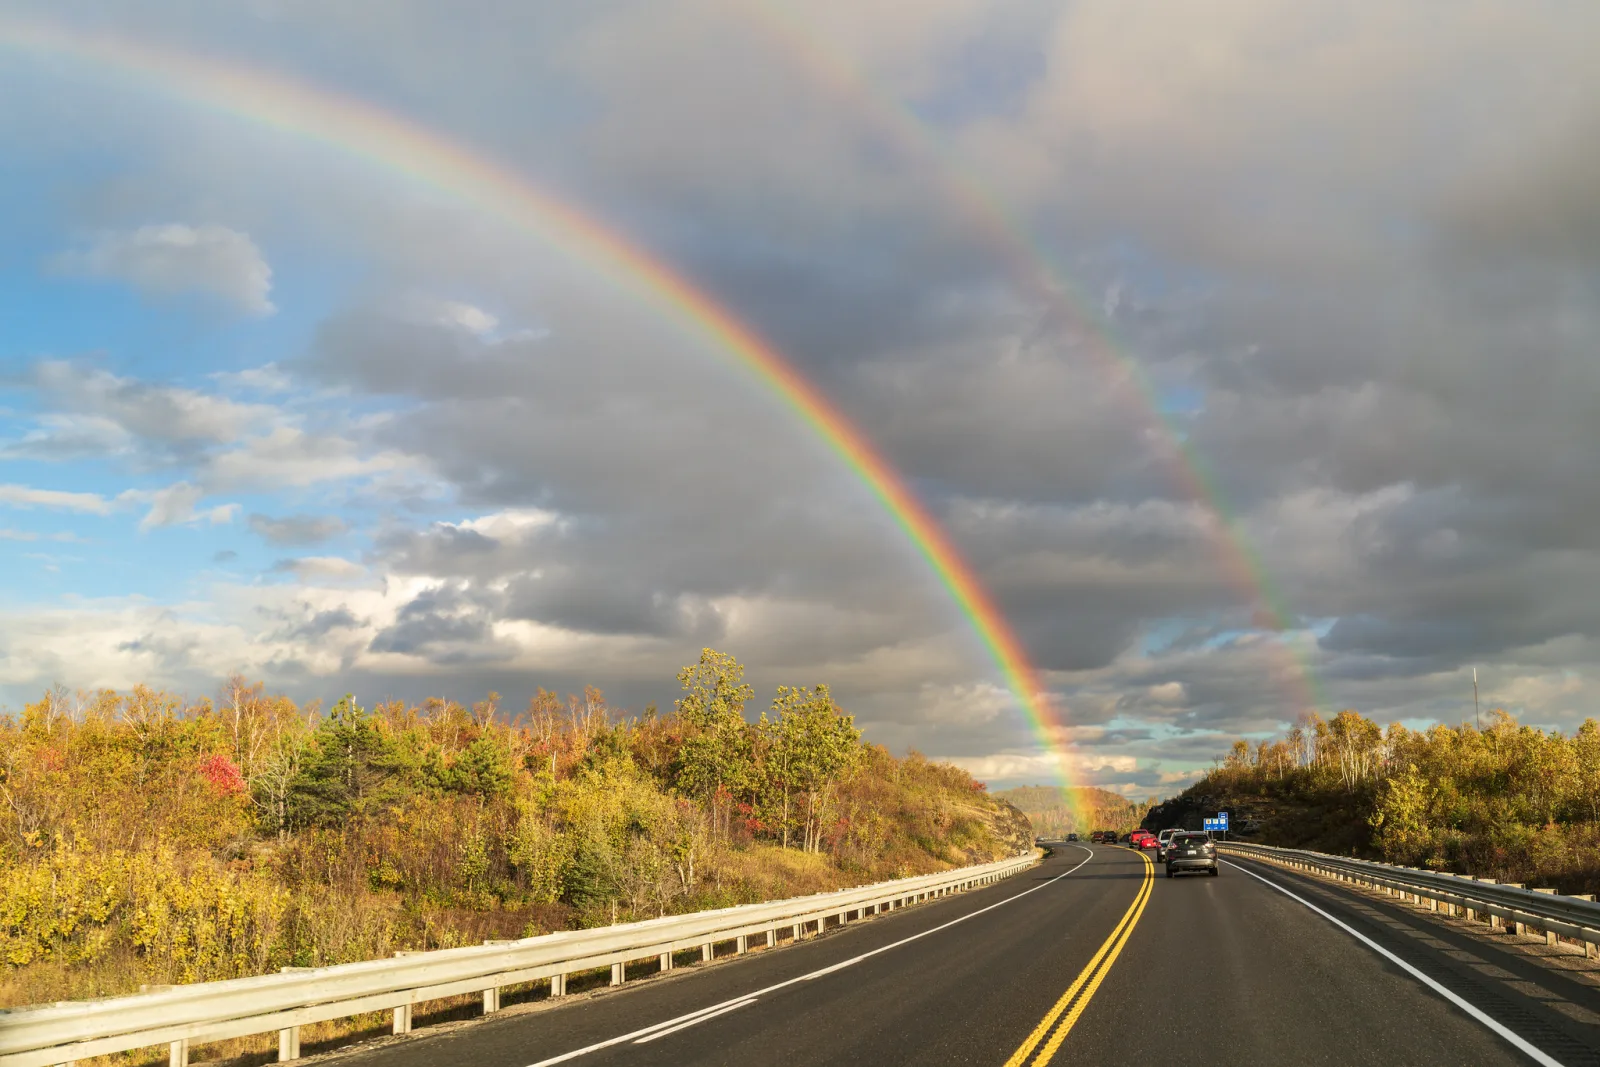
To photograph a rainbow, stand with the sun directly behind you and rain or spray in front. The primary bow is a circle of about 42 degrees radius around the antisolar point, the spot exactly opposite the sun where the shadow of your head falls, so it only stands above the horizon when the sun is lower than about 42 degrees. Fitting the whole arc takes a lens of about 16mm on full frame, and dark cloud behind the bow gives the strongest colour.
This guide goes further than the rainbow section in storm photography and the editing advice in how to make colors pop in a photo of a rainbow. It covers the geometry that tells you where a bow will stand, how to predict one, the focal length the full arc needs, exposure, polarizers, double bows, fogbows, moonbows and bows in spray.
Where a rainbow appears: the antisolar point and the 42 degree circle
A rainbow is not an object at a place. It is sunlight sent back toward you by falling drops. Each drop refracts the light as it enters, reflects it once off the inside of its far wall, and refracts it again on the way out. The returning light is concentrated at one angle, so the drops that send it to you all lie on a circle about 42 degrees from the point exactly opposite the sun.
That point is the antisolar point, and you can always find it: it is where the shadow of your own head falls. Three things follow.
- The sun is always behind you. Coloured rings or arcs near the sun are halos made by ice crystals, a different effect with different rules.
- The colours have a fixed order. Water bends each colour by a slightly different amount, so red returns at about 42 degrees and violet at about 40. Red is on the outside of the primary bow, violet on the inside, in a band roughly 2 degrees wide.
- The bow belongs to the viewer. Someone fifty paces away sees a bow made by different drops, centred on the shadow of their own head. That is why nobody reaches the end of one.
Because the sun is so distant, the antisolar point behaves like a compass bearing, not a location. If the sun sits at a bearing of 250 degrees, the centre of the bow is at 70 degrees. With the sun near the horizon, the feet of the bow touch the ground about 42 degrees either side of that, near 28 and 112 degrees.
Why the sun has to be lower than about 42 degrees
The centre of the bow is as far below the horizon as the sun is above it. The top of the arc therefore stands at 42 degrees minus the sun’s altitude. With the sun on the horizon you get a full semicircle. As the sun climbs, the bow sinks and narrows, and once the sun passes about 42 degrees the whole circle is below the horizon for anyone on level ground.
| Sun’s altitude | Top of the primary bow | Width of the bow along the horizon |
|---|---|---|
| 0 degrees (sunrise or sunset) | 42 degrees | About 84 degrees, a full semicircle |
| 10 degrees | 32 degrees | About 82 degrees |
| 20 degrees | 22 degrees | About 75 degrees |
| 30 degrees | 12 degrees | About 62 degrees |
| 40 degrees | 2 degrees | About 28 degrees, a low sliver |
| Above about 42 degrees | Below the horizon | No bow from level ground |
A field test needs no app. On level ground, a shadow as long as you are tall means the sun is at 45 degrees. If your shadow is shorter than you are, the sun is too high for a bow above the horizon.
This is why rainbows belong to mornings and late afternoons in summer, and why in winter at higher latitudes, where the sun stays low, they can appear at noon. The limit applies to the horizon, not to the effect: look down into drops below you and part of the hidden circle comes into view.
Need the sun’s altitude and bearing for a particular place and hour? How to plan a photo around the sun, moon, tides and weather explains azimuth and elevation, the two numbers that describe any light.
Predicting a rainbow before it forms
A bow needs direct sun, falling drops, and you between them with the sun at your back. Steady rain from a grey sky fails the first test. Showers pass it, because they come as separate cells with clear gaps between them.
- Look for showery weather. A forecast of sunshine and showers, or a rain radar map showing scattered cells instead of one broad band, is the signal.
- Check the sun’s altitude. Below about 42 degrees is required. Below 25 degrees gives a tall arc.
- Watch where the rain is going. The best moment comes when a shower has just passed over you and is moving away from the sun while the sky toward the sun clears. The retreating rain is the screen and the dark cloud above it is the background.
- Face your own shadow. When sunlight reaches you while rain still falls ahead, look toward the shadow of your head and then 42 degrees out from it.
In the mid-latitudes, where weather usually arrives from the west, late afternoon bows stand in the east in showers that have gone through, and morning bows stand in the west in showers still on their way.
Heavy showers with large drops make the most vivid bows; fine drizzle makes pale ones. A bow can only be as colourful as the sunlight feeding it, so close to sunset, when the sun has turned orange, the green and blue bands weaken and the bow becomes mostly red. Rainbows often last only minutes, so mount the widest lens before the sun breaks through.
How wide a lens you need for the whole arc
A complete primary bow at sunrise or sunset is 84 degrees across and 42 degrees high. That is wider than most people expect, and it is the usual reason a rainbow picture shows only a piece of the arc. The figures below are horizontal angles of view on a full-frame camera in landscape orientation.
| Focal length (full frame) | Horizontal angle of view | What fits |
|---|---|---|
| 35mm | About 54 degrees | One leg of the bow, or the crown |
| 24mm | About 74 degrees | The whole arc only when the sun is above roughly 25 degrees and the bow is low |
| 20mm | About 84 degrees | The sunset bow edge to edge, with no room to spare |
| 16mm | About 97 degrees | The whole primary bow with a margin each side |
| 12mm | About 113 degrees | Both bows of a double rainbow |
Divide by the crop factor for smaller sensors: 16mm on full frame is about 10 or 11mm on a 1.5x crop body and 8mm on a 2x crop body. On a phone, the main camera is too narrow and the ultra-wide camera is usually wide enough for the primary bow. A frame this wide needs something in its lower half, which is the subject of how to use a wide-angle lens.
If your widest lens is not wide enough, turn the camera to portrait orientation, lock exposure and focus, and shoot a row of overlapping frames from one foot of the bow to the other. Work fast, because the bow can fade between the first frame and the last. Panorama photography covers the method.
The whole arc is not always the best picture. The band of colour is about 2 degrees wide, a thin line in a 16mm frame. At 200mm the frame is about 10 degrees across, so the band fills roughly a fifth of its width. A long lens on the place where one foot meets a hillside, a church or a stand of trees is often stronger than the full semicircle.
Exposure and settings while the bow lasts
A rainbow scene is high in contrast: sunlit ground in front, a dark wall of cloud behind, the bow glowing between them. The dark cloud can persuade the meter to brighten the frame, which washes out the bow.
- Expose a little darker than the meter suggests. Minus 0.3 to minus 1 stop keeps the colours dense. An overexposed bow turns pale, and its yellow band goes white first.
- Check the colour channels. A saturated band can clip one channel while overall brightness looks safe. The RGB display described in how to read a camera histogram shows it.
- Shoot raw, and bracket if there is time. Three frames a stop apart take two seconds.
- Use a middle aperture. Around f/8 keeps a wide scene sharp from near to far.
- Focus on the land. The bow has no surface to lock on to, and autofocus may hunt on plain sky.
- Keep the front element dry. Drops on the glass show as soft smears, most of all on wide lenses at small apertures. Shade the lens between frames and wipe it before each burst.
What a polarizer does to a rainbow
The light of a rainbow is strongly polarized by the reflection inside each drop, and its direction of polarization runs along the arc. A polarizing filter therefore affects a rainbow more than almost anything else in a landscape, and the effect can go either way.
- At one rotation the bow disappears. When the filter blocks the bow’s polarization, the colours fade to almost nothing. A polarizer left on the lens at the wrong angle can cost you the picture without you knowing why.
- A quarter turn from there, the bow stands out. The filter passes nearly all of the bow’s light while cutting about a stop from the unpolarized cloud behind it, so the bow gains contrast.
Look through the viewfinder and rotate the filter slowly through a full turn. The bow fades and returns twice. Stop where it is strongest.
There is one complication. Because the polarization follows the curve, the top of the arc is polarized horizontally and the legs close to vertically. One filter setting cannot favour both. On a wide lens holding the whole bow, the rotation that brightens the crown dims the feet. For a full arc, leave the polarizer off or accept an uneven bow. For a section of the arc through a longer lens, the filter works evenly and is worth using.
Not sure how to turn the filter or read what it is doing? Polarizing filter: how to use one and when to take it off covers rotating the filter and reading the effect, rainbows, the light cost and when to remove it.
Double rainbows, the dark band and the faint inner fringes
A second, fainter bow often stands outside the first. It comes from light that reflects twice inside each drop. Its radius is roughly 51 degrees, about 9 degrees outside the primary. It is wider and dimmer, and the extra reflection reverses its colours, so its red edge faces the red of the primary.
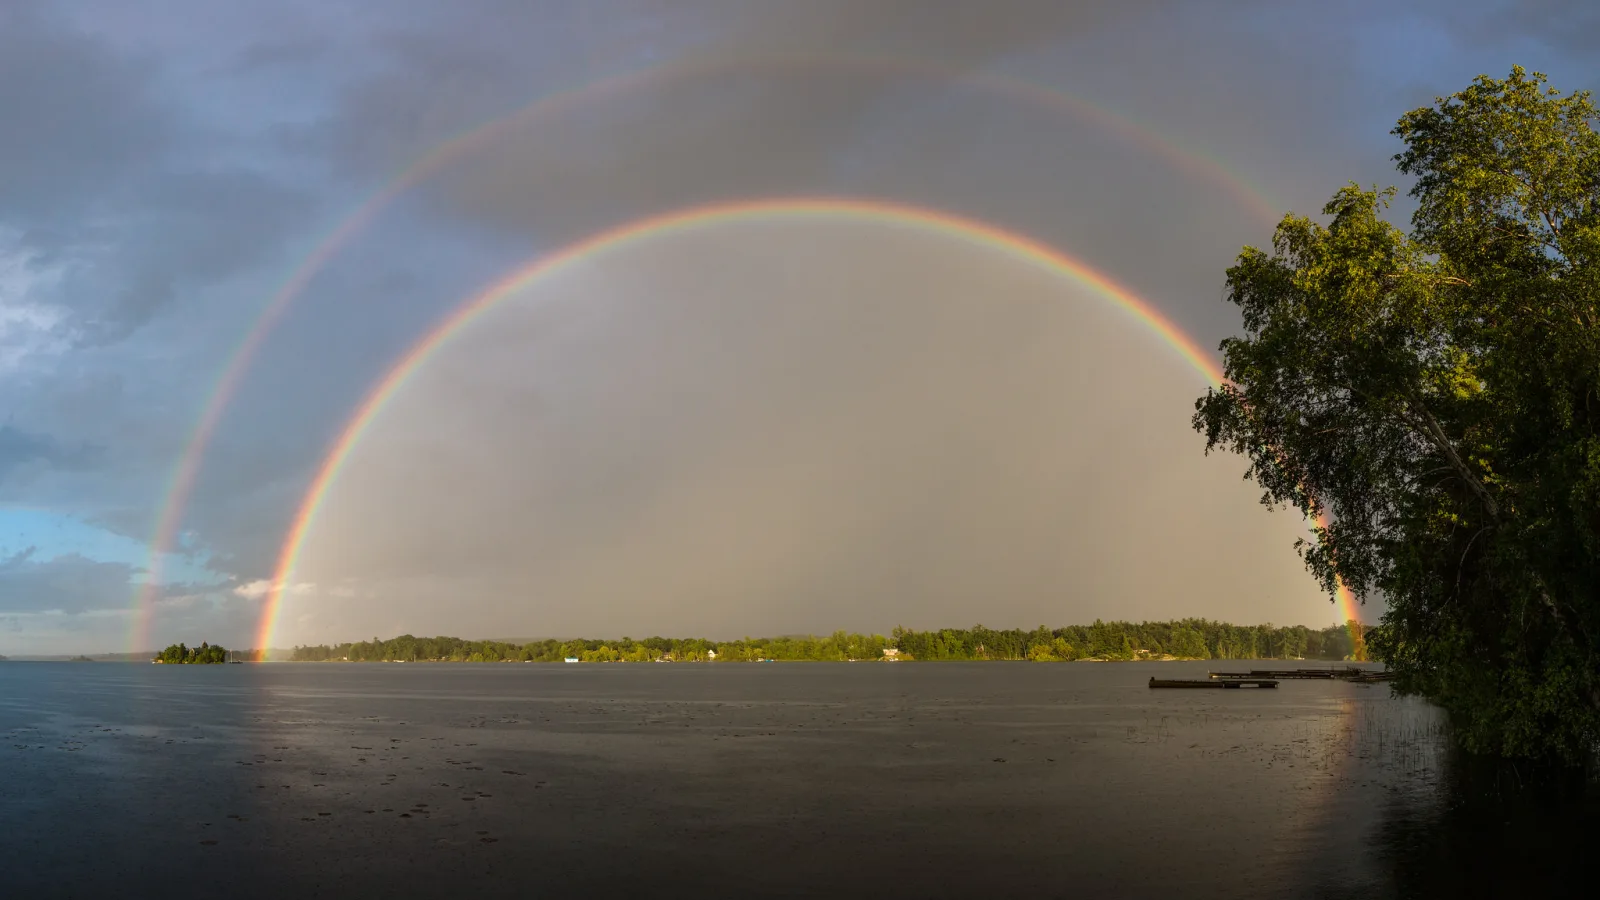
Look at the sky between the two bows. It is darker than the sky on either side. This is Alexander’s dark band, and it is real: drops in that zone cannot send you light by either the one-reflection or the two-reflection path. The sky inside the primary bow is noticeably brighter than the sky outside it, because drops there do return some light.
Sometimes a few narrow pastel fringes of green and pink sit just inside the violet edge of the primary. These are supernumerary bows, an interference effect that shows best when the drops are small and close to the same size.
- Width. The secondary spans a little over 100 degrees when the sun is on the horizon. That needs about 12mm on full frame, or a panorama.
- Exposure. The secondary is easy to lose. Slight underexposure and a dark background matter even more for it.
- Editing. The dark band and the bright interior are part of the phenomenon. Evening out the sky removes the evidence that makes a double bow look true.
Fogbows, moonbows and rainbows in spray
Fogbows
Fog droplets are far smaller than raindrops. At that size the light spreads so much that the colours overlap into a broad, pale, almost white arc, sometimes with a faint reddish outer edge. A fogbow appears opposite the sun like a rainbow, with a slightly smaller radius. Look for one when the sun breaks through thin fog behind you, or from a hillside above a fog bank. It is faint, so include a dark, simple foreground and keep the fog bright, using the exposure methods in fog and mist photography.
Moonbows
A bright moon makes a bow by the same geometry: the moon behind you, lower than about 42 degrees, with rain or waterfall spray in front and a dark sky. To the eye a moonbow looks white or grey, because human colour vision is weak in dim light. A long exposure records the colours. Use a tripod, a wide aperture and manual focus. Treat about 10 seconds at f/2.8 and ISO 1600 as a first test frame under a moon close to full, then adjust from the histogram.
Waterfalls, fountains and sprinklers
Spray makes the most predictable bows, because the drops are there every day. The rule does not change: sun behind you, spray in front, colour at 42 degrees from the shadow of your head. If you look west toward a waterfall, the bow appears in the morning, when the sun is in the east behind you. If you look east, it appears in the afternoon.
Spray also escapes the limit on the sun’s height. From a viewpoint above the mist you look down toward the antisolar point, so a bow can form at midday. Spray drifts and the bow brightens and fades from second to second: shoot short bursts and keep wiping the lens.
Photographing the waterfall as well as the bow? How to photograph waterfalls covers how shutter speed controls the look of the water, dealing with spray and moisture, and working with a polarizing filter.
Giving the bow a subject
A rainbow over nothing is a record of weather. A rainbow that lands on something is a picture. The bow sits at a fixed bearing from the sun, so you cannot move it, but you can move yourself until a subject falls under it.
- Put a foot of the bow on a subject. A farmhouse, a lone tree or a boat gives the eye a place to arrive. Walking a hundred paces sideways changes the bearing of a nearby barn a great deal while the bow stays put, so near subjects are the easiest to line up.
- Use the arc as a frame. A hill or a building centred under the crown suits a wide lens. Keep the horizon level; a tilted semicircle looks wrong at once.
- Build the lower half of the frame. The bow fills the sky, so the ground needs its own interest: a wet road catching the light, a field edge, a wall leading inward. See foreground interest in landscape photography.
- Watch your shadow. With the sun low behind you, your shadow points straight into a wide frame. Step so it falls into a darker patch, or crouch.
If the bow fades before you find a subject, look at the retreating shower cloud itself. How to photograph clouds and skies covers exposing and composing for it.
Editing a rainbow without overcooking it
A rainbow already holds the most saturated colours in the frame. The aim is to make it read clearly against its background, not to make it louder than it was.
- Set exposure and highlights first. Pull the highlights down until every band has colour and the yellow band is yellow, not white.
- Work on the background before the bow. Darkening the cloud outside the arc by a third to half a stop does more than any saturation slider, and it matches what the sky really does there.
- Use a local adjustment along the arc. A soft brush with a small amount of contrast lifts the bow without touching the land.
- Add saturation last and sparingly. A bow contains every hue, so a global change also shifts the grass and the sky.
Signs the edit has gone too far: hard edges between bands that were soft, steps or stripes inside a band, a bright halo following the arc, grass that glows, and a secondary bow as strong as the primary. Extending a bow or adding one to an empty sky is compositing. Say so when you share it.
Want to adjust only the bow or only the sky? Lightroom masking and selective adjustments covers linear and radial gradients, the brush, colour and luminance range masks, and combining and refining masks.
Common mistakes
- Only part of the arc fits. The lens is too narrow for an 84 degree bow. Fix: use about 16mm on full frame, a phone’s ultra-wide camera, or a quick panorama.
- The bow looks pale. The frame is overexposed or the background is bright. Fix: dial in minus 0.3 to minus 1 stop and move so dark cloud or a shaded hillside sits behind the bow.
- The bow vanished through the filter. A polarizer was set to block it. Fix: rotate the filter while watching the bow, or take it off.
- Soft blobs across the frame. Raindrops on the front element. Fix: shade the lens and wipe it before each burst.
- Waiting for the rain to stop. The bow needs the rain. Fix: be in position while it is still falling, and take a safe frame the moment the bow appears.
Try this
You do not need a storm to learn the geometry. On a sunny morning or late afternoon, when your shadow is longer than you are tall, take a garden hose with a fine mist setting. Put the sun behind you and spray the mist in front of a dark hedge or a shaded wall. Find the shadow of your head and look about 42 degrees out from it: the bow will be there. Spend fifteen minutes on three tests. Photograph the bow against the dark background and then against bright sky, and compare the colour. Shoot three frames at 0, minus 0.7 and minus 1.3 stops and see which holds the yellow band best. Then turn a polarizer or a pair of polarized sunglasses slowly in front of the lens and watch the bow fade and return.
Frequently asked questions
What time of day do rainbows appear?
Whenever the sun is lower than about 42 degrees and rain is falling opposite it. In summer that means morning and late afternoon. The lower the sun, the taller the bow.
What lens do I need to photograph a full rainbow?
About 16mm on a full-frame camera, or 10 to 11mm on a 1.5x crop body, for a complete primary bow. A double rainbow needs about 12mm on full frame. With a narrower lens, shoot a panorama.
Should I use a polarizing filter for rainbows?
It can help or ruin the shot. Rotated one way it erases the bow; a quarter turn away it makes the bow stand out against the cloud. It works evenly on a section of the arc but not on a full bow in a wide frame.
Why are the colours of the second rainbow reversed?
The secondary bow comes from light that reflects twice inside each raindrop instead of once. The second reflection flips the order, so red is on the inside of the outer bow.
Related guides
- Storm photography: weather safety, storm types and forecasting tools.
- Polarizing filter: how to rotate one, what it costs in light and when to take it off.
- How to make colors pop in a photo of a rainbow: targeted colour work on the bow.
- How to photograph clouds and skies: shower clouds, storm light and sunset colour.
- How to photograph rain: protecting gear, freezing or streaking raindrops and backlighting rain.
- Planning around the sun, moon and tides: the sun’s bearing and height for any hour.