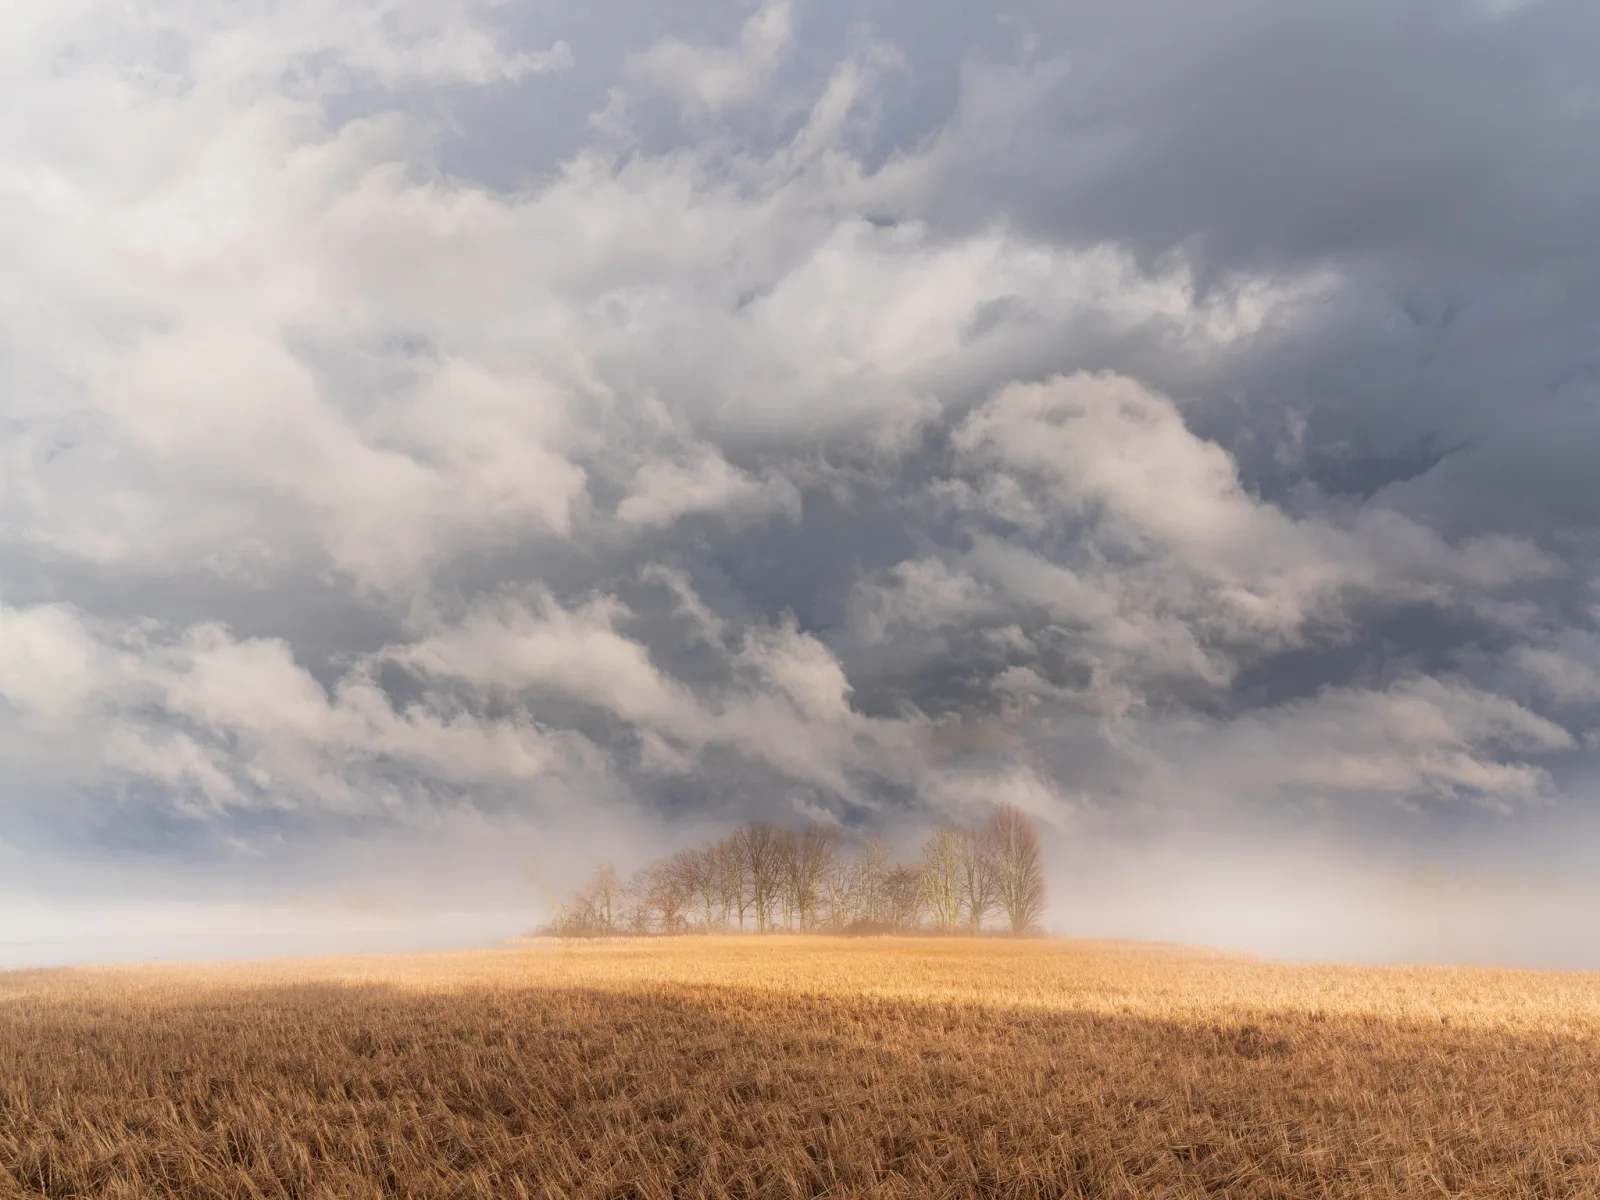
To photograph clouds and skies well, learn which cloud gives which light, give the sky most of the frame only when it has shape and direction, and expose for the brightest cloud so it keeps its texture. A polarizer deepens blue sky at 90 degrees from the sun, a graduated filter or a bracket holds a bright sky over dark land, and exposures of 30 seconds or more turn moving cloud into streaks.
This guide goes further than the cloud sections in how to photograph sunsets and storm photography. It treats the sky as the subject: reading cloud types, deciding how much frame to give them, exposure, filters, long exposures, inversions, storm structure, the cause of sunset colour, black and white, and editing.
Reading the sky: the main cloud types and the light each gives
Meteorologists sort clouds by height and by form. Two word roots do most of the work: cumulus means heaped and stratus means layered. High clouds are made mostly of ice crystals and carry the prefix cirro. Middle clouds carry the prefix alto. Clouds that produce rain carry nimbo or nimbus. You do not need more than that to predict the light.
| Cloud | Level | What it looks like | The light it gives |
|---|---|---|---|
| Cirrus | High | Thin white wisps and streaks | Hardly dims the sun; holds colour before sunrise and after sunset |
| Cirrostratus | High | A thin milky veil, sometimes with a halo around the sun | Slightly softened sun with shadows still visible; a pale sky |
| Altocumulus | Middle | Rows or ripples of small rounded lumps | A textured ceiling that takes strong colour at each end of the day |
| Altostratus | Middle | A grey sheet with the sun showing as if through frosted glass | Dim, very soft light with faint shadows or none |
| Stratus | Low | A flat, featureless grey layer | Even, shadowless light and a blank sky |
| Stratocumulus | Low | Lumpy grey and white rolls with gaps | Shafts and moving patches of sun on the land |
| Cumulus | Low base | Separate heaps with flat bases and bright tops | Full sun between clouds and drifting shadows |
| Nimbostratus | Low to middle | A thick, dark grey rain layer | Dull, low contrast light and steady rain |
| Cumulonimbus | Low base, very high top | A towering mass, often with a flat anvil | Extreme contrast: sunlit towers against a dark base |
Three readings are worth making every time you look up. First, is the cloud separate or continuous? Separate clouds mean direct sun and moving shadows; a continuous layer means soft light, the subject of how to take great photos on a cloudy, overcast day. Second, how high is it? High cloud stays lit after the sun has left the ground. Third, where are the gaps? Light arrives through them, and the beams that fan out from behind a cloud are parallel shafts that only seem to spread because of perspective, like railway tracks.
When the sky deserves most of the frame
The habit of putting the horizon a third of the way up or down is a default, not a decision. Make the decision by asking which half holds more.
- Give the sky three quarters or more when the clouds have clear shapes, when they form lines that lead somewhere, when light is breaking through them, or when the land is flat and plain.
- Give the sky a thin strip, or none, when it is an even blue or an even grey. An empty sky adds nothing but brightness.
- Keep an anchor. A sliver of land, a tree, a roofline or a boat at the bottom gives scale and tells the viewer which way is up. Without it a cloud picture becomes an abstract, which is a valid choice but a different one.
Lens choice changes what the clouds do. A wide lens tilted upward stretches the cloud overhead and makes rows of cloud converge toward the horizon, which gives the frame direction. A telephoto lens flattens a distant bank into layers and lets you pick out one tower or one lit edge. Turn the camera upright for tall cumulus, because their height is the subject. Calm water doubles a good sky.
Exposing for a bright sky
The sky is usually several stops brighter than the land beneath it, and the meter cannot know which you care about. It gets fooled in two opposite ways.
- Dark land under a bright sky. The meter lifts the exposure for the land and the clouds burn out. Use minus 0.7 to minus 1.3 stops of exposure compensation.
- A frame full of bright white cloud. The meter pulls the exposure down and the cloud turns grey. Use plus 0.7 to plus 1 stop.
In both cases the target is the same: the brightest part of the cloud should sit just short of the right edge of the histogram. A cloud that clips to pure white has no shape left, and no editing brings it back. Turn on the highlight warning and reduce exposure until only the sun itself, or its immediate glare, blinks.
At sunrise and sunset, check the separate colour channels. The red channel clips first in an orange sky, and when it does the colour flattens into a single yellow patch. Shoot raw, because a raw file holds more highlight detail than a JPEG and lets you lift the land afterwards. When one frame cannot hold both, bracket three exposures two stops apart and blend them later.
Polarizers and graduated filters
A polarizing filter darkens blue sky because light scattered by the air is partly polarized, while light from clouds is not. The blue goes darker and the clouds stay white, so they separate. The effect is strongest in a band of sky 90 degrees from the sun. Point your index finger at the sun and stick your thumb out sideways: as you rotate your wrist, the thumb sweeps the band where the filter works best. Facing toward the sun or directly away from it, or under full overcast, the filter does almost nothing to the sky.
Why does the sky go dark on one side of a wide frame? Polarizing filter: how to use one and when to take it off covers the 90-degree rule and the wide-lens problem, the light cost and when to remove the filter.
A graduated neutral density filter is dark at the top and clear at the bottom. It holds back the sky so that one exposure fits both halves. Two choices matter:
- Strength. Two and three stops are the common strengths. Meter the land and the sky separately; the difference tells you how much to hold back.
- Edge. A hard edge suits a flat horizon such as the sea. A soft edge suits an uneven horizon, because a hard line would visibly darken any hill or tree that crosses it.
Anything that stands above the horizon is darkened along with the sky. If a mountain or a building rises into the filtered zone, bracketing and blending is the cleaner method.
Never used a grad? How to use graduated neutral density filters covers choosing the right grad, positioning and metering, and when to use a filter or digital blending.
Long exposures of moving cloud
A long exposure turns moving cloud into streaks and gives a still scene a sense of time. It needs broken cloud that is visibly moving. A solid layer smears into flat grey and a clear sky gives nothing.
- Direction matters more than speed. Cloud moving toward or away from the camera makes streaks that radiate from a point on the horizon. Cloud crossing the frame makes horizontal smears, which are usually weaker.
- Low cloud streaks quickly, high cloud slowly. Fast low cloud can streak in 15 to 30 seconds. High cloud may need two minutes or more. Cloud overhead also crosses the frame faster than cloud near the horizon.
- A neutral density filter makes it possible in daylight. A 10 stop filter multiplies the exposure time by about 1,000, so 1/30 second becomes roughly 30 seconds and 1/8 second becomes about 2 minutes. A 6 stop filter multiplies it by 64.
Use a tripod, base ISO and a remote release or the self-timer. Compose and focus before fitting a dark filter, since the viewfinder goes nearly black. Take a test frame, look at the length of the streaks, and halve or double the time.
Not sure which filter strength gives which shutter time? The ND filter guide covers stops, ND numbers and optical density, converting exposure times, and light leaks in long exposures.
Cloud inversions and fog seen from above
Air normally gets colder with height. In a temperature inversion, a layer of warmer air sits above colder air near the ground and acts as a lid, trapping fog or low cloud in the valleys beneath it. From above, the cloud looks like a white sea with hills standing out of it as islands.
Inversions are most likely under high pressure after clear, calm nights, and most often in autumn and winter when the nights are long. The method is simple: get above the cloud before sunrise. A summit, a ridge road or a high pass all work. How to photograph mountains has a section on haze, cloud inversions and fast-changing weather.
- Expose for a bright subject. A frame filled with sunlit cloud top needs about plus 1 stop, checked on the histogram.
- Wait for low sun. Light skimming across the top of the layer shows its waves and ripples. An hour later the same surface is flat white.
- Use a long lens. Pick out one ridge, a line of trees or a church tower breaking the surface. The wide view is impressive in person and often empty in a photograph.
- Look for your own shadow. With the sun low behind you and cloud or fog just below, your shadow can fall on the cloud surrounded by small coloured rings called a glory. It sits at the same point opposite the sun as the centre of a rainbow, explained in how to photograph rainbows.
Storm structure from a safe distance
A thunderstorm is the largest object most people ever photograph. The top of a cumulonimbus can stand more than 10 kilometres high, and you can only see that structure from well outside it. Inside or beneath the storm there is nothing to see but grey and rain.
A storm 10 kilometres tall seen from 30 kilometres away rises about 18 degrees above the horizon, which a 35mm lens on full frame holds with room to spare. From that distance, look for these features:
- Towers. Crisp, cauliflower-shaped tops show that the cloud is still growing. They are brightest when low sun lights them from the side.
- The anvil. The flat sheet spreading from the top, where rising air stops climbing and flows outward.
- Mammatus. Rounded pouches hanging from the underside of the anvil, most striking when lit from below near sunset.
- A shelf cloud. A low, dark wedge along the leading edge, marking cold air rushing out ahead of the rain.
- Rain shafts. Grey curtains falling from the base. Streaks that fade out before reaching the ground are called virga.
Distance is also the safety rule. Lightning can strike many kilometres from the rain. If you can hear thunder, you are close enough to be struck: stop shooting and get inside a building or a hard-topped vehicle. Do not stand on a ridge or in an open field beside a metal tripod.
Want the lightning itself in the frame? How to photograph lightning covers photographing storms responsibly, the gear and camera settings, and a step-by-step technique.
Why sunrise and sunset skies turn red, and which clouds catch it
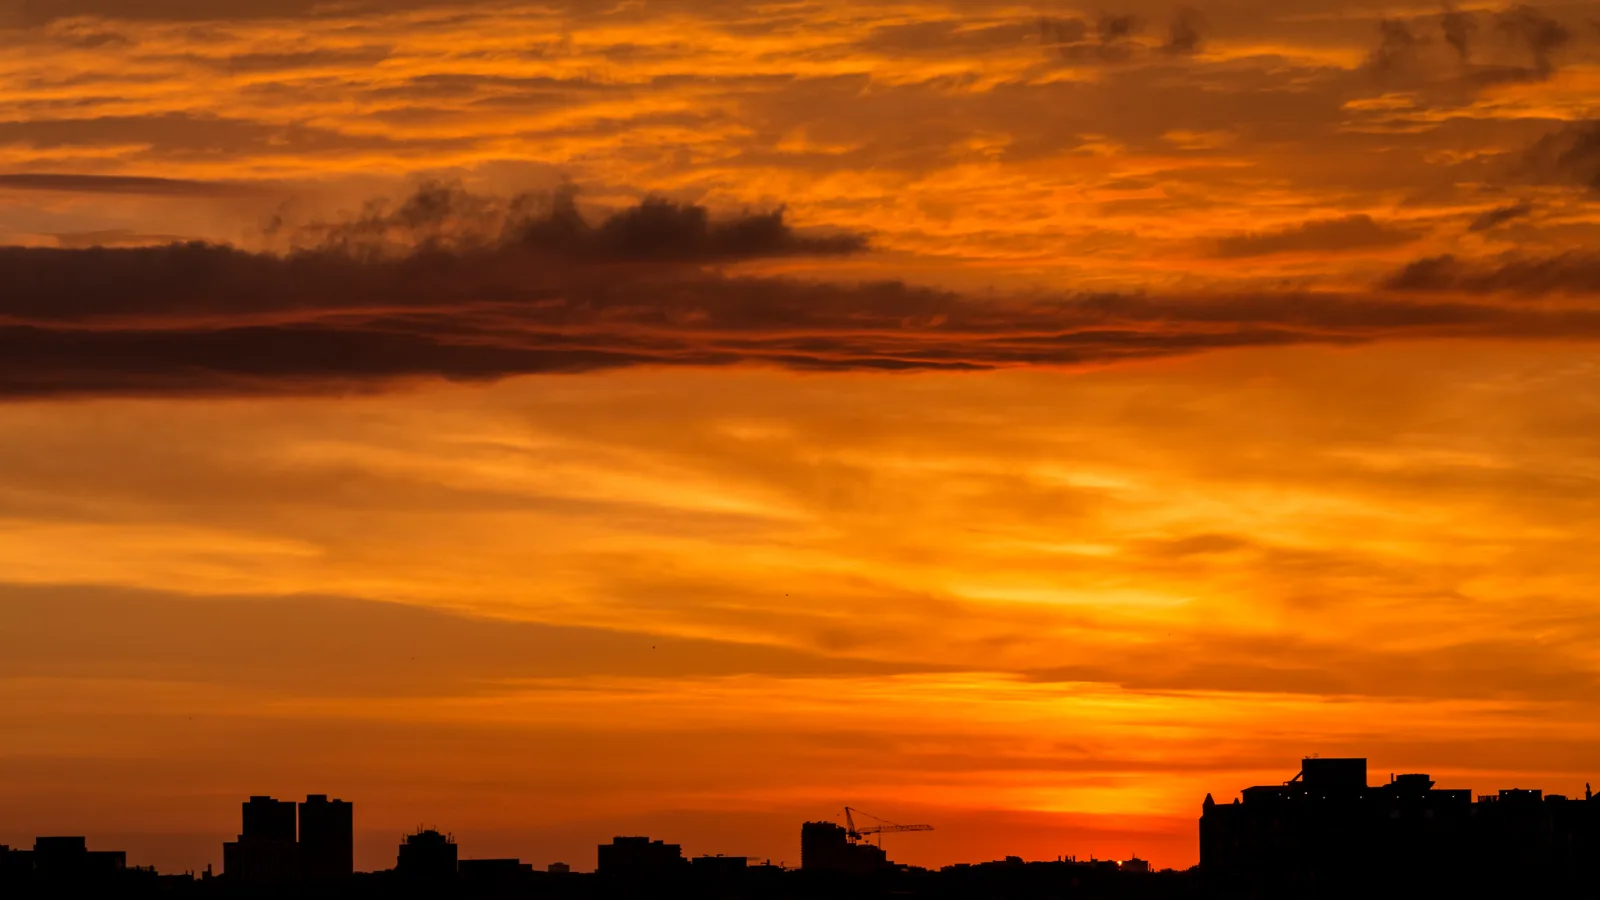
Air scatters short wavelengths of light much more strongly than long ones. That scattered blue light is why a clear daytime sky is blue. When the sun is near the horizon, its light crosses a far longer path of air before it reaches you. Most of the blue is scattered out along the way, and what arrives is orange and red. Cloud droplets scatter all colours about equally, so clouds are white at midday and simply take on the colour of whatever light reaches them.
That explains which skies light up:
- You need cloud to act as a screen. Broken middle and high cloud, such as altocumulus and cirrus, gives the largest canvas.
- You need a clear gap at the horizon in the direction of the sun. The low, reddened light has to get in underneath the cloud to light its underside. A solid bank on that horizon blocks it.
- Height sets the timing. After sunset the ground is in shadow first, then low cloud, then high cloud. Cirrus can glow well after the sun has gone, so stay at least 20 minutes past sunset, and arrive as early before sunrise.
Turn around as well. Opposite the sun in a clear twilight sky, a pink band sits above a blue-grey band along the horizon. The grey band is the shadow of the Earth rising into the atmosphere.
Set white balance to daylight or shoot raw. Auto white balance tends to neutralise exactly the warmth you came for.
Black and white skies
Without colour, a sky becomes a study in tone, and the tonal gap between blue sky and white cloud is yours to set. On black and white film, photographers used coloured filters for this: a yellow filter darkens blue sky a little, orange darkens it more, and red turns it close to black while clouds stay white. The reasoning is covered in the section on colour filters for black and white in camera lens filters explained.
With a digital file you do the same thing afterwards. Shoot in colour and raw, convert, then lower the brightness of the blue range in the black and white mixer. The sky darkens and the clouds stand forward. Go gradually: pushing blue to its limit brings out noise in the sky and can leave pale outlines where cloud edges meet it. A polarizer used at capture gives you the same separation with a cleaner file.
Skies suit black and white when shape and contrast matter more than hue: storm structure, sunbeams through gaps, streaked long exposures and rows of small cumulus. A sunset whose appeal is its colour rarely survives the conversion.
Editing skies with restraint
Skies are where over-editing shows first, because they are made of smooth gradients and soft edges.
- Recover before you enhance. Lower the highlights until the brightest cloud shows texture.
- Select the sky. Use a gradient or a sky selection so that changes to the clouds do not alter the land.
- Add contrast in small steps. Haze removal and local contrast sliders make clouds look solid quickly. Too much produces dark rims around clouds, a bright line along the horizon, grainy blue and oversaturated colour. The side effects are listed in Dehaze in Lightroom.
- Keep the natural gradient. A clear sky is lighter near the horizon and darker overhead. Flattening it to one deep blue looks artificial.
- Watch for stripes. Heavy darkening or saturation can break a smooth sky into visible steps. Back off until they go.
Two checks catch most problems. A sky should not be darker than its own reflection in water. And the land should still look as if it is lit by the sky above it: a stormy, dark sky over a brightly lifted foreground reads as two pictures joined together. Replacing a sky with one from another photograph is compositing, and should be described as that.
Common mistakes
- White, empty cloud. The highlights clipped. Fix: reduce exposure until the cloud stops blinking, and bracket when the land goes too dark.
- Half the frame given to a blank sky. Fix: lower the camera angle or raise the horizon until the sky earns its space.
- A dark band across a wide-angle blue sky. A polarizer on a very wide lens. Fix: reduce the effect, use a longer lens or take the filter off.
- A darkened hilltop. A hard graduated filter crossed an uneven horizon. Fix: use a soft edge, or bracket and blend.
- Leaving at sunset. The strongest colour often comes after the sun has gone. Fix: stay at least 20 minutes.
- Crunchy clouds. Too much haze removal and local contrast. Fix: halve the amounts and compare with the original.
Try this
Pick a day with separate cumulus clouds and blue gaps. Stand somewhere with an open view and spend twenty minutes on three short tests. First, frame the same scene three ways: horizon in the middle, horizon low with the sky filling three quarters, and horizon high with a thin strip of sky. Second, with the sky filling the frame, shoot at minus 1, 0 and plus 1 stop and compare the histograms to find where the cloud tops sit just short of clipping. Third, turn until the sun is over one shoulder, then photograph the sky toward the sun, at 90 degrees to it and directly away from it. If you have a polarizer, rotate it at each position. At home, convert one frame to black and white and lower the blue.
Frequently asked questions
What is the best time of day to photograph clouds?
The first and last hours of daylight, when low sun lights clouds from the side or from below and gives them shape and colour. Midday works for bright cumulus against blue sky, especially with a polarizer.
Why does the sky come out white in my photos?
The camera exposed for the darker land, and the sky was too bright to record. Reduce exposure by about a stop, use a graduated filter, or bracket and blend. If the sky is solid overcast, frame it out instead.
Do I need a polarizing filter for clouds?
No, but it helps on days with blue sky and white cloud, at about 90 degrees from the sun. It has little effect toward or away from the sun and none on an overcast sky.
What shutter speed blurs clouds?
It depends on how fast they cross the frame. Fast low cloud streaks in 15 to 30 seconds; slow high cloud can need two minutes or more. In daylight that requires a strong neutral density filter and a tripod.
Related guides
- How to photograph sunsets: settings, bracketing and composition when the sun is in the frame.
- Sunrise photography: the pre-dawn timeline and reading the forecast the day before.
- Storm photography: weather safety, storm types and forecasting tools.
- How to take great photos on a cloudy, overcast day: working under a continuous grey layer.
- Polarizing filter: rotating it, the wide-lens problem and when to take it off.
- How to photograph rainbows: where a bow appears when sun meets a retreating shower.