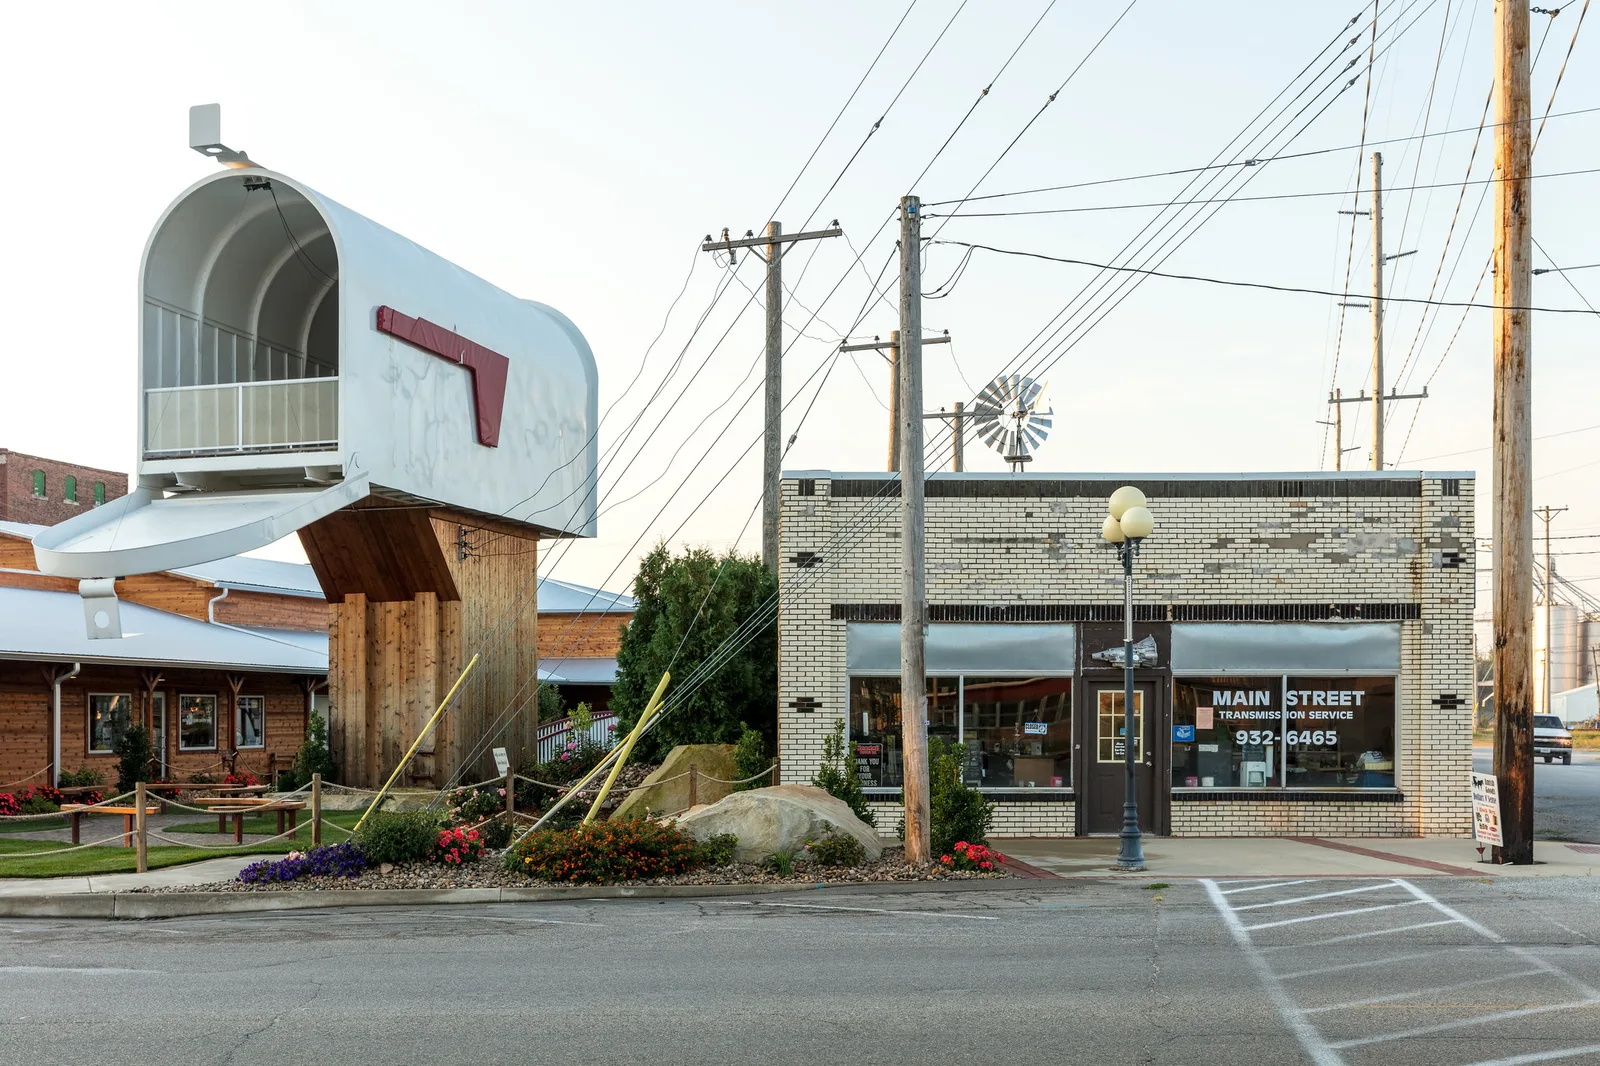
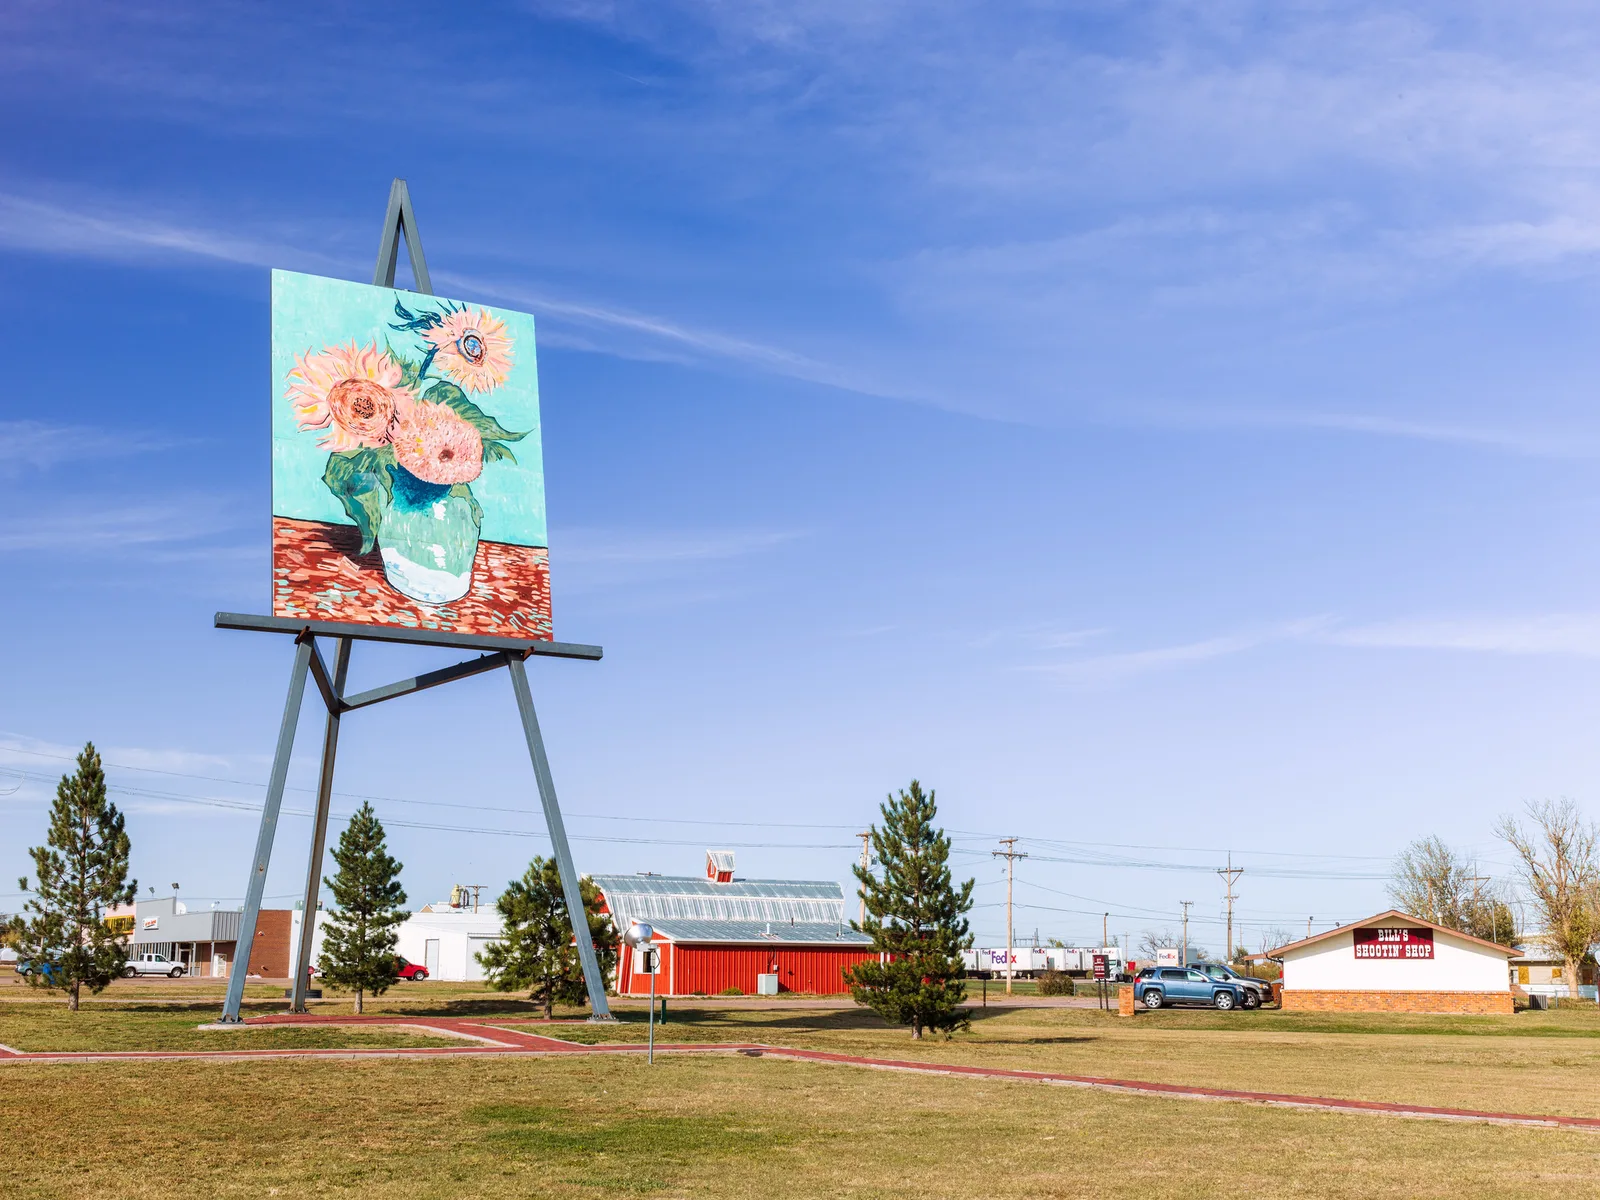
A giant mailbox, a towering painted easel, a dinosaur beside a gas station, a huge fiberglass fish or a whimsical sculpture made from scrap metal: roadside attractions are some of the most joyful subjects a traveling photographer can find. They exist to make people stop, smile and take a picture. Roadside attraction photography is about doing that picture justice, by showing scale, humor, setting and the small town character that surrounds these wonderful oddities.
This beginner guide covers why roadside attractions are fun to photograph, finding them, showing scale, including the setting, humor and storytelling, light and weather, color, angles, people, details and signs, folk art and handmade wonders, night views, settings, phones, editing, common mistakes and a short practice exercise. It pairs well with the guide to road trip photography.
Why roadside attractions are fun to photograph
Roadside attractions combine bold shapes, bright colors and a playful spirit, which makes them a delight to photograph.
- Surprise. A huge object in an ordinary place catches the eye instantly.
- Humor. Many attractions are deliberately silly, and pictures can share the joke.
- Color. Bright paint, shiny metal and fiberglass pop against the sky.
- Local pride. Many attractions celebrate a town’s history, crop, animal or famous resident.
- Story. Every giant statue or quirky sign has a tale of who built it and why.
Roadside attractions are also a wonderful excuse to explore. Driving off the highway to find a giant sculpture often leads to a charming main street, a friendly diner or a quiet landscape you would never have seen otherwise.
Kinds of roadside attractions
Roadside sights come in many forms, and each suggests a different picture. Giant objects, such as huge mailboxes, rocking chairs, paint brushes and fishing lures, play with scale. Giant animals and figures, from dinosaurs to cows to lumberjacks, often celebrate local wildlife, farming or legends. Vintage signs and buildings shaped like the things they sell, such as a donut shaped café or a teapot shaped stand, show the creativity of old highway businesses. Art installations, painted barns and outdoor murals bring color to quiet towns. Odd museums and collections, from rocks to toys, are full of detail inside and out.
Finding roadside attractions
- Small towns. Many towns build a big landmark to draw travelers off the highway.
- Old highways. Historic routes are lined with vintage signs, giant figures and quirky stops.
- Travel guides and maps. Many guides and websites collect odd and wonderful sights by region.
- Visitor centers. Local tourism offices are proud of their attractions and happy to point the way.
- Ask locals. People at gas stations and cafés often know the best oddities nearby.
Plan a little but leave room for surprises. Some of the best attractions are hand made sculptures in someone’s yard or a forgotten sign on a back road. Always photograph private yards from the road and ask before stepping onto property.
Planning a roadside route
A chain of attractions can shape a whole trip. Mark several on a map, then plan your route so you reach west facing attractions in the evening and east facing ones in the morning. Leave extra time, since one stop often leads to another discovery. Keep a simple log of each place, including its name, town and story, which makes captions and sharing much easier later. Many travelers find that the small detours become the highlights of the journey.
Showing scale
The whole point of a giant attraction is its size. Make sure the picture shows it.
- Include familiar objects. Cars, houses, benches, trees and doors tell viewers how big the attraction is.
- Add a person. A friend standing at the base, waving or looking up, gives instant scale and a smile.
- Step back. A wider view with the surroundings shows the attraction towering over its neighbors.
- Get low. Shooting from a low angle makes the object loom against the sky.
- Use a ladder or stair. Many attractions have a viewing platform or ladder that shows how high they reach.
A wide lens close to the attraction exaggerates its size, while a longer lens from farther away keeps proportions natural. Try both. The guide to scale in photography explains how size cues work.
For the strongest sense of size, place the familiar object at about the same distance from the camera as the attraction. A person standing right next to a giant statue reads clearly, while a person far in front of it can look strangely large or small. Ask your companion to step close to the base, then frame both together.
Including the setting
An attraction alone on a blue sky is fun, but the surroundings often make the picture.
- Main street. A giant object beside an ordinary storefront shows the delightful contrast.
- Open country. A huge sculpture in an empty field under a big sky feels surreal.
- Parking lots and gas stations. Everyday details show the attraction’s real home.
- Signs. A sign naming the attraction adds context and humor.
- Weather and season. Snow on a giant fish or autumn leaves around a statue add charm.
Look for the view that tells the clearest story. Sometimes the best frame shows the attraction small, with a whole town around it. The guide to small town photography covers main streets and local life.
Humor and storytelling
Roadside attractions invite playfulness. Lean into it.
- Juxtaposition. A giant object beside something tiny, or a dinosaur beside a gas pump, makes viewers laugh. See the guide to juxtaposition.
- Interaction. A friend pretending to post a letter in a giant mailbox makes a fun travel picture.
- Forced perspective. Line up a person so they seem to hold or touch the attraction. See the guide to forced perspective.
- Deadpan views. A straight, serious composition can make a silly subject even funnier.
- Story captions. Learn the history and share it with your pictures.
Humor works best when it feels kind. Celebrate the attraction and the community that made it rather than poking fun. The guide to humor in photography has more ideas.
Respecting the community
Roadside attractions are often loved by the towns that built them, and many are cared for by volunteers. Park considerately, avoid blocking driveways and businesses and keep noise low in residential areas. Buy a coffee, a souvenir or a meal in town if you can, since local businesses help keep these attractions alive. Never climb on sculptures unless it is clearly allowed, and leave every place as clean as you found it.
Light and weather
- Golden hour. Warm, low light makes paint glow and shapes stand out.
- Blue skies. A clear sky makes a clean, cheerful background for bright colors.
- Storm skies. Dark clouds behind a sunlit attraction add drama and surprise.
- Overcast days. Soft light suits shiny metal and white surfaces that glare in sun.
- Side light. Light from one side gives sculptures shape and depth.
Notice which way the attraction faces. Many are built to face the road, so the front may be lit in the morning or the evening. A quick check of the sun on arrival tells you whether to shoot now or return later.
Shiny attractions, such as polished metal or glossy fiberglass, can show harsh reflections in bright sun. Walk around until the glare moves off the important parts, or try a polarizing filter, which can reduce reflections on painted surfaces and deepen the sky behind.
Color and angles
Roadside attractions are often bright and bold. Use color and angle deliberately.
- Complementary colors. A red sculpture against green grass or a yellow figure against blue sky pops.
- Simple backgrounds. Move until the attraction stands against sky rather than clutter.
- Straight on. A centered, symmetrical view suits signs and flat painted attractions.
- Three quarter view. An angled view shows the shape of sculptures and adds depth.
- From below. Looking up makes giants feel even bigger.
Walk all the way around before settling on a view. The back of a giant statue or the side of a sign can be surprisingly interesting, and a few steps can hide a parked truck or line the attraction up with a mountain.
Composition ideas
Try a few ideas at each stop. Center a symmetrical attraction for a bold, poster like picture. Place a tall sculpture on a third line with plenty of sky around it. Frame the attraction through a car window or windshield to tell the road trip story. Include the road itself as a leading line toward the attraction. Use a low horizon to give a giant object a dramatic sky. With each frame, ask whether the picture is about size, humor, place or craft, and choose the view that makes that idea clear.
People at attractions
Roadside attractions are social places. People bring them to life.
- Your travel companions. Friends and family posing with the attraction make lasting memories.
- Visitors. Other travelers taking selfies tell the story of why the attraction exists.
- Local people. Owners and caretakers often love to talk about their attraction.
- Small figures. Distant people show scale without becoming the main subject.
Ask before making close portraits of strangers, and keep pictures of children respectful and general. Early mornings are quietest if you want the attraction to yourself.
A pose that interacts with the attraction, such as reaching up to a giant flag, sitting in a huge chair or pretending to lift a giant ball, often makes the most memorable picture of the trip.
Details and signs
Move closer, and many attractions reveal charming details.
- Handmade craft. Welded seams, painted brush strokes and stitched fabric show the work of the makers.
- Plaques. History signs and dedication plaques tell the attraction’s story.
- Weathering. Faded paint and rust on old attractions show decades of travelers.
- Vintage signs. Neon, hand lettering and bold arrows make strong graphic pictures. See the guide to sign photography.
- Souvenirs. Gift shop shelves and postcards add playful context.
A detail or two beside a wide view makes a complete portrait of an attraction and the place around it.
Folk art and handmade wonders
Some of the most moving roadside sights are not giant marketing figures but personal creations: yards filled with sculptures made from bottles, hubcaps or scrap metal, painted houses, rock gardens and whimsical fences. These are often the life work of one person. Photograph them with care and respect, and ask the maker if they are home, since they often have wonderful stories to share. Show both the overall scene and the small details that reveal the maker’s imagination.
Attractions at night
- Neon and lights. Many attractions and their signs glow after dark.
- Blue hour. Shoot soon after sunset, when the sky is deep blue and lights balance.
- Stars. In the countryside, a giant sculpture under a starry sky looks surreal.
- Tripod. Long exposures keep colors clean and noise low.
Check whether the site is open and safe at night, and stay on public ground. The guide to neon sign photography covers glowing signs in detail.
Love the glow of old signs at dusk? The guide to motel photography covers vintage signs, pools and road trip nostalgia.
Settings and lenses
- Wide lens. Close, dramatic views and tight spaces.
- Standard lens. Natural views with the setting.
- Telephoto lens. Distant attractions, details and compressed views with the town behind.
- Aperture. f/8 for sharp scenes, wider for portraits with soft backgrounds.
- Shutter speed. Hand held in daylight, tripod at night.
- ISO. Low in daylight, higher at dusk.
Using a phone
Phones are perfect for roadside stops. Use the ultra wide lens for giant objects up close, tap on the sky to keep it from turning white and try portrait mode for friends posing in front. Night mode handles glowing signs well. Keep the phone level to stop buildings and signs from leaning.
Editing roadside photos
Straighten horizons and verticals first. Lower highlights to save bright skies and white surfaces, and lift shadows on the shaded side. Keep bright colors cheerful but believable. A gentle warm tone suits nostalgic scenes, and black and white can give vintage attractions a classic feel.
Common mistakes
- No sense of scale. Include people, cars or buildings.
- Cluttered backgrounds. Move until the attraction stands against the sky or a clean setting.
- Harsh glare. Avoid midday sun on shiny surfaces, or use soft light.
- Only one view. Try wide, close, detail and setting pictures.
- Mocking the subject. Celebrate rather than ridicule.
- Trespassing. Respect private yards and posted signs.
Try this: a 10-minute roadside stop
On your next drive, stop at one quirky landmark and make five pictures in ten minutes.
- A wide view showing the attraction in its setting.
- A low angle view that makes it loom against the sky.
- A picture with a friend or familiar object for scale.
- A close detail of craft, paint or signage.
- One playful or humorous picture.
Back home, read up on the attraction’s history and write a short caption for your favorite frame.
Frequently asked questions
How do I show how big a roadside attraction is?
Include a person, car, house or other familiar object near it, and step back to show the setting.
When is the best time to photograph roadside attractions?
Golden hour for warm color, early morning for fewer visitors and blue hour for lit signs.
What lens is best for giant sculptures?
A wide lens for dramatic close views, and a standard or telephoto lens for natural proportions.
Can I photograph folk art in someone’s yard?
From the road, usually yes. Ask the owner before entering, and be respectful of their home.
How do I make roadside photos funny without being unkind?
Use playful poses and juxtaposition that celebrate the attraction rather than mock it.
Curious about the stations and stops along old highways? The guide to gas station photography covers pumps, canopies and roadside light.
Want to see more giant figures and carvings? The guide to statue and sculpture photography covers form, light and scale.
For terms such as juxtaposition, forced perspective and blue hour, see the photography glossary.