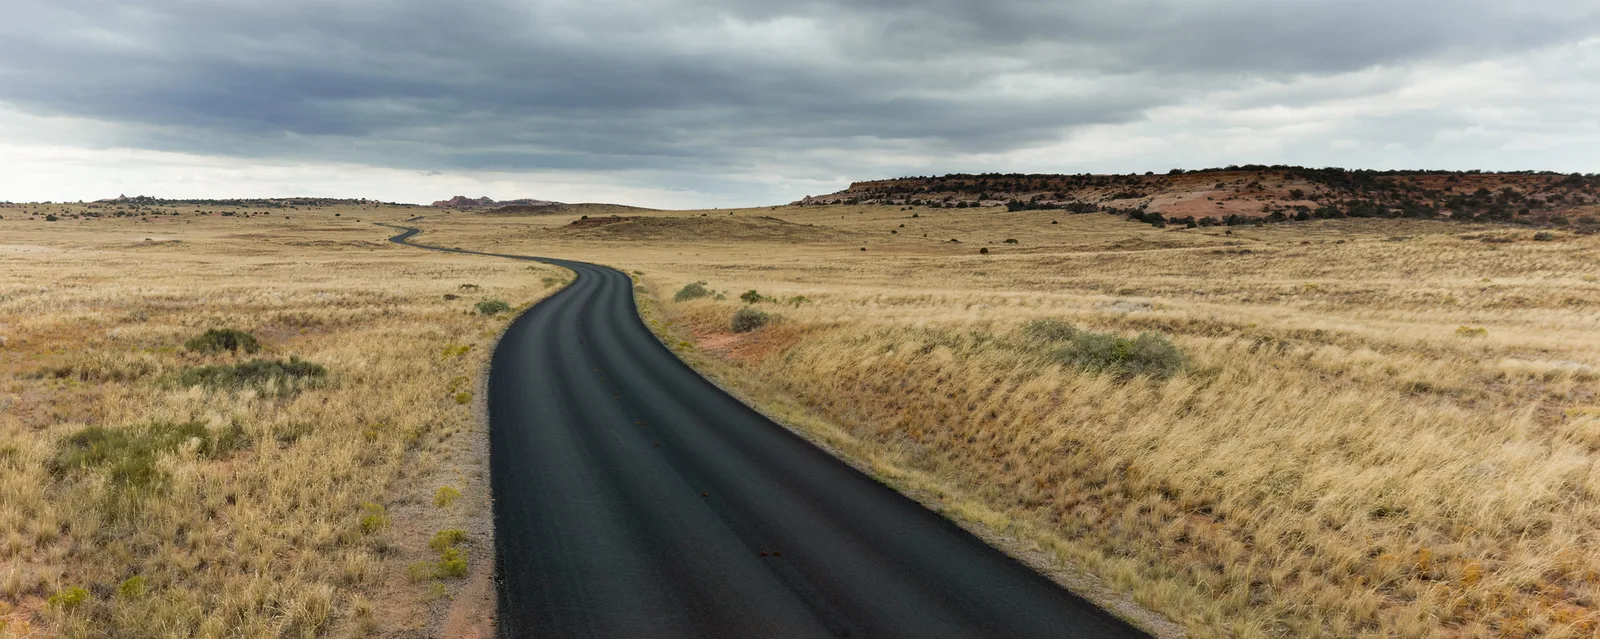
A road trip is a story that unfolds one mile at a time: empty highways, sudden views, small towns, roadside oddities, motel signs and long evenings in new places. It is one of the best ways to grow as a photographer, because every day brings different light and subjects you could never plan in advance. The challenge is to slow down enough to see them and to stop safely when you do.
This guide covers planning a route around good light, keeping your camera ready in the car, shooting safely on and beside the road, the many subjects a journey offers and how to turn a trip into a set of pictures that tells a story. For general advice on photographing new places, the travel photography guide is a good companion.
Plan the drive around the light
Most road trips are planned around distance: how far to drive each day and where to sleep. Photographers get better pictures when they plan around light instead. The same view can be dull at noon and unforgettable an hour before sunset.
- Drive in the middle of the day. Hard midday light is the least useful for landscapes, so it is the natural time to cover ground.
- Stop for the first and last hours of sun. Try to be somewhere worth photographing at sunrise and sunset, rather than on a highway. The golden hour guide explains why those hours matter so much.
- Look at the direction of travel. Driving west in the evening puts the sun in your eyes; driving east puts it behind you, lighting the scene ahead. Plan scenic stretches so the light falls on what you will see.
- Leave room for detours. Some of the best pictures come from side roads and unexpected stops. A day packed with miles leaves no time to turn around for something you glimpsed.
- Check sunrise and sunset times for each place you will be. They shift as you travel, especially north and south, and they change through the year.
A simple rule helps: if you would not want to be driving through a place at noon, plan to arrive there early or late. Scenic drives through mountains, canyons and coasts are worth timing for good light.
Keep the camera ready
On a road trip, the moments you want to capture are often brief: a herd of animals, a storm over the plains, a beam of light through clouds. A camera packed in the trunk will miss them.
- Keep the camera within reach of the passenger, with a lens fitted that covers most situations, such as a standard zoom.
- Use a small bag on the floor or seat, not a large pack. Wedge it so it cannot fly forward in a sudden stop.
- Charge everything every night. Batteries, phones and power banks. A car charger or a small power bank keeps you going on long days. The guide to camera batteries covers spares and charging.
- Back up as you go. Copy each day’s pictures to a second card, a laptop or cloud storage. A lost or broken card should never cost you the whole trip. The photo backup guide explains simple ways to do it.
- Protect gear from heat. Never leave cameras in a parked car on a warm day. Take them with you, even for a short stop. The guide to photography in hot weather explains why.
Shooting safely from and beside the car
Road trip photography has one absolute rule: the driver drives. Never use a camera or phone while driving, even at a stop light. Pull over properly or hand the camera to a passenger.
Shooting from a moving car
Passengers can make good pictures through windows if they know the tricks.
- Use a fast shutter speed. Start at 1/1000 to freeze passing scenery. Things close to the road move fastest, so frame farther-off subjects for sharper results.
- Shoot forward, not sideways. Scenes ahead move across the frame slowly. The view out of a side window races past.
- Press the lens close to the glass to cut reflections from the dashboard and interior, and avoid resting it on the glass, which transmits vibration.
- Take off a polarizing filter. It can produce rainbow patterns on car windows.
- Clean the windshield at every fuel stop. Bugs and dust that you never notice while driving will appear in every picture.
The guide to photographing through glass explains reflections and shutter speeds in more detail.
Stopping safely
- Use pullouts, viewpoints and parking areas. Do not stop on a narrow shoulder or a bend where other drivers cannot see you.
- Get well off the road before setting up. A tripod at the edge of a lane is dangerous for you and for drivers.
- Watch for traffic when crossing or standing near the road, especially on fast highways and at dusk.
- Respect private land. Fences and gates mean the land belongs to someone. Shoot from public places or ask permission.
Want to know how fast a shutter you need to freeze the view from a moving car? Photographing through glass has the numbers and the tricks for windows.
The road as a subject
On a road trip, the road itself is the main character. A strip of asphalt, a line of telephone poles, the curve of a highway into hills: these say journey more clearly than any landmark.
- Curves and bends. A road winding into the distance, like the one at the top of this page, leads the eye through the frame. Look for S-shaped curves from a slight rise.
- Straight roads to the horizon. A long, straight road meeting the sky makes a strong vanishing point. Stand safely at the side, never in the lane, and use a longer lens to stack the distance.
- Lines along the road. Center lines, fences, power poles and guardrails are all leading lines that pull the viewer into the scene.
- The car in the landscape. A car parked at a viewpoint or a tiny vehicle on a far road gives scale and a sense of travel.
- Weather on the road. Rain on asphalt, a storm ahead, fog lifting from a valley: weather turns an ordinary stretch into a mood.
A longer lens is surprisingly useful here. Zooming in on a distant road as it climbs a hill compresses the bends together and makes the hill look steeper. The page on lens compression explains why.
Landscapes along the way
Many road trips pass through landscapes you will never see again. It is tempting to shoot every view from the car park, but a short walk often makes a big difference.
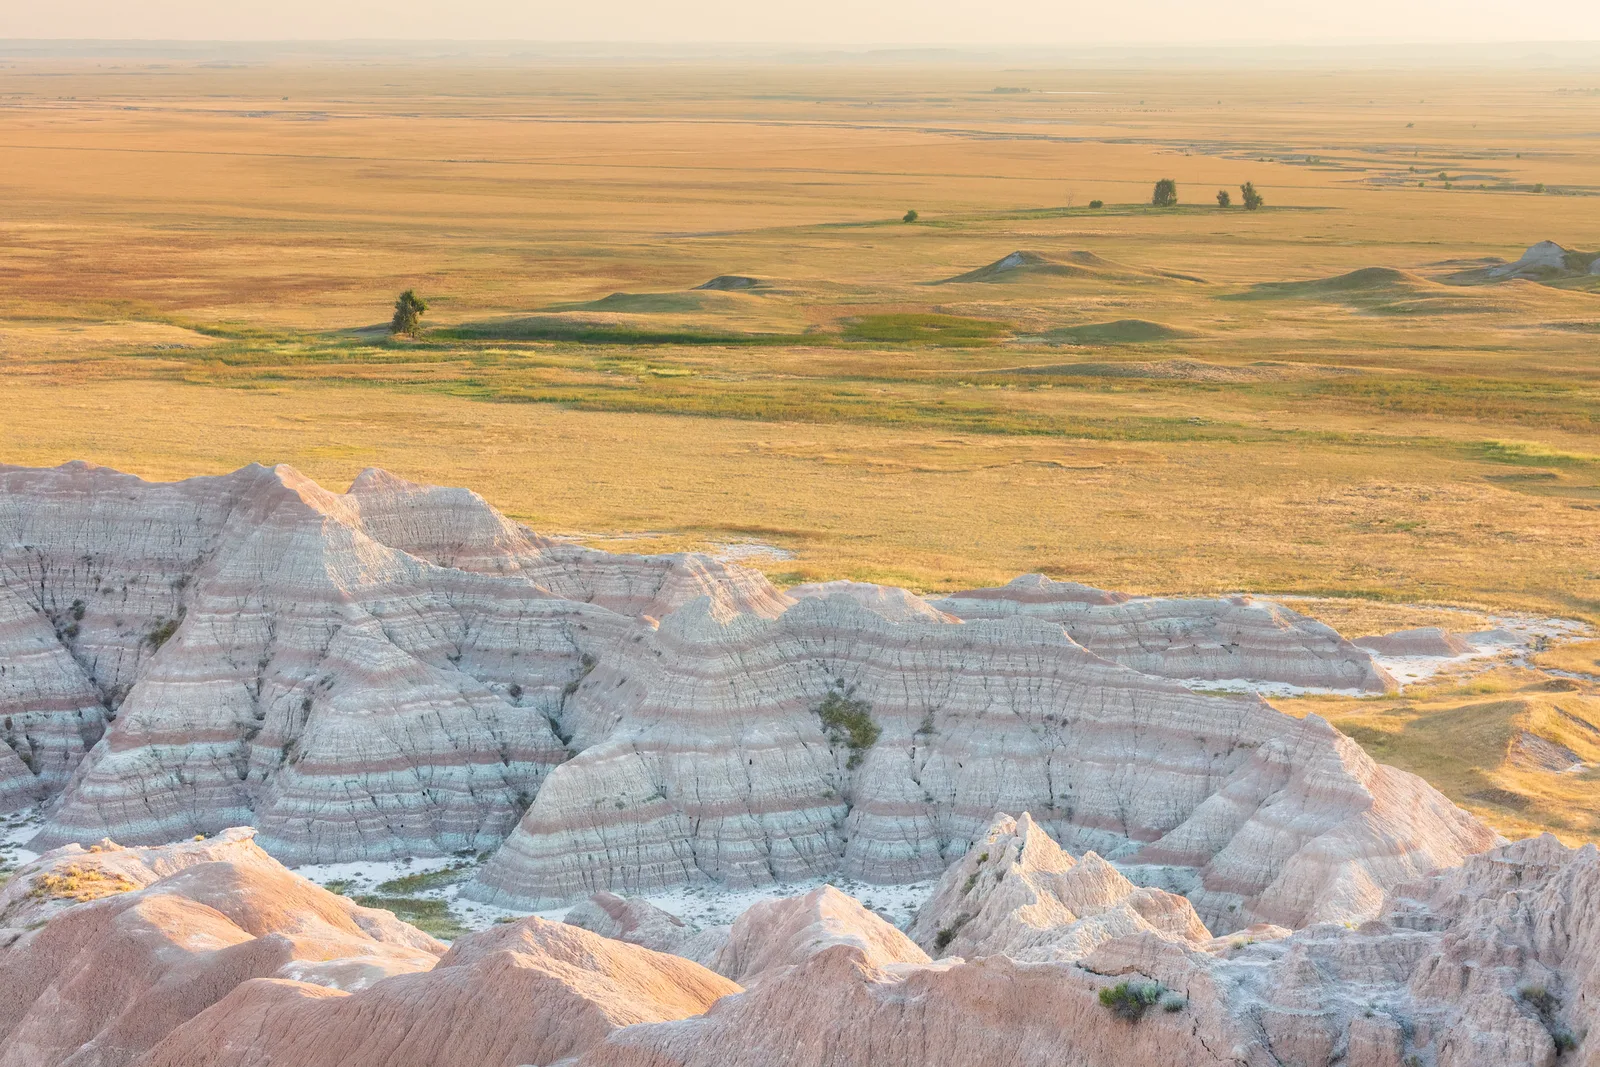
- Walk a few minutes from the viewpoint. The edge of a car park rarely has the best foreground. A few hundred steps along a trail can give you rocks, plants or ridges to put in front of the view, as in the second photo on this page.
- Look for foreground. A near object gives the picture depth. The guide to foreground interest explains how to find one.
- Use the weather you get. You cannot wait days for perfect light on a road trip. Clouds, rain and haze all make pictures if you work with them.
- Photograph the in-between. Long stretches between famous places, such as plains, farmland and empty desert, are part of the journey. Some of the most evocative pictures come from places with no name.
Towns, signs and roadside details
A road trip is more than scenery. Small towns, diners, gas stations, motels, painted signs and odd roadside attractions all tell you where you are. These subjects work in any light, which makes them ideal for the middle of the day when landscapes look flat.
- Main streets. Look for storefronts, old banks, water towers and murals. Early morning, before traffic, is often the calmest time.
- Signs and lettering. Vintage motel signs, hand-painted billboards and town welcome signs are full of character.
- Food and stops. A plate at a roadside diner, a fuel pump, a vending machine at a rest area: small, everyday details make a trip feel real.
- Roadside oddities. Giant statues, unusual buildings and local landmarks are part of road trip culture. Include enough surroundings to show the setting.
Respect people’s privacy and property. Ask before photographing people up close, and be friendly if someone asks what you are doing. The guide to sense of place covers how details like these show where you are.
Wildlife and weather along the route
Animals by the road and sudden changes in weather are two of the great surprises of a long drive. Both appear without warning and both reward a camera that is ready.
- Stay in the car for wildlife. Large animals near the road are often more relaxed around a parked vehicle than a person on foot. Pull fully off the road, turn off the engine to cut vibration, and shoot through the open window.
- Keep your distance. Never approach or feed animals, and never block traffic to watch them. A longer lens lets you fill the frame from a respectful distance.
- Watch the sky ahead. On open plains you can see storms coming from far away. Pull over somewhere safe and photograph the clouds before they arrive, then move on before the weather reaches you.
- Use fog and rain. Mist in a valley at dawn or wet asphalt shining under a gray sky can be more memorable than a clear day. The guide to fog photography explains how to expose for it.
- Think about scale. A tiny car or animal in a vast landscape tells the viewer how big the place really is.
Hoping to photograph animals you meet along the way? The guide to wildlife photography covers lenses, settings and fieldcraft.
Night on the road
Evenings and nights are some of the most rewarding times on a road trip. Many routes pass through places far from city lights, where the night sky is spectacular.
- Light trails. From a safe spot well away from the traffic, a long exposure turns passing headlights and taillights into streaks of color. The guide to light trails covers settings and timing.
- Stars over open country. Remote roads and campgrounds can have very dark skies. Find a foreground before dark and come back with a tripod. The guide on how to photograph stars explains settings and focus.
- Lit signs and motels. Neon and lit signs glow at dusk, when there is still some color in the sky.
Never set up a tripod on or beside a road at night. Drivers do not expect people there, and dark clothing is almost invisible. Use parking areas, viewpoints and campgrounds.
Photographing your companions and yourself
Years later, the pictures of people on the trip often mean more than the landscapes. Include your companions doing ordinary things: reading a map, stretching at a viewpoint, laughing over dinner. Candid moments say more than lined-up poses in front of a sign.
If you are traveling alone, a small tripod and the camera’s self-timer or a remote let you appear in your own pictures. Stand small in a big landscape, walking along a road edge or sitting on a rock, to show the scale of the place. The guide to taking travel photos of yourself has more ideas.
Telling the story of the trip
A road trip is a natural story with a beginning, a middle and an end. Thinking of your pictures as a set, rather than a pile of separate shots, makes them far more engaging to look back on and to share.
- Opening: leaving home, packing the car, the first stretch of highway.
- Wide views: the big landscapes that define each region.
- Details: signs, food, maps, motel keys, dusty boots.
- People: companions, locals you meet with permission, yourself.
- The road: pictures that show movement and distance between places.
- Ending: the last sunset, the car unpacked, the odometer.
Make a short edit of your best twenty or thirty pictures when you get home. Choose ones that show different things, rather than ten versions of the same view. The guide to visual storytelling explains how pictures work together, and editing them with a consistent look helps them feel like one set; see consistent photo editing.
Want to turn the trip into a set of pictures that reads like a story? How to create a photo essay explains how to sequence and edit a series.
Common mistakes
- Driving through the best light. Sunrise and sunset happen on the highway. Fix: plan to be at a scenic spot for the first and last hours of sun.
- Stopping unsafely. Pulling onto a narrow shoulder for a quick shot. Fix: use pullouts and parking areas, and get well away from the traffic.
- Every picture from the car park. The same view as everyone else, with no foreground. Fix: walk a few minutes from the viewpoint.
- Blurry window shots. Shutter too slow. Fix: use 1/1000 or faster and frame subjects farther from the road.
- Only landscapes. The pictures show places but not the journey. Fix: add signs, food, the car, the road and people.
- Losing the pictures. A single card holds the whole trip. Fix: back up every evening.
Try this: a 10-minute rest stop challenge
At your next fuel or rest stop, give yourself ten minutes and a single lens.
- Minutes 1 to 3: Photograph three details that tell you where you are: a sign, a texture, something for sale.
- Minutes 4 to 6: Find one leading line, such as a fence, curb or road marking, and make a frame that uses it.
- Minutes 7 to 8: Make one picture of your car or companions in the setting.
- Minutes 9 to 10: Step back and make one wide frame that shows the whole place.
Do this at every stop and by the end of the trip you will have a collection of pictures that records the journey, not just the destinations.
Frequently asked questions
What camera settings should I use from a moving car?
Use 1/1000 or faster, a moderate aperture such as f/5.6 to f/8 and auto ISO. Shoot forward rather than sideways, and press the lens close to the glass to cut reflections.
What lens is best for a road trip?
A standard zoom covers most situations. A longer zoom helps with distant roads and wildlife, and a wide lens helps with big landscapes and interiors. If you carry one lens, make it a versatile zoom.
How do I keep my photos safe on a long trip?
Back up every day to a second card, a laptop or cloud storage, and keep copies in different bags.
How do I photograph a road safely?
Stand well off the road in a pullout or on a verge with good visibility, never in a lane. Use a longer lens so you do not need to stand close to traffic.
Can I make good road trip photos with a phone?
Yes. Phones are quick to pull out, which suits road trips. Clean the lens often, tap to set exposure on bright skies, and use the zoom for distant roads.
For terms such as vanishing point, leading lines, lens compression and golden hour, see the photography glossary.