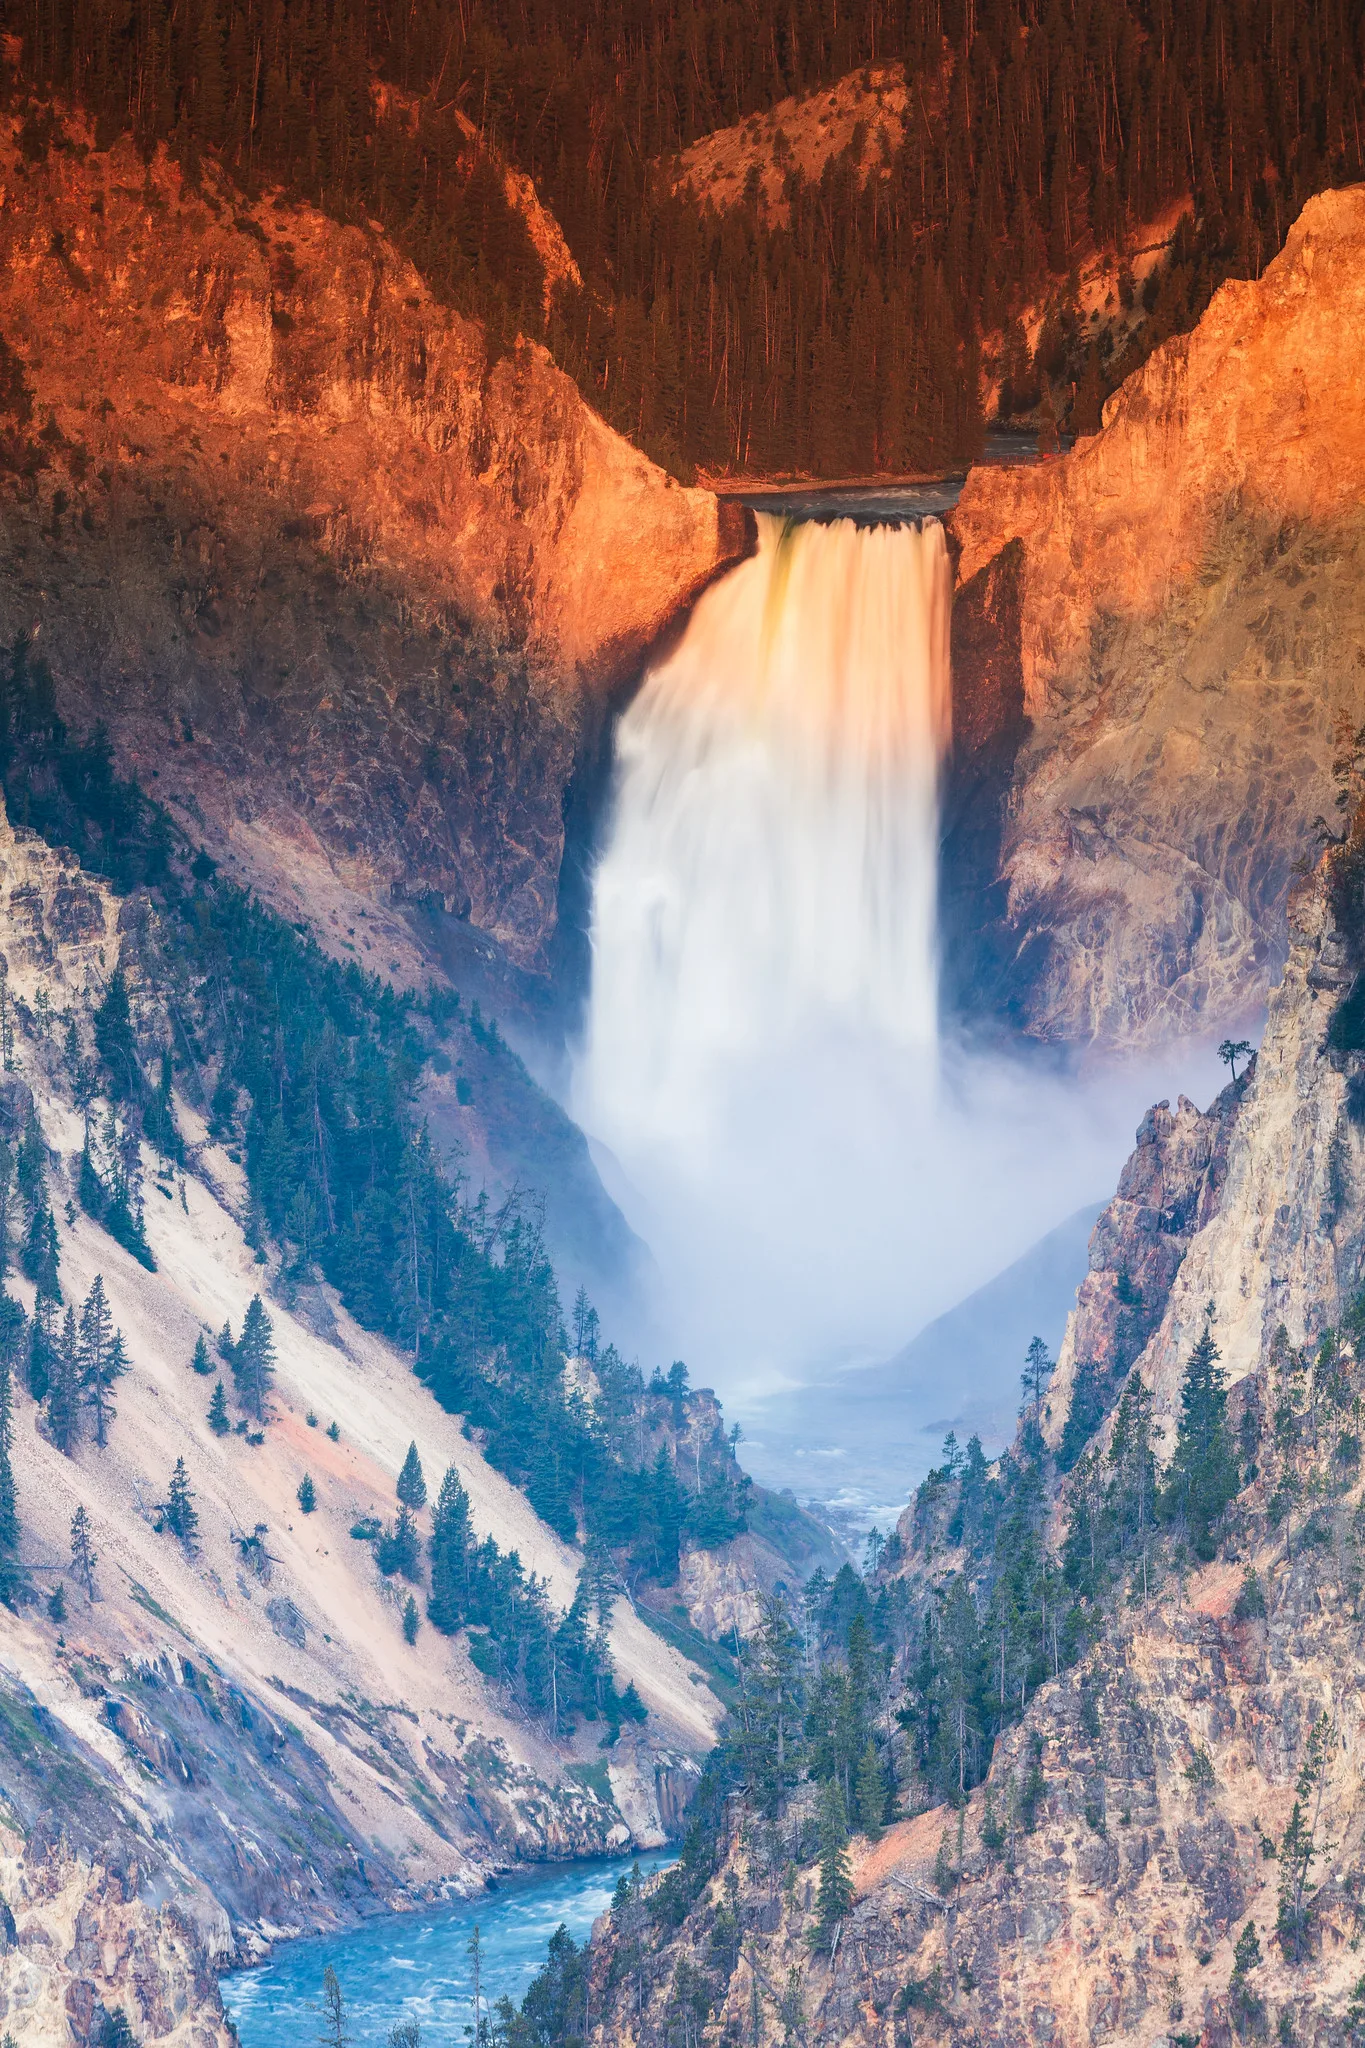
Choose a vertical photo when your subject is tall or standing, such as a person, a waterfall, a tree or a doorway, or when the photo will be seen on a phone screen. Choose a horizontal photo when your subject is wide or spread out, such as a landscape, a group of people, a street or anything moving sideways, or when it will be seen on a computer, TV or in a slideshow. When you are not sure, take both. It only costs a second, and the better one is often the one you did not expect.
Turning the camera on its side is one of the simplest decisions in photography, and one of the most overlooked. Many beginners hold the camera horizontally all the time because that is how it sits in the hand, and hold the phone vertically all the time for the same reason. Simply asking “which way round?” before each shot will make your photos stronger.
This page explains the words photographers use, how each orientation changes the feel of a photo, which suits common subjects, how the final screen or print affects the choice, and how to practice.
The words: orientation, portrait and landscape
Orientation simply means which way the frame is turned.
- Horizontal, also called landscape orientation: the frame is wider than it is tall.
- Vertical, also called portrait orientation: the frame is taller than it is wide.
- Square: the same width and height.
The names “portrait” and “landscape” come from painting, where portraits of people were usually tall and paintings of scenery were usually wide. They are only names. You can take a wonderful horizontal portrait of a person, and many great landscapes are vertical.
The shape of the frame is described by its aspect ratio, the relationship between its width and height, such as 3:2 or 4:3. Turning the camera keeps the same aspect ratio but swaps the long and short sides.
How each orientation feels
The shape of a photo changes how the eye moves through it, and so how it feels.
Horizontal photos
Human eyes sit side by side, so a wide frame feels natural. People tend to read a horizontal photo from side to side, which gives it a calm, stable, open feeling. Horizontal frames are good at showing:
- Width and space, like a wide valley, a beach or a skyline.
- Relationships between several things side by side, such as two people talking or a dog chasing a ball.
- Movement across the frame, like a runner, a car or a bird in flight, with space in front of the subject to move into.
- Context, where the surroundings help tell the story.
Vertical photos
A tall frame makes the eye move up and down. It feels more energetic and focused, and it emphasizes height. Vertical frames are good at showing:
- Height, like a waterfall, a tall tree, a lighthouse or a tower.
- A single subject, especially a standing person, because the frame wraps around them and cuts out distractions on the sides.
- Depth from front to back, like a path or a river leading from the bottom of the frame into the distance.
- Layers, such as a flower in front, a field in the middle and mountains behind.
The waterfall at the top of this page is a good example. Shot horizontally, the falls would be a narrow strip in the middle, with lots of canyon wall on each side. Turned vertically, the water runs from top to bottom and the height is the whole story.
Which orientation for common subjects
These are starting points, not rules. Treat them as the first version to try.
| Subject | Usually try first | Why |
|---|---|---|
| One person, full length or half length | Vertical | The frame matches the shape of a standing person. |
| Head and shoulders portrait | Vertical | Less empty space on each side of the face. |
| Two or more people | Horizontal | People stand side by side. |
| Wide landscape or beach | Horizontal | Shows the width of the scene. |
| Landscape with a strong foreground | Vertical | Room for the foreground and the distance. |
| Waterfall, tree, tower | Vertical | Emphasizes height. |
| Street scene | Horizontal | Shows people and their surroundings. |
| Doorway, window, staircase | Vertical | Matches the shape of the subject. |
| Sports and moving subjects | Horizontal | Space for the subject to move into. |
| Food on a table | Either | Vertical for one plate, horizontal for a spread. |
| Pets | Either | Vertical for a sitting dog or cat, horizontal for one lying down or running. |
Photographing people and not sure how much of them to include? Portrait photography covers framing, posing and light for beginners.
Where the photo will be seen
The screen or print your photo ends up on matters as much as the subject.
Phones and social media
Most people hold their phones upright, so vertical photos fill more of the screen. On social apps that show photos in a feed, a vertical photo takes up more space as people scroll, so it gets more attention. Many apps crop very tall photos to a slightly shorter shape, so leave some room at the top and bottom. The page on social media photo sizes lists the shapes most apps use.
Stories, reels and short videos are full-screen vertical. If you shoot for them, shoot vertically from the start. The guide on shooting vertical video for social media covers framing for those formats.
Computers, TVs and slideshows
Computer screens, laptops, TVs and projectors are wide. A horizontal photo fills them; a vertical photo appears as a narrow strip with black bars on each side. If you are making a slideshow for a party or a presentation, shoot mostly horizontally.
Prints, books and walls
For a single print, either works; choose the one that suits the subject and the wall. For photo books, think about the page: a vertical photo fills one page, while a horizontal photo can spread across two. For a set of frames on a wall, a mix of both can look lively, while all the same orientation looks calm and orderly.
How to turn the camera properly
Turning the camera vertically changes how you hold it, and it is easy to get a little wobble or a tilted horizon.
- Turn the grip up. With most cameras, rotate so the hand grip and shutter button are at the top. Your right hand then holds the top of the camera and your left hand supports it from underneath, with your elbow tucked against your body.
- Keep elbows in. A raised elbow sticking out to the side is less steady. Tuck it down if you can. The guide on how to hold your camera shows both grips.
- Check the horizon. Vertical photos make a crooked horizon more obvious. Use the grid or level. See horizons in photography.
- On a tripod, flip the head sideways or use an L-shaped bracket that lets the camera sit vertically over the center of the tripod. See how to use a tripod.
- On a phone, just turn it. Keep your fingers clear of the lens, which moves to a corner when you rotate.

Breaking the obvious choice
Sometimes the most interesting photo comes from going against the shape of the subject.
- Tall subjects, wide frame. The palm tree street above is full of tall trees, but the horizontal frame shows the whole row repeating along the road. The pattern became the subject, not a single tree.
- Wide subjects, tall frame. A vertical frame of a wide beach, with a lot of sky above, can make the space feel vast and empty. It works well with negative space, the empty area around a subject.
- A person in a horizontal frame. Placing someone to one side, with their surroundings beside them, tells the viewer where they are. It is called an environmental portrait.
- Square. A square frame feels balanced and still. It suits centered subjects, patterns and symmetrical scenes. Many cameras and phones can shoot square, or you can crop afterward.
- Panoramic. A very wide, thin frame for sweeping views. Phones have a panorama mode, and cameras can stitch several photos together. See panorama.
Composition tips that change with orientation
The basic rules of composition still apply when you turn the camera, but they work a little differently.
- Thirds: the grid turns with you. In a vertical frame, the horizontal lines are higher and lower, which gives a lot of room for sky or foreground. See the rule of thirds.
- Leading lines: a path, river or fence that runs from the bottom of the frame into the distance often works best vertically, because there is more length for the line to travel. See leading lines.
- Room to move: a horizontal frame gives a moving subject space to move into. Leave more space in front of it than behind. This is called the rule of space.
- Filling the frame: matching the frame to the shape of the subject lets you get it bigger in the photo. A standing person in a vertical frame can be twice the size of the same person in a horizontal one. See fill the frame.
Can I just crop it later?
You can, but you lose a lot. To turn a horizontal photo into a vertical one, you have to cut away well over half of the picture. That leaves a much smaller, lower quality image that may look soft when printed or seen on a big screen. Cropping a little is fine. Cropping from one orientation to the other is a last resort.
The one exception is when you deliberately shoot wide to give yourself options, for example with a phone in a fast-moving situation. Even then, turning the camera is almost always better.
A quick decision checklist
When you raise the camera, run through these four questions. With a little practice they take less than a second.
- What shape is my subject? Tall and narrow suggests vertical. Wide and low suggests horizontal.
- What is around it? If the sides of the scene are messy or boring, a vertical frame cuts them out. If the surroundings help tell the story, a horizontal frame keeps them in.
- Which way is it moving or looking? A subject moving or looking sideways needs space on that side, which a horizontal frame gives easily.
- Where will it be seen? Phone feed: lean vertical. Slideshow, TV or website banner: lean horizontal.
If two answers point one way and two point the other, take both and decide later.
Orientation on trips and at events
Travel and events are where beginners most often wish they had shot the other way. A few simple habits help:
- Shoot each important scene both ways. A famous building, a viewpoint or a special moment deserves a horizontal and a vertical version.
- Think about the album. If you plan a photo book or slideshow, a mix of wide establishing shots and tall detail shots makes it far more interesting to flip through.
- Use vertical for details. Signs, doors, market stalls, plates of food and people at work often look best tall and close.
- Use horizontal to set the scene. A wide street, a harbor or a crowd tells the viewer where you were. The guide on street photography has more ideas for scenes like these.
A good habit on any outing is to look back at your photos at lunchtime. If almost all of them are the same orientation, spend the afternoon deliberately shooting the other way.
Common mistakes
- Never turning the camera. Many beginners take every photo horizontally with a camera, or vertically with a phone. Ask “which way?” every time.
- A standing person tiny in a wide frame. Turn the camera vertically and step closer.
- A group cramped in a tall frame. Turn horizontally so everyone fits without cutting anyone off.
- A crooked vertical. Vertical frames show tilt easily. Use the grid or level.
- Ignoring where the photo will be seen. A vertical slideshow photo shows up small with black bars; a horizontal photo is small in a phone feed.
- Cropping from horizontal to vertical afterward. It throws away most of the picture. Turn the camera when you shoot instead.
Try this: a 10-minute both-ways walk
This is one of the quickest ways to train your eye.
- Minutes 1 to 6: Walk around your home, garden or street. Find six subjects. Photograph each one twice: once horizontally, once vertically. Move your feet or zoom so that each version is well framed, not just a turned copy.
- Minutes 7 to 8: Look at each pair side by side. For each one, pick the winner and say out loud why: “taller”, “shows more space”, “less clutter on the sides”.
- Minutes 9 to 10: Count how many winners were the orientation you would normally have used. Many people find that about half of the winners surprise them.
Frequently asked questions
Should photos be vertical or horizontal?
It depends on the subject and where the photo will be seen. Tall subjects and phone screens suit vertical; wide subjects and computer or TV screens suit horizontal.
What is the difference between portrait and landscape orientation?
Portrait orientation is a tall, vertical frame. Landscape orientation is a wide, horizontal frame. The names come from painting and do not limit what you can photograph.
Are vertical photos better for social media?
Usually, yes. Vertical photos fill more of a phone screen in feeds. Check the app’s preferred shape and leave a little room at the top and bottom in case it crops.
How do I hold my camera vertically?
Turn it so the shutter button is at the top, support the camera from below with your left hand, and keep your elbows close to your body.
Can I make a horizontal photo vertical in editing?
Only by cropping away most of it, which lowers the quality. It is much better to turn the camera when you take the shot.
Which orientation is best for printing?
Either. Choose the one that suits the subject, the frame and the wall. A mix of both looks lively on a gallery wall.
Why do my vertical phone photos look sideways on my computer?
The phone saves a small note in the file that says which way up it is. Some older programs ignore that note. Rotate the photo in your editing app and save it again, and it will display correctly everywhere.
Now that the frame is the right shape, what goes inside it? Composition covers the main ways to arrange a photo.