Food photography makes people hungry. That is its power and its purpose: to capture a dish so vividly that viewers can almost taste it through the screen. Whether you are shooting for a restaurant menu, a food blog, a cookbook, or social media, the principles are the same: beautiful light, thoughtful styling, and camera settings that capture every glistening detail. This guide covers everything from the overhead flat lay to the moody restaurant shot.
Introduction to Food Photography
Food photography is deceptively challenging. The dish itself might look stunning to the naked eye, but translating that three-dimensional, aromatic, steaming reality into a compelling two-dimensional image requires a distinct set of skills. You need to understand light, composition, color theory, and food styling, often working against a ticking clock as your subject wilts, melts, and loses its visual appeal minute by minute.
Unlike most photography genres, food photography gives you almost complete control over your scene. You choose the background, the props, the angle, the lighting, and even the arrangement of every element on the plate. This control is both an advantage and a responsibility: there is no excuse for a poorly composed food image when you can adjust every variable. The flip side is that this control means food photography is an excellent genre for learning foundational photography skills because you can isolate and practice one variable at a time.
This guide covers essential techniques for every style of food photography, from bright and airy to dark and moody. You will learn camera settings for natural and artificial light, composition strategies, lighting setups, common mistakes to avoid, post-processing tips, and practical exercises to develop your eye.
Essential Food Photography Techniques
1. Choosing Your Angle
Every dish has a best angle, the perspective that shows its defining features most effectively. Choosing the wrong angle wastes the food stylist’s effort and your own.
- Overhead (90 degrees) – Best for flat lays, pizza, salads, grain bowls, charcuterie boards, cookies, and any dish with interesting top-down patterns. Shows the arrangement and color palette of a full table
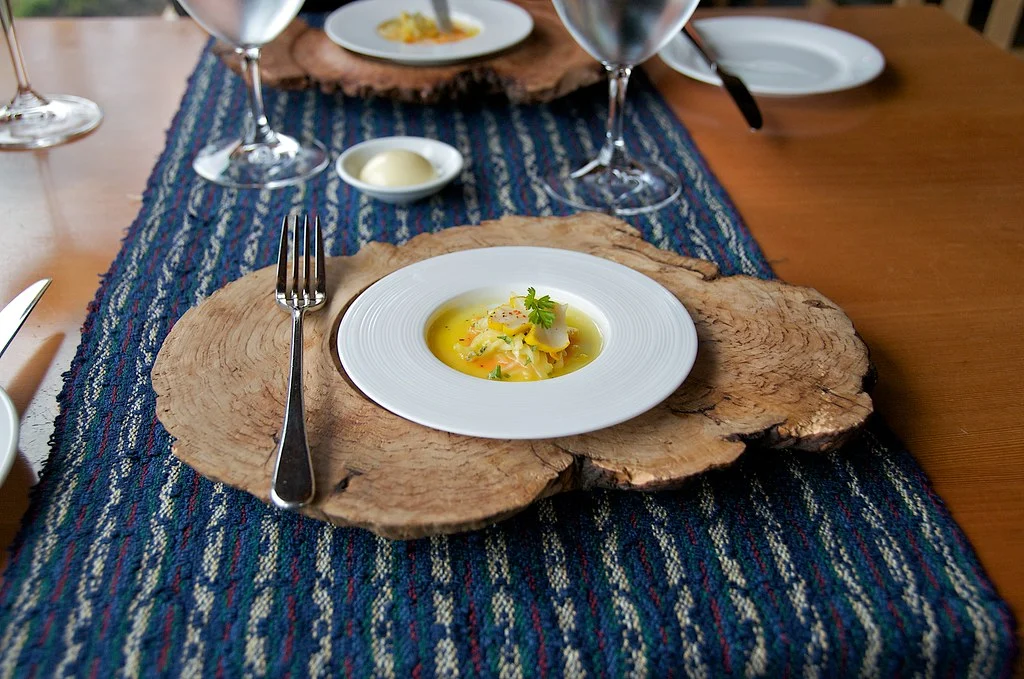
- 45 degrees – The most common and versatile food angle. Best for burgers, sandwiches, pasta, soup, drinks, and layered dishes. Shows both the top surface and the cross-section or height
- Straight-on (0 degrees) – Best for stacked pancakes, layered cakes, tall drinks, burgers, and anything where height is the hero. Creates a dramatic sense of scale
- Low angle (below 45 degrees) – Adds drama and emphasizes height. Good for drinks, bottles, and tall desserts
2. Food Styling Basics
Food styling is the art of making food look its most photogenic without misrepresenting it. You do not need a professional food stylist to start; you need attention to detail and a pair of tweezers.
- Undercook slightly – Food continues to wilt, melt, and lose its structure under lights. Cook vegetables to 80% doneness so they retain their color and shape
- Build height – Mound food toward the center. Use hidden supports (toothpicks, ramekins underneath) to create lift. Flat food looks dead; height conveys freshness and abundance
- Garnish with purpose – A sprig of herbs, a crack of pepper, a drizzle of oil, a scattering of sea salt flakes. Each garnish should complement the dish both visually and culinarily
- Sauce and liquid last – Drizzle sauces, add dressings, and pour drinks immediately before shooting. Liquids soak in, pools settle, and fizz flattens in minutes
- Spray with water – A fine mist of water mixed with glycerin gives vegetables and fruits a fresh, dewy appearance that lasts longer than plain water
- Use odd numbers – Three tacos, five cookies, seven shrimp. Odd numbers create visual balance and feel more natural than even groupings
3. Props and Surfaces
The props and surfaces in your frame tell the story of the meal. They establish mood, season, cuisine, and context without a single word.
- Surfaces – Collect a variety of backgrounds: weathered wood boards, marble slabs, dark slate, linen tablecloths, ceramic tiles, baking sheets, and concrete. Two to three versatile surfaces cover most food photography needs
- Props – Vintage cutlery, cloth napkins, handmade ceramics, cutting boards, cast iron pans, glass bottles, and fresh ingredients (whole lemons, herb bunches, scattered flour). Keep props supporting, never competing with the hero dish
- Color palette – Choose props that complement the food’s colors. Warm-toned food (roasted chicken, bread, pasta) sings against cool, muted backgrounds. Bright, colorful food (salads, smoothie bowls) pops against neutral surfaces
- Negative space – Leave breathing room in the frame. Not every inch needs to be filled. Empty table space draws the eye to the hero dish
4. Color Theory for Food
Color is one of the most powerful tools in food photography, and understanding basic color theory helps you create images that feel harmonious and appetizing.
- Complementary colors – Colors opposite each other on the color wheel create visual pop. Red tomatoes on a green salad. Orange carrots on a blue plate. Use complementary contrasts to make the hero element jump out
- Analogous colors – Colors next to each other on the wheel create a cohesive, harmonious mood. Warm-toned scenes (red, orange, yellow) feel comforting and rustic. Cool-toned scenes (green, blue, purple) feel fresh and modern
- Avoid competing colors – If the dish is the star, the background and props should support it in muted, neutral tones. A bright red plate under a tomato-sauced pasta competes rather than complements
- White and neutral – White plates are the industry standard because they let the food’s own colors shine without competition
5. Hero Shots vs. Process Shots
A complete food photography story includes both the finished dish (hero shot) and the process of making it (process shots).
- Hero shot – The final, styled, garnished dish in its best light. This is the magazine cover, the menu image, the recipe card thumbnail. It needs to be flawless
- Process shots – Hands kneading dough, a whisk in a bowl of batter, vegetables being chopped, a pan sizzling on a stove. These add narrative, movement, and human connection to the story
- Action shots – Pouring, drizzling, sprinkling, slicing. Use a fast shutter speed (1/500s or faster) to freeze mid-pour shots, or a slower speed for intentional motion blur in the falling element
- Ingredient shots – Beautiful arrangements of raw ingredients before cooking. These work well as recipe post headers and establish the “before” story
6. Creating Steam and Freshness
Steam signals hot, fresh food. Without it, a bowl of soup looks lukewarm and uninviting.
- Hidden steam source – Place a microwaved wet cotton ball or sponge behind the dish, hidden from camera. The steam rises naturally for 30-60 seconds
- Shoot immediately – Real steam from genuinely hot food is the most convincing. Have everything composed and styled before the food arrives from the kitchen, then shoot in the first 90 seconds
- Backlight steam – Steam is only visible when side-lit or backlit. If your main light is behind the dish, steam becomes a beautiful, wispy element. Front-lit steam is invisible
Camera Settings for Food Photography
Natural Window Light (The Standard)
The vast majority of professional food photography is shot with natural window light, modified with diffusers and reflectors. It is free, beautiful, and endlessly versatile.
- Mode: Manual or Aperture Priority
- Aperture: f/2.8 to f/5.6 for hero shots with selective focus. f/8 to f/11 for flat lays where you want edge-to-edge sharpness
- ISO: 100-400 on a tripod for maximum image quality
- Shutter Speed: Whatever the exposure requires. On a tripod, you can go as slow as needed. 1/60s minimum for handheld
- White Balance: Daylight or custom. Accurate white balance is critical for food because a warm color cast makes white plates look yellow, and a cool cast makes food look unappetizing
- Focus: Manual focus on the hero element, such as the peak of a burger, the drizzle of sauce, or the crisp edge of a cookie
Artificial Light Setup
When natural light is not available (commercial kitchens, evening shoots, or consistency across a multi-day shoot), a single strobe or continuous light replaces the window.
- Aperture: f/5.6 to f/11
- ISO: 100
- Shutter Speed: Flash sync speed (1/200s) for strobe, or adjusted for continuous light
- Light source: One large softbox (3×4 feet or larger) positioned to the side at a 90-degree angle, elevated slightly above the food to mimic a large window
- Power: Low power for soft output. The larger and closer the light source, the softer the shadows
- Modifier: Grid on the softbox to control spill and keep the light directional
Restaurant and Low-Light Settings
Shooting in a dimly lit restaurant presents unique challenges: you cannot set up lights, you cannot rearrange the table, and the food arrives when the kitchen says it is ready.
- Aperture: f/1.8 to f/2.8, wide open to gather maximum light
- ISO: 1600-6400, depending on the restaurant’s ambient light
- Shutter Speed: 1/60s to 1/125s handheld
- White Balance: Custom or Kelvin setting. Restaurant lighting is often warm tungsten, and auto white balance struggles with mixed sources
- Use a window seat during daytime. Position the dish near the window and use a white napkin as a reflector on the shadow side
- No direct flash – Direct flash on food in a restaurant looks amateurish and annoys other diners. If you must add light, use a small LED panel at low power and warm color temperature
Composition Tips for Food Photography
- Rule of Thirds – Position the hero dish at an intersection point, with supporting elements filling the remaining space. The eye goes to the dish first, then explores the scene
- Leading Lines – Use cutlery, napkin folds, drizzled sauce, or the edge of a cutting board to point toward the hero dish
- Negative Space – Leave empty table surface to let the dish breathe. Crowded frames feel chaotic; breathing room feels intentional and editorial
- Triangular composition – Arrange three key elements (hero dish, supporting dish, and a prop) in a triangle for a naturally balanced, dynamic layout
- S-curve and C-curve – Arrange elements along a gentle curve for flow that guides the eye through the frame. Works especially well for flat-lay table scenes
- Golden Ratio – Place the hero dish along the golden spiral. The eye naturally follows the spiral inward, landing on the dish as the focal point
- Layering and depth – Include foreground elements (blurred fork tips, scattered crumbs) and background elements (a bottle of olive oil, a cutting board) to create three-dimensional depth
Lighting for Food Photography
Natural Light
A large north-facing window (or any window without direct sunlight) is the gold standard for food photography lighting. The light is soft, directional, and endlessly flattering to food.
- Side light – The most popular food lighting setup. Position the food 2-4 feet from the window with the light hitting from the side at a 90-degree angle. This creates highlight on one side and shadow on the other, revealing texture and dimension
- Backlight – Position the food between the window and the camera. Backlight creates rim light on the edges of dishes and glassware, makes translucent foods glow, and makes steam and smoke visible. Use a white reflector in front of the food (on camera side) to fill the shadows
- Diffusion – If direct sunlight streams through the window, hang a white curtain, diffusion panel, or even a white bedsheet to soften it. Food in direct sun develops harsh, ugly shadows and hot spots
- Black flag (negative fill) – Place a black foam board on the opposite side from the window to deepen shadows for a moody, dramatic look. This is the foundation of dark, editorial food photography
Artificial Light
- Single strobe with softbox – Mimics a window. A large softbox on a boom, positioned to the side and slightly behind the food, is the professional standard for controlled food photography
- Continuous LED panel – Lets you see exactly how the light falls before you shoot. Excellent for learning light placement and for video
- Avoid mixed sources – Turn off overhead kitchen lights when shooting with a strobe or window light. Mixed color temperatures create impossible white balance situations
Common Mistakes in Food Photography
- Using direct flash – Direct, on-axis flash flattens food, eliminates texture, and creates an unappealing look. Never use the pop-up flash for food
- Cluttered frames – Too many props, plates, and garnishes overwhelm the hero dish. If an element does not serve the story, remove it
- Wrong white balance – Yellow-tinted food images look unappetizing. Shoot a gray card at the start of each session and dial in white balance precisely
- Food sitting too long – Lettuce wilts, ice cream melts, sauces congeal, and cheese hardens within minutes. Style the set first with a stand-in plate, then swap in the real dish and shoot immediately
- Shooting from too far away – Get close to the food. Fill the frame with texture, color, and detail. A distant shot of a plate on a table looks like a snapshot, not a photograph
- Ignoring the plate rim – Drips, smears, and crumbs on the rim of the plate look careless. Clean the rim with a damp cloth before every shot
- Identical angles for every dish – Different foods have different best angles. Overhead is not always the answer. Consider the dish’s height, layers, and defining features before choosing your perspective
Post-Processing Tips for Food Photography
- White balance correction – The single most important post-processing step. Ensure whites are truly white and that overall color temperature makes the food look appetizing
- Clarity and texture – Boost clarity slightly (+10 to +25) to enhance food texture: the crust of bread, the grain of meat, the crystals of sugar
- Vibrance vs Saturation – Boost greens in salads and reds in tomatoes selectively without pushing skin tones (for hands-in-frame shots) into unnatural territory
- HSL adjustments – Fine-tune individual color channels. Push greens toward cyan for a fresh, modern food look. Warm yellows and oranges slightly for comfort food
- Consistent editing across a series – For recipe posts, cookbooks, or restaurant menus, maintain a consistent editing style across all images. Create and save presets for your food photography style
- Clean up in post – Remove distracting elements, clean up plate rims you missed during the shoot, and adjust specific colors to bring the image closer to how the dish actually looked
Try This: Practical Exercises
Exercise 1: One Dish, Three Angles
Prepare or order a single dish and photograph it from three different angles: overhead, 45 degrees, and straight-on. Compare the results and notice how each angle emphasizes different qualities of the same food. A stack of pancakes looks best straight-on, while a salad shines from overhead. Learning to instinctively choose the right angle for each dish is one of the most valuable skills in food photography.
Exercise 2: Light Direction Study
Place a single dish near a window and photograph it with light coming from the side, from behind, and from 45 degrees behind. For each position, take one shot with a white reflector filling the shadows and one without. This exercise teaches you how dramatically light direction changes the mood and texture of food images, and how fill (or the absence of it) controls contrast.
Exercise 3: Dark and Moody vs. Bright and Airy
Photograph the same subject in two completely different styles. For the bright, airy version, use a white background, white reflectors on all sides, and slight overexposure. For the dark, moody version, use a dark surface, a black flag to block fill light, and slight underexposure. This exercise demonstrates how props, surfaces, and light control create entirely different emotional responses to the same dish.
Exercise 4: Styling with Restraint
Start with a bare plate of food and photograph it. Then add one prop at a time (a napkin, a fork, a glass, a garnish, a second plate) and photograph after each addition. Review the series and identify the point where the scene went from “too empty” to “just right” to “too cluttered.” This exercise develops your sense of when to stop adding elements, which is the hardest discipline in food styling.
Building Your Food Photography Portfolio
- Cook and shoot at home – You do not need a client to create portfolio images. Cook what you love, style it with care, and photograph it in your best light
- Develop a recognizable style – Whether it is bright and airy, dark and moody, or rustic and natural, consistency in lighting, color palette, and mood helps clients and followers recognize your work instantly
- Offer test shoots – Approach local restaurants, bakeries, and cafes with an offer to photograph a few dishes in exchange for portfolio images and a credit. Many small businesses need better food photography and will eagerly accept
- Show variety – Include different cuisines, angles, lighting setups, and styling approaches. A burger, a sushi platter, a layer cake, and a cocktail demonstrate range
- Include process and lifestyle shots – Clients increasingly want more than just finished dishes. Show hands in frame, kitchen environments, and the human element of cooking
Related Resources
- Exposure – Master manual exposure for full creative control over your food images
- Aperture – Learn to control depth of field for selective focus on your hero dish
- White Balance – Accurate color is essential for appetizing food photography
- ISO – Balance image quality and light sensitivity for any shooting scenario
- Shutter Speed – Freeze action pours or use slower speeds for creative effect
- Bokeh – Create beautiful background blur to isolate your hero dish
- Composition – Apply fundamental composition rules to food styling
- Focal Length – How lens choice affects perspective and compression in food shots
- Macro Photography – For extreme close-up food texture details
- Photography Glossary – Quick reference for any term you encounter
Related Genre Hubs: Portrait Photography | Landscape Photography | Street Photography | Night Photography | Macro Photography | Wildlife Photography