To take good photos of yourself when travelling alone, compose the scene first as if you were not in it, then put the camera on a small tripod or a stable surface and trigger it with interval shooting, a remote or the 10 second self-timer. Focus on the spot where you will stand, walk in, and let the camera take 20 to 40 frames while you move naturally. A stranger with clear instructions is the backup.
This guide covers the field side of the problem: supports, triggers, focus with nobody behind the camera, how big you should be in the frame, what to say to a helper, and how not to lose your gear. Indoor and creative work is covered in self-portrait photography, and the wider subject in travel photography. Neither deals with being alone at a viewpoint with a view worth being in.
Compose the place first, then add yourself
The usual solo travel picture is an arm’s-length selfie: a face filling half the frame and a sliver of landmark behind one ear. It records that you were there and almost nothing about where “there” was. The fix is to reverse the order of decisions. Make the photograph of the place you would make anyway, then choose the one spot in it where a person belongs.
- Frame the scene. Find the composition without you in it: the foreground, the lines, the horizon, the light.
- Find the empty spot. Look for a position where a figure would have a plain background (sky, water, a pale path, an even wall) and would not overlap the main feature. The end of a jetty, a bend in a trail, the top of a flight of steps and a gap between two trees are typical.
- Mark it. Note a stone, crack or tuft of grass so you can find the spot without looking at the camera. If nothing is there, drop your hat or bag on it for focusing and pick it up when you arrive.
- Check the light on that spot. If it is in deep shade while the scene is sunlit, you will be a dark blob. Either move the spot or plan a silhouette.
- Take a test frame without you. Check the horizon is level and the exposure is right before you start walking.
Supports: tripods, clamps and things you find
You need the camera to stay exactly where you put it, at the height you chose, for a minute or two. What you carry depends on how much weight you will tolerate.
| Support | Good for | Limits |
|---|---|---|
| Full-size travel tripod | Any height, any lens, low light, wind | Weight and bulk; banned or restricted at some sites |
| Tabletop or flexible-leg tripod | Walls, benches, rocks, railings; fits a jacket pocket | Low viewpoint unless you find something to stand it on; light cameras only |
| Clamp with a small ball head | Fences, signposts, chair backs | Needs something to grip; check it twice |
| Bag, jacket, shoe or rock | Emergencies; costs nothing | Hard to level and aim; camera can slide |
Height changes the picture more than most people expect. A camera at ground level looking up makes you tall against the sky and hides the middle distance. A camera at chest height gives the most natural proportions. If your small tripod sits on the ground, tilt the screen up, check that the horizon does not cut through your neck or waist, and consider sitting or crouching so the low viewpoint suits the pose.
In wind, spread the legs wide, keep the centre column down and hang your bag from the hook if the tripod has one. Never set a tripod where a gust or a passer-by could send it over an edge or into water. The guide to using a tripod covers setup and stability in detail.
Triggers: timer, interval, remote or video
The trigger decides whether you get one stiff frame or forty relaxed ones. The table compares the options.
| Method | How it works | Best for | Weakness |
|---|---|---|---|
| 10 second self-timer | Press, walk, one frame (or a short burst on some cameras) | Spots within about 10 metres | A walk back to the camera for every attempt |
| Interval shooting | Camera takes a frame every few seconds for as long as you set | Distant spots, walking shots, natural movement | You cannot see results until you return |
| Wireless remote | Small button in your hand fires the shutter | Choosing the exact moment | Limited range; the remote can show in your hand |
| Phone app remote | Live view and shutter on your phone | Checking framing from the spot | Connection drops at distance; you are holding a phone |
| Video, then pull a still | Record a clip and save one frame | Fast movement, phones | Lower resolution than a photo; more motion blur |
The self-timer
Ten seconds at a walking pace is roughly 10 to 14 metres, less the time to turn round and settle. That is enough for a figure a few metres from the camera and not enough for a small figure in a big view. If your camera lets you set the number of frames the self-timer takes, choose the maximum so one walk gives several chances.
Interval shooting
This is the most useful setting for solo travel and the least known. Many cameras have an interval timer in the menu; if yours does not, a plug-in intervalometer does the same job. A good starting recipe:
- Interval: one frame every 2 or 3 seconds.
- Number of frames: 40 to 60, which gives about two minutes.
- Start delay: none needed. The first frames of you walking away are simply deleted.
Two minutes is long enough to walk 50 metres, stand, turn and walk back. Because the camera keeps firing while you move, some frames catch a natural stride or a turn of the head that you could never time with a single press.
Remotes and apps
A simple wireless remote is small, cheap to run and reliable at short range. Hide it in a closed fist or a pocket, or press it and then use a 2 second delay so your hand can drop. Wireless links weaken with distance and obstacles, so test the range before you rely on it.
Focus and exposure with nobody behind the camera
Autofocus normally runs when you press the shutter, and at that moment you are not in the frame. Left alone, the camera focuses on whatever is in the middle, usually the distant view, and a nearby figure comes out soft. There are three reliable answers.
- Focus on your mark, then lock. Autofocus on the bag or stone at your spot, then switch to manual focus so the camera cannot change it. If you use back-button focus, the shutter never refocuses and there is nothing to switch.
- Let depth of field cover you. With a wide lens the zone of sharpness is deep. At 24mm and f/8 on a full-frame camera, focusing about 3 metres away keeps everything from roughly 1.5 metres to the horizon acceptably sharp. If you will be 10 metres or more from the camera, focus on the scene and you will be sharp too. See hyperfocal distance for the reasoning.
- Use continuous autofocus with face or eye detection. This works when you are fairly large in the frame, roughly waist-up or closer. For a small figure the camera has too few pixels of face to find, so use one of the first two methods.
Exposure needs the same treatment. In an automatic mode the brightness can jump from frame to frame as you walk in wearing a white shirt or a dark coat. Take a test frame, then set the exposure manually or lock it, so all 40 frames match, with a shutter speed of about 1/250 second to freeze a walking figure. If the sky is bright behind you, decide in advance whether you want detail in your face (expose brighter, perhaps +0.7 to +1 with exposure compensation) or a silhouette (expose for the sky).
How big should you be? The small figure in a big scene
A person in a landscape does two jobs. They give the view a sense of scale, because everyone knows roughly how tall a human is, and they give the viewer someone to stand in for. Neither job needs a visible face, and both work better when the figure is small.
A convenient rule for judging size: with a 24mm equivalent lens held horizontally (close to the main camera on most phones), the height of the scene the frame covers is about equal to your distance from the camera. Stand 17 metres away and a 1.7 metre person fills about a tenth of the frame height. With a 50mm lens you need about twice that distance for the same size.
| Your height in the frame | Distance at 24mm | Reads as |
|---|---|---|
| About one half | 3 to 4 metres | A portrait with a setting |
| About one fifth | 8 to 9 metres | A person in a place, both equal |
| About one tenth | 17 metres | A landscape with a figure for scale |
| One twentieth or less | 35 metres or more | A vast scene; the figure is a detail to discover |
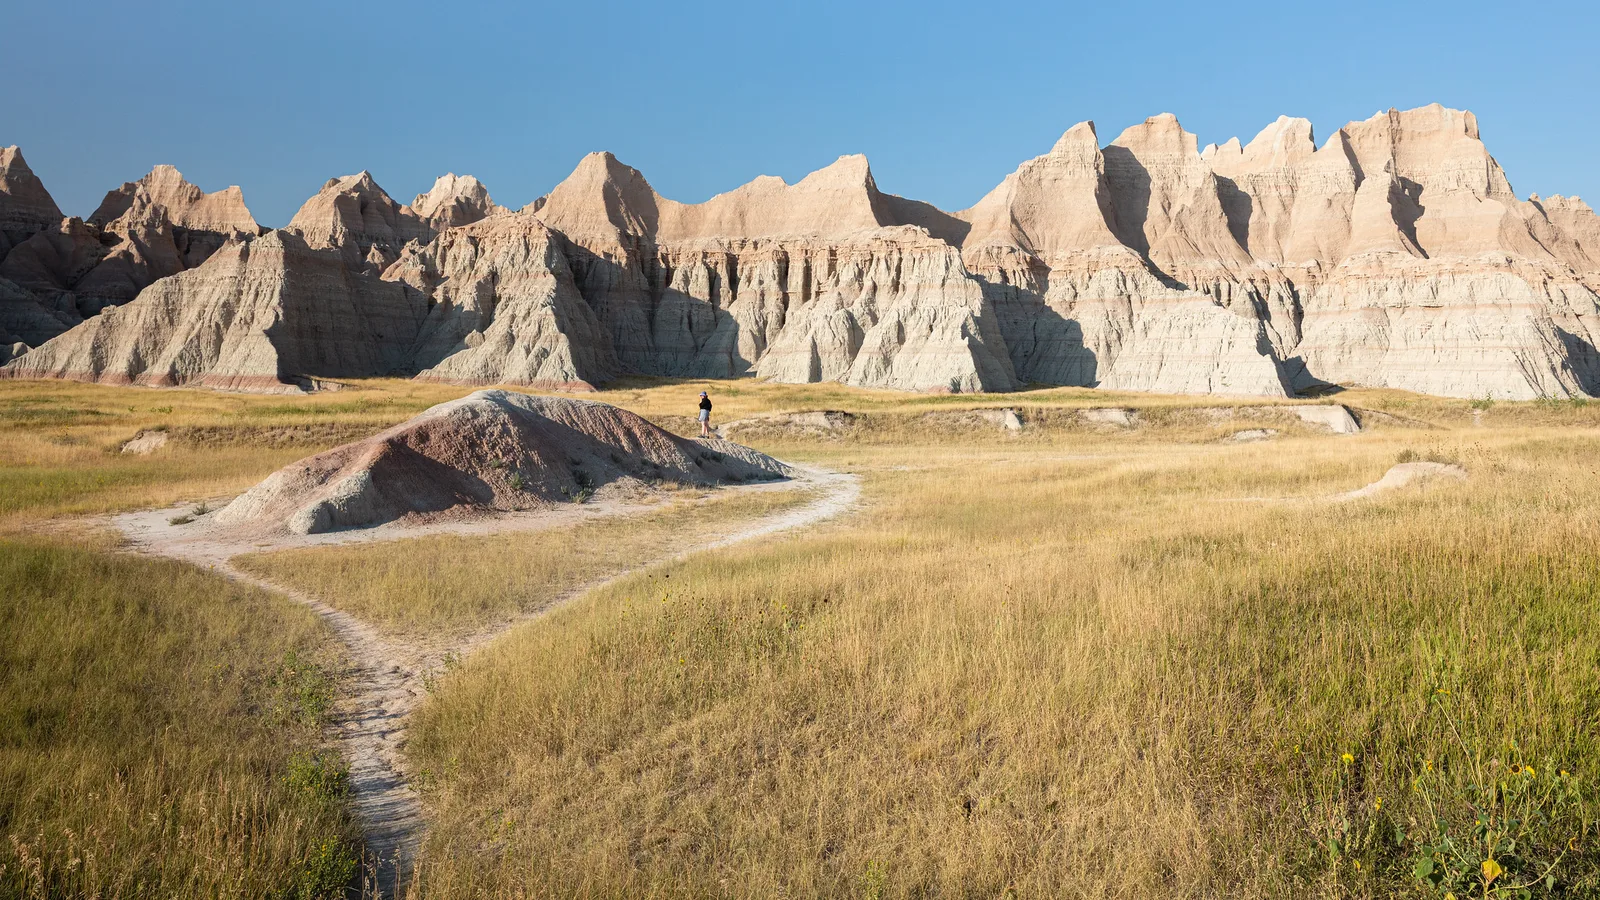
A small figure only works if the eye can find it. Four things make that happen:
- Tonal contrast. A dark figure on a pale background or a light one on a dark background. A grey jacket against grey rock vanishes.
- Colour. A red, orange or yellow layer is visible at sizes where nothing else is. Many travellers pack one bright jacket or scarf for exactly this reason.
- A clean outline. Stand where your whole shape sits against one plain area, not half against sky and half against rock. Keep a gap between your arms and body, and stand side-on or walking so your legs separate.
- Placement. Put yourself where lines in the scene lead (the end of a path, the point of a headland) and face or walk into the larger part of the frame. The rule of space explains why a figure looking into the frame feels settled.
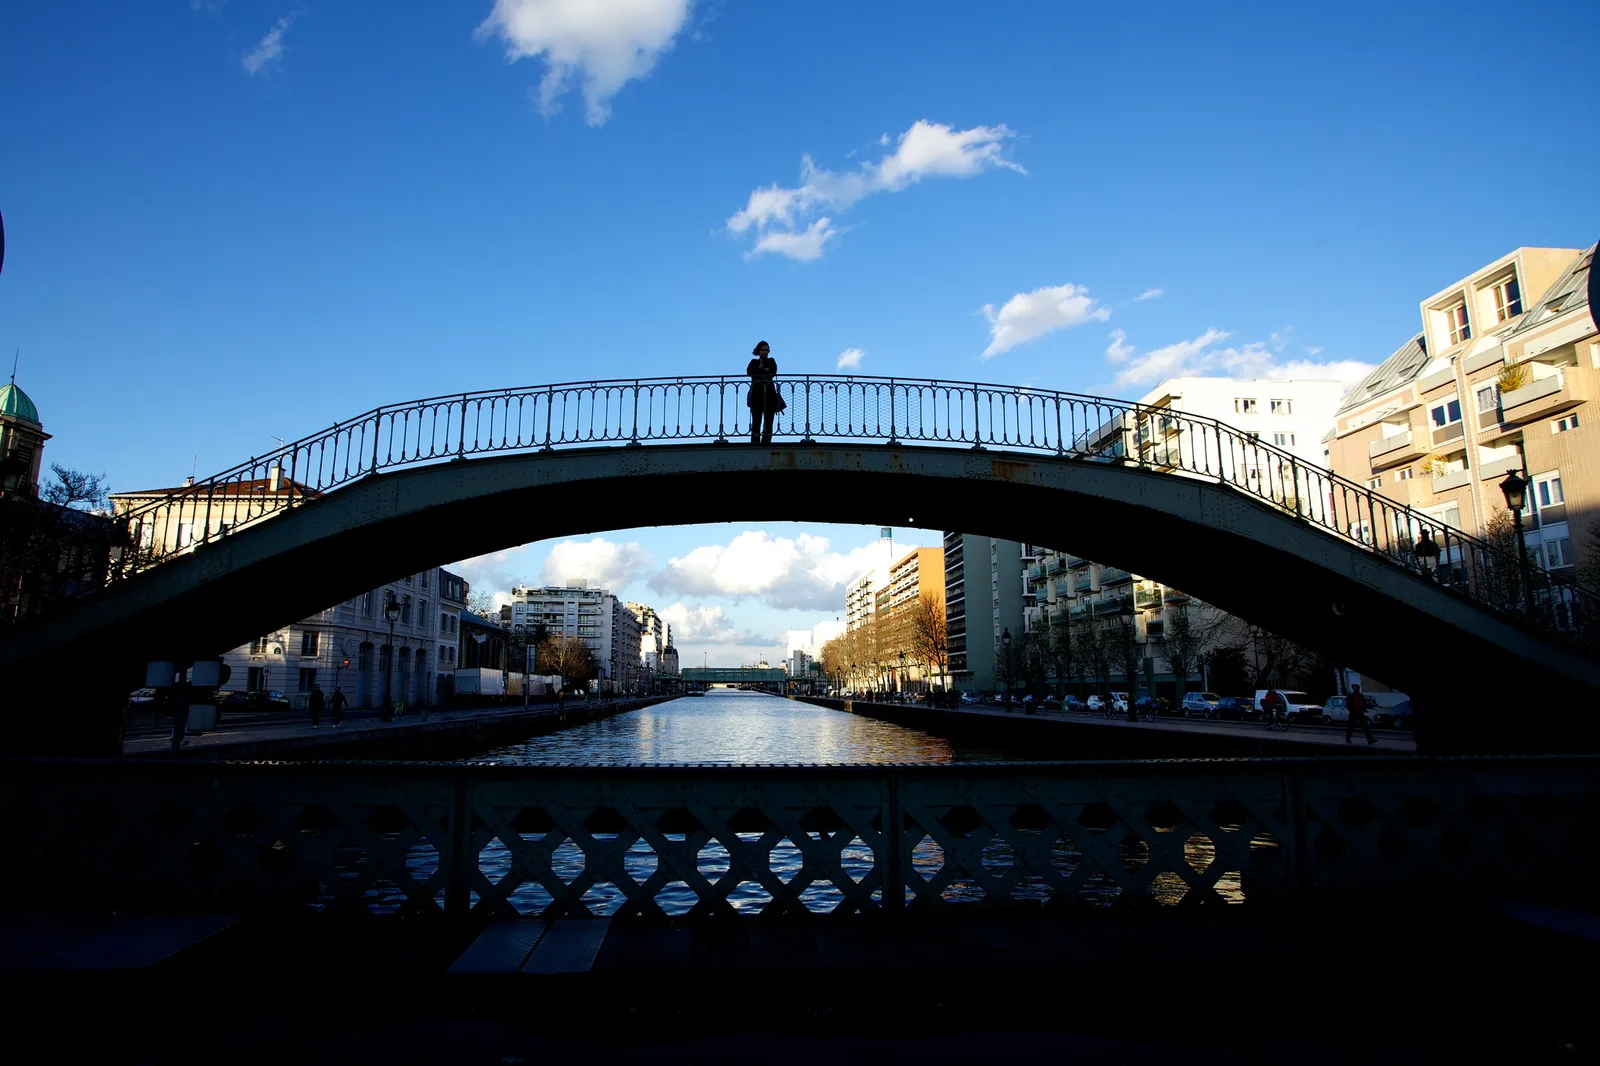
Silhouettes suit solo work especially well. They need no expression, no flattering light on the face and no particular clothing, only a bright background and a clear shape. The method is in the guide to silhouette photos.
Standing, walking and looking: poses that do not look posed
Standing square to the camera with arms at your sides is what the body does when it has no instructions. Give it some.
- Walk. Walk away from the camera, toward it, or across the frame while the interval timer runs. Walk slower than normal and take slightly longer steps. The best frames are the ones with a clear gap between the legs.
- Look at the view, not the lens. A figure facing the scene invites the viewer to look at it too. Turn your head a little to one side so the profile shows.
- Do what you would do there anyway. Drink the coffee, read the map, tie a boot, lean on the railing, sit on a wall. Give your hands a job: a strap, a cup, a hat.
- Change something every few seconds. With one frame every 2 seconds, shift your weight, turn, take two steps, sit down. Forty frames of the same stance give you one picture.
For closer, waist-up pictures where posture matters more, the portrait posing guide has the details.
Asking a stranger and getting a usable frame
Handing over a camera with “could you take my picture?” produces a centred, tilted, head-to-toe snapshot from standing height with the landmark cut off. The stranger is not at fault; they were given no information. Do the photography yourself and leave them only the button.
- Choose the helper. Someone carrying a camera of their own, or a person who has just asked you to photograph them, tends to take more care. Offering to take theirs first is the easiest opening.
- Set everything. Exposure, focus mode with face detection, a wide enough focal length, burst mode on. On a phone, set the lens and lock exposure.
- Show the picture you want. Take the frame of the empty scene from the exact position and height, show it on the screen and say: “Like this, with me standing by that post.”
- Mark where they stand. “Right here, camera at this height.” If the picture needs a low viewpoint, say so and show it.
- Ask for many frames. “Hold the button down, or take ten.” People take one and hand the camera back unless told otherwise.
- Check before they leave. Look at the result on the spot, and ask for one more round if your feet are cut off.
Busy places, safety and an unattended camera
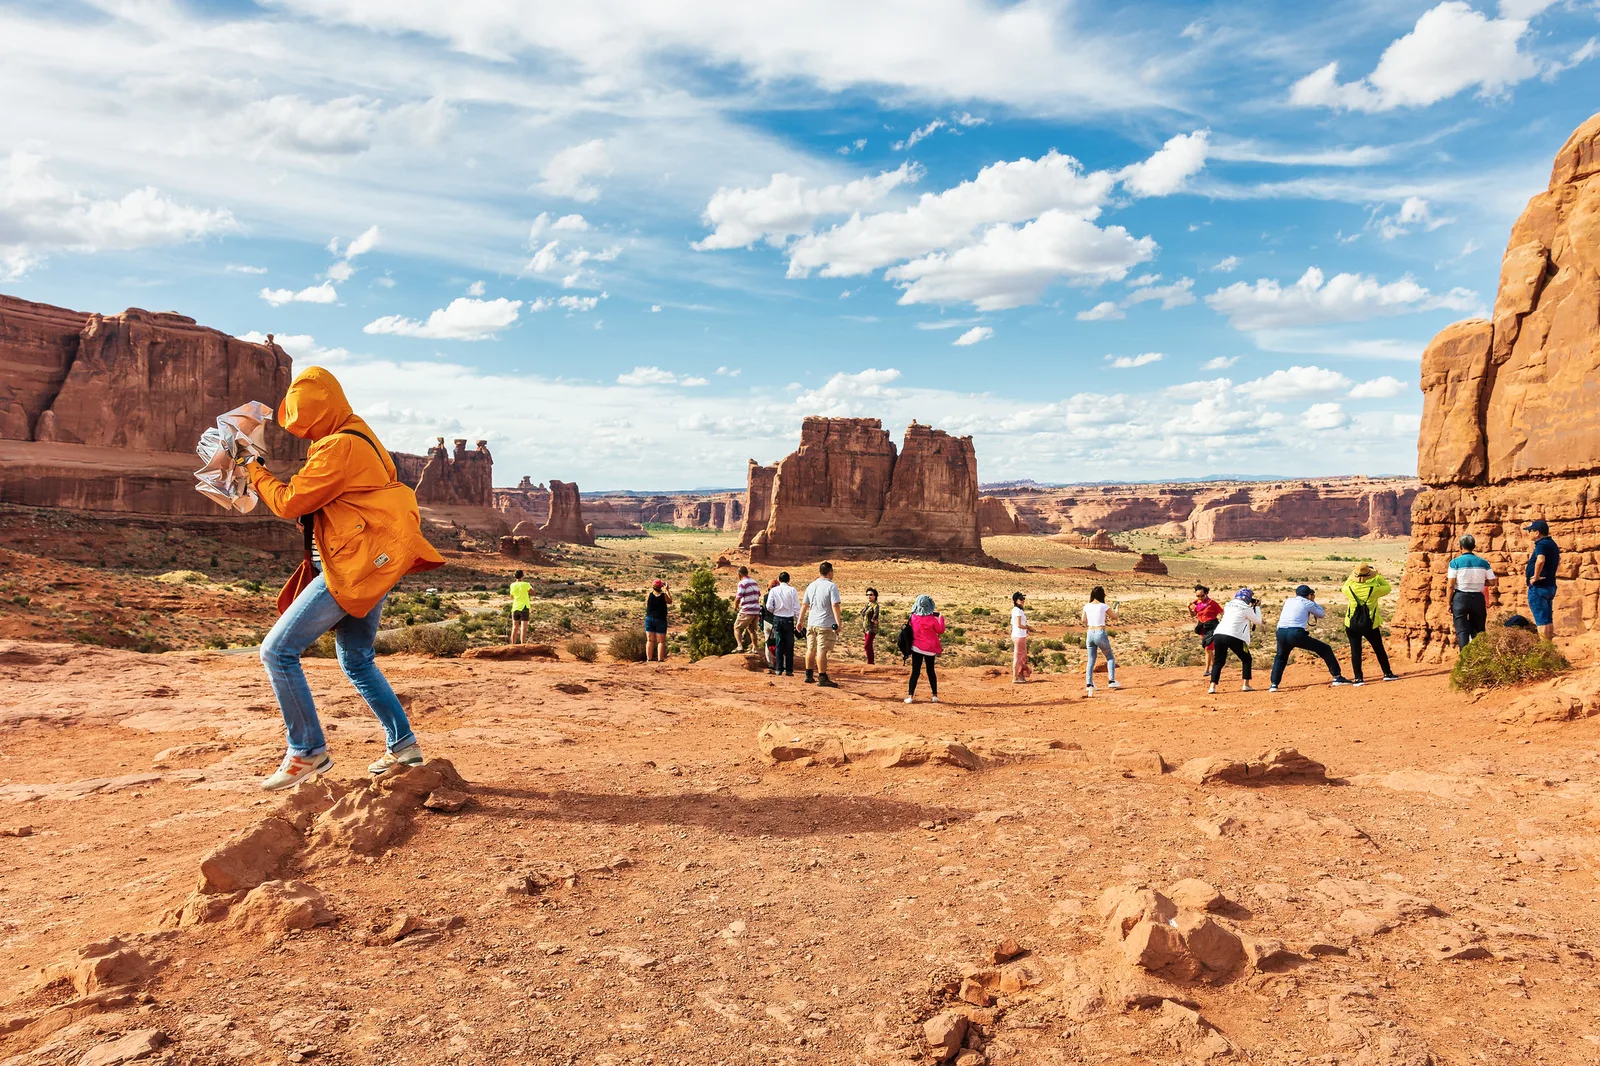
A camera on a tripod 30 metres away from its owner is exposed to three risks: theft, being knocked over, and you not watching where you put your own feet.
- Match the distance to the place. On an empty hillside, 50 metres is fine. In a city, stay within a few steps of the camera, or use a wall-top position only you can reach quickly.
- Keep your bag on you. Wear it or leave it out of frame within reach of your walk, never beside the tripod. Passport, wallet and phone stay in your pockets.
- Go early. The hour after sunrise has the fewest people, the lowest risk and usually the best light. The guides to sunrise photography and golden hour cover timing.
- Stay out of the way. Do not block paths, steps or doorways with tripod legs, and give up the spot quickly when others are waiting. Some sites restrict tripods; a tabletop tripod on a wall often attracts no attention, but follow the rules where they exist.
- Never walk backwards. Decide your spot while looking at the ground, walk to it facing forward, and stay well back from cliff edges, wet rocks, traffic and railway lines. No photograph needs you at the very edge: from the camera’s position, a figure two metres back from a drop looks the same.
When a famous view is full of other visitors, the methods in photographing busy landmarks (timing, unusual angles and longer exposures) apply just as well with you in the frame.
Phone-only methods
Everything above works with a phone and a pocket tripod, and a phone adds a few tricks of its own.
- Use the rear camera. On most phones the rear cameras have larger sensors and better lenses than the front one. You lose the preview, so frame the empty scene first.
- Timer with burst. Many phone cameras take a short burst when the timer fires. Choose the 10 second option and check whether yours does.
- Hands-free triggers. Depending on the phone: a voice command, a raised palm, the volume button on wired earphones, a paired watch or a small wireless shutter button. Find out which yours supports before the trip.
- Video as a fallback. Record a clip at the highest resolution, walk through the scene, and save the best frame afterward. A frame from 4K video is about 8 megapixels, enough for sharing and small prints.
- The widest lens for a small support. The ultra-wide camera takes in a lot from close range, but stay away from the edges of the frame, where figures stretch.
More phone technique is in the guide to smartphone photography.
Common mistakes
- The background is the afterthought. Your face fills the frame and the place is a blur behind it. Fix: compose the place first and step back until you are a fifth of the frame or less.
- Focus on the far distance. You are soft and the mountains are sharp. Fix: focus on your mark and lock it, or use a wide lens at f/8.
- One frame per walk. A single timer shot catches a blink or a half step. Fix: use interval shooting or a timer burst.
- A figure that merges with the background. Dark clothing against dark rock. Fix: stand against sky, water or a pale path, or wear one bright layer.
- The horizon through your head. A line cutting the figure at the neck is distracting. Fix: raise or lower the camera so your head sits clearly above or below the horizon.
- Handing over an unprepared camera. The stranger guesses. Fix: set it up, show an example frame and ask for ten.
Try this
Practise before the trip, in a park or on a quiet street near home, for fifteen minutes. Put your camera or phone on a wall, bench or small tripod and compose a scene with a clear spot for a figure about 15 metres away. Drop a bag on the spot, focus on it and lock the focus. Set interval shooting to one frame every 2 seconds for 40 frames (or start a video on a phone), collect the bag, and spend the time walking through the spot, standing, turning and looking away. Review the frames and note three things: which poses look natural, whether you are sharp, and whether you stand out from the background. Then repeat once at about 5 metres and compare how the balance between you and the place changes.
Frequently asked questions
How do solo travellers take photos of themselves?
Most use a small tripod or a stable surface with the camera’s interval timer, self-timer or a wireless remote, and walk into a scene they have already composed. Some record video and save a frame. Asking another visitor, with clear instructions, is the other common method.
Do I need a tripod to take travel photos of myself?
No, but you need something that holds the camera still at a chosen angle. Walls, benches, rocks and a bag work. A pocket tripod weighs little and removes most of the compromises on height and levelling.
How do I keep myself in focus with a self-timer?
Focus on an object at the place you will stand, then switch to manual focus so the setting cannot change. With a wide lens at f/8 and a subject more than a few metres away, depth of field covers small errors.
Is a selfie stick a good option?
It gets more of the scene in than an outstretched arm, but the viewpoint is still close, wide and slightly above you, so the place stays secondary. A stick that doubles as a small tripod is more useful as a support than as a stick. For close-up technique see how to take a good selfie.
Is it safe to leave a camera on a tripod and walk away?
It depends on the place. In quiet natural locations the main risks are wind and uneven ground. In busy places keep the camera within a few steps, keep valuables on you, and use a helper or a phone at your feet instead.
Related guides
- Self-portrait photography: indoor light, expression and creative ideas.
- Travel photography: planning, gear and telling the story of a trip.
- Scale in photography: why a small figure makes a landscape look bigger.
- How to use a tripod: stable setup on rough ground and in wind.
- How to take silhouette photos: exposure for a dark figure against a bright sky.
- Photographing busy landmarks: getting a clean view at popular places.
- Intervalometer: what interval shooting is and how it is set.
- Candid photography: natural pictures of other people you meet on the way.