Twilight is the time between day and night when the sun is below the horizon but still lights the sky. It comes in three stages: civil twilight (sun up to 6 degrees below the horizon, bright enough to see without lights), nautical twilight (6 to 12 degrees, deep blue sky, city lights glowing) and astronomical twilight (12 to 18 degrees, nearly dark, faint stars appear). For most beginners, the best photos come from civil and early nautical twilight, using a tripod, low ISO and shutter speeds of a few seconds.
Many beginners pack up their cameras as soon as the sun sets. That is often exactly when the most beautiful light begins. The sky keeps changing colour for an hour or more, from orange and pink to deep blue and finally to black. Buildings light up, the sky balances with the lights, and scenes look magical.
That whole period is called twilight, and it is not one single thing. Astronomers divide it into three stages, and each one gives different light and different photo opportunities. Knowing the difference helps you plan, arrive on time and choose the right settings.
This guide is for beginners. It explains the three twilights in plain words, what each looks like, what to photograph, how to plan, which settings to use, and the mistakes to avoid. There is a 10-minute exercise and an FAQ at the end.
What twilight is
When the sun sets, it disappears below the horizon, but its light keeps reaching the upper atmosphere. The air high above scatters that light back down, so the sky stays bright for a while. As the sun sinks lower, less light reaches the sky and it gradually darkens.
The same thing happens in reverse before sunrise, which is why sunrise photography starts in the dark. Morning twilight starts in darkness and brightens until the sun comes up. Everything in this guide applies to both evening and morning twilight; just reverse the order.
Twilight stages are defined by how far the centre of the sun is below the horizon, measured in degrees. You do not need to measure anything yourself. Weather apps, photography planning apps and sunrise and sunset tables list the times for you.
The three stages of twilight
Civil twilight
Sun: from the horizon to 6 degrees below.
Civil twilight begins right after sunset and is the brightest stage. There is still enough light to see clearly outdoors without street lights. The sky near the horizon often glows orange, pink and gold, while the opposite side of the sky turns soft blue and pink.
Look for a band of pink above a darker blue band on the horizon opposite the sunset. The pink band is often called the belt of Venus, and the dark band beneath it is the shadow of the Earth itself cast onto the atmosphere. It is a lovely, easy subject for beginners.
Civil twilight is great for:
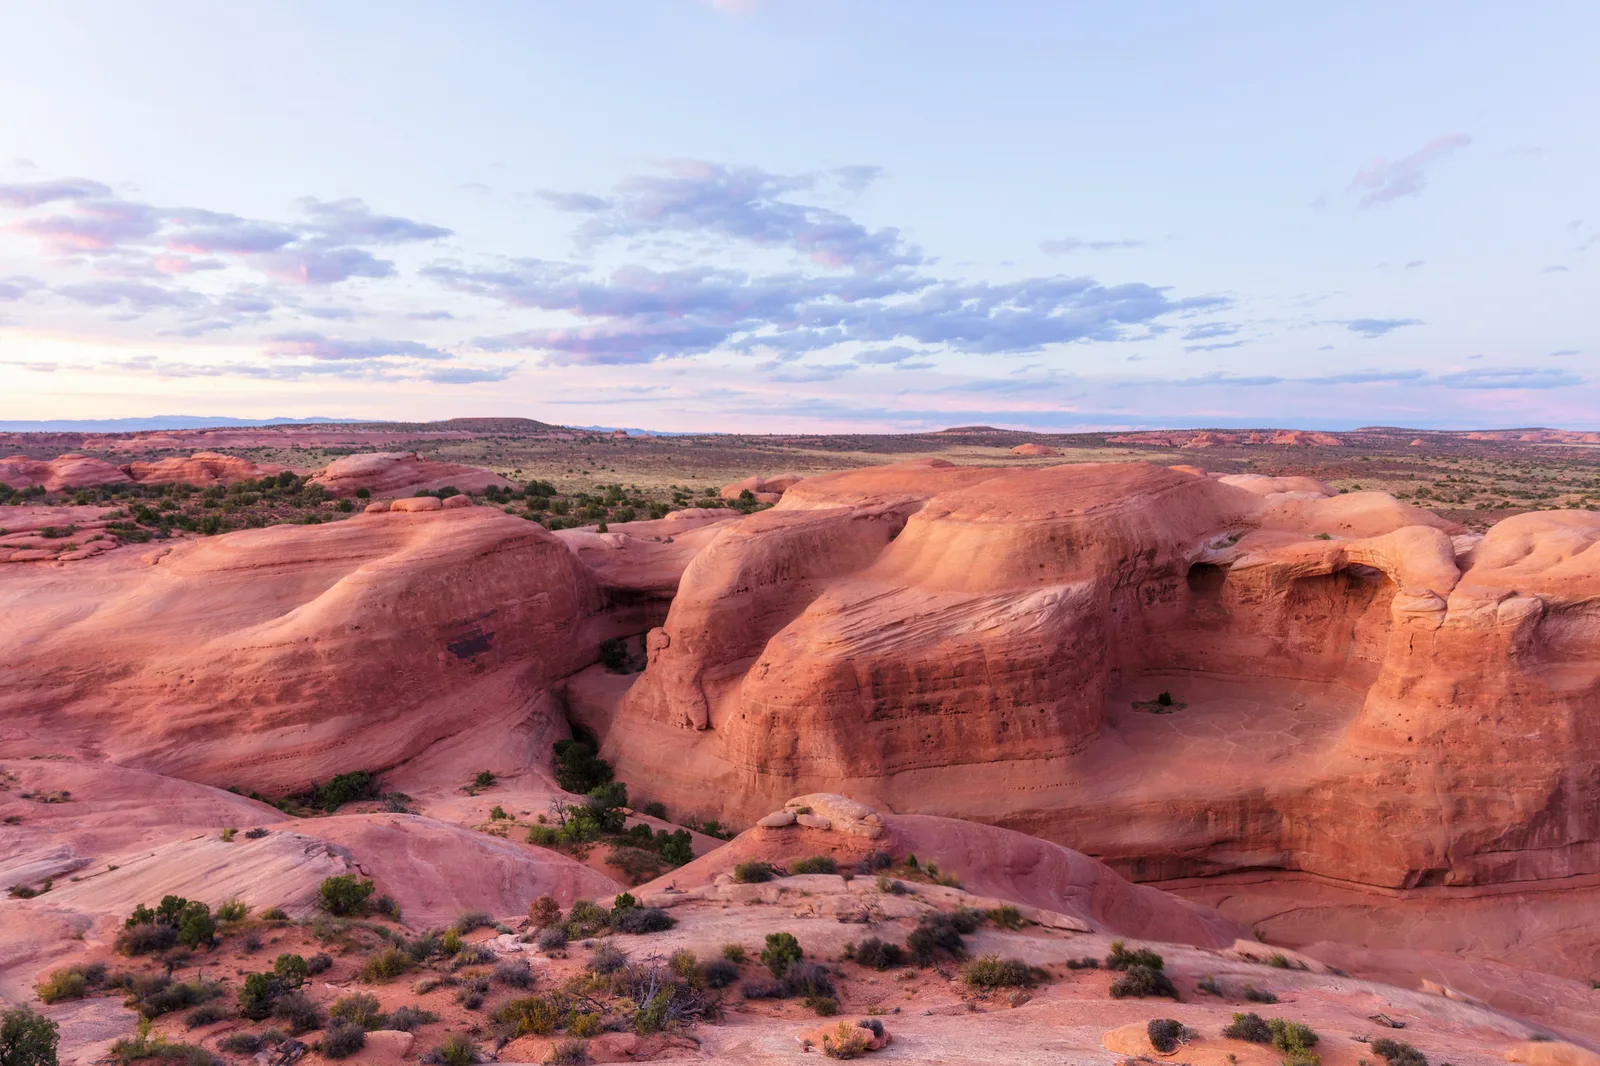
- Soft, glowing landscapes with no harsh shadows, like the sandstone photo further down this page.
- Portraits with soft, even light. Faces still have enough light without flash.
- Silhouettes against a colourful sky.
- Pastel skies over water.
Nautical twilight
Sun: from 6 to 12 degrees below the horizon.
The name comes from sailors. During nautical twilight, the horizon at sea is still visible, so sailors could navigate by the stars and the horizon together. The sky turns a deep, rich blue, and the brightest stars and planets appear.
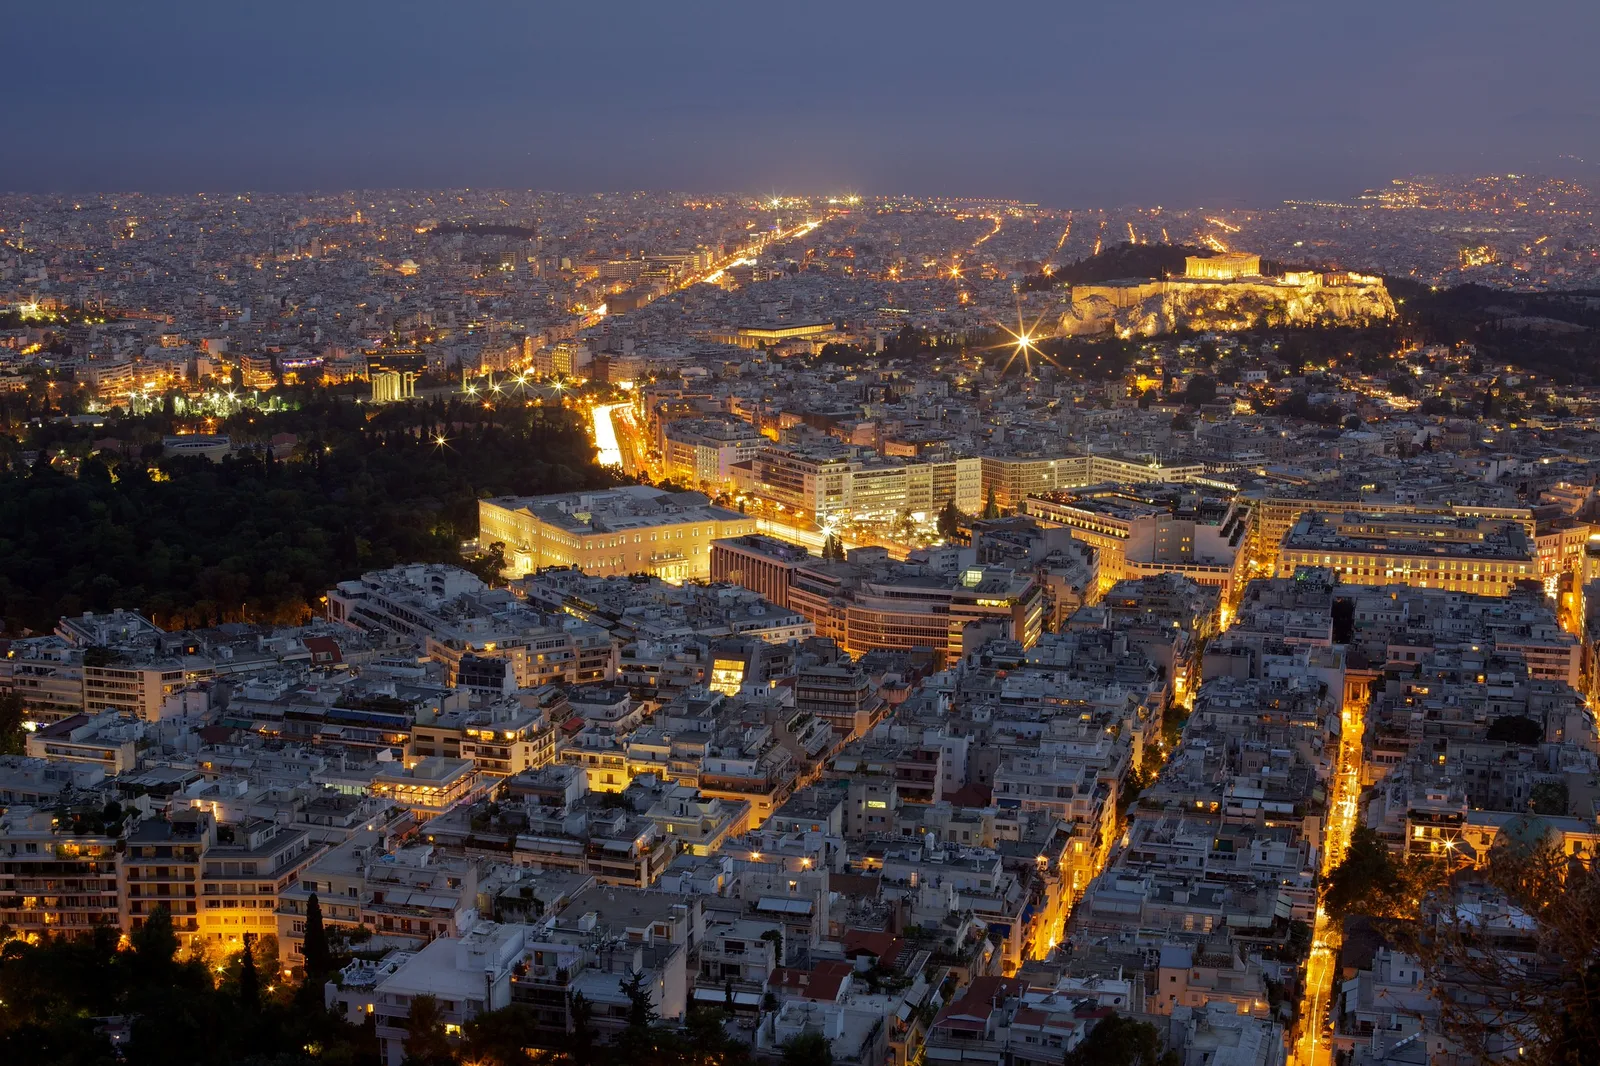
The start of nautical twilight, along with the end of civil twilight, is what most photographers call the blue hour. City lights are on, but the sky still has colour and brightness. The lights and the sky are close in brightness, so the camera can capture both well in one photo. The Athens photo at the top of this page was taken in this kind of light.
Nautical twilight is great for:
- Cityscapes and skylines, with lit windows against a blue sky.
- Bridges, buildings and monuments lit by floodlights.
- Streets with lights and passing cars.
- Waterfronts, where lights reflect in the water.
Astronomical twilight
Sun: from 12 to 18 degrees below the horizon.
To most people, astronomical twilight looks like night. The sky is very dark, but a faint glow remains near the horizon where the sun set. Astronomers care because faint stars and galaxies are still slightly washed out. Once the sun is more than 18 degrees below the horizon, true night begins, and the techniques in the night photography guide take over.
Astronomical twilight is great for:
- Starting to see stars in photos, with a faint gradient of colour at the horizon.
- Silhouetted landscapes under early stars.
- Setting up for astrophotography and star photos, which work best after astronomical twilight ends.
For most beginners, astronomical twilight is the least useful stage, because it is too dark for easy cityscapes and not yet dark enough for the best star photos. It is a good time to set up and practise focusing in the dark.
How long each twilight lasts
The length of each stage depends on where you are and the time of year. Near the equator, the sun drops almost straight down, so each stage is short, roughly 20 to 25 minutes. Further from the equator, the sun sets at a shallow angle and each stage lasts longer. In summer at high latitudes, twilight can last for hours, and in some places it never gets fully dark at all.
This has a practical effect. If you are near the equator, you need to be ready before sunset because the blue sky passes quickly. If you are far north or south, you have more time but may need to stay out later.
The simplest approach: look up the times for your location on the day you plan to shoot. The guide to planning around the sun, moon and tides explains the tools.
Twilight vs golden hour vs blue hour
These terms overlap, which can be confusing.
- Golden hour is when the sun is low but still above the horizon, or just touching it. Light is warm and directional, with long shadows.
- Civil twilight starts at sunset. The light is soft, with no direct sun.
- Blue hour is a photographer’s term, not an exact astronomical one. It roughly covers the end of civil twilight and the start of nautical twilight, when the sky turns deep blue.
- Nautical and astronomical twilight follow as the sky darkens toward night.
In the evening the order is: golden hour, sunset, civil twilight, blue hour, nautical twilight, astronomical twilight, night. In the morning it runs the other way.
Gear for twilight
As the light fades, you need longer exposures, so a few things help a lot:
- A tripod. The most important tool. It holds the camera perfectly still for exposures of several seconds.
- A remote or the self-timer. Pressing the shutter button can shake the camera. A two-second timer avoids this.
- A torch or headlamp. For finding your way and your camera buttons in the dark.
- Warm clothes. Temperatures drop quickly after sunset.
If you do not have a tripod, rest the camera on a wall, a bench or a bag. Phones often have a night mode that combines several exposures automatically, which works surprisingly well in twilight.
Camera settings for twilight
These are starting points. Adjust after checking your first photos.
Civil twilight
- ISO: 100 to 400 on a tripod; higher handheld.
- Aperture: f/8 for landscapes; wider for portraits.
- Shutter speed: often 1/30 second to 1 second on a tripod. Handheld, raise ISO to keep it fast enough.
Nautical twilight and blue hour
- ISO: 100 on a tripod for clean files.
- Aperture: f/8 to f/11 for sharp cityscapes. Small apertures also turn bright lights into starbursts.
- Shutter speed: commonly 2 to 30 seconds. Longer exposures blur moving water, clouds and traffic into smooth shapes. See long exposure photography.
Astronomical twilight
- For stars, switch to star photo settings: a wide aperture, a high ISO and an exposure of about 10 to 25 seconds with a wide lens. The star photography guide gives details.
General tips
- Shoot RAW so you can adjust colour and brightness easily later.
- Use the histogram rather than trusting the screen, which looks very bright in the dark. See the histogram guide.
- Turn off image stabilisation on a tripod if your camera manual recommends it.
- Focus carefully. Autofocus can struggle in low light. Focus on a bright light or a high-contrast edge, or use manual focus with the screen magnified.
White balance in twilight
Twilight light is cool and blue, while city lights are usually warm orange or white. Your white balance choice changes the mood a lot.
- Daylight white balance keeps the sky blue and the lights warm. It is a good, natural starting point.
- Auto white balance may try to neutralise the blue, making the sky greyish and losing the twilight feeling.
- A cooler setting makes the sky even bluer, for a dramatic look.
If you shoot RAW, you can decide later. The white balance guide explains more.
Planning a twilight shoot
- Check the times. A tool such as the golden hour calculator helps. Look up sunset and the start and end of civil and nautical twilight for your location.
- Check the weather. A few clouds can catch colour beautifully. Total cloud cover often means a dull grey twilight, although blue hour can still work for cityscapes.
- Scout in daylight. Find your spot and composition before it gets dark. It is much harder to explore at twilight.
- Arrive early. Be set up at least 20 minutes before sunset.
- Stay late. The best colour often comes 15 to 40 minutes after sunset, after many people have left.
- Know which way to look. The bright glow is toward the sunset. The pink belt of Venus and soft blue are opposite it. Both are worth photographing.
What to photograph at twilight
- Cityscapes. Lit windows, bridges and skylines against a blue sky.
- Water. Lakes, rivers and harbours reflect the sky and lights.
- Landscapes. Soft civil twilight gives gentle, even light on rocks and mountains.
- Silhouettes. Trees, people and buildings against a glowing sky.
- The moon. A rising moon in twilight (see how to photograph the moon) shows detail on the moon and colour in the sky at once. The guide to moonlight photography has ideas for after dark.
- Light trails. Car lights become streaks during long exposures.
- Portraits. Early civil twilight gives soft, flattering light; later, mix with flash or street light.
Twilight with a phone
You do not need a big camera to enjoy twilight. Phones handle it well, especially in the brighter civil twilight stage.
- Tap to set exposure on the sky. Then slide the brightness down slightly to keep the colours rich instead of washed out.
- Use night mode later. As the sky darkens, night mode takes several frames and blends them. Hold very still, or lean the phone against something solid.
- Turn off flash. It only lights the nearest few metres and ruins the twilight mood.
- Avoid digital zoom. It looks noisy in low light. Walk closer or crop later.
- Try a small phone tripod. Even a tiny one makes a big difference.
Editing twilight photos
Twilight photos usually need only light editing. A few simple steps:
- Set white balance to taste. Keep some blue; do not make the sky neutral grey.
- Adjust exposure so the sky looks like it did, not brighter. Twilight should feel like evening.
- Recover highlights around bright lights and lift shadows a little in buildings and foreground.
- Add a touch of contrast or clarity if the photo looks flat, but go easy.
- Reduce noise if you used a high ISO.
Resist pushing saturation too far. Twilight colours are subtle, and over-saturated skies quickly look fake.
Common mistakes
- Leaving right after sunset. The best colour often comes later. Stay at least 30 to 40 minutes.
- Arriving too late. Twilight moves fast, especially near the equator. Be set up before sunset.
- No tripod. Long exposures handheld are blurry. Use a tripod or a solid surface.
- Waiting too long for cityscapes. Once the sky turns black, the lights look harsh against it. Shoot while the sky is still blue.
- Trusting the screen. It looks bright in the dark. Check the histogram.
- Auto white balance killing the blue. Try daylight white balance.
- Only looking toward the sunset. Turn around; the opposite sky often has soft pink and blue.
- Pressing the shutter by hand. Use a timer or remote to avoid shake.
Try this: a 10-minute twilight sequence
Choose any view with some sky, ideally with a light or building in it. Set up on a tripod or a steady surface before sunset.
- Before sunset: Frame your view and set ISO 100, f/8, RAW and daylight white balance.
- Sunset: Take one photo.
- Every few minutes after sunset for ten minutes of shooting spread across the twilight, take another photo from the same spot. Adjust shutter speed to keep the exposure looking right.
- Each time, turn around and take one frame of the opposite sky.
- At home, line the photos up in order and note when civil twilight ended and nautical twilight began.
Notice which frame you like best. Many people are surprised it is not the sunset itself but one from 20 or 30 minutes later.
Frequently asked questions
What are the three types of twilight?
Civil (sun up to 6 degrees below the horizon), nautical (6 to 12 degrees) and astronomical (12 to 18 degrees). After 18 degrees, it is full night.
Which twilight is best for photography?
Civil twilight for soft landscapes and portraits, and the end of civil plus early nautical twilight, the blue hour, for cityscapes.
Is blue hour the same as twilight?
Blue hour is part of twilight. It roughly covers late civil and early nautical twilight, when the sky is deep blue.
How long does twilight last?
It depends on your location and the season. Each stage can be about 20 minutes near the equator and much longer far from it.
Do I need a tripod for twilight photos?
For the best results, yes, especially after civil twilight. Phones with a night mode can manage handheld in many situations.
Is morning twilight the same as evening twilight?
Yes, just in reverse. Morning starts with astronomical twilight and ends with civil twilight at sunrise.
Want more detail on that deep blue window for cityscapes? Read the blue hour photography guide.
Staying out after twilight ends? Learn how to photograph stars.