Seeing Landscapes Like a Photographer
Everyone has stood in front of a breathtaking view, taken a photo, and been disappointed that the image did not capture what they felt. This is the central challenge of landscape photography — translating a three-dimensional, multi-sensory experience into a two-dimensional frame. The wind, the smell of pine, the vastness of the sky, the sound of water — none of that comes through in a photograph. What you have to work with is light, composition, and timing. The good news is that those three elements, used well, are more than enough.
The difference between a record shot and a genuine landscape photograph is intention. A record shot says “I was here.” A photograph says “this is what it felt like to be here.” That shift happens when you stop trying to capture everything your eyes see and start making deliberate choices about what to include and what to leave out. A sweeping panorama of a mountain range might look impressive to the naked eye, but without a focal point — a lone tree, a winding river, a splash of color — it often falls flat in a photograph.
Train yourself to look for the elements that create visual interest: the way light rakes across a hillside, a layer of mist sitting in a valley, the contrast between dark storm clouds and sunlit ground. These are the moments that separate a compelling landscape image from a flat snapshot. As we explored in Lesson 1: Re-Discovering Your World, the art of seeing is about slowing down, paying attention, and noticing what most people walk past. In landscape photography, that attentiveness is everything.
Start by asking yourself a simple question before you press the shutter: what drew me to this scene? If you cannot answer that clearly, you are not ready to photograph it yet. Walk around. Look at the scene from different positions, different heights. Wait for the light to change. The landscape is not going anywhere — give yourself permission to be patient.
Planning Your Shoot
Great landscape photography rewards preparation. While there is always room for spontaneity and happy accidents, the photographers who consistently produce outstanding landscape work are the ones who plan their sessions carefully. They study maps, check weather forecasts, track the position of the sun, and arrive at their chosen location well before the best light appears.
Light is the single most important factor in landscape photography, and the quality of light is determined almost entirely by time of day and weather. The golden hour — roughly the first hour after sunrise and the last hour before sunset — produces warm, directional light that rakes across the landscape, revealing texture and creating long shadows. The blue hour — the period of twilight before sunrise and after sunset — offers cool, even light with rich, saturated colors. These are the hours when landscape photographers do their best work. Midday light, with the sun directly overhead, tends to be flat and harsh, washing out colors and eliminating the shadows that give a landscape its three-dimensional quality.
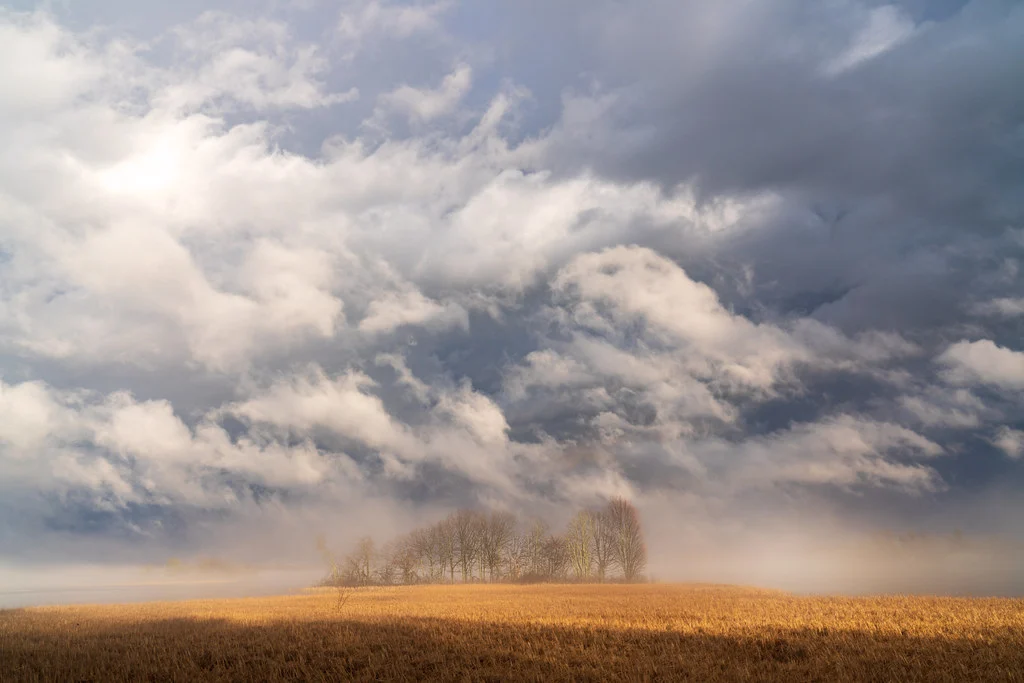
Weather is your ally, not your enemy. Overcast skies can be dull for broad vistas, but they are ideal for waterfalls, forests, and intimate scenes where even light is an advantage. Fog and mist create atmosphere and mystery. Storm clouds add drama and contrast. Some of the most powerful landscape photographs ever made were shot in conditions that most people would consider “bad weather.” If you only shoot on clear, sunny days, you are missing some of the most compelling light the natural world has to offer.
Seasonal changes transform familiar locations into entirely new subjects. A tree that is unremarkable in summer becomes extraordinary covered in autumn color or rimmed with frost. A lake that is placid in July might be wild with waves in November. One of the most valuable habits you can develop as a landscape photographer is returning to the same locations throughout the year. You will learn how the light moves, how the seasons change the character of the place, and you will start to anticipate the moments when conditions align to create something special.
Use mapping tools and sun-position apps to plan where the sun will rise and set relative to your chosen viewpoint. Knowing this in advance lets you position yourself for the best light without scrambling at the last minute. Arrive early, set up your equipment, and give yourself time to compose thoughtfully rather than rushing to catch the light as it fades.
Composition Strategies for Landscapes
Composition in landscape photography is about creating a sense of order and depth within a vast, often chaotic natural scene. The principles you learned in Lesson 6: Basic Composition and Lesson 8: Advanced Composition all apply here, but landscape work puts particular emphasis on depth, layering, and the use of foreground elements.
Foreground interest is one of the most important compositional tools in landscape photography. Including a strong element in the near foreground — a textured rock, a patch of wildflowers, a tide pool, a fallen log — anchors the image and draws the viewer’s eye into the scene. Without foreground interest, many landscape photographs feel like they begin in the middle distance and float without a foundation. Get low. Move close to that foreground element. Let it fill the bottom third of the frame and lead the eye toward the horizon.
Layering creates a sense of three-dimensional depth in a two-dimensional image. Look for scenes that naturally divide into distinct layers — a foreground of rocks, a midground of trees, a background of mountains, and a sky above. Each layer adds depth and pulls the viewer deeper into the image. Atmospheric haze, which makes distant layers progressively lighter and bluer, enhances this effect naturally. On misty mornings, mountain ridges recede in layers of decreasing contrast, creating images with extraordinary depth.
Leading lines are everywhere in natural landscapes if you train yourself to see them — a winding river, a path through a field, a fence line, the edge of a shoreline, even the curve of a dune. These lines guide the viewer’s eye through the frame, creating a visual journey from foreground to background. The most effective leading lines begin near a corner of the frame and lead inward toward the main subject or the horizon.
Not every landscape needs to follow the rule of thirds or include dramatic leading lines. Some of the most powerful landscape images use centered compositions — a perfectly symmetrical reflection in a still lake, a lone tree in the center of an empty field. Minimalist landscapes, where large areas of the frame are given over to sky, water, or empty ground, can be extraordinarily striking. The key is intentionality. Whether you use a complex, layered composition or a starkly simple one, make sure it is a deliberate choice rather than an accident.
Consider the panoramic format when a scene is too wide for a single frame. You can either use your camera’s panoramic mode or shoot a series of overlapping frames and stitch them together in your editing software. The panoramic format naturally suits landscapes because it mirrors the wide sweep of human vision. Just be aware that panoramic images need particularly strong compositions — all that horizontal space needs something to hold the viewer’s attention.
Working with Light and Weather
Light is not just illumination — it is the primary subject of every landscape photograph. The same mountain, the same coastline, the same forest looks entirely different at dawn than it does at noon, and different again under storm clouds than under clear blue sky. Learning to read light and weather is the landscape photographer’s most essential skill.
Cloud types tell you a great deal about the light you are going to get. High, wispy cirrus clouds catch the warm colors of sunrise and sunset and can paint the sky in spectacular fashion. Cumulus clouds — the big, puffy ones — create patterns of light and shadow on the ground as they move across the sun. A thin overcast layer acts as a diffuser, softening shadows and reducing contrast. Heavy, dark nimbus clouds mean rain is coming, but the edges of a storm often produce the most dramatic light of all — shafts of sunlight breaking through gaps in dark clouds, illuminating part of the landscape while the rest remains in shadow.
Do not put your camera away when the weather turns. Rain creates saturated colors and glossy surfaces. Fog isolates subjects and simplifies compositions. Snow transforms familiar landscapes into graphic studies of light and shadow. Frost decorates every surface with crystalline texture. Wind creates movement in grasses and clouds that can be captured with longer exposures. Some of the most memorable landscape photographs are made in conditions that most people would consider reasons to stay indoors.
High contrast is the landscape photographer’s persistent challenge. When the sky is much brighter than the ground — which is nearly always the case at sunrise and sunset — your camera cannot capture the full range of light in a single exposure. You have several options. Expose for the highlights and let the shadows go dark for a dramatic, moody look. Use a graduated neutral density filter to darken the sky and balance it with the foreground. Bracket your exposures — shooting one for the sky and one for the ground — and blend them later in post-processing. Each approach has its place, and as you gain experience, you will develop a preference. For a deeper understanding of how light works, review Lesson 7: Lighting.
A polarizing filter is one of the most useful tools for landscape work. It deepens blue skies, reduces glare on water and wet surfaces, cuts through atmospheric haze, and increases color saturation — all without any post-processing. Unlike most filter effects, a polarizer’s impact cannot be easily replicated in editing software. Rotate the filter while looking through the viewfinder and watch how the scene changes. The effect is strongest when you are shooting at roughly 90 degrees to the sun.
Technical Considerations
Landscape photography places specific technical demands on your camera work. The goal, in most cases, is to achieve front-to-back sharpness — everything from the nearest foreground element to the distant horizon rendered in crisp detail. This requires careful attention to aperture, focus, and camera stability.
Hyperfocal distance is a concept every landscape photographer should understand. It is the focus distance at which everything from half that distance to infinity appears acceptably sharp. By focusing at the hyperfocal distance rather than on your foreground subject or the horizon, you maximize the depth of field in your image. The exact distance varies with your focal length and aperture, but as a general rule, focusing about one-third of the way into the scene at f/8 to f/11 will give you good results. Many photographers use apps or charts to calculate the hyperfocal distance precisely, but with practice, you will develop an intuitive sense for it. For a detailed refresher on settings, visit the Landscape Photography hub.
Long exposures open up creative possibilities unique to landscape photography. A multi-second exposure turns moving water into silky, smooth flows and transforms breaking waves into ethereal mist. Exposures of 30 seconds or longer streak clouds across the sky, creating dynamic movement in what would otherwise be a static image. To achieve long exposures in daylight, you will need neutral density filters — dark glass or resin that reduces the amount of light entering the lens without affecting color. A 6-stop or 10-stop ND filter can turn a 1/125 second exposure into one lasting several seconds or even minutes.
Exposure bracketing is the practice of shooting the same composition at multiple exposure settings — typically one at your meter reading, one brighter, and one darker. This gives you options in post-processing and is especially valuable in high-contrast scenes where a single exposure cannot capture the full range of light. Some photographers blend these bracketed frames into HDR (high dynamic range) images, while others simply choose the best single frame from the set.
A sturdy tripod is essential for serious landscape work. It enables long exposures, ensures precise composition, and forces you to slow down and think about your framing. When using a tripod, turn off your lens’s image stabilization (it can actually introduce vibration on a stable platform), use a remote shutter release or your camera’s self-timer to avoid touching the camera during exposure, and make sure your tripod is set up on solid ground. In wind, hang your camera bag from the center column to add weight and stability. A tripod is not just a support tool — it is a compositional tool that encourages you to work more deliberately.
Try This — Landscape Exercises
Landscape photography is learned in the field. These exercises will help you develop your eye for composition, your patience for light, and your ability to find beauty in the overlooked details of the natural world.
One Location, Three Compositions. Visit a single landscape location and challenge yourself to create three distinctly different compositions without moving more than ten steps from your starting position. You might change focal length, change your height (stand, kneel, lie flat), change direction, or focus on different elements of the scene. This exercise trains you to see beyond the obvious and find multiple photographs within a single view.
Golden Hour Challenge. Arrive at a landscape location 30 minutes before sunset. Start shooting and continue until 20 minutes after the sun has gone below the horizon. Do not stop or review your images during this time — just keep responding to the changing light. When you get home, lay out the images in chronological order and study how the light transformed the scene over that 50-minute window. Notice the colors, the shadows, the contrast, and the mood at each stage.
Intimate Landscape. Instead of seeking a sweeping vista, look for beauty on a smaller scale. Find a close-up scene in nature — a pattern in tree bark, light filtering through leaves, a frost-covered spider web, a reflection in a puddle, the texture of moss on a stone. Create a landscape image that is measured in feet rather than miles. This exercise sharpens your observational skills and proves that you do not need a dramatic location to make a compelling landscape photograph. If you are looking for inspiration on how different photographers have approached the natural world, explore the work of Ansel Adams, whose images demonstrate the power of light, patience, and a deep connection to the land.
Landscape photography is a practice of patience and presence. The more time you spend outdoors with your camera, the better you will become at reading light, anticipating weather, and finding compositions that transform a view into a photograph. Do not wait for a trip to a dramatic location — the landscape nearest to you, in the right light and from the right perspective, holds photographs worth making. For more on this genre, including guides to photographing specific subjects like waterfalls and the elements, explore the Landscape Photography hub.