Why Camera Settings Matter for Landscape Photography
Landscape photography demands technical precision. Unlike portraits where you can reshoot in seconds, the perfect landscape light may last only minutes, and your camera settings determine whether you capture it with stunning clarity or miss it entirely. The difference between a snapshot and a gallery-worthy landscape often comes down to three critical decisions: your aperture, your shutter speed, and your ISO.
In this guide, you will learn the exact camera settings professional landscape photographers use in every lighting condition, from golden hour to stormy skies. Whether you are shooting wide mountain vistas or intimate forest details, these settings will help you capture sharp, well-exposed images every time.
Quick Reference: Landscape Photography Settings Cheat Sheet
Use this table as a starting point, then adjust based on conditions. These settings assume you are shooting on a tripod in good daylight.
| Setting | Recommended Value | Why |
|---|---|---|
| Shooting Mode | Aperture Priority (A/Av) or Manual (M) | You control depth of field; camera handles the rest |
| Aperture | f/8 – f/11 | Sweet spot for edge-to-edge sharpness on most lenses |
| Shutter Speed | Varies (use tripod if below 1/focal length) | Determined by aperture and ISO; tripod frees you from limits |
| ISO | 100 (base ISO) | Lowest noise and maximum dynamic range |
| White Balance | Daylight or Auto (shoot RAW) | RAW lets you fine-tune later; Daylight is a neutral starting point |
| Focus Mode | Single Shot (AF-S / One-Shot) | Landscape subjects do not move; lock focus precisely |
| Focus Area | Single Point | Place the focus point exactly where you need sharpness |
| Metering Mode | Matrix / Evaluative | Reads the entire scene for balanced exposure |
| Drive Mode | Single Shot or 2-second Timer | Timer or remote eliminates camera shake on a tripod |
| File Format | RAW (or RAW + JPEG) | Maximum editing flexibility for highlights and shadows |
Aperture: The Most Important Landscape Setting
Aperture controls your depth of field, which determines how much of the scene is in sharp focus from front to back. In landscape photography, you almost always want everything sharp, from the wildflowers at your feet to the mountains on the horizon.
The f/8 to f/11 Sweet Spot
Every lens has an aperture range where it produces the sharpest possible images. For the vast majority of lenses, that sweet spot falls between f/8 and f/11. At these apertures, you get excellent sharpness across the frame while maintaining enough depth of field to keep foreground and background in focus.
This sweet spot exists because of how light interacts with lens optics. At very wide apertures (f/2.8, f/4), lens aberrations reduce edge sharpness. At very narrow apertures (f/16, f/22), diffraction softens the entire image. The middle range gives you the best of both worlds: sharp corners, minimal aberration, and no noticeable diffraction.
Why not f/16 or f/22? A common beginner mistake is to close the aperture as far as possible, thinking “smaller aperture = more depth of field = sharper image.” While smaller apertures do increase depth of field, they also introduce diffraction, a physics phenomenon where light waves bend around the aperture blades, creating a softer overall image. At f/16 you will notice slight softness; at f/22, it is pronounced. Stick to f/8 or f/11 for the best results.
When to Use f/16
There is one scenario where f/16 is worth the slight diffraction trade-off: when you have a very close foreground element (within 1 to 2 feet of your lens) and a distant background. The extra depth of field at f/16 can keep both in focus. Even in this case, consider focus stacking as an alternative. Take two or three shots at f/8, each focused at a different distance, then blend them in post-processing for maximum sharpness throughout.
Understanding Hyperfocal Distance
Hyperfocal distance is the focus distance that gives you the deepest possible depth of field at a given aperture and focal length. When you focus at the hyperfocal distance, everything from half that distance to infinity will be acceptably sharp. For example, with a 24mm lens at f/11, the hyperfocal distance is approximately 6 feet. Focus at 6 feet, and everything from 3 feet to infinity is sharp.
Use our hyperfocal distance calculator or a phone app to find the right distance for your lens and aperture. This technique eliminates guesswork and is especially useful for scenes with strong foreground elements. You can also check the results with our depth of field calculator to preview exactly what will be in focus.
Shutter Speed: Controlling Motion and Light
Shutter speed in landscape photography is more creative than technical. With your camera on a tripod, you are free to use any shutter speed, opening up possibilities like silky waterfalls, streaking clouds, and perfectly sharp scenes in low light.
Handheld Landscapes
If you are shooting without a tripod, use the reciprocal rule: your shutter speed should be at least 1/(focal length). With a 24mm lens, shoot at 1/25s or faster. With a 70mm lens, use 1/80s or faster. Image stabilization lets you go 2 to 3 stops slower, so a stabilized 24mm lens might work at 1/6s.
That said, a tripod fundamentally changes landscape photography. It frees you from shutter speed constraints, lets you shoot at your lens’s sharpest aperture and lowest ISO regardless of light level, and forces you to slow down and compose more carefully. If you are serious about landscapes, a sturdy tripod is your most important accessory after the camera itself.
Tripod Landscapes
On a tripod, shutter speed becomes a creative tool. Use a 2-second timer or remote trigger to eliminate camera shake, then choose your shutter speed based on the effect you want:
- 1/500s or faster: Freezes everything, including waves, grass, and leaves. Best when you want absolute sharpness throughout a windy scene.
- 1/4s to 2s: Creates partial motion blur in water, giving waterfalls and streams a slightly silky look while preserving some texture.
- 2s to 30s: Produces fully smooth water and can blur moving clouds into dramatic streaks. Requires an ND filter in daylight.
- 30s to several minutes: Extreme long exposures that turn waves into glass and clouds into painterly smears. Requires a strong ND filter (10-stop or more) and Bulb mode for exposures longer than 30 seconds.
For long exposures in daylight, you will need a neutral density (ND) filter. A 6-stop ND turns a 1/60s exposure into 1 second. A 10-stop ND turns 1/60s into 16 seconds. Start with a 6-stop ND, which is versatile enough for most daytime long exposure work.
Mirror Lock-Up and Electronic Shutter
On DSLR cameras, the mirror flipping up creates a small vibration that can cause subtle blur at shutter speeds between 1/15s and 1s. This is called “mirror slap.” Enable mirror lock-up mode to raise the mirror before the exposure begins, eliminating this vibration. Mirrorless cameras do not have this issue. Some cameras also offer an electronic first curtain shutter, which reduces vibration even further.
ISO: Keep It Low
ISO should almost always be at its lowest native value for landscape photography, typically ISO 100 or ISO 64 on some cameras. Low ISO gives you the cleanest image with the most dynamic range, which matters enormously when you need to recover shadow detail or pull back highlights in post-processing.
Dynamic range is the difference between the brightest and darkest tones your camera can capture in a single exposure. At ISO 100, a modern camera might capture 14 stops of dynamic range. At ISO 800, that drops to 11 or 12 stops. Those extra stops of range mean the difference between recovering a blown-out sky and losing it forever.
The only exception: If you are shooting handheld in low light and need a faster shutter speed, raise ISO as needed. A sharp image at ISO 400 is always better than a blurry image at ISO 100. But whenever you can use a tripod, keep ISO at base.
Auto ISO for Landscapes
Auto ISO is useful for handheld shooting in changing light, but on a tripod it can raise your ISO without reason. If you are using Aperture Priority on a tripod, the camera might boost ISO instead of using a slower shutter speed. Manually set ISO 100 and let the shutter speed be as long as needed. Your images will be cleaner and have more dynamic range. If you are in a situation where you need Aperture Priority on a tripod, set Auto ISO’s minimum shutter speed to 1 second or slower.
Metering and Exposure for Landscapes
Getting exposure right in landscape photography can be tricky because natural scenes often have extreme contrast: bright skies and dark shadows, sunlit peaks and shaded valleys. Your metering mode determines how the camera reads the scene and suggests an exposure.
Matrix/Evaluative Metering
For most landscape situations, matrix metering (Nikon) or evaluative metering (Canon) works well. It reads the entire scene and produces a balanced exposure. This is your default starting point. Check the histogram after each shot to verify the exposure, and adjust with exposure compensation if needed.
Expose to the Right (ETTR)
The “expose to the right” technique pushes your exposure as bright as possible without clipping highlights. On the histogram, the data should reach close to the right edge without slamming against it. Why? Brighter exposures capture more tonal information and less noise. You can darken a bright image in post with no quality loss, but brightening a dark image amplifies noise and loses shadow detail.
To use ETTR: Take a test shot. Check the histogram. If there is a gap between your data and the right edge, add +1/3 or +2/3 exposure compensation and reshoot. If highlights are clipping (data piling up against the right edge), pull back by -1/3 stop. This technique requires shooting in RAW, since you will need to bring the brightness back down in post-processing.
Bracketing for High-Contrast Scenes
When a scene has more contrast than your camera can capture in a single exposure, such as a bright sunset sky with a dark foreground, exposure bracketing is the solution. Take three shots: one at the metered exposure, one at -2 stops (for the sky), and one at +2 stops (for the shadows). Blend them later using HDR software or luminosity masks in Photoshop.
Most cameras have an auto-bracketing feature (AEB) that takes the three shots in quick succession. Set your camera to continuous drive mode with AEB enabled, and one press of the shutter captures all three frames.
Scenario-Specific Settings
Golden Hour Landscapes (Sunrise and Sunset)
Golden hour is the most popular time for landscape photography, and for good reason. The warm, low-angle light creates long shadows, saturated colors, and dramatic skies.
| Setting | Value |
|---|---|
| Aperture | f/8 – f/11 |
| ISO | 100 |
| Shutter Speed | 1/15s – 1/125s (on tripod) |
| White Balance | Daylight or Shade (to enhance warmth) |
| Metering | Matrix / Evaluative (watch for blown highlights in the sky) |
Pro tip: Expose for the sky and recover the shadows in post. A graduated ND filter can balance the exposure between bright sky and darker foreground in-camera. If you do not have a graduated ND, shoot bracketed exposures and blend them later.
Arrive at least 30 minutes before sunrise or stay 30 minutes after sunset. The best light often happens in the 10 to 15 minutes before and after the sun is at the horizon, when the sky can turn brilliant shades of pink, orange, and purple. Many beginners pack up too early and miss the best color.
Waterfall and Moving Water
Silky, smooth water requires long shutter speeds. The exact speed depends on how much smoothing you want. For detailed guidance, see our complete waterfall photography guide.
| Setting | Value |
|---|---|
| Aperture | f/11 – f/16 |
| ISO | 100 (lowest possible) |
| Shutter Speed | 1/4s – 2s for partial smoothing; 2s – 30s for fully silky |
| Filter | ND filter (3-stop to 10-stop depending on light) |
| Tripod | Essential |
Pro tip: Start with a 1-second exposure and review. If water looks too static, go longer. If it looks like featureless white, go shorter. The sweet spot for most waterfalls is 0.5s to 2s. Rivers and streams often look best at 2 to 5 seconds, while ocean waves can be striking at both very short (1/1000s to freeze spray) and very long (10 to 30 seconds for a misty effect) shutter speeds.
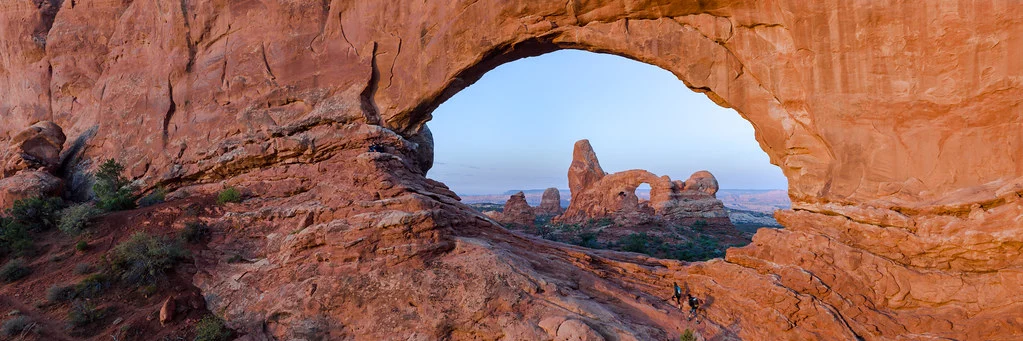
Wide Vista and Mountain Scenes
| Setting | Value |
|---|---|
| Aperture | f/8 – f/11 |
| ISO | 100 |
| Focus Distance | Hyperfocal distance for maximum depth of field |
| Focal Length | 14mm – 35mm for grand vistas; 70mm – 200mm for compressed layers |
For maximum sharpness in wide vistas, focus at the hyperfocal distance. Do not simply focus on infinity, because that wastes depth of field in the foreground. Use our hyperfocal distance calculator to find the ideal focus point.
Consider your focal length choice carefully. Wide-angle lenses (14mm to 35mm) emphasize foreground elements and create a sense of depth and drama. Telephoto lenses (70mm to 200mm) compress layers, stacking mountains and ridgelines into a more abstract, graphical composition. Both are valid approaches. Many landscape photographers carry both a wide zoom and a telephoto zoom to handle different compositions at the same location.
Night Landscape and Starry Skies
| Setting | Value |
|---|---|
| Aperture | Widest available (f/1.4 – f/2.8) |
| ISO | 1600 – 6400 |
| Shutter Speed | Use the 500 Rule: 500 / focal length = max seconds before star trails |
| Focus | Manual focus on a bright star or distant light using Live View at maximum zoom |
| White Balance | 3800K – 4200K for neutral night sky |
With a 24mm lens, the 500 Rule gives you 500 / 24 = approximately 20 seconds before stars begin to trail. For more detail on night shooting techniques, see our night photography guide and astrophotography guide.
Stormy and Overcast Conditions
Do not put your camera away when the weather turns. Overcast skies produce soft, even light that eliminates harsh shadows and saturates colors. Storm clouds add drama that blue skies simply cannot match.
| Setting | Value |
|---|---|
| Aperture | f/8 – f/11 |
| ISO | 100 – 400 |
| Shutter Speed | 1/30s – 2s on tripod (use slower speeds to blur rain or moving clouds) |
| White Balance | Cloudy (adds warmth) or Auto |
In overcast conditions, exclude most of the sky from your composition since featureless gray sky is uninteresting. Focus on the landscape itself: forests, rivers, details, and textures. If storm clouds have dramatic shape and movement, include them and use a slower shutter speed to blur the motion.
Focusing Tips for Landscape Photography
Precise focus is critical in landscapes because you are often printing or displaying at large sizes where any softness is visible.
Use Single Point AF
Do not let the camera decide where to focus. Switch to single-point AF and place the focus point on the most important element in the scene, usually about one-third of the way into the frame for maximum depth of field coverage. If you are not sure where to focus, use the hyperfocal distance technique described above.
Use Live View for Critical Focus
For ultimate precision, switch to Live View, zoom in to 10x magnification on your focus point, and manually fine-tune focus. This is especially important for night landscapes and any scene where you are shooting wide open. Phase-detection autofocus (through the viewfinder) can be off by a small amount. Live View uses contrast-detection focus, which is slower but more accurate, or lets you manually verify sharpness by eye.
Back-Button Focus
Assign focus to a rear button (AF-ON) instead of the shutter button. This way, you can focus once, release the button, and recompose freely without the camera refocusing each time you press the shutter. It is particularly useful in landscape photography where your focus point rarely changes between shots. Learn more in our back-button focus guide.
Focus Stacking for Maximum Sharpness
When you have an extreme foreground-to-background depth, even f/11 at the hyperfocal distance may not keep everything sharp. Focus stacking solves this by combining multiple exposures focused at different distances. Take three to five shots, each focused at a different point from near to far, all at f/8. Merge them in software (Photoshop, Helicon Focus, or similar) to create an image that is razor-sharp from inches away to infinity.
This technique is especially powerful for wide-angle compositions with close foreground flowers, rocks, or textures leading to a distant background.
Essential Filters for Landscape Photography
Filters are not optional accessories for serious landscape photographers. They solve problems that cannot be fixed in post-processing.
Circular Polarizer (CPL)
A polarizing filter reduces reflections and glare, deepens blue skies, and saturates colors. It is the one filter whose effect cannot be fully replicated in software. Use it to cut through haze on distant mountains, remove reflections from water surfaces (revealing rocks and fish below), and make foliage colors pop. Rotate the filter while looking through the viewfinder to adjust the strength of the effect.
A CPL reduces light by about 1 to 2 stops, so factor that into your exposure. It works best when you are shooting at 90 degrees to the sun. At very wide angles (14mm to 20mm), a polarizer can create uneven darkening across the sky, so use it with caution on ultra-wide lenses.
Neutral Density (ND) Filters
ND filters reduce the amount of light entering the lens without affecting color. They allow you to use longer shutter speeds than would otherwise be possible, enabling silky water, blurred clouds, and other motion effects even in bright daylight. Common strengths are 3-stop, 6-stop, and 10-stop. A 6-stop ND is the most versatile starting point.
Graduated ND Filters
Graduated ND filters are dark on top and clear on the bottom, designed to balance the brightness between sky and foreground. They come in soft-edge (gradual transition, best for uneven horizons like mountains) and hard-edge (abrupt transition, best for flat horizons like ocean scenes). While exposure bracketing and HDR can replicate this effect digitally, a graduated ND lets you get it right in a single frame with no post-processing required.
Common Landscape Settings Mistakes
1. Always Shooting at f/22
As discussed above, diffraction at f/22 softens your images significantly. Stay at f/8 to f/11 for the sharpest results. Only go to f/16 when you need extreme depth of field with a very close foreground, and consider focus stacking as a better alternative.
2. Ignoring the Histogram
The LCD preview on your camera is unreliable, especially in bright outdoor light. It changes appearance based on screen brightness settings and ambient light. Always check your histogram to ensure you are not clipping highlights (losing detail in bright areas). Use the ETTR technique described above to maximize dynamic range and minimize noise.
3. Using Auto ISO on a Tripod
Auto ISO is useful for handheld shooting, but on a tripod it can raise your ISO without reason. Manually set ISO 100 and let the shutter speed be as long as needed. Your images will be cleaner and have more dynamic range. There is no downside to a slow shutter speed on a stable tripod.
4. Not Using a Tripod
A tripod is not just for long exposures. It forces you to slow down, carefully compose, and check your edges. The best landscape photographers almost always use tripods because the discipline improves every aspect of the image. A tripod also lets you keep ISO at its lowest, use optimal apertures, and shoot at any time of day regardless of light level.
5. Shooting JPEG Only
Landscape images often require significant post-processing: recovering blown skies, lifting shadows, adjusting white balance. JPEG files lose too much data for these edits. Always shoot RAW for landscapes. The extra file size is worth it for the editing flexibility you gain.
6. Focusing on Infinity
Many beginners twist the focus ring to the infinity mark and assume everything will be sharp. In reality, focusing at infinity wastes depth of field in the foreground. Use the hyperfocal distance to maximize sharpness across the entire scene. On many lenses, the true infinity focus point is slightly before the infinity mark on the barrel.
7. Neglecting Composition
Perfect settings mean nothing without strong composition. Before adjusting any settings, find a compelling foreground element, apply the rule of thirds or leading lines, and check your edges for distractions. The settings exist to execute your vision. They are not the vision itself.
Frequently Asked Questions
What is the best aperture for landscape photography?
For most landscapes, f/8 to f/11 delivers the sharpest results. This range balances depth of field with optical sharpness, avoiding both wide-aperture softness and small-aperture diffraction. Only go to f/16 if you have an extremely close foreground element and cannot focus stack.
Do I need a full-frame camera for landscape photography?
No. Crop sensor cameras produce excellent landscape images. Full-frame sensors do offer wider fields of view at the same focal length and slightly better dynamic range at base ISO, but the difference is smaller than most people think. Great landscape photography depends far more on light, composition, and technique than on sensor size.
Should I always use a tripod for landscapes?
While a tripod is highly recommended, you can capture great landscapes handheld in bright conditions. Use the reciprocal rule for minimum shutter speed, enable image stabilization, and keep ISO as low as your shutter speed allows. For sunrise, sunset, blue hour, long exposures, and any situation requiring maximum image quality, a tripod is essential.
What ND filter strength should I start with?
A 6-stop ND filter is the most versatile starting point. It turns a 1/60s exposure into a 1-second exposure, which is enough to smooth water and create subtle cloud motion in most conditions. If you want extreme effects like glassy water in bright sunlight, add a 10-stop ND to your kit.
How do I avoid blurry landscape photos?
The most common causes of blurry landscapes are camera shake (use a tripod and timer/remote), incorrect focus point (use single-point AF at the hyperfocal distance), and diffraction from too-small apertures (stay at f/8 to f/11). Check each of these systematically if your images are not sharp.
Try This: Practice Exercises
Exercise 1: The Aperture Comparison
Find a landscape scene with both a near foreground and a distant background. Set up your tripod and take three identical compositions at f/5.6, f/11, and f/22. Compare the images at 100% zoom on your computer. Notice how f/11 is sharper overall than f/22 despite less depth of field on paper. Pay special attention to the corners, where the difference is most obvious.
Exercise 2: Shutter Speed Effects on Water
Visit a stream, fountain, or waterfall. Shoot the same composition at 1/500s, 1/15s, 1s, and 5s (use an ND filter for the longer exposures if needed). Study how different shutter speeds change the character of the water. Decide which look you prefer for different situations. Most photographers find that 0.5s to 2s produces the most appealing balance between motion and texture.
Exercise 3: Golden Hour Challenge
Arrive at a location 30 minutes before sunset. Set your camera to f/11, ISO 100, and Aperture Priority. Take a photo every 5 minutes as the light changes. Review the shutter speeds the camera chose and how the light transforms the scene. This trains your eye to recognize the best moments and understand how quickly golden hour light changes.
Related Resources
Ready to deepen your landscape photography skills? Explore these resources:
- Aperture in Photography – Understand depth of field and diffraction in depth
- Shutter Speed Guide – Learn creative motion techniques
- Understanding ISO – Why base ISO matters for landscapes
- The Exposure Triangle – How aperture, shutter speed, and ISO work together
- Landscape Photography Hub – Complete genre guide
- Composition Guide – Strengthen your landscape compositions
- Photo Editing for Beginners – Process your landscape RAW files
Related Tools and Guides
- Hyperfocal Distance Calculator – Find the focus point that maximizes sharpness across the entire scene
- Depth of Field Calculator – Preview depth of field for your specific camera and lens
- How to Photograph Waterfalls – Silky water techniques for landscape scenes
- How to Photograph Sunsets – Golden hour settings and techniques
- How to Photograph Northern Lights – Night landscape settings for aurora