To teach photography well, teach seeing before settings. Spend the first weeks on light, framing and point of view with whatever cameras the class has, usually phones, then add exposure controls once students can say why one picture works better than another. Give one constraint per assignment, ask for a small edited set (3 to 5 frames) with a short written reflection, critique in every session, and grade the process and the choices with a rubric students see in advance.
This guide is for classroom teachers, homeschooling parents and club leaders who have to plan a unit or a term. It ties together the single-session lesson plans for each grade on this site and the three free courses, and it goes further than photography for kids (which is written for parents and young children) by covering term planning, shared equipment, assignments that fit one class period, critique, a sample grading rubric, consent and display.
What students should be able to do at each stage
Start planning from outcomes, not from a list of topics. A useful outcome is something you can watch a student do: “frames the subject so nothing distracting touches the edge”, not “understands composition”. The table groups the school years into four stages. The grade links open a one-lesson plan for that year, each with timings, materials, a practical challenge and a follow-up activity. Ages are approximate. Treat each plan as a first session and build the weeks around it.
| Stage | By the end, a student can | Lesson plans |
|---|---|---|
| Early primary (ages 6 to 8) | Hold the camera still, keep fingers off the lens, get close to a subject, tell you what the picture is of | Grade 1, Grade 2, Grade 3 |
| Upper primary (ages 9 to 11) | Choose a high, low or eye-level viewpoint on purpose, notice where the light comes from, pick the best of five frames and say why | Grade 4, Grade 5, Grade 6 |
| Middle school (ages 12 to 14) | Use named composition tools, adjust brightness and focus deliberately, make basic edits, build a five-picture story with captions | Grade 7, Grade 8, Grade 9 |
| High school (ages 15 to 18) | Control aperture, shutter speed and ISO for an intended effect, plan and edit a project around an idea, write an artist statement, critique a classmate’s work with evidence | Grade 10, Grade 11, Grade 12 |
A term plan that puts seeing before settings
The most common planning error is to open with the camera’s dials. Aperture numbers mean nothing to a student who has not yet noticed that the background of a picture matters. Open with looking, and bring in each technical control at the moment it solves a problem the students have already met in their own pictures.
The plan below assumes ten weeks. Shorten it by merging weeks 6 and 7 and dropping week 8.
| Week | Focus | What students make |
|---|---|---|
| 1 | Looking: one subject, many viewpoints. Holding the camera steady. | 12 frames of one ordinary object, no two from the same position |
| 2 | The frame: edges, backgrounds, getting closer | Before and after pairs: a cluttered frame and a cleaned-up one |
| 3 | Light: direction, hard and soft, window light and shade | The same object lit from the front, the side and behind |
| 4 | Composition tools: thirds, lines, framing, pattern | One picture per tool, labelled |
| 5 | First formal critique and re-shoot | One earlier assignment repeated after feedback |
| 6 | Exposure: brightness as a choice, then motion (freeze and blur) | A bright and a dark version of one scene; one frozen and one blurred movement |
| 7 | Focus and depth: sharp subject, soft or sharp background | A portrait of an object with the background controlled |
| 8 | Editing: crop, straighten, brightness, contrast, colour | An original and an edit side by side, with the changes listed |
| 9 | Story: sequence, variety of distances, captions | Shooting for the final project |
| 10 | Selection, final critique and display | A finished set of 5 with a short statement |
For reading material, assign individual lessons from the free courses rather than whole courses. The Photography Fundamentals course starts with observation before it reaches camera controls, which matches weeks 1 to 5; the Intermediate Photography course suits older students in weeks 6 to 8; and the Applied Photography Masterclass works genre by genre, which helps students who have chosen portraits, landscape or street work for a final project. The exposure triangle page can replace a printed handout in week 6.
The shape of a single session
A 50 to 60 minute session works best in four parts, and the shooting part should be the longest:
- Look (5 to 10 minutes). Project two or three photographs that show today’s idea. Ask “what do you notice?” before you explain anything.
- Demonstrate (5 minutes). Take one picture badly and then well, in front of the class, with a phone connected to the screen if you can.
- Shoot (20 to 25 minutes). One constraint, a fixed boundary (this room, this corridor, the yard up to the fence) and a clear return time.
- Review (10 to 15 minutes). Each student chooses one frame. Look at as many as time allows and name what worked.
Teaching with phones and shared cameras
Few classrooms have a camera for every student, and they do not need one. Everything in weeks 1 to 5 can be taught on a phone or tablet, and most of weeks 6 to 8 can too. On most phones, tapping the screen sets focus and brightness on that point, and dragging the brightness slider that appears is a working lesson in exposure compensation. The guides to smartphone photography and phone camera settings cover those controls in detail.
When devices are shared, structure the sharing so nobody stands idle:
- Pairs or threes with roles. One photographer, one director who finds the next subject or holds a reflector (a sheet of white card), one recorder who notes what was tried. Rotate every five minutes on your signal.
- A frame limit. Give each student 10 or 12 frames per task. A limit slows students down, makes them look first, and keeps the review manageable.
- Stations. Split the room into a window-light table, a shadow corner with a desk lamp, a texture hunt in the corridor and an editing desk. Groups move every 10 minutes, so four devices can serve a whole class.
- Cardboard viewfinders. A rectangle cut from card lets every student practise framing while waiting for a camera. It costs nothing and it teaches the same skill.
Agree an equipment routine: strap on before the camera leaves the table, lens wiped at the start, batteries on charge at the end, a numbered slot for every device. Decide in advance how files leave the devices. A shared class folder with one subfolder per student, and file names that begin with the student’s initials and the assignment number, saves time at grading. Check your school’s rules on phones in lessons before you plan around personal devices, and have a school-owned alternative for students who do not have one.
Not enough cameras to go round? The camera simulator runs in a browser with no sign in, and its 21 challenges cover aperture, shutter speed, ISO, metering and white balance.
Ten assignments that fit one class period
Each of these needs no travel, works on any camera and can be shot in 20 minutes. The constraint is the teaching point, so state it in one sentence and do not add a second.
- One object, twelve views. A chair, a shoe, a water bottle. No two frames from the same position or distance. Teaches that viewpoint is a decision. Pair it with the guide to photography angles.
- Alphabet hunt. Find letter shapes in architecture, furniture and nature, not printed letters. Teaches looking at shape instead of at things.
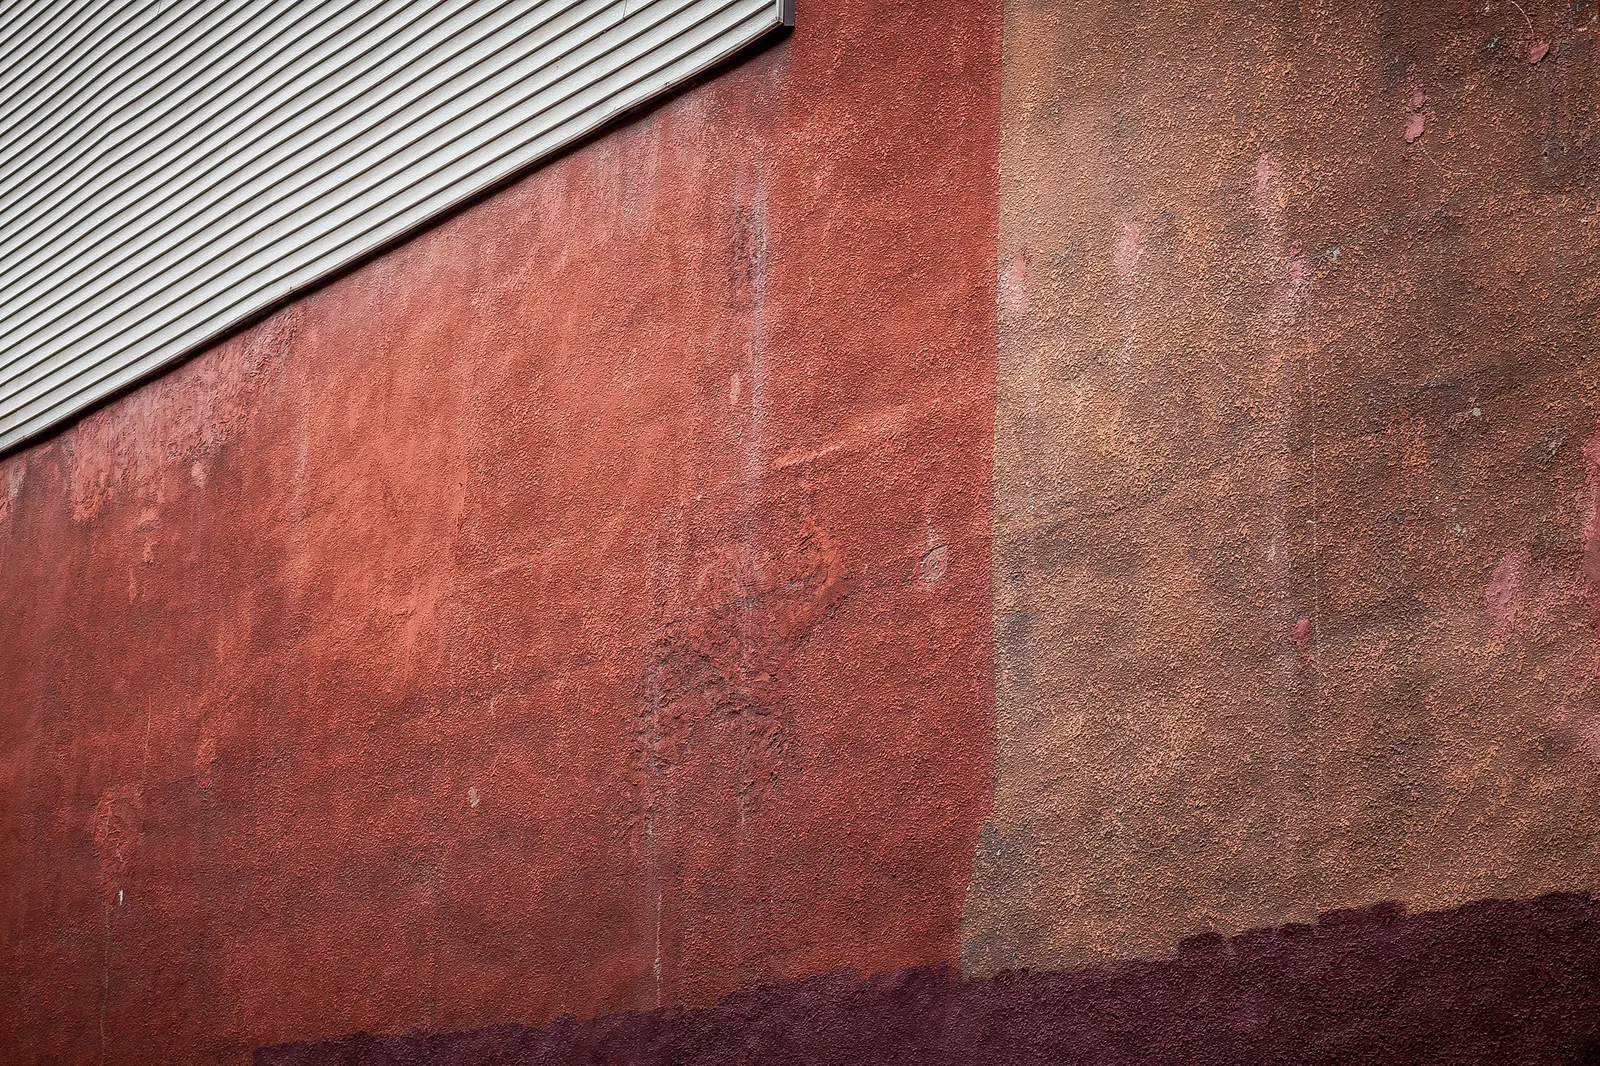
- Texture only. Fill the whole frame with a surface: brick, bark, fabric, peeling paint. No objects. See texture in photography for how side light brings a surface out.
- Shadows as the subject. On a sunny day, photograph shadows rather than the things that cast them. Indoors, use one lamp.
- A frame within a frame. Shoot through a doorway, a window, a gap in a fence or a pair of hands.
- Lines that lead. Corridors, railings, floor tiles and paths, with something at the end of the line. Links to leading lines.
- One colour. Each group draws a colour from a bag and may only photograph that colour.
- Thirds and centre. The same subject placed on a third and in the dead centre. Students argue for the one they prefer. See the rule of thirds.
- Portrait without a face. Show who someone is through hands, shoes, a bag or a desk. This sidesteps most consent problems and produces thoughtful pictures.
- Five-frame story. A wide view, a medium view, a close detail, an action and an ending, about something that happens in school. The guide to types of camera shots gives the vocabulary, and the photo essay guide takes it further.
For homework and longer units, the site has ready-made material: a photography scavenger hunt with lists for different skill levels, photography project ideas for final projects, a set of storytelling assignments for students, and the assignments attached to the Fundamentals lessons, beginning with the Lesson 1 assignment. Paired pictures are another reliable brief for older students; see diptychs and triptychs.
Running a class critique in twenty minutes
Critique is where much of the learning happens. Keep it short, frequent and structured so that it feels routine. The full method (describe, interpret, evaluate) is set out in how to critique photography; in a classroom it needs a few extra rules.
- Show work anonymously at first. Put one picture per student into a slideshow without names. Students speak more honestly about the picture and less about the person.
- Describe before judging. The first speaker may only say what is in the frame and where. “I like it” is not allowed until someone has described it.
- Use sentence starters. “My eye goes first to…”, “The light is coming from…”, “One thing I would try is…”. Print them on a card for younger classes.
- Two strengths and one question. Each picture gets two things that work and one question for the photographer, such as “what would happen if you stepped left?”
- The photographer speaks last. They say what they intended and what they would change. That answer is evidence for the reflection row of your rubric.
With 30 students you cannot discuss every picture aloud. Alternatives: a silent gallery walk in which each student leaves two sticky notes on other students’ prints, or groups of four that critique among themselves while you circulate.
A sample grading rubric for photographs
Grading photographs feels subjective until the criteria are written down. A rubric makes the grade about observable choices, and it lets a student with a basic phone score as well as one with an expensive camera. Share it when you set the assignment, not when you return the grade. The version below uses four criteria and four levels; adapt the wording and weighting to your own curriculum and assessment policy.
| Criterion | 4: Excellent | 3: Secure | 2: Developing | 1: Beginning |
|---|---|---|---|---|
| Meets the brief | Every frame answers the constraint, and at least one answers it in an unexpected way | Every frame answers the constraint | Some frames answer the constraint | The set ignores the constraint or is incomplete |
| Composition | Clear subject, deliberate viewpoint, clean edges and background in every frame | Clear subject and a considered viewpoint in most frames | Subject is identifiable, but backgrounds or edges distract | No clear subject; frames look unplanned |
| Technical control | Focus and brightness support the idea throughout; any blur or darkness is clearly intended | Sharp where it matters and well exposed in most frames | Frequent unintended blur, tilt or poor exposure | Faults prevent the pictures from being read |
| Selection and reflection | A tight edit with varied frames; the written reflection explains choices and names a specific next step | A sensible edit; the reflection describes what was done and why | Near-duplicates in the edit; the reflection only describes the pictures | No edit made, or no reflection |
Each row scores 1 to 4, for a total out of 16. If you want to reward effort and thinking over polish, double the last row and mark out of 20. Three practical points make the rubric fairer:
- Grade a set, not a single picture. One lucky frame says little. Three to five frames show whether the student can repeat a result.
- Ask for the rejects. A contact sheet or folder of everything shot shows the process: how many viewpoints were tried and whether the student improved during the session.
- Keep taste out of it. Whether you like the subject is not a criterion. A picture of a bin can score 16.
For checking knowledge rather than pictures, the free photography quizzes are ten questions each and work as a starter or an exit ticket. Use them before teaching a topic to find out what the class already knows.
Consent, privacy and photographing classmates
Your school’s policies on photographing students, on devices and on publishing images come first. Read them before the unit starts, ask the person responsible for safeguarding or data protection if anything is unclear, and follow them where they differ from anything here. Rules on images of children vary by country, region and school. What follows is general good practice, not legal advice.
- Check the permission records. Most schools hold a record of which families have agreed to photographs and for what purposes. Know which students must not be photographed or published before any camera comes out, and handle it without singling those students out.
- Teach asking as a skill. A student asks before photographing a classmate, and “no” needs no reason. Anyone can ask for a picture of themselves to be deleted, and it is deleted in front of them.
- Design the brief to reduce risk. Objects, places, light, shadows, hands and silhouettes teach every skill on this page. Portraits can be of a willing partner inside the lesson only.
- Set no-camera areas. Toilets, changing rooms and anywhere else your school names are off limits at all times.
- Keep files on school systems. Prefer school devices and school storage. If personal phones are allowed, set a rule that pictures of other students are transferred to the class folder and then deleted from the phone, and that nothing is posted to personal accounts.
- Publish carefully. For anything shown beyond the classroom, follow the school’s rules on names and faces. A common approach is first name only or no name, and no picture that identifies a student whose family has not agreed.
For older students, photography etiquette and ethics gives discussion material, and model release forms explains how working photographers record permission.
Displaying and printing student work
An audience changes how carefully students edit. Plan the display at the start of the unit so the final project has a destination.
- Print small and consistently. Prints of 10 by 15 cm (4 by 6 inches) or A5 are cheap, and a grid of same-size prints looks deliberate. Mount them on black or white card with an even border.
- Hang at student eye level. Put the centre of the display at the eye height of the viewers, and keep equal gaps between prints.
- Add a caption card. A title, the assignment and one sentence from the student’s reflection, in the form of name your school permits.
- Let students curate. Give a group the job of ordering the wall: which picture opens and which sit side by side.
Phone pictures usually print well at these sizes. If prints come out darker than the screen, raise the brightness slightly before printing and make one test print first; how to prepare photos for printing explains why, and the photography exhibition guide covers a larger end-of-year show.
Common mistakes
- Starting with the exposure triangle. Students memorise numbers and still take dull pictures. Fix: spend the first third of the unit on viewpoint, framing and light, and introduce each control when a picture needs it.
- Briefs that are too open. “Take some interesting photos” produces random snapshots. Fix: one constraint, one boundary, one number of frames.
- No time to review. Pictures that are never looked at teach nothing. Fix: end every session with each student choosing one frame, even if only five are discussed.
- Grading the camera. Sharper, cleaner files from better equipment earn higher marks. Fix: grade choices and process with a rubric that a phone can max out.
- Critique as a list of faults. Students stop showing work. Fix: description first, two strengths, then one question.
- Leaving consent until a problem appears. Fix: check the school’s policy and permission records in the planning stage, and teach the asking rule in the first session.
Try this
Before you teach your first session, do the first assignment yourself. Set a timer for 15 minutes, choose one ordinary object in your classroom and take exactly 12 frames of it with your phone, no two from the same position: above, below, very close, far away, through something, against the window, in shadow. Then choose your best three and write two sentences about why. You now have demonstration pictures, a realistic sense of how long the task takes, and a worked example of the reflection. Score your own set against the rubric to test its wording.
Frequently asked questions
Do students need real cameras to learn photography?
No. Viewpoint, framing, light, selection and critique can all be taught on phones or tablets, and those are the skills that make the biggest difference. Dedicated cameras become useful when older students study aperture, shutter speed and lens choice, and even then one camera shared between three or four students is workable.
How do you grade photography fairly?
Publish a rubric with the assignment, grade a small edited set instead of one picture, and include the student’s process and written reflection. Criteria should describe things you can observe, such as whether the brief was met and whether the background was controlled, and should leave out personal taste and equipment quality.
What should a first photography lesson cover?
How to hold the camera steady, how to look before shooting, and one exercise in changing viewpoint, such as twelve different views of a single object. Finish by having each student choose their best frame and say why. Leave exposure settings for later weeks.
How long should a photography unit be?
Six to ten weeks gives enough time for seeing, light, composition, basic exposure, editing and a small final project. A shorter block of three or four sessions can still cover viewpoint, framing and light with a single critique at the end.
Related guides
- Photography for kids: games, cameras and projects for young children outside school.
- How to critique photography: the describe, interpret, evaluate method in full, with worked examples.
- Photography Fundamentals: the free beginner course, with assignments and quizzes alongside the lessons.
- Free photography quizzes: short knowledge checks by topic.
- Photography scavenger hunt: themed lists for a single lesson or a field trip.
- Photography project ideas: themes for final projects and independent study.
- How to create a photo essay: planning, shooting and ordering a picture story.
- Photography composition techniques: the reference page for the tools in week 4.