Desert photography depends on low sun. Bare sand and rock have no trees or grass to give them shape, so shadows do it: shoot in the first and last hour of the day with the light coming from the side, expose for the bright sand (often +0.7 to +1 stop over the meter), and use f/8 to f/11 at base ISO. At midday, go into canyons, where sunlight bounced between the walls gives the richest colour.
This guide covers dunes, canyons, open arid country, the hot middle of the day, night skies, and keeping yourself and your camera working in sand and heat. For tripod technique, depth of field and general composition, see landscape photography; for portraits and everyday subjects in strong sun, see shooting in harsh daylight. This page deals with what is particular to dry places.
Why deserts need low sun more than other landscapes
A forested hillside has colour and texture in any light. A dune or a bare rock plain is one material in one colour, and from above it is lit evenly. The picture exists only when shadows appear. That makes the direction of light the first decision, ahead of lens or location.
Desert air is also dry and usually clear. With little moisture or cloud to scatter it, sunlight arrives hard: shadow edges are sharp and the difference between lit and shaded ground is large. At noon that is harsh. Near sunrise and sunset it is exactly what you want, because the light is both warm and crisp, and each ripple, crest and ledge throws a clean shadow.
A workable day looks like this:
- Before sunrise. Walk in by headlamp and be in place 30 minutes early. Twilight gives soft, even, slightly blue light with no hard shadows, good for pastel scenes.
- First hour of sun. The main event for dunes and open country. Shadows are long and the sand is at its warmest colour.
- Mid-morning to mid-afternoon. Narrow canyons, shaded details, scouting, rest and water.
- Last hour of sun. The same low light from the other side, often with more wind and more dust in the air.
- After sunset. Turn around. Opposite the sunset, a pink band often sits above a blue-grey band along the horizon. The blue-grey band is the shadow of the Earth rising, and it is easy to see in clear desert air.
Photographing sand dunes: crests, ripples and footprints
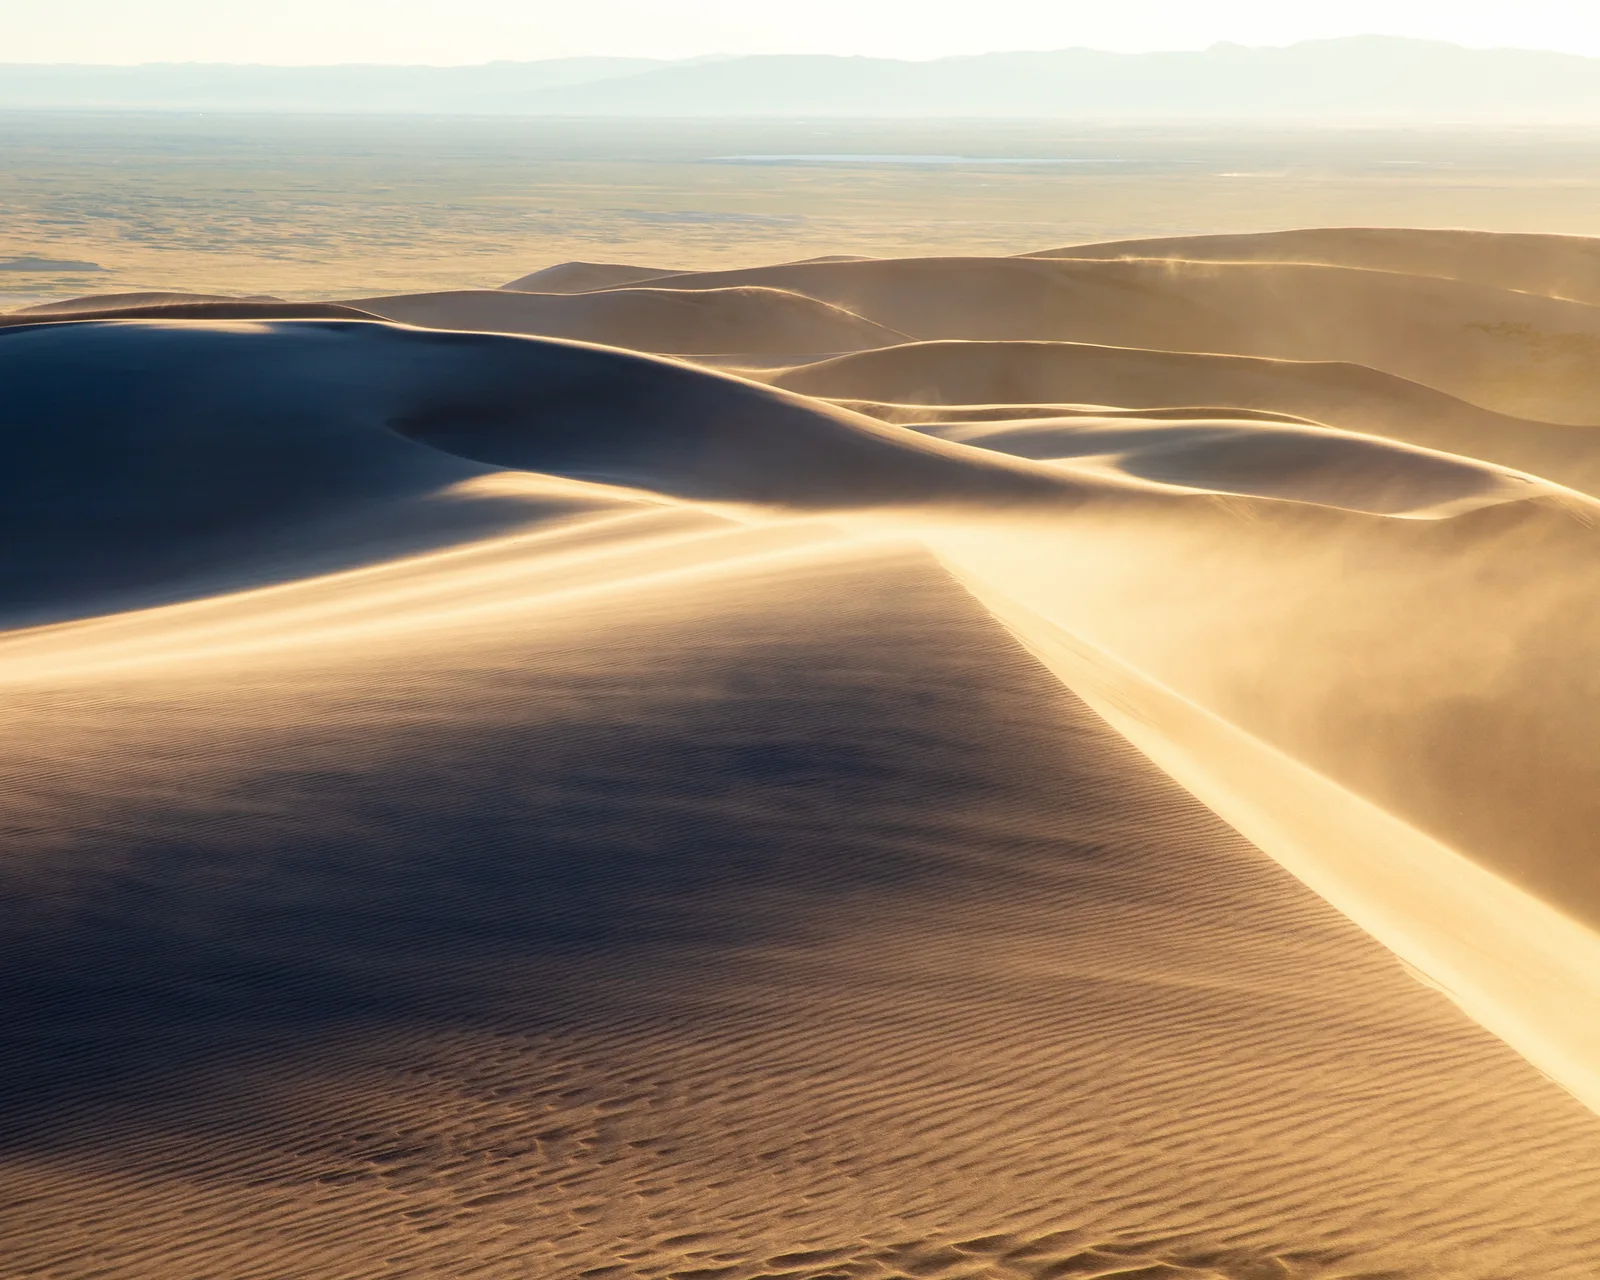
Wind builds a dune with a long, gentle slope on the side it blows from and a short, steep slope (the slip face) on the sheltered side. Dry sand cannot stand steeper than roughly 30 to 34 degrees, so slip faces all sit at about that angle. The line where the two slopes meet is the crest, and it is the subject of most dune pictures.
Find the crest and light it from the side
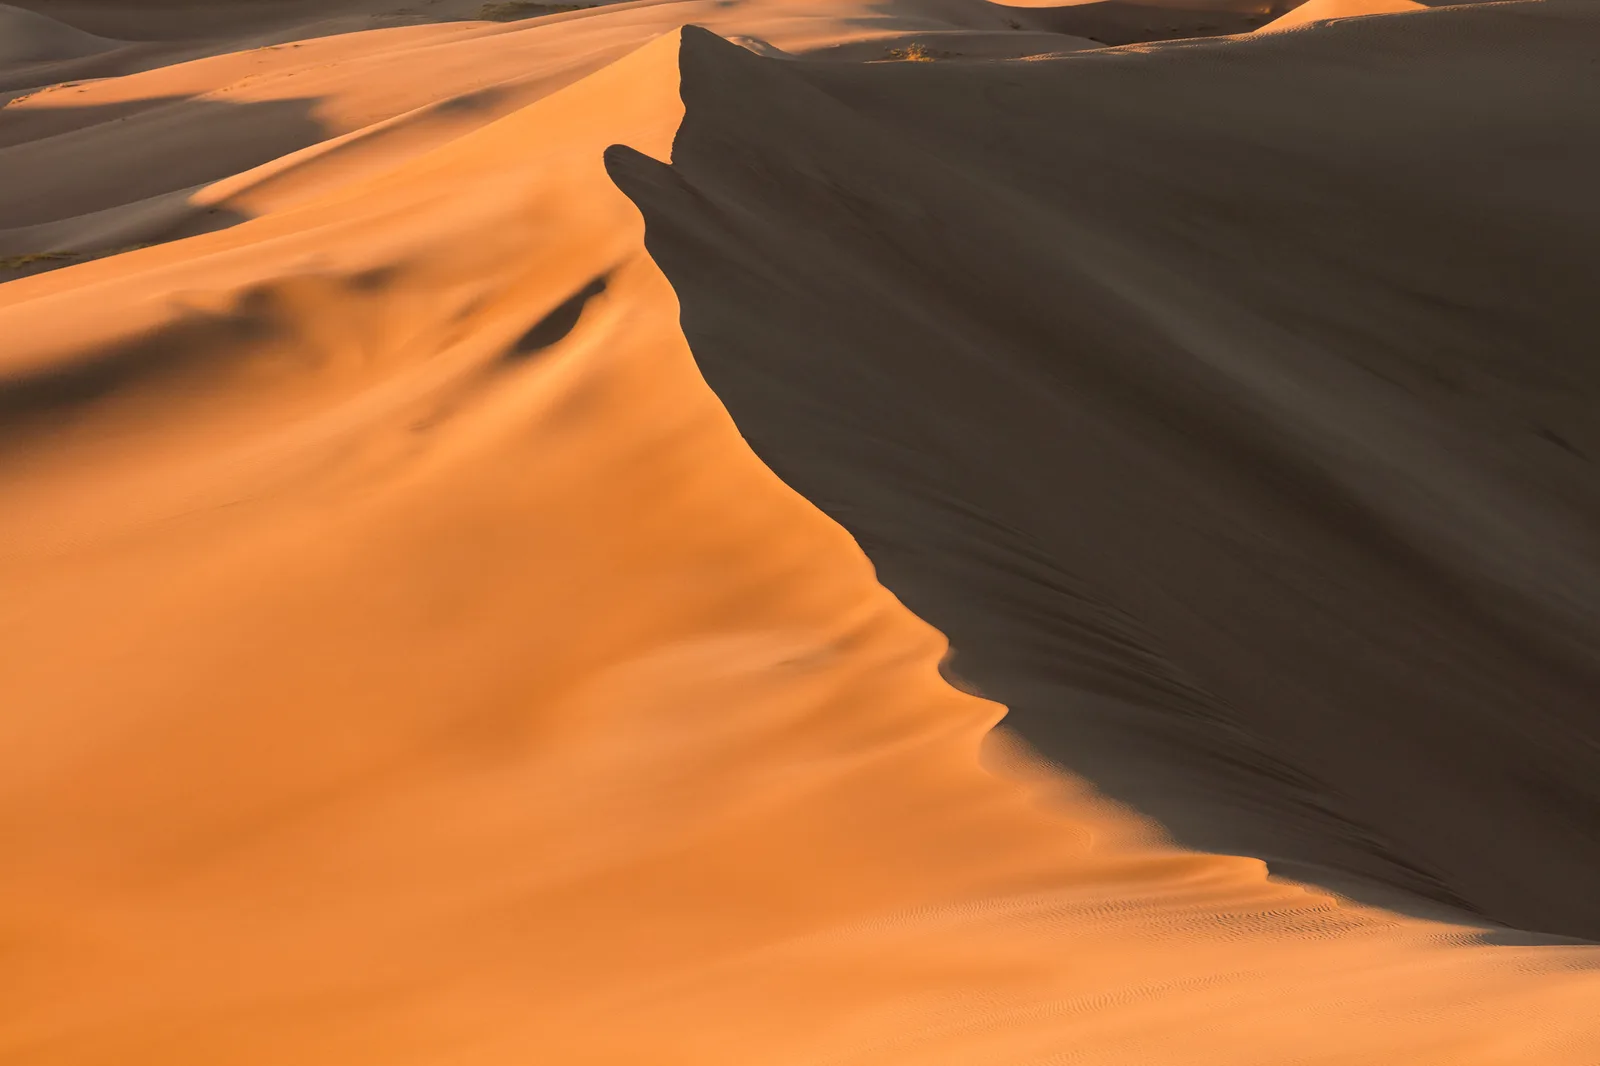
With the sun low and off to one side, one flank of the dune is lit and the other falls into shadow. The crest becomes a sharp line between bright and dark, usually an S-curve. Move until that line runs through the frame in a way you like: from a lower corner toward the upper third is a reliable start. If the sun is behind you, both flanks are lit and the line disappears; walk a quarter of the way around the dune and look again.
Long lens or wide lens
From the edge of a dune field, a telephoto between 100 and 400mm picks out overlapping crests and stacks them into bands of light and shadow with no sky at all. This is the easiest way to make a strong dune picture, and it keeps you off the sand you are photographing. The handling advice in the telephoto guide applies, especially in wind.
Inside the dunes, a wide lens held 30 to 50cm above the surface turns ripples into a foreground that leads to a distant crest. Ripples form at right angles to the wind and only show when the light skims across them, so this works for a short time after sunrise and before sunset. Use f/11 to f/16 and focus about a metre in. Ripples are a natural case of pattern and repetition; a single plant, stone or animal track breaking the pattern gives the eye a place to stop.
Keep your own tracks out of the picture
- Decide on the composition from a distance before you walk toward it.
- Approach along the side or the back of the dune, never across the face you intend to shoot.
- Walk on crests where you can. The sand is firmer there and climbing is easier than going straight up a slip face.
- Go early. Wind overnight often wipes the previous day’s footprints, and popular dunes are tracked again by mid-morning.
- Allow time. Walking in soft sand is slow; plan on about double what the same distance would take on a trail.
Canyons and reflected light
Canyons reverse the timetable. In a narrow canyon the best light is not direct sun but sunlight that has struck one wall and bounced onto the other. Sandstone reflects mostly warm wavelengths, so each bounce makes the light more orange. A shaded wall lit this way appears to glow from within.
- Go when the sun is high. Sun has to reach the upper walls before it can bounce down. Late morning to early afternoon is usually best in deep, narrow canyons.
- Photograph the shaded wall. Look for a surface in shade that faces a sunlit one. The stronger the sunlit wall, the brighter the glow.
- Leave out the sky and direct sun. A strip of sky or a patch of sunlit rock is many stops brighter than the glowing shade and will burn out. Frame so that everything in the picture is lit by bounce.
- Fix the white balance. Auto white balance sees a frame full of orange and cools it toward grey. Use the daylight preset, or shoot raw and set it later.
- Use a tripod. At f/8 to f/11 and ISO 100, exposures in a deep slot commonly run from half a second to several seconds.
Fine dust hangs in the air in slot canyons, so fit one lens before you enter and leave it on. Many well-known slot canyons are on managed or private land and need a permit or guide; check the local rules before you travel.
Above all, narrow canyons are dangerous in rain. A storm many kilometres upstream can send a flash flood through a canyon under a blue sky. Check the forecast for the whole area that drains into the canyon, not only the spot you are standing in, and stay out if storms are possible. More on this in storm photography.
Wide canyons seen from the rim behave like other big landscapes: side light early and late shows the layers, and midday light flattens them. The floor often sits in shadow while the rim is in sun, so bracket three frames two stops apart when you want detail in both.
Emptiness, scale and where to put the horizon
Open desert is mostly space, and the pictures that work treat the space as the subject. That is the method of minimalist photography: one clear element and a lot of nothing around it.
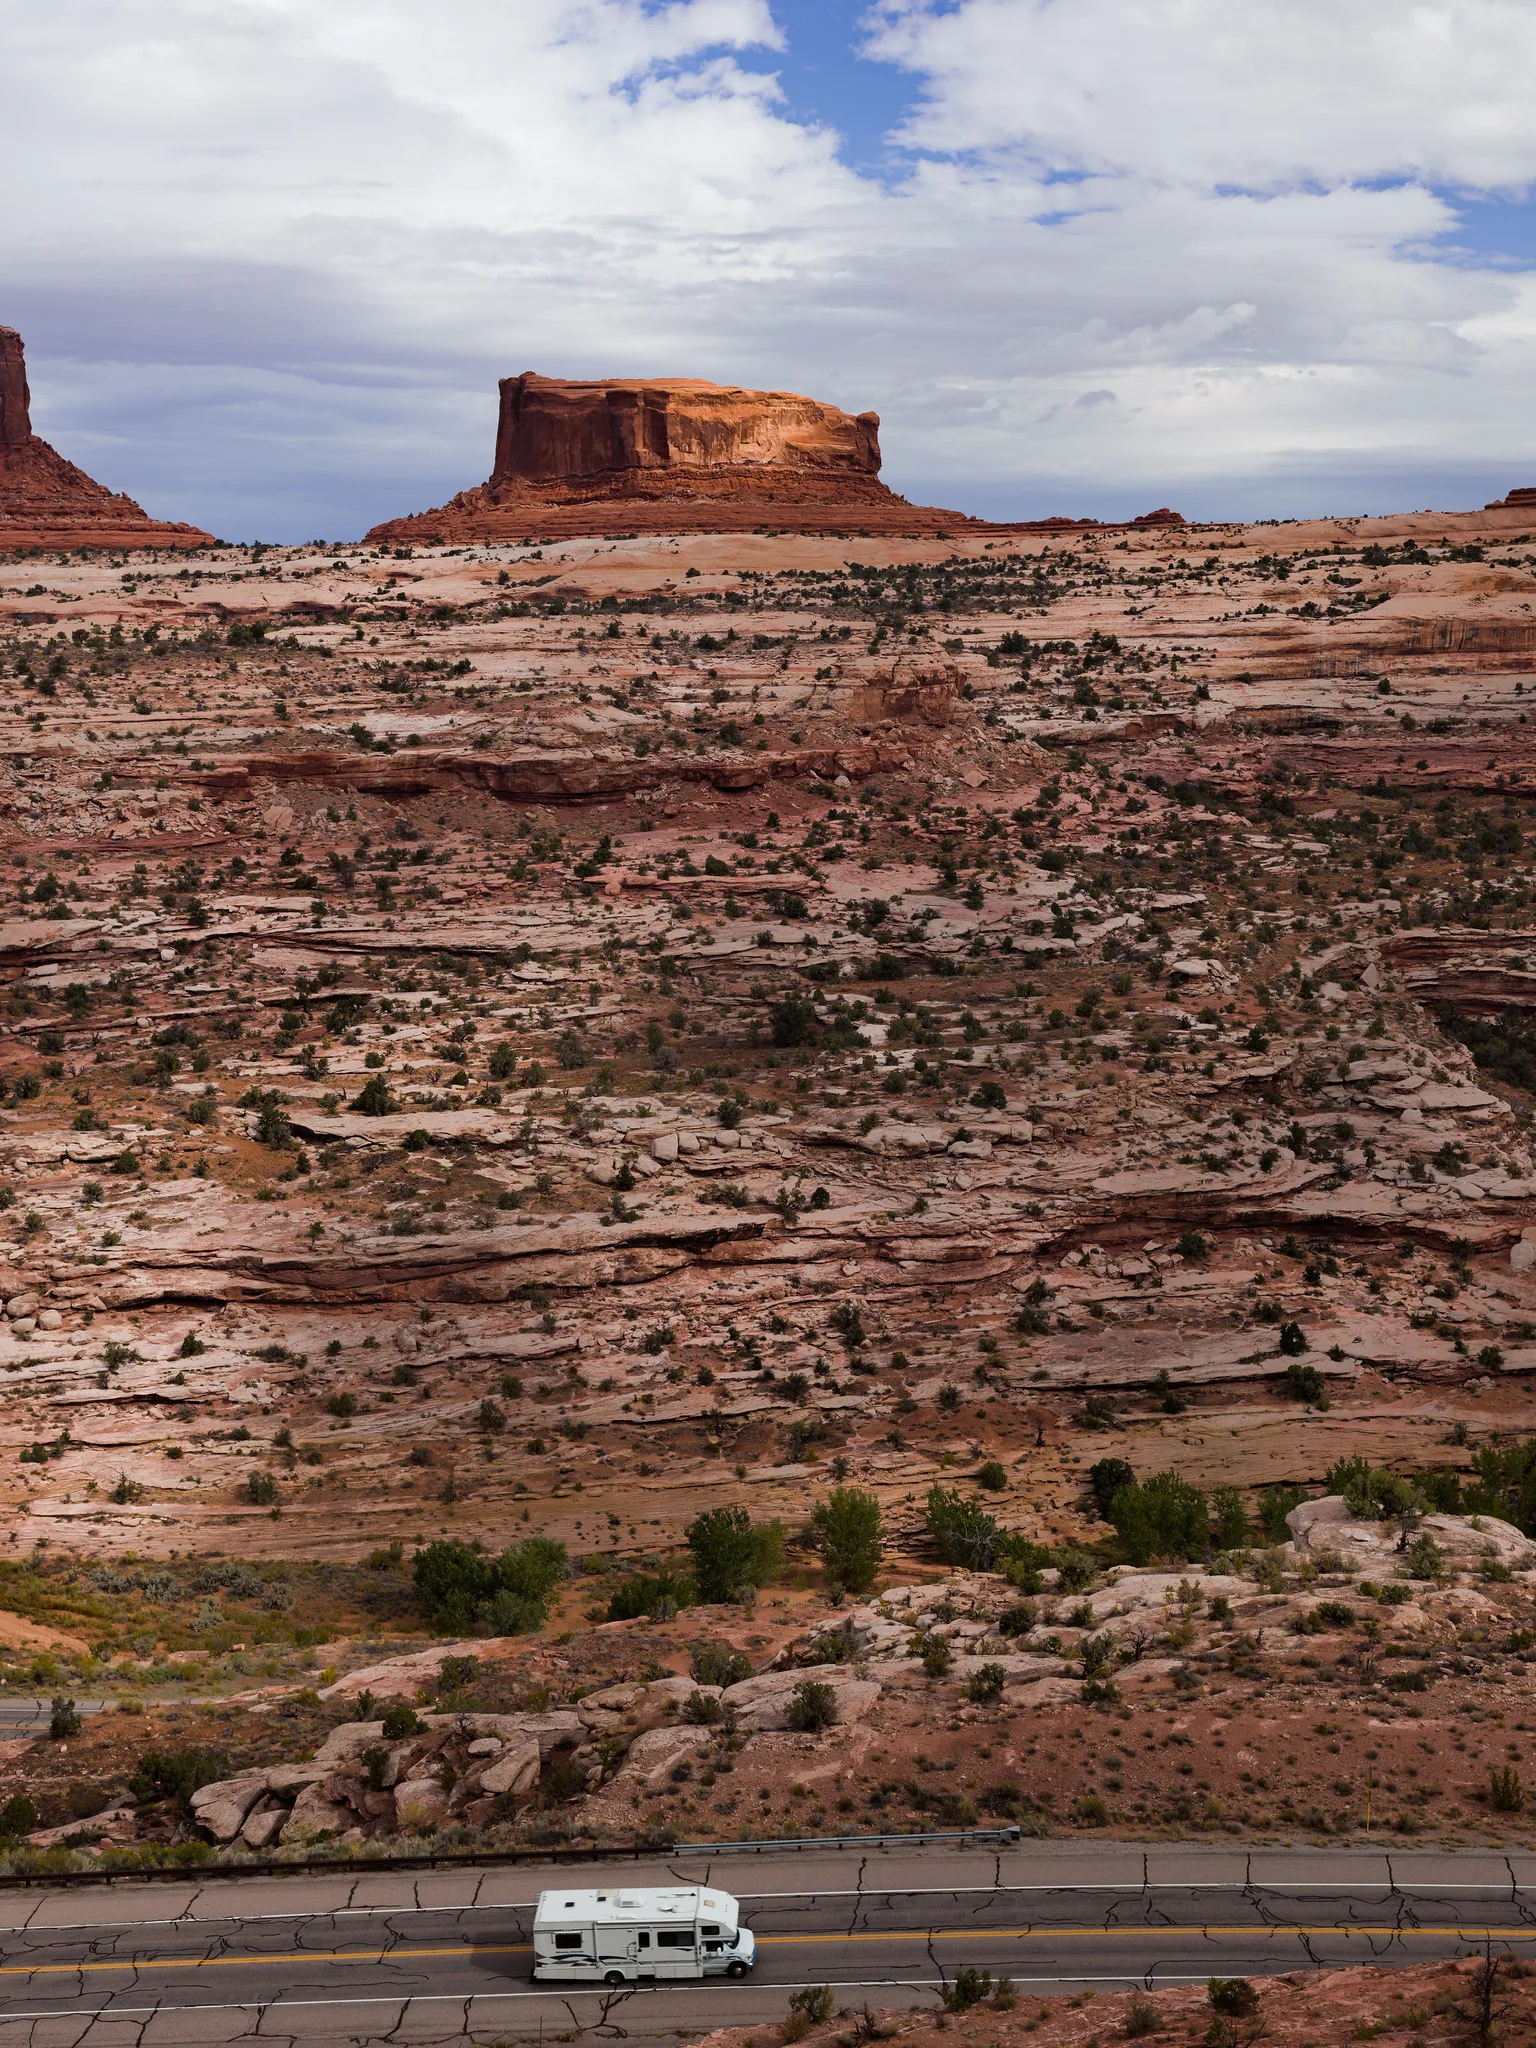
- Pick one anchor. A lone shrub, a butte, a cracked patch of dry mud, a road running to the horizon. If you cannot name the anchor in two words, the frame is not ready.
- Place the horizon on purpose. With a plain sky, put the horizon high and give the frame to the ground. With storm cloud or strong colour, put it low. A horizon through the middle works mainly for symmetrical scenes.
- Let empty areas stay empty. Smooth sand or blank sky is negative space that makes a small subject stand out. Resist filling it.
- Add a known size. Desert landforms give no clue to their size. A walker on a crest, a vehicle on a road or a single tree turns a pattern into a place. Keep the reference small, a few percent of the frame, and set it against a plain tone so it reads at a glance. See scale in photography.
Midday, heat shimmer and what still works
From late morning the sun is high, shadows are short and the ground heats up. Hot ground warms the air just above it, and that air rises in unsteady currents that bend light. Through a long lens, distant detail ripples and will not come sharp at any shutter speed or aperture. It is not a focus fault. The fixes are to shoot earlier, get closer, use a shorter focal length, or raise the camera so the line of sight passes higher above the ground.
Things that still work in the middle hours:
- Reflected light in canyons, as above.
- Black and white. Hard light, deep shadows and plain skies suit strong monochrome. Weak midday colour stops mattering.
- Close details in shade. Cracked mud, rock layers, plants and weathered wood under an overhang or in your own shadow.
- Cloud days. Scattered cloud drops moving shadows on the land. Wait for a patch of light to land on your subject. Building storms give the most dramatic desert skies of all, at a safe distance.
- A polarizing filter. It deepens a blue sky and cuts glare on rock, most strongly at right angles to the sun. On lenses wider than about 24mm the darkening is uneven across the sky, so ease it off.
Exposure and settings for bright sand and deep shadow
Pale sand, salt and light rock are brighter than the mid-tone a meter assumes, so automatic exposure renders them dull and grey. Add exposure compensation and confirm on the histogram: the sand should sit well to the right without touching the edge. Red and brown rock is close to a mid-tone and usually needs little or none.
| Scene | Aperture | Shutter and ISO | Notes |
|---|---|---|---|
| Pale dunes in sun, wide view | f/11 | Base ISO; +0.7 to +1 stop | Check the sunlit sand is not clipped |
| Ripples close to the lens | f/11 to f/16 | Base ISO, tripod | Focus about a metre in; get low |
| Dune crests with a telephoto | f/8 to f/11 | 1/500 or faster handheld, or tripod | Wind shakes long lenses; raise ISO rather than risk blur |
| Slot canyon, reflected light | f/8 to f/11 | ISO 100, 0.5 to 8 seconds, tripod | Daylight white balance; no sky in frame |
| Canyon from the rim, floor in shadow | f/8 to f/11 | Base ISO; bracket 3 frames, 2 stops apart | Blend later if needed |
| Small figure for scale | f/8 | 1/250 or faster | Expose for the land, not the person |
| Night sky with rock foreground | Widest, f/1.8 to f/2.8 | 15 to 25 seconds, ISO 3200 to 6400 | Manual focus on a bright star |
Three further points. Shoot raw: the warm light and blue shadows of early morning are hard to balance in a JPEG and easy in a raw file. Shade the lens with a hood or your hand, because flare is strong when a low sun sits just outside the frame. And judge exposure by the histogram, not the screen, which looks dim in bright surroundings and tempts you to overexpose.
Desert night skies
Dry air, few clouds and long distances from towns make deserts some of the best places to see stars. Go on a night with no moon in the sky for the most stars, or with a part-lit moon low to one side if you want the land lit naturally. Start at the widest aperture, 15 to 25 seconds and ISO 3200 to 6400 with a wide lens, then adjust. Longer exposures on a fixed tripod turn stars into short streaks.
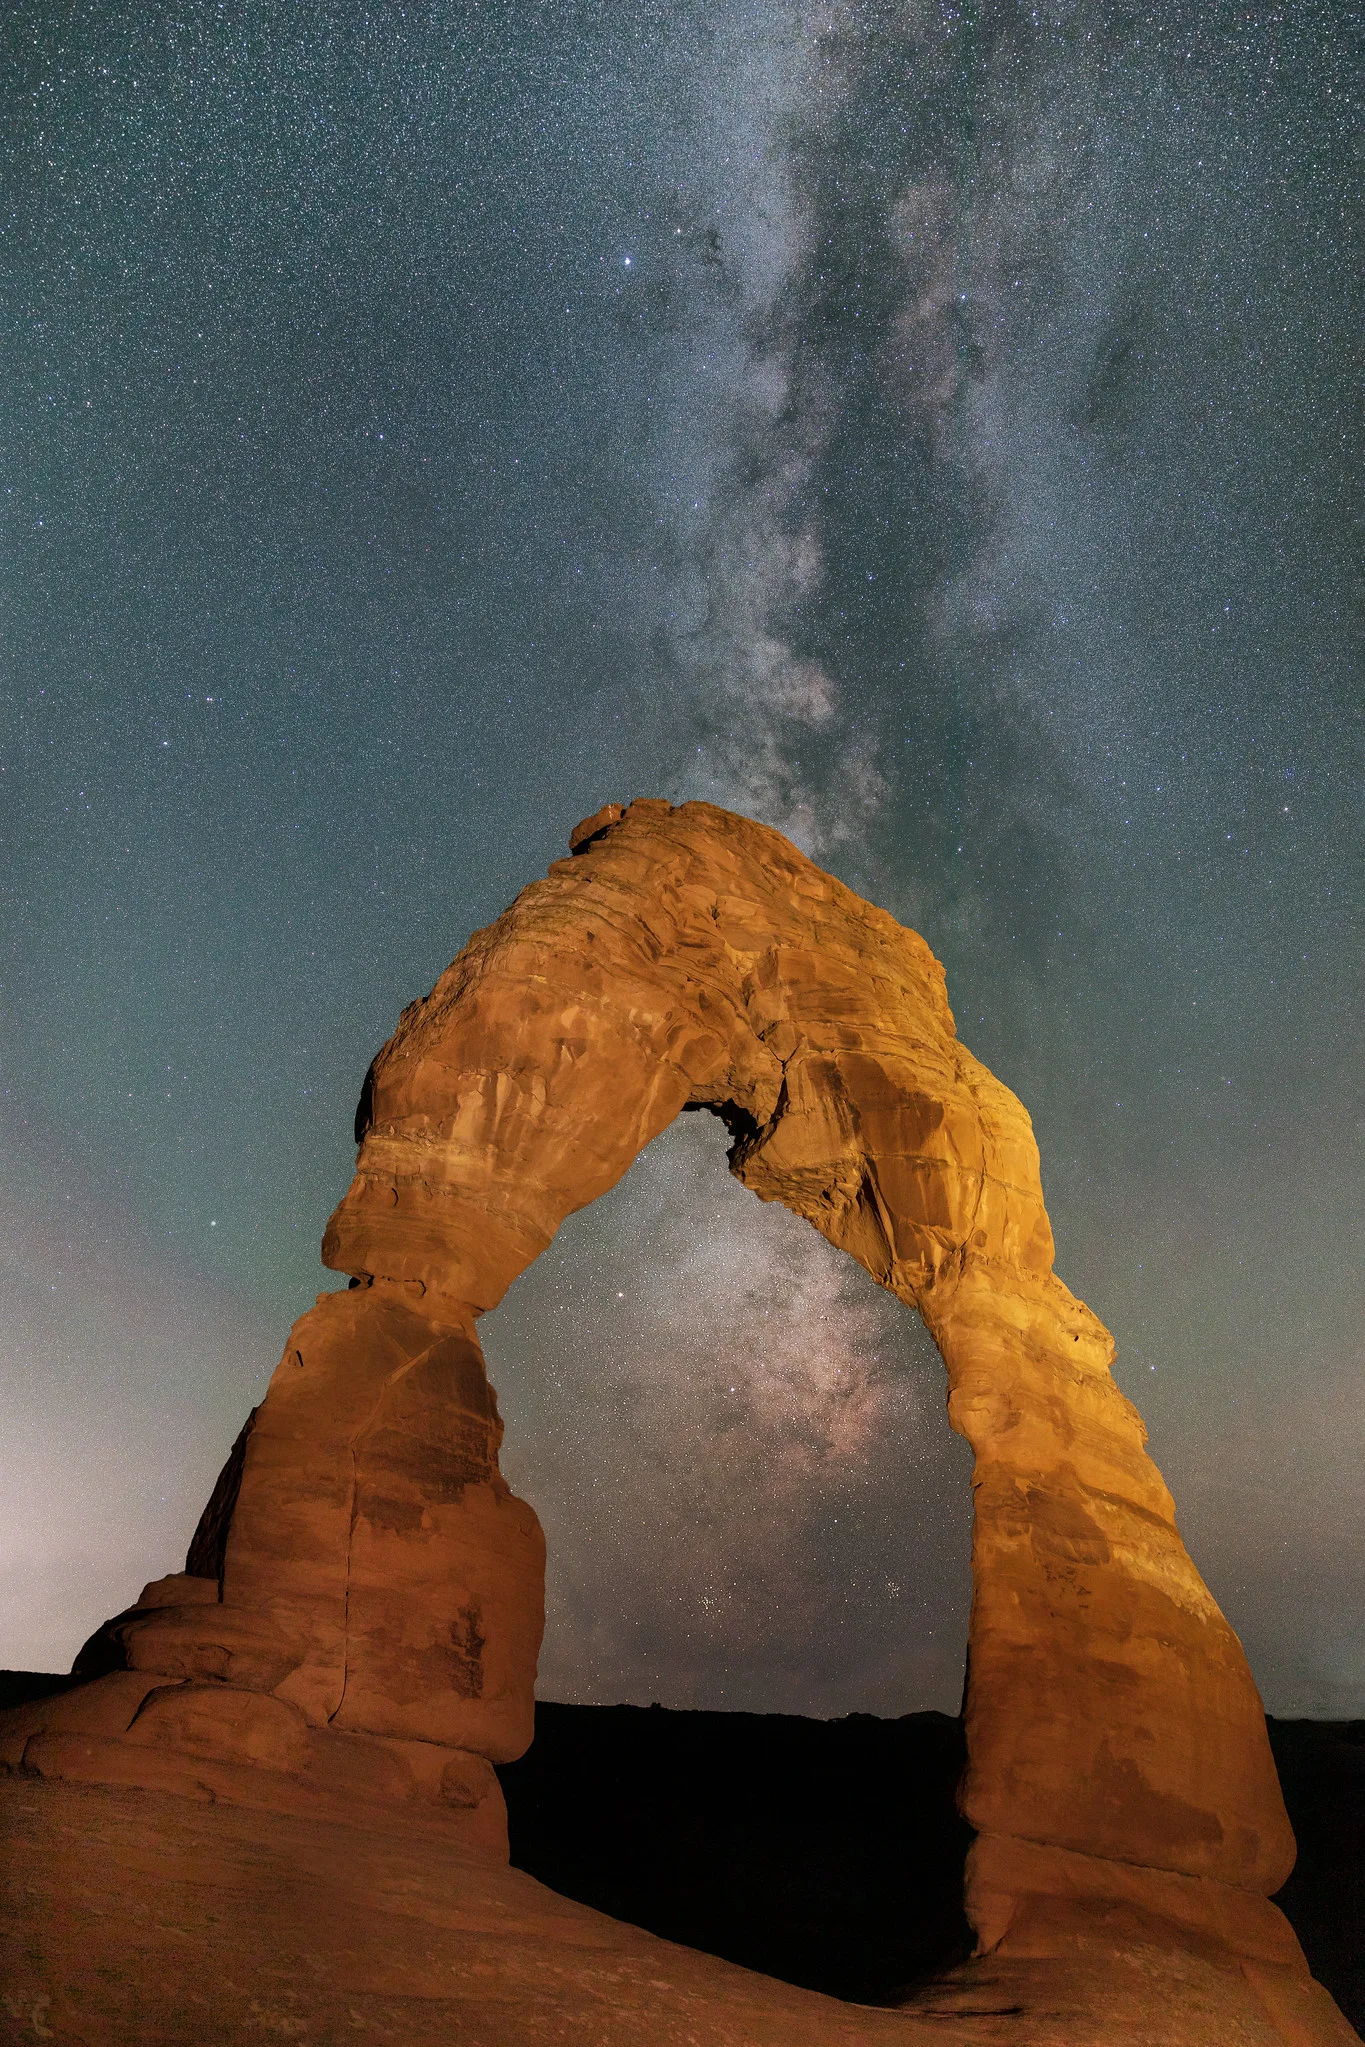
Find the foreground in daylight. Arches, buttes, lone trees and dune crests all make clean shapes against the sky, and you need to know the walking route before dark. Some parks restrict or ban lighting rock formations with torches, so check before you plan to add light. Deserts also lose heat fast after dark under clear skies; a place that was hot at 4pm can be near freezing before dawn, so pack warm layers. Full method is in how to photograph stars and the Milky Way and astro-landscape photography.
Sand, dust, heat and water: protecting the camera and yourself
The camera
- Do not change lenses in the wind. Choose a zoom that covers your needs, or change inside a vehicle or with your back to the wind and the camera pointing down.
- Keep the bag zipped and off the sand where possible. Blowing sand travels mostly within a metre of the ground, so a camera on a tripod is safer than one in an open bag at your feet.
- Extend the lowest tripod sections first, so the leg locks stay above the sand, and push the feet in for stability. Rinse or wipe the legs afterwards before collapsing them.
- Blow, do not wipe. Grit on the front element scratches if you rub it. Use a blower first, every time.
- Manage heat. Never leave a camera or batteries in a closed car in the sun. Keep the camera shaded between shots.
Cleaning steps after a dusty trip are in the camera care guide.
You
- Water. Park services in hot deserts commonly advise carrying at least four litres per person per day, and more if you are walking. Carry it even for a short dawn shoot; a twisted ankle can turn one hour into six.
- Navigation. Dune fields have no trails and look the same in every direction. Mark your vehicle on a GPS or phone map before you walk, and note a landmark.
- Timing. Photograph at the ends of the day and rest in shade through the hottest hours. That suits the light as well.
- Tell someone where you are going and when you will be back. Phone coverage is often absent.
- Tread lightly. In many deserts the dark, lumpy soil crust between plants is alive and takes years to recover from a single footprint. Keep to trails, bare rock and dry washes.
Common mistakes
- Shooting dunes at midday. No shadows, no shape. Fix: be there for the first or last hour of sun.
- Sun behind the camera. Both sides of every dune are lit and the crests vanish. Fix: move until the light comes from the side.
- Grey, dull sand. The meter underexposed it. Fix: add +0.7 to +1 stop and check the histogram.
- Footprints across the foreground. Fix: plan the frame from a distance and walk around, not through.
- Sky in a canyon frame. A burnt-out white strip pulls the eye from the glowing wall. Fix: tilt down or move until only bounce-lit rock is in view.
- Grey canyon walls. Auto white balance removed the warmth. Fix: use the daylight preset or correct the raw file.
- Soft telephoto pictures in the heat. Fix: shoot before the ground warms up, or get closer with a shorter lens.
- Nothing to look at. A wide frame of empty ground with no anchor. Fix: find one element and build the frame around it.
Try this
You can learn the main lesson without a desert. Find any plain, textured surface outdoors: a sandy beach, a sandpit, a gravel car park, a ploughed field or a rough concrete wall. In the last hour before sunset, spend 15 minutes on it. Make one frame with the sun behind you, one with the sun directly to your side, and one facing toward the sun (shade the lens with your hand). Keep the framing the same. Then get low, 30cm above the surface, and repeat the side-lit frame with a wide lens. Compare the four on a larger screen and note how much texture each shows. The side-lit, low frame is the one to look for when you reach real dunes.
Frequently asked questions
What is the best time of day for desert photography?
The first hour after sunrise and the last hour before sunset for dunes and open country, because low side light creates the shadows that show form. Narrow canyons are the exception and are usually best from late morning to early afternoon.
What settings should I use for sand dunes?
Start at f/11, base ISO and +0.7 to +1 stop of compensation for pale sand, on a tripod if the light is low. With a telephoto in wind, raise the shutter speed to 1/500 or faster and accept a higher ISO.
How do I protect my camera from sand?
Avoid changing lenses outdoors in wind, keep the bag closed and off the ground, and remove grit with a blower before any cloth touches the glass. A clear filter on the front of the lens gives you a surface you can clean without worrying about the lens itself.
Why do slot canyon photos glow orange?
The colour comes from sunlight bouncing between sandstone walls, which reflect warm wavelengths more than cool ones. The glow is real, but it only records if the white balance is not left to neutralise it.
Can I photograph deserts with a phone?
Yes. Tap the brightest sand to set exposure and lower the brightness slider slightly so highlights hold, use the telephoto camera for dune crests, and keep the phone in a sealed bag between shots because the charging port collects grit.
Related guides
- Landscape photography: the general method that this page builds on.
- Direction of light: why side light shows form and front light hides it.
- Patterns and repetition: making pictures from ripples, cracks and rock layers.
- Minimalist photography: composing with one subject and a lot of space.
- Shooting in harsh daylight: people and everyday subjects under high sun.
- How to photograph stars and the Milky Way: night settings and focusing in the dark.
- Camera care: cleaning sand and dust off gear safely.
- How to photograph mountains: light, scale and haze in high country.