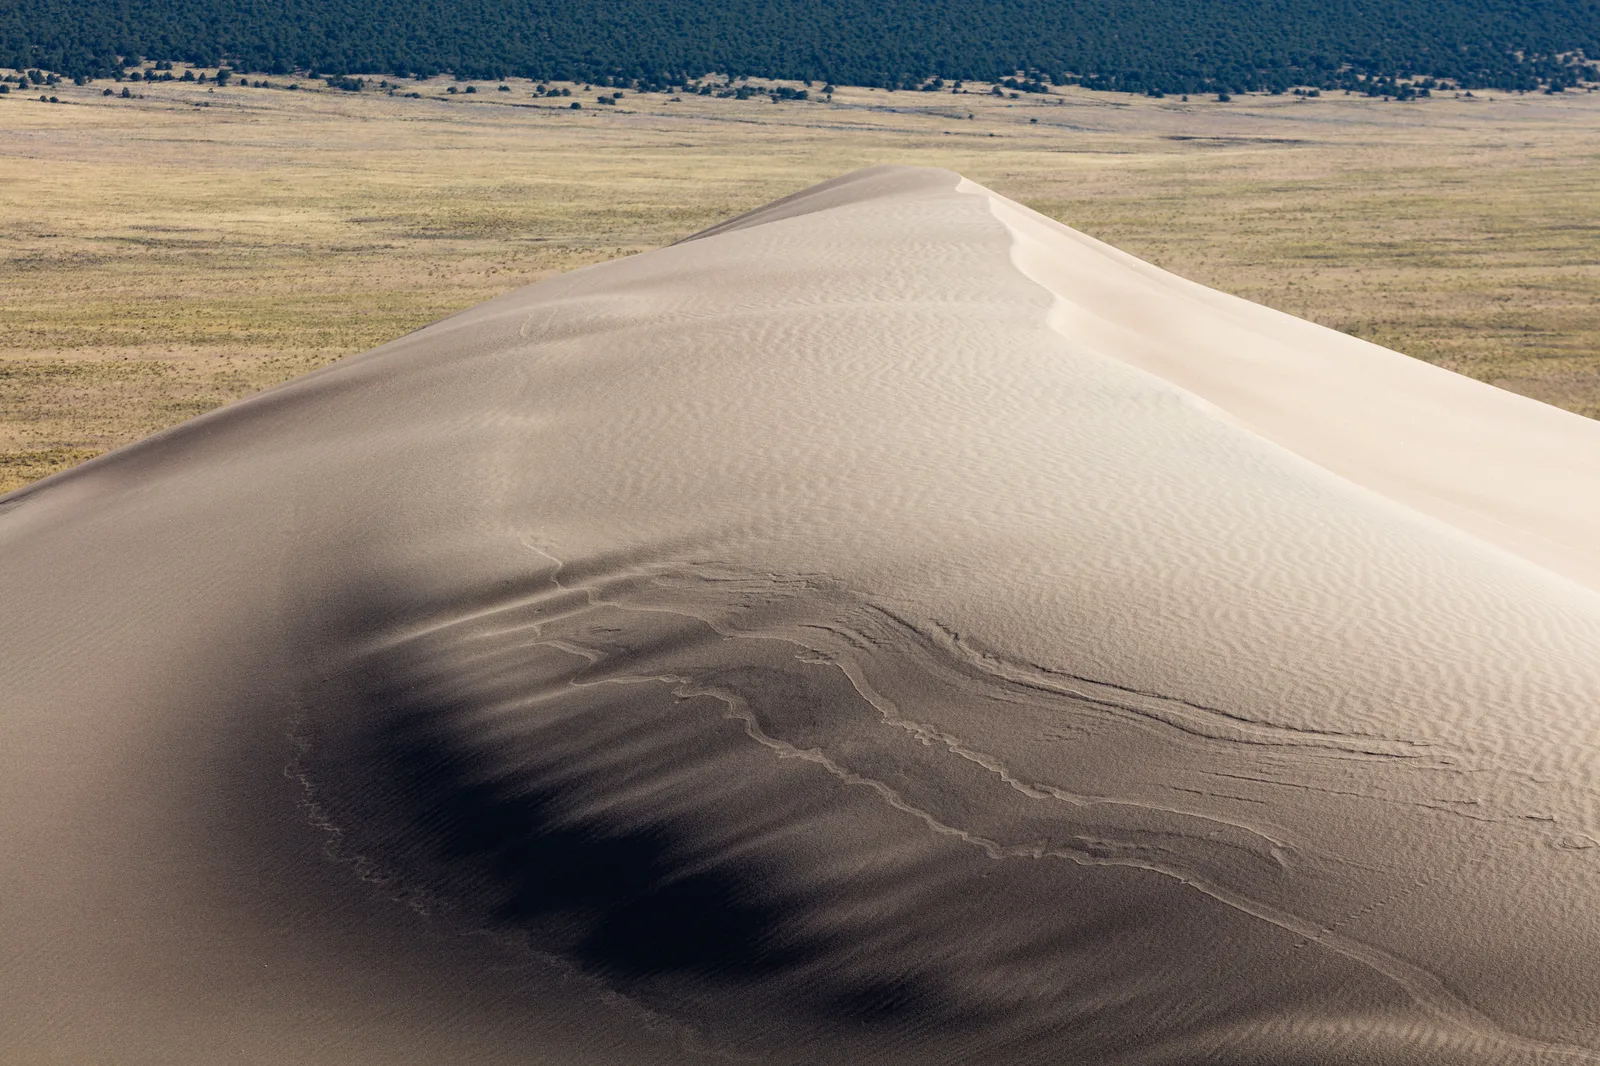
Sand dunes are among the simplest subjects in nature: one material, one color, a few smooth shapes. That simplicity is exactly why they make such beautiful photographs, and why they can be so frustrating. In flat light a dune is a featureless hill of sand. In the right light it becomes a sculpture of curves, sharp edges and fine ripples. Learning to see that difference is most of the work.
This guide covers how dunes take shape, when the light reveals them, how to expose bright sand correctly, and how to compose with curves, ripples and empty space. It also explains how to protect your camera from blowing sand. The desert photography guide has a shorter section on dunes along with canyons, heat and night skies; this page goes further into dunes alone, whether they sit in a desert or behind a beach.
How dunes take their shape
A dune is sand that wind has piled up and keeps moving. Wind pushes grains up the gentle side of the dune, and they tumble down the steeper side. Over time the dune creeps forward. The sharp ridge where the two sides meet is the crest, and it is the line most dune photographs are built around.
Dunes take different forms depending on how much sand there is and how steadily the wind blows:
- Crescent dunes form where sand is limited and the wind comes mostly from one direction. Their horns point downwind, and they make clean, isolated shapes.
- Long ridges line up across large sand seas, creating repeating bands that look wonderful from a high point or through a long lens.
- Star dunes grow where winds come from several directions. They have arms radiating from a high peak and many crests to work with.
- Coastal dunes sit behind beaches and are often held in place by grasses. They tend to be lower, with plants, fences and paths that add foreground interest.
You do not need to name the type to photograph it well. What matters is noticing where the crests run and which way the wind has been blowing, because that tells you where the sharp lines and ripples will be.
Light is everything
A dune has no texture of its own except tiny ripples, and no color variation except what the light gives it. That makes light the whole story. When the sun is high, both sides of a dune are lit, the shadows shrink and the shapes vanish. When the sun is low and to one side, one flank glows while the other falls into shade, and the crest becomes a crisp line between the two.
- Side light is the most useful. It reveals the curves of crests and makes ripples pop. Position yourself so the sun is to your left or right.
- Backlight makes edges glow and turns ripples into fine lines of light and shadow. Protect your lens from flare with your hand or a hood.
- Front light, with the sun behind you, flattens dunes. It is the light to avoid for most dune pictures.
- Soft light on overcast days or after sunset gives gentle tones and pastel color, which suit quiet, minimal compositions.
The best light usually lasts about an hour after sunrise and an hour before sunset. Plan to be in position before it starts, because walking on sand is slow. The page on direction of light explains the effect of each angle in more detail, and the golden hour guide covers timing.
Want to know exactly when the sun will be low and where it will rise? Planning the sun, moon and tides shows how to work it out before you go.
Exposing for bright sand
Camera meters assume the world is a middle gray. Pale sand is much brighter than that, so the camera darkens it, and dunes come out a dull, muddy tan. The fix is simple: tell the camera to make the picture brighter.
- Start with exposure compensation of about plus two-thirds to plus one stop on a sunlit dune.
- Check the histogram. The sunlit sand should sit toward the right side without pressing against the edge.
- Turn on highlight warnings if your camera has them, and pull back if the brightest crests start blinking.
- In shade or soft light, you will need less compensation, sometimes none.
Shadows on dunes are part of the design, so do not try to lift them all. A dark band of shadow next to a bright crest is what gives the picture its graphic strength. If the contrast is very high, shoot raw so you have room to adjust later.
Composing with curves and lines
Dunes are made of lines: crests, shadows, ripples and the edges where sand meets sky. Strong dune pictures usually arrange a few of those lines with care and leave out everything else.
- Follow the crest. An S-shaped crest running from a lower corner toward the top of the frame leads the eye through the picture. Move around until the line flows the way you want.
- Use the shadow as a shape. The dark side of a dune can be a bold, solid form. Let it fill part of the frame like a block of color.
- Layer the crests. From a high point or the edge of a dune field, several crests can stack behind each other in bands of light and dark.
- Keep the horizon simple. A thin strip of sky, or no sky at all, often works better than a large bland one. If the sky is dramatic, give it more room.
- Find the edge of the dunes. Where sand meets grass, forest or mountains, the contrast between textures can be striking, as in the photo at the top of this page.
Curves and lines are powerful because they move the eye. The guide to leading lines explains how to use them, and shape in photography covers how strong forms hold a picture together.
Ripples, patterns and close details
Wind ripples are the fine ridges that cover the surface of a dune. They form across the direction of the wind and are only a finger’s width apart, so they show up only when light skims across them at a low angle. That gives you a short window early and late in the day.
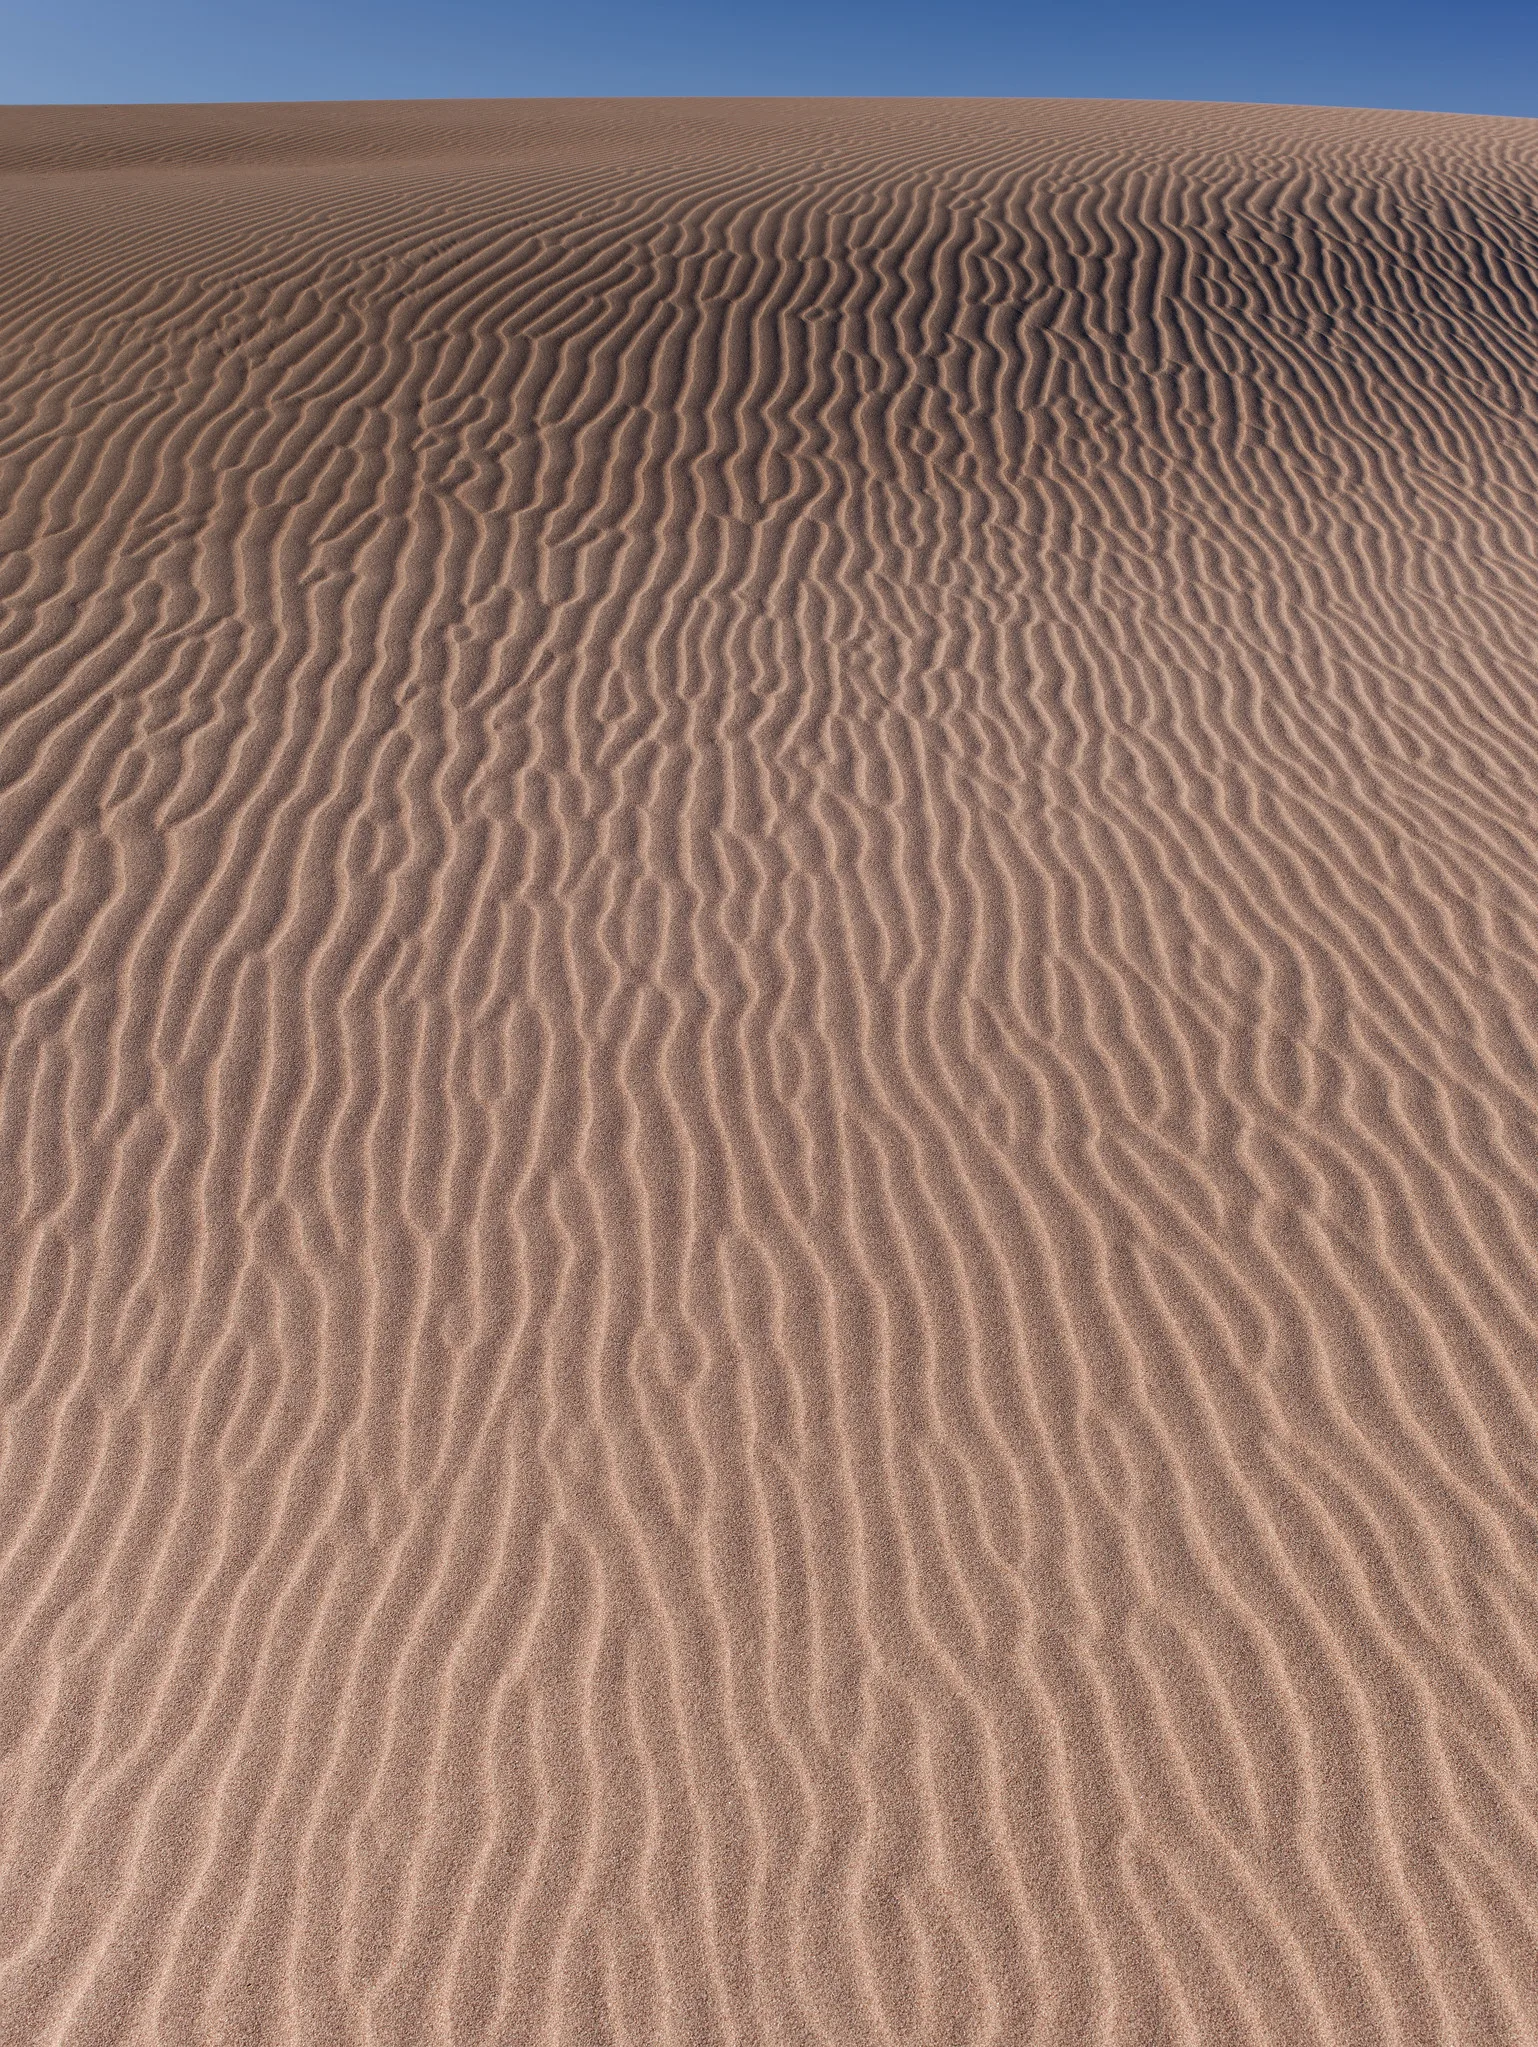
Ripples work in two ways. Shot from above, they become a pure pattern that fills the frame. Shot from low down with a wide lens, they become a foreground that leads toward a crest or the sky. For the low view, bring the camera close to the sand, use a small aperture such as f/11 and focus a short distance in so the ripples and the distant dune both look sharp. The depth of field guide explains why this works.
Look closely for other details as well: a single plant casting a long shadow, animal tracks crossing a slope, the patterns of darker and lighter grains where wind has sorted the sand. These small subjects can be found even in harsh midday light, when big views are flat.
Showing scale and adding life
Dunes are hard to measure by eye. A small rise near your feet can look like a mountain in a photo, and a huge dune can look like a sandpile. Including something of known size solves this.
- A person on a crest gives an instant sense of size. Keep them small in the frame and walking along the ridge for a clean silhouette.
- Plants and trees at the edge of a dune field show the height of the sand behind them.
- Footprints tell a story and show scale, but they can also spoil a pristine slope. Decide whether you want them, and if not, find untouched sand.
A telephoto lens is especially good here. From a distance, a figure on a far crest looks tiny against an enormous slope. The page on scale explains more ways to show size, and lens compression explains why long lenses stack crests so effectively.
Keeping footprints off your picture
Nothing ruins a dune photograph faster than a line of footprints across the perfect slope, and the footprints are often your own. A little planning helps.
- Arrive early. Overnight wind often smooths the sand, and by mid-morning popular dunes are covered in tracks.
- Plan your route. Walk along the back of a dune or in the low troughs, not across the faces you might want to shoot.
- Use a longer lens. Shooting from a distance lets you frame untouched sand without walking on it.
- Look for wind. On a breezy day, tracks fill in quickly. A few minutes of waiting can clear a slope.
On coastal dunes, stay on marked paths. Dune grasses hold the sand in place, and trampling them can damage the dune itself.
Protecting your gear from sand
Sand is hard on cameras. Fine grains get into zoom rings, buttons and lens mounts, and they scratch glass if you wipe them across it.
- Choose one lens before you go. Changing lenses in the wind invites sand onto the sensor. If you must change, turn your back to the wind and work quickly inside a bag.
- Use a blower, not a cloth. Blow sand off the front glass first. Wiping gritty glass grinds the particles across it.
- Consider a protective filter. A clear or UV filter is cheaper to replace than a front element if blowing sand pits the glass.
- Keep the camera covered. A plastic bag with a hole for the lens or a simple rain cover keeps grit out of the body in strong wind.
- Never set the camera down on sand. Hang it from your shoulder or put it in a closed bag.
At home, clean the camera gently with a blower and a soft brush before opening anything. The guide to camera maintenance covers cleaning in more detail.
Wind, weather and dunes after dark
Wind is what builds dunes, and it can also be a subject. On a breezy afternoon with low sun behind it, sand streams off the crests in fine, glowing veils. A fast shutter speed around 1/500 freezes the spray into texture, while a slower one around 1/15 turns it into soft streaks. Protect the camera carefully on windy afternoons, because the same wind that makes the picture is driving sand into every gap.
Weather changes the mood completely. After rain, damp sand turns darker and holds sharp edges, and puddles in the troughs can reflect the sky. Under storm clouds, a sunlit dune against a dark sky makes a dramatic contrast. Fog over coastal dunes softens everything into layers of gray.
After sunset, dunes take on cool, pastel tones in the blue hour, and on clear nights far from towns they make clean, simple foregrounds beneath the stars. Find your composition in daylight, mark the spot, and come back with a tripod and a headlamp. Deserts cool quickly after dark, so pack a warm layer even after a hot day.
Planning to stay out for the stars? How to photograph stars covers the settings, focus and timing for night skies over a dark landscape.
Black and white and editing
Dunes are a natural fit for black and white photography. Without color, the picture becomes pure shape, line and tone, which is what dunes are made of. Look for strong contrast between lit and shaded sides, and think about where the deepest blacks and brightest whites will fall.
When editing in color, keep things simple. Set white balance so the sand looks the way you remember: warm at sunrise and sunset, more neutral in midday light. Add a little contrast to separate light and shadow, and avoid heavy saturation, which quickly makes sand look orange and artificial. A gentle crop can tighten the line of a crest and remove distracting tracks at the edge of the frame.
Common mistakes
- Shooting at midday. High sun lights both sides and the shapes disappear. Fix: come back for the first or last hour of sunlight.
- Gray, dull sand. The camera underexposed the bright scene. Fix: add exposure compensation and check the histogram.
- Footprints across the main slope. They draw the eye away from the curves. Fix: plan your route, arrive early or use a longer lens.
- Too much empty sky. A large, blank sky weakens the composition. Fix: tilt down, use a longer lens, or include only a thin strip of sky.
- Sand in the camera. Grinding sounds in zoom rings and spots on the sensor. Fix: keep one lens on, cover the camera in wind and use a blower before a cloth.
- Front light flattening everything. With the sun behind you, the dune looks like a flat shape. Fix: walk until the sun is to the side.
Try this: a 10-minute light study on one dune
- Minutes 1 to 2: Pick a single dune with a clear crest. Note where the sun is.
- Minutes 3 to 4: Shoot it with the sun behind you, then walk until the sun is to your side and shoot again.
- Minutes 5 to 6: Walk until the sun is ahead of you, shield the lens and shoot the backlit edge.
- Minutes 7 to 8: Get low and make one frame with ripples in the foreground leading to the crest.
- Minutes 9 to 10: Zoom in on the shadow side and make one frame of pure shape, with no sky.
Compare the five frames side by side. You will see that the dune never changed. Only the light and your position did.
Frequently asked questions
What is the best time to photograph sand dunes?
The first hour after sunrise and the last hour before sunset, when low sun throws long shadows and reveals the curves and ripples. Midday light is usually too flat for big views.
Why do my dune photos look gray?
Bright sand fools the camera’s meter into underexposing. Add about two-thirds to one stop of exposure compensation and check the histogram.
What lens is best for dunes?
A telephoto isolates crests and patterns from a distance and keeps you off the sand. A wide lens is best for low views across ripples. A standard zoom covers both reasonably well.
How do I keep sand out of my camera?
Keep one lens on, never put the camera down on the sand, cover it in wind and blow grit off the glass instead of wiping it.
Can I photograph dunes with a phone?
Yes. Tap on the bright sand and slide exposure up a little, use the main lens or zoom for crests, and shoot early or late for the best shadows.
For terms such as exposure compensation, histogram, depth of field and lens compression, see the photography glossary.