Environmental portrait photography places a person within a setting that reveals something meaningful about who they are. Instead of isolating your subject against a plain backdrop, you use the world around them to tell a richer, more layered story. A chef photographed in their kitchen. A musician surrounded by instruments in a cramped rehearsal space. A farmer standing in the field they have worked for decades. The environment becomes a second subject, adding context that a studio portrait simply cannot provide. This guide covers everything you need to create compelling environmental portraits, from choosing locations and managing light in real spaces to directing subjects and building a portfolio that stands out.
What Is Environmental Portraiture
An environmental portrait is a photograph of a person in a setting that provides context about their life, work, personality, or interests. The term was popularized by portrait photographer Arnold Newman in the mid-twentieth century, and it has since become one of the most widely practiced forms of portrait photography. What separates it from a standard portrait is intent. In a studio portrait, the background is neutral or decorative. In an environmental portrait, the background is informational. It tells the viewer something they could not learn from the subject’s face alone.
This genre sits at an intersection of several photographic disciplines. It borrows the subject-focused approach of traditional portraiture, the storytelling instincts of documentary photography, the observational eye of street photography, and the compositional rigor of editorial work. The key distinction from studio portraiture is control. In a studio, you control every variable. In an environmental portrait, you are working within a real space that comes with its own character and limitations. Learning to work with these constraints rather than against them is the central skill of this genre.
Environmental portraits also differ from candid photography. While candid shots capture unposed moments, environmental portraits are typically directed. You are making deliberate choices about where the subject stands, how they interact with the space, and what elements you include or exclude from the frame. The subject is aware of the camera. The goal is not to catch them unaware but to present them authentically within a meaningful context.
The Relationship Between Subject and Environment
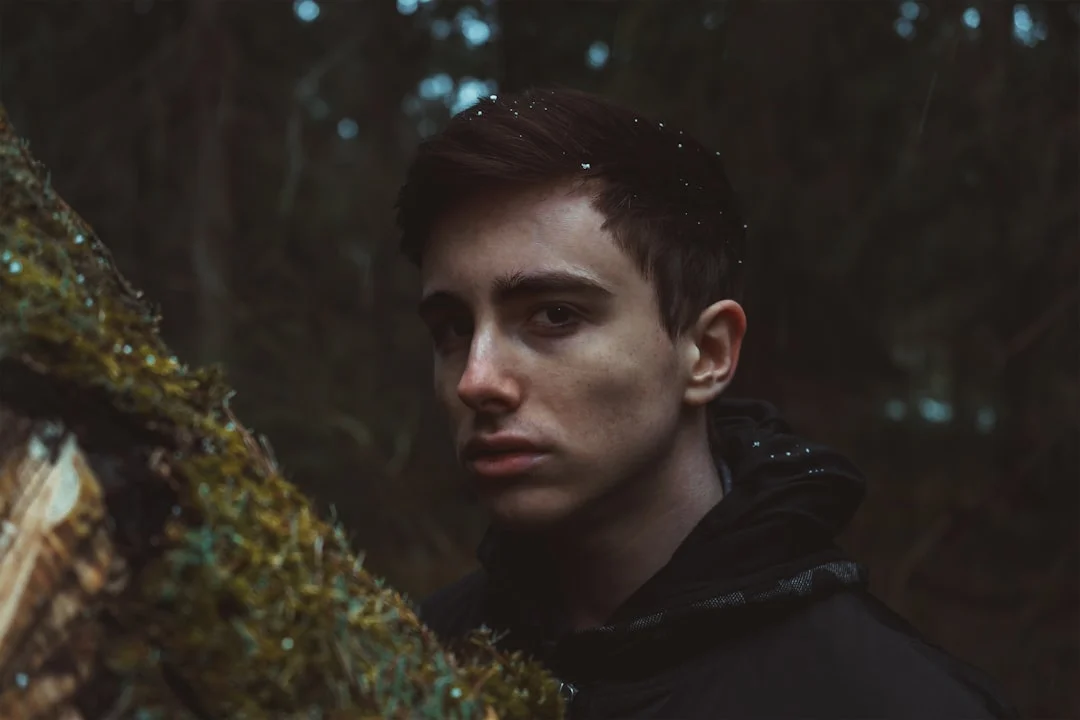
The defining quality of a strong environmental portrait is the relationship between the person and the place. The environment should not merely be a backdrop. It should actively contribute to the viewer’s understanding of the subject. When this relationship works, the viewer feels they know something real about the person just by looking at the photograph. When it fails, the environment becomes visual noise that distracts from the subject without adding meaning.
Think of it this way: the environment should answer a question about the person. What do they do? Where do they spend their time? What matters to them? What world do they inhabit? A woodworker surrounded by shavings and hand tools communicates craft and patience. A teenager in their bedroom covered with posters and half-finished projects reveals personality and interests that a headshot never could.
The strongest environmental portraits create a visual dialogue between subject and setting. A person in formal business attire standing in a raw, unfinished warehouse tells a different story than the same person sitting behind a polished desk. Proportion matters enormously. In traditional headshot photography, the subject fills most of the frame. In environmental portraiture, you often pull back, and your subject may occupy a smaller portion of the image. Too tight, and you lose the environment. Too wide, and the subject gets lost. The subject should remain the clear focal point even when they occupy only a third or a quarter of the frame.
Choosing Meaningful Locations
Location selection is the foundation of environmental portraiture. The right location does half the storytelling work for you. The wrong location creates a disconnect that no amount of technical skill can overcome. Here is how to think about choosing and evaluating locations.
Start with the subject’s story. A portrait of an artist in their studio communicates something fundamentally different from the same artist at a gallery opening. Each location emphasizes a different facet of who they are. Talk to your subject beforehand. Ask about the spaces where they spend the most time and the places that feel most like “theirs.”
Scout the location in advance. Whenever possible, visit the location before the shoot. Note the direction of natural light at different times of day. Identify potential backgrounds, framing elements, and problem areas. Walking through the space without the pressure of a live session lets you preplan compositions and anticipate challenges.
Look for visual richness and texture. The best locations have layers of visual detail that reward closer inspection. A mechanic’s garage with decades of accumulated tools and handwritten notes on the wall offers far more storytelling potential than a clean, generic office. Texture, patina, and accumulated objects give the viewer something to explore beyond the subject’s face.
Consider the practical constraints. A visually stunning location that is too dark or too cramped to work in will undermine your session. Think about ceiling height (important for lighting), available electrical outlets, and whether you have permission to move furniture or objects to improve the composition.
Workplace vs. personal space. Workplaces are the most common setting because they provide an immediate narrative: this is what this person does. But personal spaces can be equally powerful. A person’s home, their garden, or their car can reveal personality in ways a professional environment cannot. Consider mixing both in a single session.
Working with Available Light in Real Spaces
Lighting is arguably the biggest technical challenge in environmental portraiture. Unlike a studio where you build light from scratch, real spaces come with existing light that you need to understand, evaluate, and work with. The quality of natural light in a space depends on the time of day, the weather, the direction and size of windows, and the reflective surfaces around the room. Mastering available light in real environments is essential before you ever add supplemental lighting.
Window light is your best friend. Large windows produce soft, directional light that flatters faces and creates beautiful transitions between highlight and shadow. Position your subject near a window, facing it or at a 45-degree angle to it, and you have a natural portrait lighting pattern that rivals any studio setup. North-facing windows provide consistent, even light throughout the day. South-facing windows offer stronger, more dramatic light that changes as the sun moves.
Identify the dominant light source. In any interior space, one light source usually dominates. It might be a large window, an overhead fluorescent fixture, or a desk lamp. Find it and decide whether to use it as your key light or to overpower it with your own lighting. Understanding how light behaves in a space is the first step toward controlling it.
Watch for mixed color temperatures. Real spaces often combine daylight from windows (roughly 5500K) with tungsten overhead lights (roughly 3200K) and fluorescent fixtures that vary wildly. This mix creates color casts that are difficult to correct. If possible, turn off artificial lights and rely solely on window light, or close blinds and rely solely on artificial light. Committing to a single color temperature simplifies white balance and produces cleaner results.
Use reflective surfaces to your advantage. White walls, light-colored ceilings, and reflective floors all bounce light around a room, filling shadows and creating softer overall illumination. You can enhance this by placing a reflector opposite the main light source to bounce fill light back onto your subject’s shadow side.
Embrace imperfect light. Not every environmental portrait needs perfectly even illumination. A pool of light falling on your subject while the rest of the room falls into shadow can be incredibly dramatic. Harsh overhead light can convey the gritty reality of a workplace. The goal is not always pretty light. The goal is appropriate light that serves the story you are telling.
Supplementing Light Without Destroying the Mood
Sometimes available light is not enough. The room is too dark, the contrast is too extreme, or the color is unfixable. In these situations, you need to add light. The challenge in environmental portraiture is adding light without making it obvious. If the final image looks “lit,” you have lost the natural, authentic feeling that makes environmental portraits compelling. The goal is to enhance what is already there, not to overpower it.
Match the existing light direction. If the dominant light comes from a window on the left, add your supplemental light from the same direction. A flash on the opposite side creates a second set of shadows that looks unnatural. Work with the room’s natural light patterns, not against them.
Use bounce flash for invisible fill. Bouncing flash off a white ceiling or wall produces soft, diffused light that blends seamlessly with the ambient illumination. The light appears to come from the room itself. This requires a white or near-white surface. Colored surfaces will tint the bounced light.
Use off-camera flash with large modifiers. When you need more control, set up an off-camera flash with a large softbox or umbrella. Larger modifiers produce softer light that blends naturally with ambient illumination. Position the flash where a window might naturally be, and the result looks like the room simply has better natural light.
Balance flash power with ambient exposure. The key to invisible supplemental light is ratio. Your flash should be just strong enough to lift the shadows or add a catchlight to the eyes. Start by setting your exposure for the ambient light, then dial in flash power until it adds just enough fill. A good starting point is flash power one to two stops below your ambient exposure. This keeps the room’s natural mood intact while gently improving the light on your subject’s face.
Use practical lights as part of the scene. A desk lamp, a computer monitor, or a workshop light that is already part of the environment can serve as a motivated light source. Turning on a desk lamp next to your subject adds warm fill light that looks completely natural because it is part of the scene. Continuous LED panels also work well for environmental portraiture since what you see is what you get, and you can position them subtly on a shelf or behind an object to add a rim light or practical glow.
Composition: Balancing Subject and Context
Composition in environmental portraiture requires a different mindset than traditional portrait composition. In a standard portrait, everything in the frame serves the subject. In an environmental portrait, you are composing two things simultaneously: the person and the place. Getting this balance right is the difference between a portrait that happens to have a background and a true environmental portrait where subject and setting feel inseparable.
Use wider framing than you normally would. Environmental portraits typically require a wider view than traditional portraits. You need to show enough of the surroundings to establish context. Even a waist-up crop can be “environmental” if the visible background clearly communicates the setting. Do not be afraid to pull back further than feels comfortable. Some of the most powerful environmental portraits show the subject occupying only 20 to 30 percent of the frame, with the environment filling the rest.
Place the subject using the rule of thirds. Positioning your subject at a third-line intersection rather than dead center creates space for the environment to breathe and feel present. If the subject is at the left third, the remaining two-thirds show their workspace, home, or setting. This asymmetric placement naturally creates a visual relationship between the person and their surroundings.
Use leading lines to connect subject and environment. Lines within the environment (hallways, rows of shelves, workbenches, fences, pathways) can lead the viewer’s eye toward or away from the subject. Position your subject so that the room’s natural lines draw attention to them rather than away from them. A long corridor with the subject at the end, or a row of bookshelves converging on a person seated at a desk, creates a powerful visual pull.
Use framing elements within the scene. Doorways, windows, arches, machinery, and shelving can all serve as natural frames around your subject. A photographer seen through the frame of their darkroom door. A baker framed by the opening of a brick oven. These compositional devices create depth and layers while emphasizing the connection between person and place.
Manage the foreground. Objects in the foreground can add depth and context. A blurred tool in the near foreground, with the sharp subject in the middle distance, creates a layered composition that pulls the viewer into the scene. But foreground clutter that does not serve the story is a distraction, not an asset.
Simplify ruthlessly. Environmental does not mean chaotic. Your composition should have a clear visual hierarchy: the subject is primary, meaningful environmental elements are secondary, and everything else should be minimized or excluded. Move objects out of frame if they distract. Change your angle to eliminate a distracting element. Every element in the frame should earn its place.
Camera Settings for Environmental Portraits
The technical settings for environmental portraiture often differ from traditional portrait work because you are balancing two competing priorities: keeping the subject sharp and prominent while rendering the environment with enough detail to be meaningful.
Aperture: wider is not always better. In traditional portraiture, wide apertures like f/1.4 or f/2 are prized for isolating the subject. In environmental portraiture, blurring the background defeats the purpose. You will typically work in the f/2.8 to f/5.6 range. At f/2.8, the environment will be soft but recognizable. At f/5.6, it will be sharper and more detailed. If the environment contains text (signs, book spines, menus) that you want the viewer to read, you need a smaller aperture for adequate depth of field. If the environment just needs to suggest a type of place, a wider aperture that renders the setting as recognizable but soft keeps the subject as the clear focal point while still providing context.
Focal length shapes the relationship. Your choice of focal length fundamentally changes how subject and environment relate. Wide-angle lenses (24mm to 35mm on full frame) include more of the environment and exaggerate the sense of space, but distort facial features at close range, so keep the subject in the center of the frame or at a moderate distance. Standard focal lengths (35mm to 50mm) provide a natural perspective that closely matches human vision. Many celebrated environmental portraits were shot at 35mm or 50mm because these focal lengths feel honest. Short telephoto lenses (85mm to 135mm) compress the background, making it appear closer to the subject, which helps when the environment is far behind but graphically strong.
Shutter speed and ISO considerations. Real spaces are often dimmer than you expect. Do not hesitate to push to ISO 1600, 3200, or higher if the light demands it. A sharp, slightly noisy image is always better than a blurred, clean one. If your subject is relatively still, you can use shutter speeds as low as 1/60s. If they are in motion, aim for 1/125s or faster.
Shoot in RAW. Environmental portraits often require significant post-processing adjustment due to mixed lighting and the need to balance brightness between subject and surroundings. RAW files give you the latitude to recover highlights, lift shadows, and correct white balance without degrading image quality.
Directing Subjects in Their Own Space
In an environmental portrait, the subject is already in a space they know intimately. Your job is to guide them into positions and activities that look natural and photograph well, while respecting that this is their territory. The best direction feels collaborative rather than imposed.
Start by observing. Before you direct anything, spend a few minutes watching your subject in their space. Where do they naturally stand? How do they hold their tools? These natural behaviors will look more authentic in photographs than anything you could invent. Your job is to refine what is already there, not to create something from scratch.
Ask them to do something real. The most natural environmental portraits show the subject engaged in a genuine activity. Ask the chef to chop something. Ask the musician to tune their instrument. Real activity produces natural body language and genuine facial expressions. You can always ask them to pause mid-action and look toward the camera, but the activity frames provide the authenticity.
Use the posing fundamentals adapted to the setting. The basic principles still apply: weight shifted to one leg, body angled, chin slightly forward. But these adjustments need to look organic to the space. Leaning against a workbench looks natural. Standing at parade rest in the middle of a workshop does not. Let the environment dictate the pose. If there is a counter to lean on, use it. If there is a stool to sit on, try it.
Mix direct gaze and activity shots. Shoot some images where the subject looks into the lens, some where they are absorbed in their work, and some where they look at something within the environment. This variety gives you options during editing and captures different emotional registers.
Communicate simply. Most subjects are not professional models. Instead of “give me a three-quarter turn with Rembrandt lighting,” say “turn your body this way and look toward the window.” Demonstrate what you mean or give them a specific action to perform. Simple, concrete direction produces better results than vague creative concepts.
Editorial vs. Documentary Approaches
Environmental portraiture spans a spectrum from highly editorial to purely documentary. Understanding where your work falls on this spectrum, and being intentional about it, will sharpen both your shooting and your communication with clients or subjects.
The editorial approach treats the environment as a stage to be designed. The photographer may rearrange objects, clean up the space, add props, and carefully direct the subject. Magazine profiles, corporate portraits, and branding photography typically take this approach. The images look natural, but they are carefully constructed. Objects are moved to improve the composition, distracting elements are removed, and the subject is positioned in the most flattering light. The result feels both authentic and elevated.
The documentary approach treats the environment as it is. The photographer observes and records without significantly altering the space or staging the subject. Documentary photography and photojournalism typically demand this approach for ethical reasons. The images may be less polished, but they carry greater credibility because the viewer trusts that what they see is real.
Most environmental portrait work falls somewhere between these extremes. A corporate portrait might be heavily editorial. A photo essay about a community leader might be mostly documentary with some directed moments. The important thing is to be deliberate about your approach. If you are going to rearrange a workspace, ask permission first. If you are taking a documentary approach, explain that you want the subject to go about their routine naturally. Environmental portraits make implicit claims about a person’s life and surroundings, so understand the expectations of the context in which your images will appear and shoot accordingly.
Editing for Mood and Consistency
Post-processing environmental portraits requires a thoughtful approach that enhances the mood of the scene while maintaining the relationship between subject and environment. The editing choices you make should serve the story rather than impose a generic look. Here is how to approach the editing process for environmental portraits.
Set the white balance intentionally. The color temperature of your edit communicates mood. A warm grade suggests comfort and craft. A cooler grade suggests clinical precision or modernity. A woodworker’s shop should feel warm. A surgeon’s operating room should feel cool. Let the environment guide the color temperature rather than defaulting to neutral.
Manage the exposure balance between subject and environment. In many environmental portraits, the subject and the environment are at different exposure levels. Use local adjustment tools (brushes, radial filters, graduated filters) to balance the exposure. Brighten the subject’s face if it is too dark. Darken an overly bright background if it draws attention away from the subject. The goal is a balanced image where both subject and environment are visible and readable, unless you are deliberately using shadow or silhouette for creative effect.
Preserve the character of the environment. Aggressive editing that smooths textures, eliminates noise, or oversaturates colors can strip the environment of the very details that make it interesting. A weathered workbench should look weathered. Peeling paint should look like peeling paint. A dim, moody space should remain dim and moody. Editing should enhance what is there, not replace it with an idealized version.
Maintain consistency across a series. If you are delivering a set of environmental portraits from the same session or project, they should feel cohesive. Consistent white balance, exposure treatment, contrast levels, and color grading tie the images together as a unified body of work. Create a base preset or editing profile for each project and apply it as a starting point, then fine-tune individual images as needed. This workflow saves time and ensures visual coherence.
Retouch conservatively and crop carefully. Aggressive skin smoothing on a mechanic in a greasy workshop creates a jarring disconnect. Keep retouching minimal and appropriate to the context. When cropping, ask whether each element you are cutting adds to the story. Always leave enough environmental context that the “environmental” character of the portrait remains intact.
Building an Environmental Portrait Portfolio
A strong environmental portrait portfolio demonstrates your ability to connect people to places in visually compelling ways. It should show range across different subjects, environments, and lighting conditions while maintaining a recognizable style.
Start with people you know. Friends, family members, and colleagues are excellent first subjects because they are comfortable with you and willing to be patient while you learn. Photograph them in their workplaces, their kitchens, their garages, their studios. These early shoots build your technical skills and help you develop your approach without the pressure of a paid assignment.
Seek out subjects with visually rich environments. Craftspeople, artists, farmers, chefs, mechanics, and musicians will produce more dynamic environmental portraits than someone at a generic desk. Reach out to local businesses and artisans. Many people are flattered to be photographed in their workspace and happy to collaborate in exchange for images they can use.
Show variety and edit ruthlessly. Include diverse environments (indoor and outdoor, bright and moody), different types of subjects, and different compositional approaches (wide, medium, tight). But a portfolio of 15 exceptional images is far more powerful than 50 mixed-quality ones. Every image should demonstrate a clear, meaningful connection between subject and environment. If an image is technically strong but the environmental connection is weak, cut it.
Include context when presenting. Environmental portraits benefit from captions that identify the subject and setting. “Maria Torres, fourth-generation ceramicist, in her family’s studio” gives the viewer a deeper appreciation than an untitled portrait. This context reinforces the storytelling nature of the genre.
Secure model releases. If you plan to use environmental portraits commercially, you need signed model releases from every identifiable person. This applies even if the shoot was casual or unpaid. For business locations, also consider whether the owner wants approval of images showing their space.
Common Mistakes in Environmental Portraiture
- Including the environment but not connecting it to the subject. If the background is visible but meaningless, you just have a portrait with a busy background. Every element in the frame should contribute to the viewer’s understanding of the person.
- Using too-wide apertures that blur the environment into oblivion. Shooting at f/1.4 or f/1.8 creates beautiful bokeh but eliminates the environmental context that defines the genre. If the background is an unrecognizable smear of color, you are making a standard portrait, not an environmental one.
- Overlit environments that look like a studio. Adding too much flash power destroys the natural light character of a space. If your lighting completely overpowers the ambient light, you have lost the environmental feel.
- Cluttered compositions without visual hierarchy. A busy environment is not the same as a meaningful one. If there is no clear focal point, the viewer’s eye bounces around without settling on the subject. Use aperture, light, and compositional lines to establish the subject as the anchor.
- Posing the subject like they are in a studio. Environmental portraits call for natural, contextual posing. The subject should interact with their space, not just stand in it with a stiff smile.
- Neglecting the background entirely. The opposite of cluttered compositions: shooting the subject without paying attention to what is behind them. Check for distracting elements (poles appearing to grow out of heads, bright spots pulling attention) and adjust your position to eliminate them.
- Shooting everything at one focal length. Sticking exclusively to one lens limits the range of environmental relationships you can create. Use wider focal lengths for expansive shots and moderate telephotos for compressed, intimate ones. Changing your lens changes the story.
- Forgetting to photograph details. Environmental portrait sessions should include close-up details of the space: tools, textures, objects, and atmospheric elements. These detail shots complement the portraits and enrich the story.
Try This
- Photograph the same person in three different environments. Choose a friend or family member and photograph them in their workplace, their home, and a public space they frequent. Compare how each environment changes the story the portrait tells. Notice how their posture, expression, and energy shift with the setting.
- Shoot an environmental portrait using only natural window light. Find a subject near a large window and use no flash, no reflectors, and no modifications. Practice positioning the subject relative to the light: facing the window, at 45 degrees, with the window behind them. See how each position changes the mood and the balance of light and shadow.
- Create a three-image set of a local artisan. Reach out to a craftsperson, baker, or mechanic and ask to photograph them at work. Deliver a wide shot showing the full environment, a medium shot showing the subject engaged in their craft, and a tight detail shot of their hands or tools.
- Practice the “invisible flash” technique. Set up one off-camera flash bounced off a wall or ceiling in a dimly lit room. Photograph a subject with ambient light only, then add the bounced flash at progressively higher power levels. Find the sweet spot where the flash improves illumination without visibly changing the room’s character.
- Photograph an empty environment, then add the person. Before your subject steps into position, photograph the empty space. Then photograph them in it. Compare the two images. This trains your eye to see the environment as its own compositional element.
Frequently Asked Questions
What is the best lens for environmental portraits?
A 35mm lens on a full-frame camera (or its crop-sensor equivalent) is the most versatile choice. It includes a generous amount of the surroundings while maintaining a natural perspective without severe distortion. A 50mm is another excellent option with less distortion risk. Many environmental portrait photographers carry both a 35mm and an 85mm to cover wide and compressed framings. If you can only bring one lens, the 35mm is the safest bet.
How do I get permission to shoot in private locations?
A direct, honest request works best. Explain who you are, what you are photographing, and how the images will be used. Most people are receptive, especially if you offer copies of the final images. For commercial or editorial work, you may need a formal location release in addition to a model release. Always clarify usage rights in advance.
How much of the environment should be in focus?
Enough to be recognizable and meaningful. A moderate depth of field (f/2.8 to f/5.6) that renders the environment as soft but identifiable is often ideal. This keeps the subject as the sharpest element while allowing the viewer to understand the setting. If the environment contains specific details you want readable (text, fine objects, artwork), use f/5.6 to f/8 for greater sharpness throughout.
What if the location is visually boring?
Most spaces are more visually interesting than they first appear. Look harder. Change your angle. Get low or high. A plain white office has a window that throws interesting shadows. A generic hallway has repeating lines and a vanishing point. If the space is genuinely featureless, focus on making it a graphically strong backdrop: use symmetry, clean lines, and the geometry of the space itself.
How do I handle mixed lighting in interior spaces?
The simplest solution is to eliminate one source. Turn off overhead fluorescent lights and rely on window light, or close the blinds and use only the artificial light. If you cannot control the sources, gel your flash to match the dominant ambient light (a CTO gel matches tungsten, a green gel matches fluorescent) and set your white balance accordingly. Shooting in RAW gives you the most flexibility for correcting mixed lighting in post.
Should I clean up the environment before shooting?
It depends on your approach. For editorial work, light cleanup is standard. Remove distracting items that do not serve the story, but do not sanitize the space so thoroughly that it loses its character. For documentary work, leave the space as you find it. When in doubt, ask your subject what they would prefer. It is their space.
How do I make the subject stand out in a busy environment?
Several techniques help. Use selective focus to keep the subject sharp while the environment softens slightly. Use light to make the subject the brightest element in the frame. Use color contrast: a subject in a red shirt against a muted workspace will draw the eye immediately. Use compositional devices like leading lines that point toward the subject, framing elements that surround them, or negative space that isolates them. And position the subject at a visually dominant point, such as a rule-of-thirds intersection.
Continue Learning
Strengthen your foundation in portrait photography for subject direction, composition for balancing complex scenes, and lighting for managing real-world illumination. Explore documentary photography for storytelling instincts and street photography for observing and reacting quickly in uncontrolled environments.