Murals and street art turn ordinary walls into galleries. A giant painted face on the side of a building, a block-long scene in an alley, a small stenciled figure by a doorway: each one adds color and personality to a street, and each one is a gift to photographers. Murals are bold, bright and public, and they change a neighborhood’s character in a way few other things do.
This guide covers where to find murals, how to photograph a whole wall straight and true, how to show a mural in its street, how to include people and details, the best light, how to respect the artists and how to build a collection. For the technical side of copying flat art accurately, such as even lighting and color, see the guide to photographing artwork.
Why murals make good subjects
Murals offer things that many subjects lack, and they suit every level of experience.
- Bold color and design. Murals are made to be seen from across the street, so they already have strong shapes and colors.
- A sense of place. Many murals celebrate local history, culture and people. They say something about where you are.
- Change. Street art comes and goes. Walls are repainted, new pieces appear and old ones fade, so your pictures become a record of a neighborhood over time.
- Interaction. People walk past, pose, lean and play in front of murals, creating chance moments between painted figures and real ones.
- Accessibility. Murals are free to see, usually in public places and often concentrated in walkable areas.
Murals also teach useful skills. Squaring up a wall trains you to see straight lines, waiting for a passerby trains your timing and choosing what to include around the art trains your eye for composition. Those lessons carry over to architecture, street and travel photography.
Where to find murals
Many towns and cities have more murals than most residents realize. Once you start looking, they appear everywhere.
- Arts districts and older neighborhoods, where artists and small businesses often commission walls.
- Alleys and laneways, which are favorite spots for street art and are often quieter than main streets.
- The sides of shops and restaurants, where owners commission murals as signs and decoration.
- Under bridges and overpasses, where large concrete walls invite art and offer shade.
- Small towns, which often have murals celebrating local history on main street. The guide to small town photography has more on photographing them.
- Festivals, where artists paint walls live over a few days. Watching a mural being made is a story in itself.
Local tourism maps and community art programs often list mural locations. A walk with a map and a camera is one of the easiest photo outings you can plan. The photo walk guide explains how to make the most of one.
Photographing the whole mural
The first picture of any mural is usually a clean, straight record of the whole work. This is harder than it sounds, because walls are big and streets are narrow.
- Stand square to the wall. Position yourself directly in front of the center of the mural. Even a small angle makes one end look bigger than the other.
- Keep the camera level. Tilting up at a tall mural makes the top look narrower than the bottom. Step back as far as the street allows instead.
- Use the grid. Line up the top and bottom edges of the mural with the grid lines in your viewfinder or screen.
- Choose the right lens. A standard focal length from across the street gives the most natural look. A wide lens fits big walls in tight spaces but can bend straight lines near the edges. See the guide to the wide angle lens.
- Leave a small margin around the mural, so you can straighten and crop later without losing any of the art.
- Use f/8 for sharpness across the whole wall.
If you have to tilt the camera, correct the lines in editing. The page on perspective distortion explains why walls lean and how to fix them.
Need to copy a painting or mural with accurate color and no glare? The guide to photographing artwork covers lighting and color for flat art.
Showing a mural in its street
A straight record is useful, but a mural is part of a place. Stepping back to include its surroundings often makes a more interesting photograph.
- Include the building. Show the whole wall, the roofline and the windows, so viewers see how big the mural is.
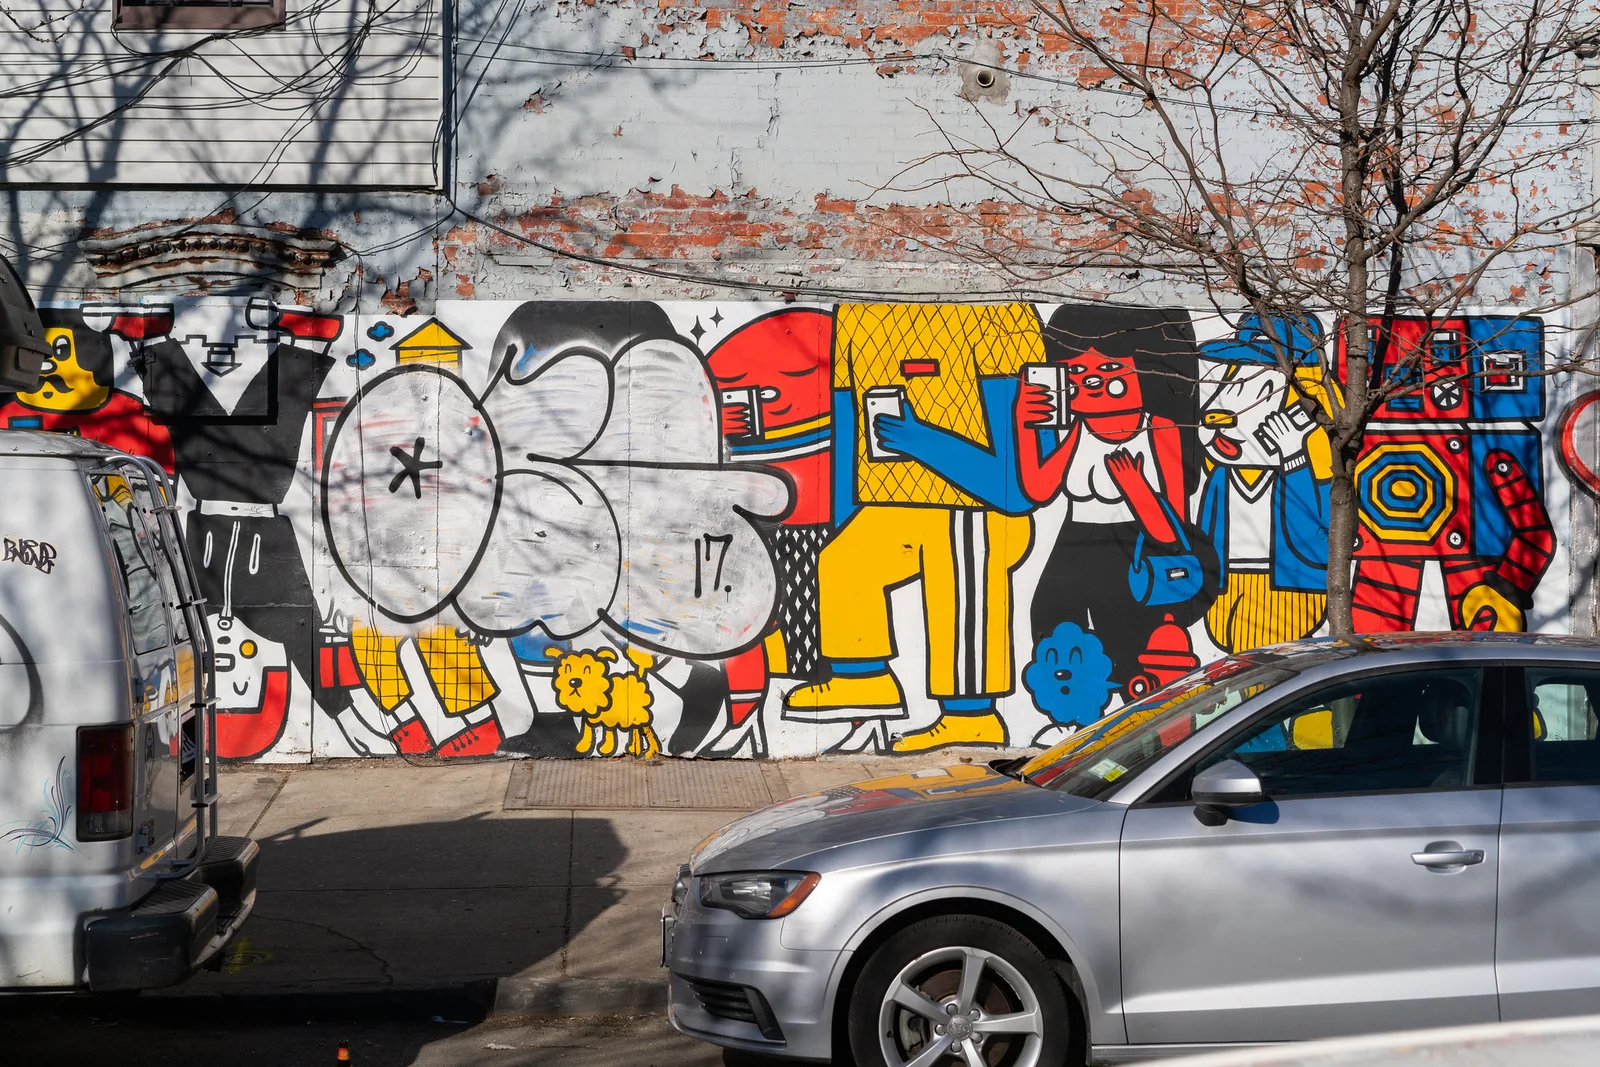
- Include the street. Sidewalks, parked cars, bicycles and street signs place the mural in everyday life, like the car parked in front of the mural at the top of this page.
- Look for contrast. A bright mural on a gray industrial street, or a painted forest beside a parking lot, can be striking.
- Show it from an angle. An angled view along the wall shows a long mural receding into the distance, with depth and rhythm.
- Look for a high view. A window, parking garage or hill can show a mural on a rooftop or a large wall in its neighborhood.
The guide to sense of place explains how details and surroundings combine to show where you are.
People and murals
Some of the most memorable mural photographs include people. A real person next to a painted one can create humor, contrast or a sense of scale.
- Wait for a passerby. Frame the mural and wait for someone to walk into the right spot. A single figure in a contrasting color works especially well.
- Look for interaction. A painted hand that seems to reach toward a walker, a painted face that seems to watch someone pass: these alignments make people smile. The guide to juxtaposition explains how contrasts like this work.
- Use scale. A small person in front of a huge mural shows how big the art is.
- Photograph friends. Murals make colorful backgrounds for portraits. Ask your subject to stand a few steps away from the wall so the art softens behind them.
- Respect strangers. Photograph people as part of the scene, and ask before making close portraits.
Details, textures and small pieces
Not every piece of street art is a giant wall. Small works and close details reward a slower look.
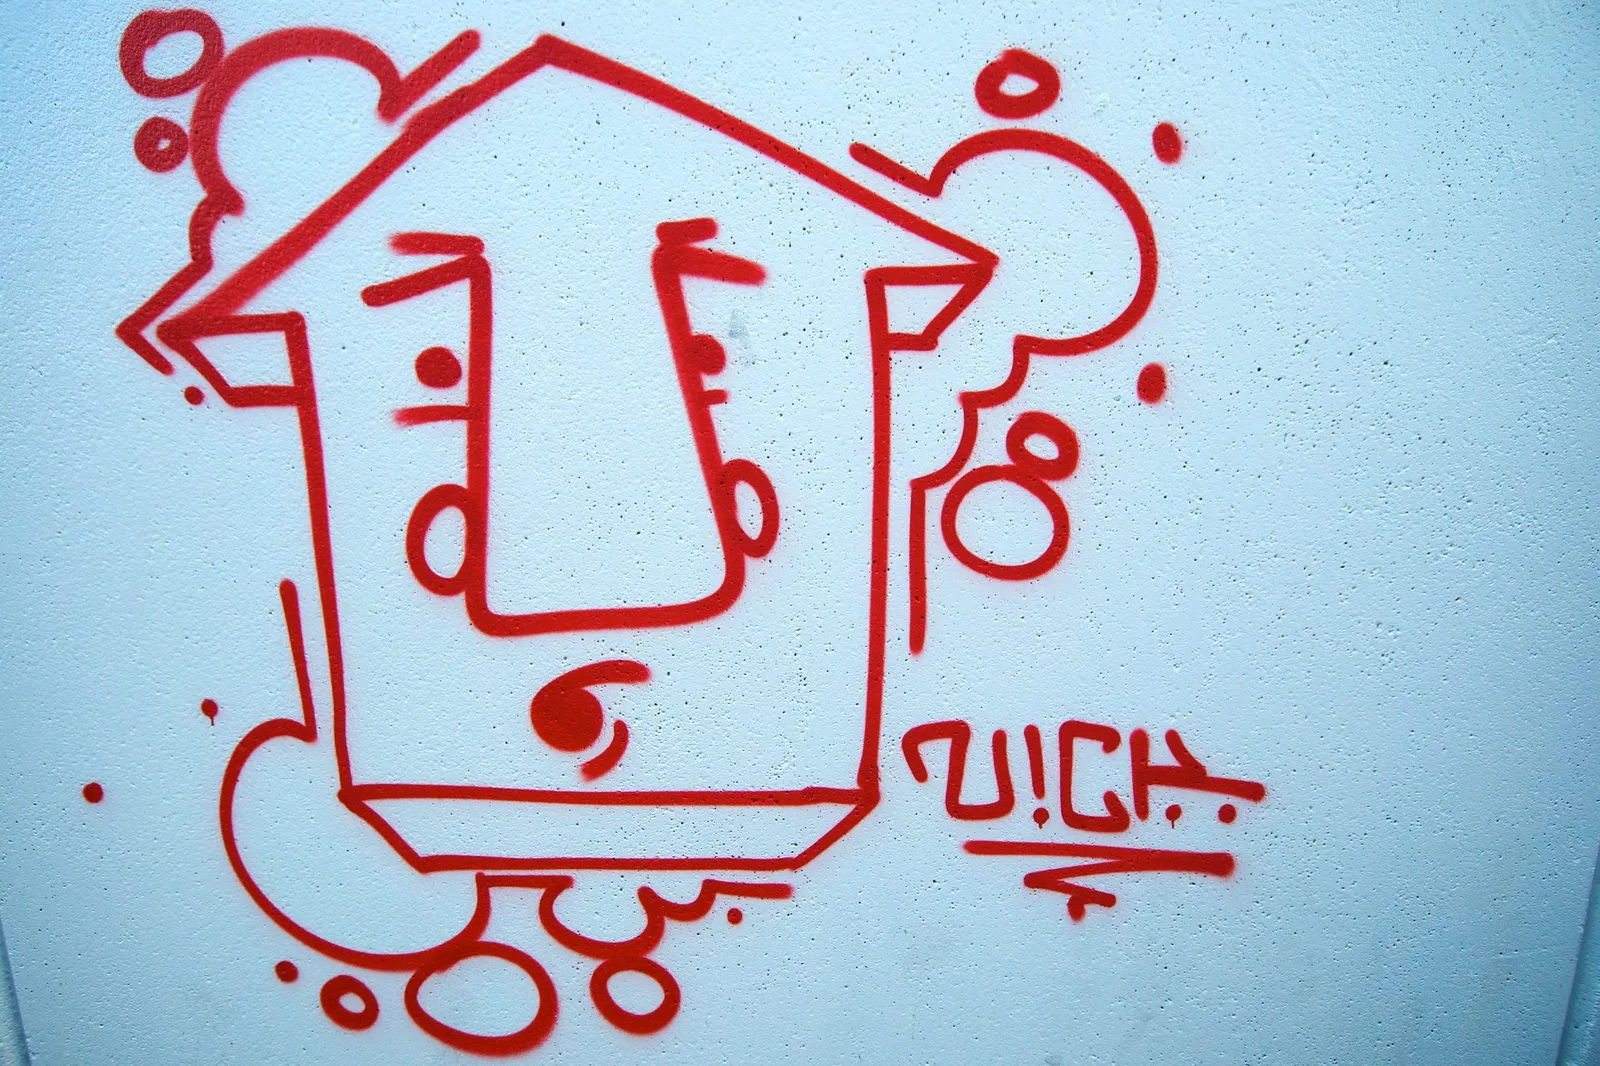
- Small pieces. Stencils, stickers, tiles and small painted figures hide on doors, poles and corners. Frame them tightly against their background, like the small tag on this page.
- Brushwork and drips. Move close to show the texture of the paint, the drips of spray paint and the layers of color.
- Weathering. Peeling, fading and cracking show a mural’s age and its place in the life of a street.
- Layers. Walls painted over many times show layers of old art at their edges.
- Signatures. The artist’s signature is part of the work, and a picture of it helps you credit them later.
Side light brings out the texture of paint on rough brick and concrete. The page on texture explains why.
The best light for murals
Murals are flat and often large, so even light is usually best for showing their color.
- Open shade or overcast skies light the whole wall evenly, without harsh shadows or glare. This is ideal for clean records.
- Avoid split light. A shadow from a tree or building across part of a mural divides it and makes exposure difficult. Come back when the wall is fully lit or fully shaded.
- Use low sun for mood. Warm light at the start or end of the day can make a mural glow, and long shadows of passersby can add drama.
- Watch for glare. Glossy paint reflects sunlight. Move a little to the side or use a polarizing filter to reduce it.
- Try dusk. Some murals are lit at night, and streetlights can give an alley a moody feel.
Wet weather can help too. Rain darkens pavement and deepens color on painted walls, and puddles in front of a mural can reflect it for a second, upside-down version of the art.
Check which way a wall faces. A wall facing away from the sun spends most of the day in open shade, while a sun-facing wall may be best early, late or on cloudy days.
Respect, credit and permission
Murals are created by artists, and good mural photographers treat them with respect.
- Credit the artist when you share a picture. Many murals include a signature or a name nearby.
- Photograph from public places and do not enter private lots or climb on property for a better view.
- Be careful in alleys, which may be private property or working delivery areas. Stay aware of traffic.
- Know the limits. Photographing public art for personal use is generally fine, but selling pictures where the artwork is the main subject can raise copyright questions. The page on fair use and copyright explains the basics.
- Never add or damage art for a picture.
Building a mural collection
Because street art changes, a collection of murals becomes more valuable over time.
- Record where and when. Note the street and the date for each mural, so your collection becomes a record of your town.
- Return to the same walls to see how they change, fade or are replaced.
- Pick a theme, such as animals, faces, local history or a single neighborhood.
- Shoot consistently. A set of straight, centered records looks unified when shown together.
- Add context pictures so the collection shows the streets as well as the art.
Looking for a longer project like this? The list of photography project ideas has more themes to follow over months.
Photographing a mural being painted
Watching a mural come to life is one of the best stories in street photography. Artists often paint over several days, and many are happy to be photographed while they work, especially at festivals and commissioned projects.
- Ask first. Introduce yourself, explain what you would like to do and offer to share the pictures. Most artists appreciate the documentation.
- Show the scale. A small figure on a lift or ladder against a giant half-finished wall says everything about the effort involved.
- Photograph the tools. Spray cans lined up on the ground, buckets of paint, sketches taped to the wall and paint-covered hands are all part of the process.
- Come back each day. Photograph the wall from the same spot every day to show it growing from outline to finished work. Shown as a sequence, the pictures make a satisfying small story.
- Stay out of the way. Keep clear of ladders, lifts and wet paint, and never block the artist’s view of the wall.
The guide to documentary photography explains how to tell a story like this over several visits.
Want to show the people behind the art as well as the wall? The guide to environmental portraits explains how to photograph people in their working setting.
Editing mural photos
Good editing keeps a mural looking the way it does in person, which is what most viewers want from a mural picture.
- Straighten first. Level the bottom edge of the wall and correct any lean from tilting the camera.
- Crop carefully. For records, crop to the edge of the art. For context pictures, leave the surroundings in.
- Set white balance so white paint looks white and colors match the wall. The page on white balance explains how.
- Go easy on saturation. Murals are already colorful, and too much saturation makes paint look artificial.
- Remove small distractions such as a stray sign or bin at the edge, but do not change the art itself.
Common mistakes
- Leaning walls. The camera was tilted or off center. Fix: stand square, keep the camera level and use the grid.
- Cut-off edges. Part of the mural is missing. Fix: step back, leave a margin and crop later.
- Split shadows. A shadow line divides the art. Fix: return when the wall is evenly lit.
- Distorted lines. A very wide lens bends edges. Fix: step back and use a longer focal length.
- Only straight records. The pictures look like catalog copies. Fix: add context, people and details.
- No credit. Fix: photograph the signature and credit the artist when sharing.
Try this: a 10-minute mural study
Find one mural near you and give yourself ten minutes.
- Minutes 1 to 3: Make a straight, level record of the whole mural, standing square to its center.
- Minutes 4 to 5: Step back and include the building and street around it.
- Minutes 6 to 7: Move close and photograph a detail: a face, a texture or the signature.
- Minutes 8 to 10: Frame the mural and wait for a person to walk into the scene.
Compare the four pictures. Each shows the same art in a different way, and together they tell its story.
Frequently asked questions
Is it legal to photograph murals?
Photographing murals in public places for personal use is generally fine. Commercial use where the art is the main subject can raise copyright questions, so check local rules and consider asking the artist.
How do I photograph a mural that is too big for my lens?
Step back across the street if you can. If not, photograph it in several overlapping frames and join them into a panorama, keeping the camera level for each frame.
What time of day is best for murals?
When the whole wall is in open shade or under clouds. Avoid times when a shadow line crosses the art.
How do I stop murals looking dull in photos?
Expose carefully so bright colors do not wash out, and keep the camera square to the wall. In editing, adjust white balance for accurate color rather than adding heavy saturation.
Can I photograph murals with a phone?
Yes. Turn on the grid, stand square to the wall and use the standard lens rather than the ultra wide, which bends lines.
How do I avoid cars and people blocking a mural?
Visit early in the morning, when streets are quiet and fewer cars are parked. Be patient and wait for gaps in traffic, or include passing people on purpose as part of the scene.
Should I photograph graffiti tags too?
Tags and small pieces are part of street culture and can make strong graphic pictures. Photograph them from public places and treat them as you would any other art.
For terms such as perspective distortion, polarizing filter, juxtaposition and panorama, see the photography glossary.