Trains are wonderful subjects. They are big, powerful and full of character, they run through some of the most beautiful country there is and they connect towns, cities and people in a way few things do. A long freight curving through autumn hills, a commuter train sliding into a station at dusk, a single track vanishing over the plains: these pictures stir something in almost everyone.
Train photography, sometimes called railfanning, is also a hobby where safety comes before everything else. This guide covers the rules that keep you safe, where to stand, how to plan around trains and light, the classic angles, the settings for sharp moving trains, panning, stations and details, and how to show trains as part of the landscape. For the basics of moving subjects, the guide to the shutter speed is a good companion.
Safety first, always
Trains are much faster, quieter and harder to stop than most people realize. A train can take over a mile to stop, and modern trains can approach with surprisingly little noise. Every year people are hurt or killed on railroad tracks, including photographers. No picture is worth that risk.
- Never stand, walk or set up on tracks. Railroad tracks and the land beside them are private property in most places, and trespassing is both illegal and dangerous.
- Stay well back. Trains are wider than the rails and can carry loose straps, chains or debris. Stand far enough away that you are clear of anything hanging from the side.
- Expect a train at any time, on any track and from either direction. Schedules change and trains do not always follow a timetable.
- Watch for a second train. After one train passes, another may be coming on a parallel track, hidden by the first.
- Do not use bridges or tunnels as viewpoints unless they have a public walkway away from the rails.
- Never photograph from a crossing. Stay off the road and behind the barriers, and never ignore lights or gates.
- Keep your eyes up. Looking through a viewfinder narrows your awareness. Take a moment to look around between frames.
Treat this list as fixed, not as advice. Experienced train photographers are some of the most careful people you will meet, because they understand how dangerous railroads can be.
Where to photograph trains
The best places to photograph trains are public places with a clear view and a safe distance from the tracks.
- Public roads and sidewalks that run beside a railroad, separated by a fence or a wide verge.
- Station platforms, where permitted. Stay behind the yellow line and follow staff instructions.
- Road bridges and footbridges with a public walkway, which give a high view of trains passing beneath.
- Parks and public land with views of a line, such as a hillside overlooking a valley.
- Heritage railways and museums, which often welcome photographers and sometimes run special photo days.
Before you go, look at a map to find public places near a line, especially where the track curves, crosses a bridge or passes through open country. Scouting a spot without a train first lets you plan your framing in peace. The guide to location scouting covers how to find good spots.
Planning around trains and light
Photographing trains is a mix of planning and patience. You need a train, a safe place and good light to come together.
- Learn how often trains pass. Busy lines may see a train every few minutes; quiet rural lines may see one or two a day. Passenger timetables help with passenger trains. Freight is less predictable, so allow plenty of time.
- Listen and watch for signs. Signals changing, crossing bells and a distant horn all suggest a train is approaching.
- Check the direction of light. The front of a train should be lit, so think about which way trains travel and where the sun will be. Morning light may suit one direction and evening light the other.
- Plan for the best hours. Low, warm light early and late makes trains glow and gives long shadows. The guide to golden hour photography explains why.
- Bring patience. Many train pictures involve long waits. Bring water, snacks and something warm.
Not sure where the sun will be when the train arrives? Planning around the sun, moon and tides explains how to predict light at any spot.
The classic angles
Train photographers often return to a few well-tested angles. Each shows a train in a different way.
- The three-quarter view. Standing to one side of the line, at a safe distance, you see the front and side of the train at once as it approaches. This is the classic railfan picture, showing the shape of the locomotive and the length of the train behind it.
- The broadside. Standing square to the line shows the train side on, which suits colorful cars, long passenger trains and trains crossing bridges.
- The going-away view. Photographing the back of a train as it leaves can be quietly moving, especially on a long, empty line.
- The curve. A train bending around a curve shows its length and adds movement. From a slight height, the whole train snakes through the frame.
- The high view. From a hill or a public bridge, you can show the train in the landscape, with the line leading through the scene.
A longer lens is extremely useful. It lets you stay far from the track while filling the frame, and it compresses a long train into a dramatic line of cars. The page on lens compression explains why this works.
Settings for sharp moving trains
Freezing a moving train is easier than many people expect, because trains move along a predictable path.
- Shutter speed: start at 1/500 for trains approaching at an angle and 1/1000 or faster for trains crossing the frame side on or traveling quickly.
- Aperture: f/5.6 to f/8 keeps the front of the train and some of the cars behind it sharp.
- ISO: use auto ISO so the camera keeps the shutter speed high as the light changes.
- Focus: use continuous autofocus to follow an approaching train. The page on AF-C explains how it works. Alternatively, prefocus on a spot on the track, such as a sleeper or a signal post, and press the shutter as the front of the train reaches it.
- Burst mode: a short burst as the train reaches the ideal position gives you a choice of frames. See burst mode for more.
Practice framing before the train arrives. Decide where in the frame the front of the train should be when you take the picture, often about a third of the way in, with space in front of it to move into.
Showing motion: panning and blur
A perfectly frozen train shows detail, but a little blur can show speed and energy.
- Panning. With a slower shutter speed, such as 1/30 to 1/60, follow the train smoothly as it passes and press the shutter mid-swing. The train stays fairly sharp while the background streaks. The guide to panning photography covers the technique.
- Motion blur with a still camera. On a tripod, use a slow shutter speed so a passing train becomes a soft streak while the station or landscape stays sharp. This works well at stations and at dusk. See motion blur.
- Light trails at night. Long exposures of trains at night turn their lights into lines across the scene. The guide to light trails covers settings and timing.
Expect many failed frames when you start panning. Even experienced photographers keep only a few from each pass.
Trains in the landscape
Some of the most beautiful train pictures show the train as a small part of a big scene. A train crossing a valley, skirting a lake or running beside a river tells a story about the land and the journey.
- Step back. A wide view with a small train gives a sense of scale and place. The page on scale explains how size comparisons work in a picture.
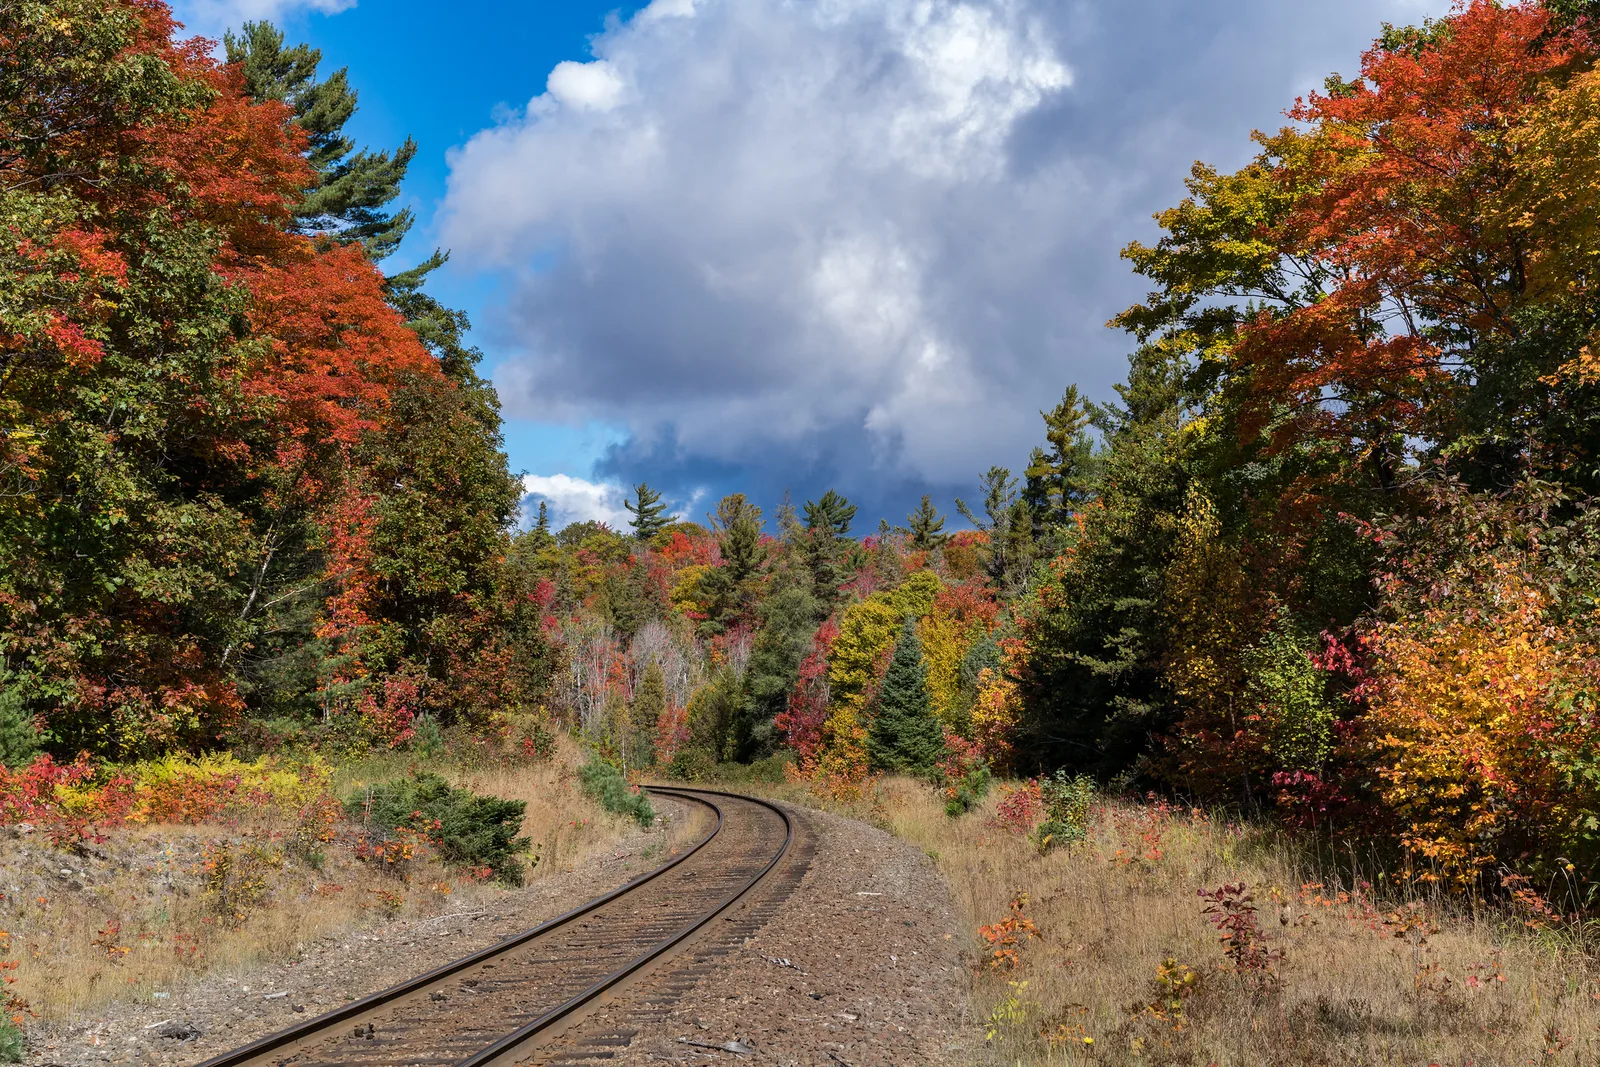
- Use seasons. Autumn color, winter snow and spring green all change the mood of the same line. A track through autumn trees, as at the top of this page, is a picture even before the train arrives.
- Use weather. Fog, rain and snow soften the scene and make headlights glow. The guide to fog photography explains how to expose in mist.
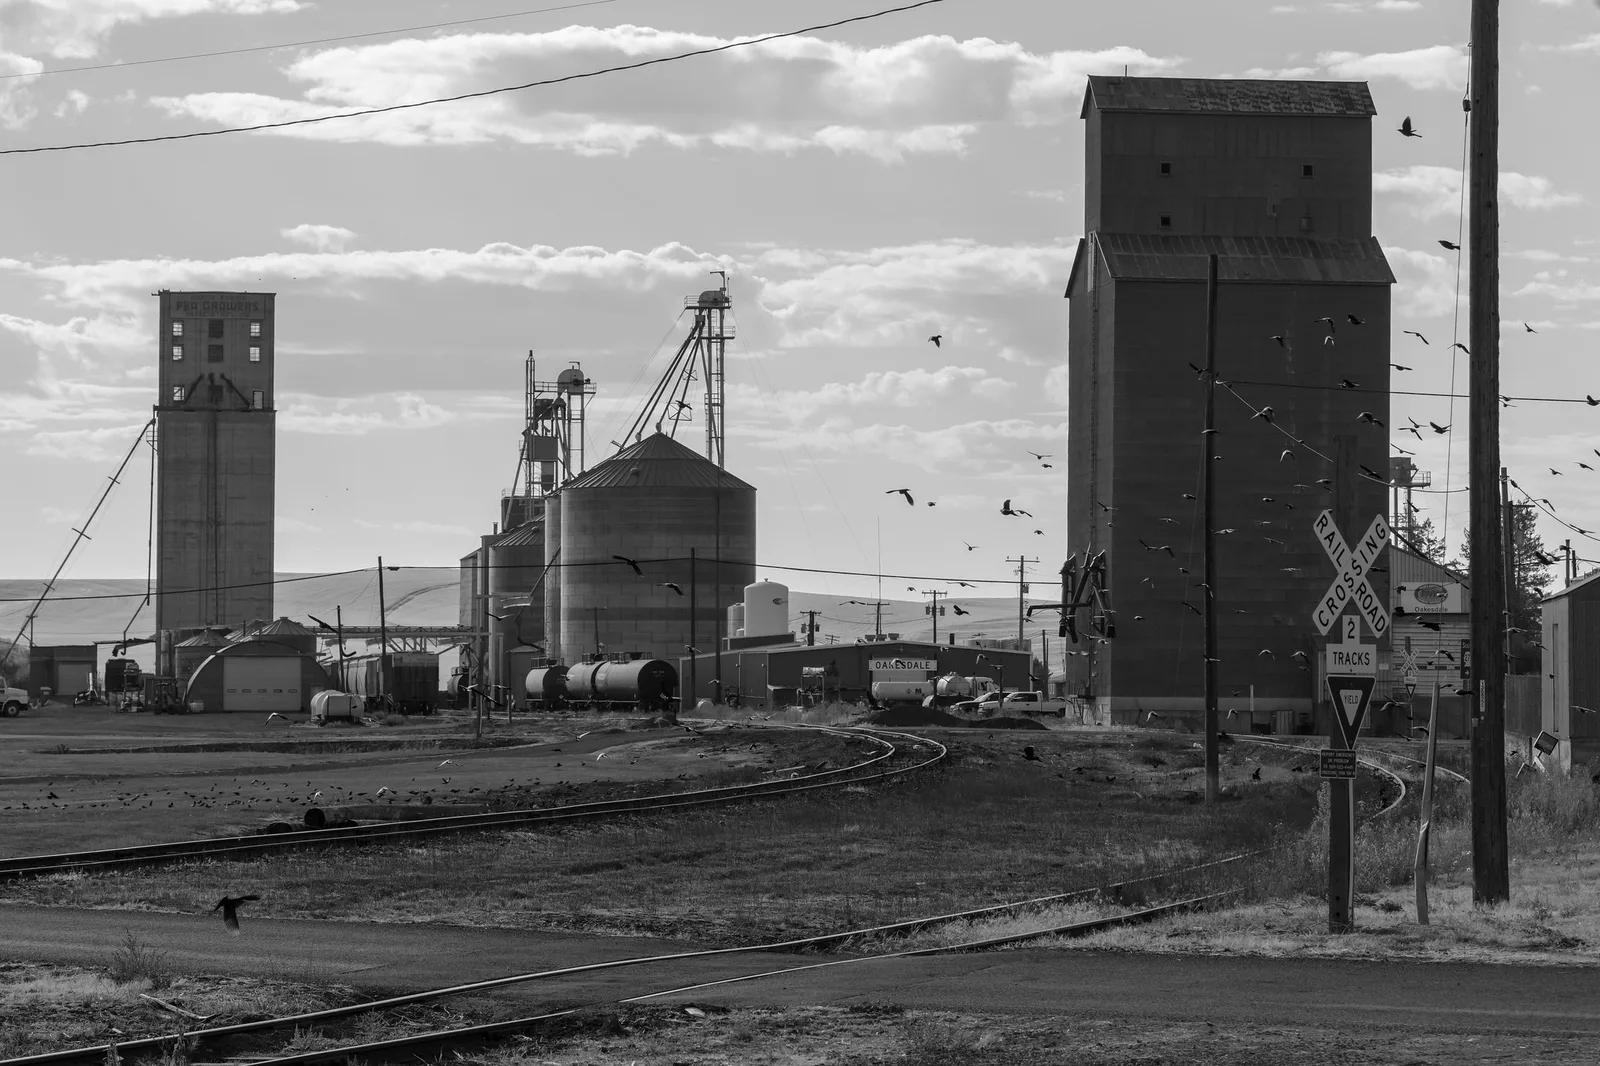
- Include landmarks. Grain elevators, bridges, stations and small towns all show why a railroad is where it is.
Stations, platforms and details
Trains are only part of railroad photography. Stations, platforms and the details of the railroad all make strong pictures, often when no train is around.
- Station architecture. Grand stations have high ceilings, clocks and patterned windows, and small country stations have their own charm. Look for symmetry and leading lines.
- Platform life. Passengers waiting, greeting and saying goodbye are part of the story. Photograph candidly and respectfully, and follow any rules on photography at the station.
- Signals and signs. Lit signals at dusk, mileposts, station names and old painted signs make good details.
- Tracks seen from safe places. Lines of rail converging into the distance are a classic subject. Photograph them from a platform end, a public bridge or a safe viewpoint, never from the track itself.
- Old equipment. Heritage railways and museums have locomotives, cars and workshops full of texture and color.
Drawn to the lines of rails and platforms? The guide to leading lines explains how to use them to guide the eye.
Trains at night and in winter
Darkness and bad weather bring out a different side of the railroad. Headlights cut through the night, lit stations glow and snow turns a familiar line into a quiet, graphic scene.
- Start at dusk. The blue hour after sunset is ideal, because there is still color in the sky to balance a train’s lights and the lit windows of passenger cars.
- Use a tripod for stations. On a quiet platform where tripods are allowed, a long exposure shows a train as a streak of light against sharp architecture.
- Raise the ISO for moving trains. To freeze a train at night you will need a high ISO and a wide aperture. Some noise is a fair price for a sharp picture.
- Photograph snow and steam. In cold weather, trains throw up clouds of powder snow and heritage engines produce great plumes of steam. Expose a little brighter than the meter suggests so that snow stays white.
- Look after yourself. Cold platforms and roadside viewpoints get chilly fast during long waits. Dress warmly and carry spare batteries in an inside pocket.
Safety matters even more after dark. Wear something light or reflective, stay well back from the rails and never assume a train will be lit or loud enough to notice in time.
Want to try more railroad scenes after dark? The guide to night photography covers exposure, focus and tripods in low light.
Photographing from the train
Riding a train is a great way to see and photograph a landscape. You can make good pictures through the window if you know how.
- Choose a seat on the side with the best view and away from the sun if possible, to reduce glare.
- Press the lens close to the glass, without touching it, to cut reflections and avoid vibration.
- Use a fast shutter speed, such as 1/1000 or faster, and frame distant subjects, which move across the frame more slowly than things close to the track.
- Look forward along the line on curves, when you can see the front of your own train.
- Photograph inside the train too: passengers reading, a coffee on the table, light falling across the seats.
The guide to photographing through glass covers reflections and window shots in more detail.
Common mistakes
- Standing too close. Being near the rails is dangerous. Fix: stay well back on public land and use a longer lens.
- Front of the train in shadow. Fix: plan for which way trains travel and where the sun will be.
- A blurred train. The shutter speed was too slow. Fix: use 1/500 or faster, or 1/1000 for trains crossing the frame.
- Cutting off the front. The train moved further than expected. Fix: leave space in front of the train and practice your timing.
- Distracting poles and wires. Fix: move a little to place the train between poles, or choose a different spot.
- Only photographing locomotives. Fix: add stations, people, landscapes and details.
Try this: a 10-minute station practice
Visit a busy station or a safe public viewpoint near a line with frequent trains.
- Minutes 1 to 2: Find a safe spot, well back from the platform edge or the line, and choose a point where the front of a train will be in the frame.
- Minutes 3 to 4: Set 1/1000, auto ISO and continuous autofocus, and make a test frame of the empty track.
- Minutes 5 to 7: When a train arrives, photograph it as it reaches your chosen point, using a short burst.
- Minutes 8 to 10: Turn to the details: a clock, a sign, a passenger waiting. Make three detail pictures.
Check your results. Was the front of the train sharp? Was it in the right place in the frame? Next time, try a slower shutter speed and pan with a passing train.
Frequently asked questions
Is it legal to photograph trains?
Photographing trains from public places is legal in most places. Walking on tracks or railroad property without permission is not, and it is dangerous. Stations may have their own rules, so check signs or ask staff.
What shutter speed freezes a moving train?
Start at 1/500 for trains approaching at an angle and 1/1000 or faster for fast trains crossing the frame side on.
What lens is best for train photography?
A telephoto zoom is the most useful, because it lets you stay far from the tracks. A wide lens helps with stations and trains in the landscape.
How do I know when a train is coming?
Passenger timetables help with passenger trains. Signals, crossing bells and distant horns are clues, but always assume a train could come at any time.
Can I photograph trains with a phone?
Yes. Use burst mode for moving trains, tap to focus on the track where the train will be, and stay well back. Phones are especially good for stations and trains in the landscape.
Where are the safest places for train photography?
Public land well away from the tracks, station platforms behind the marked line, public footbridges and heritage railways that welcome visitors.
For terms such as shutter speed, burst mode, panning and lens compression, see the photography glossary.