Trees are some of the most patient and generous subjects in photography. They stand still, they change with every season and every kind of light, and each one has a character of its own: a lone oak in a field, a twisted pine clinging to a cliff, a bare winter tree drawn like ink against the sky. Learning to photograph a single tree well teaches almost everything about composition, light and seeing.
This guide focuses on individual trees and small groups: how to find a tree with character, how to frame it, how light and seasons change it, how to photograph bark, leaves and branches, how to deal with wind and when to try black and white. For whole woodlands and the special challenges of shooting inside a forest, see the guide to forest photography.
Why trees make great subjects
A tree is a subject you can return to again and again, and it will never look quite the same twice.
- Shape. Every tree has a distinctive outline: round, tall and narrow, spreading, twisted or bent by the wind. That outline is often the strongest part of a tree picture. The page on shape explains why outlines matter so much.
- Change. Leaves arrive, turn color and fall. Snow settles on branches. Blossom comes and goes. A single tree can carry a year-long project.
- Character. Old trees show their age in scars, hollows and twisted trunks. They suggest time, endurance and survival.
- Accessibility. There are trees in parks, streets, gardens, fields and mountains. You do not need to travel to find a good one.
- Patience. A tree waits for you. You can come back for better light, a different season or a new idea.
Finding a tree with character
Not every tree makes a good picture. The ones that do usually have something that sets them apart. Before raising the camera, take time to look.
- Isolation. A tree standing alone in a field, on a hill or beside water is far easier to photograph than one crowded among others.
- A strong outline. Look for a clear, recognizable shape: a perfect dome, a single leaning trunk, branches reaching out like arms.
- Age and scars. Gnarled trunks, exposed roots, hollows and lightning scars tell a story.
- A setting. A tree growing from rock, beside a ruin or above a valley says something about its place and its struggle.
- A contrast. One tree in autumn color among bare ones, or a dark tree against snow, stands out naturally.
Once you find a tree you like, walk all the way around it. Its shape changes dramatically from different sides, and one direction usually shows it far better than the others. Note the direction that works so you can plan the light.
The lone tree and negative space
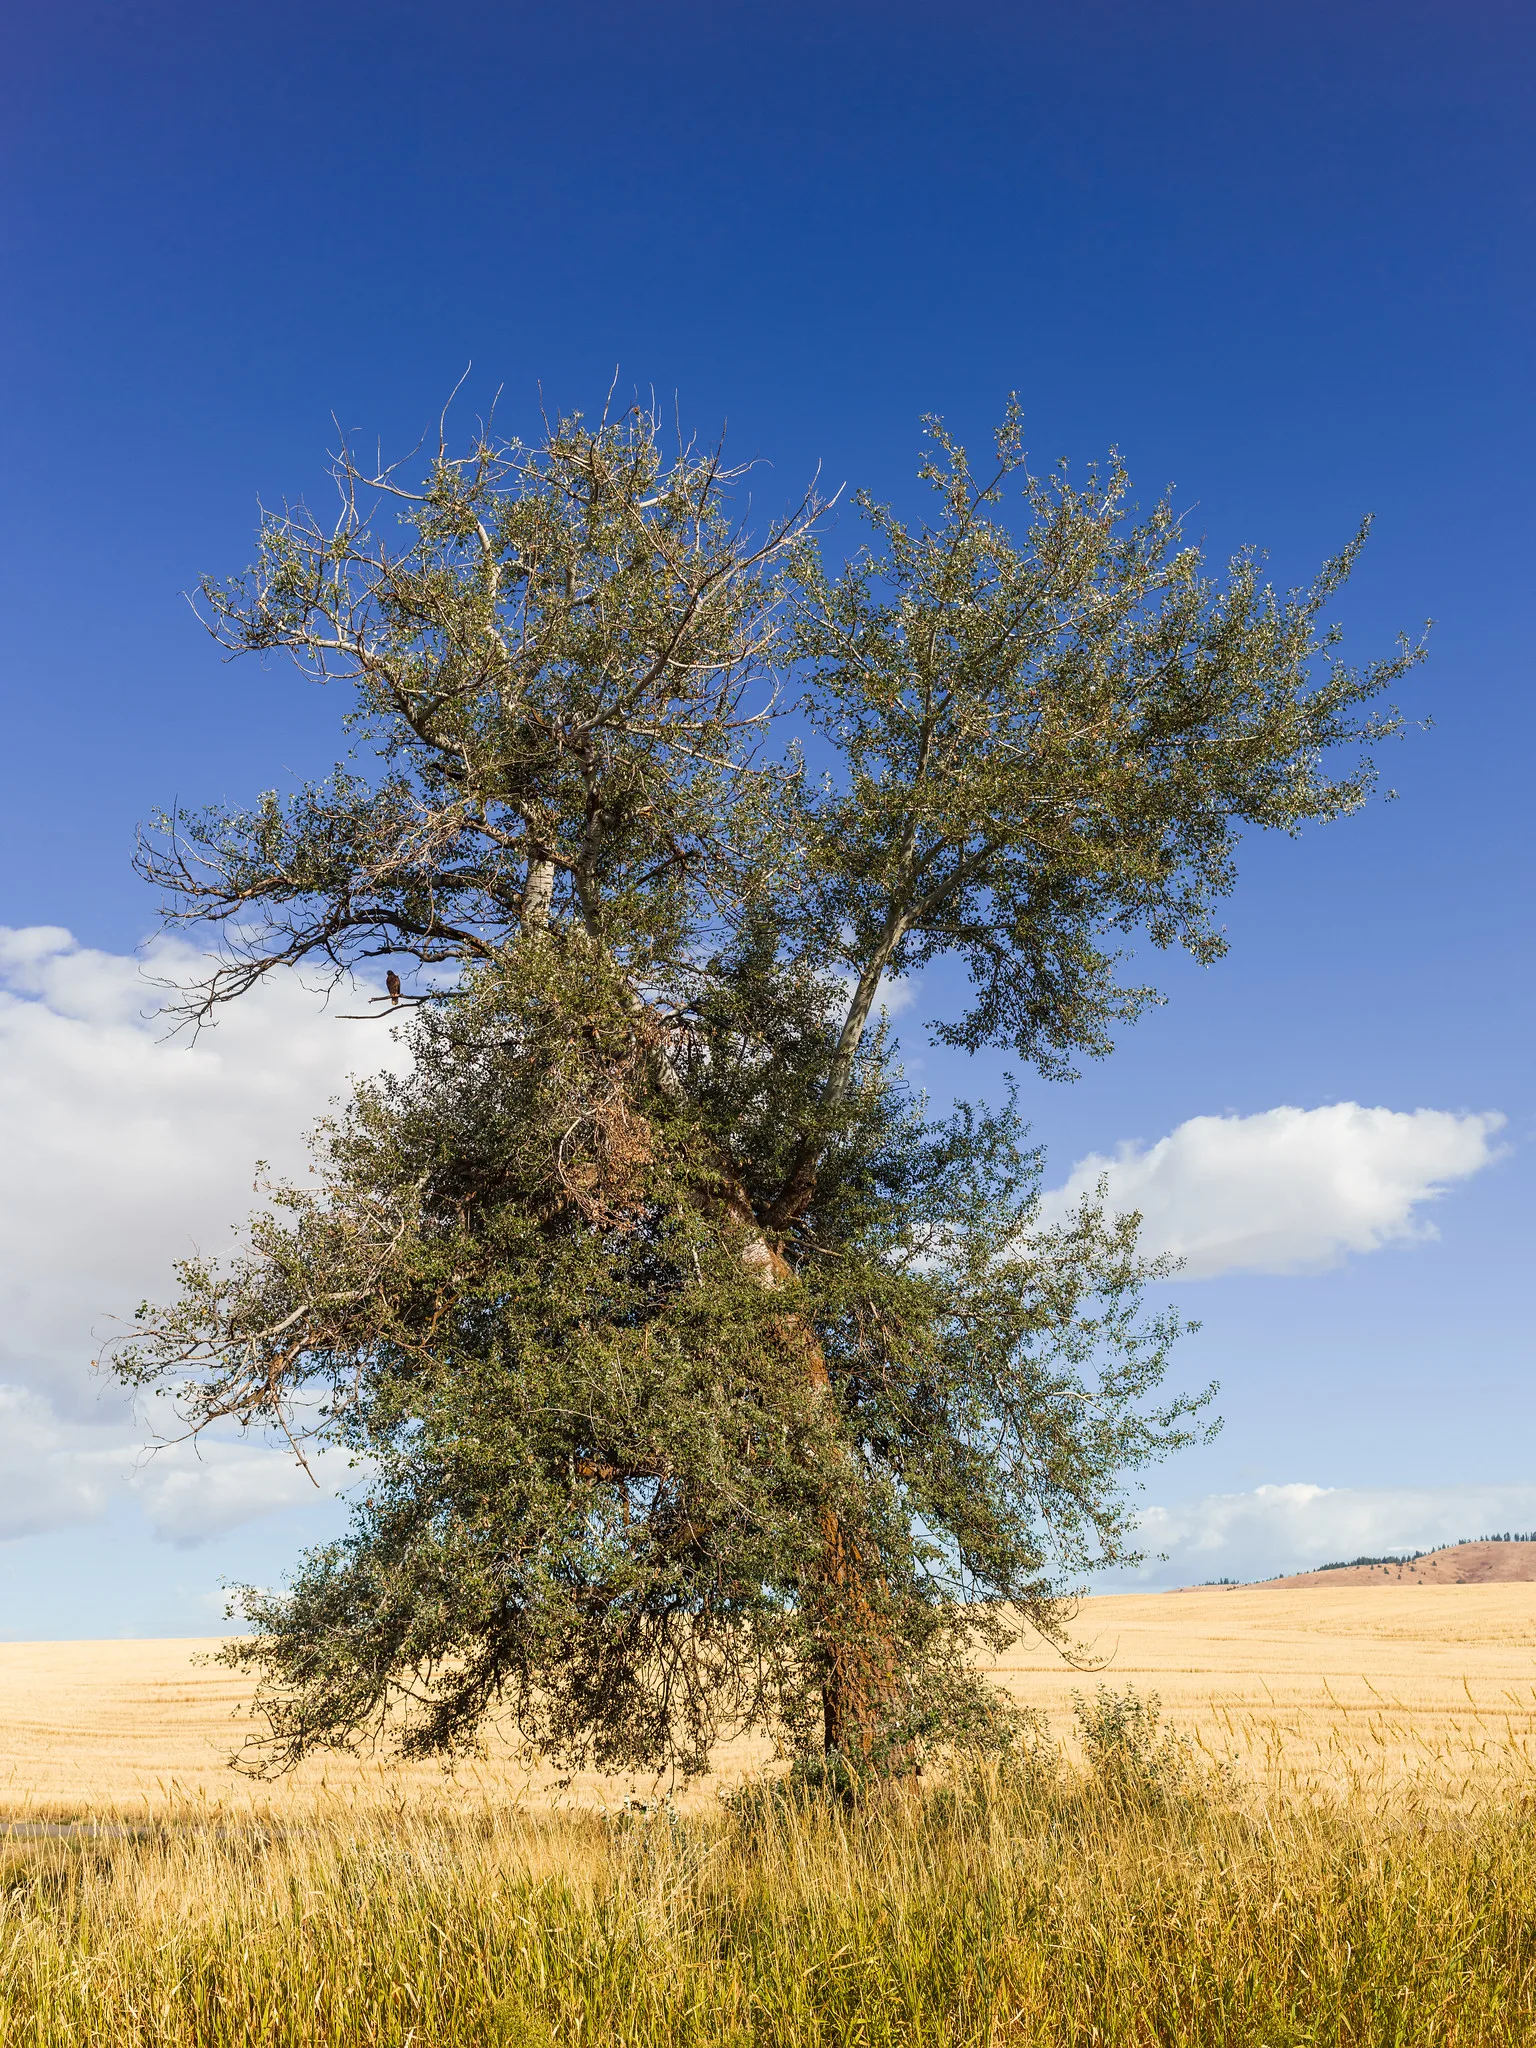
The lone tree is one of the classic subjects of landscape photography, and for good reason. A single tree surrounded by open space is simple, calm and instantly readable.
- Keep the background clean. A plain sky, a snowy field or a misty hillside lets the tree’s outline stand out. Move until nothing behind the tree competes with it.
- Use plenty of space. Giving the tree room in the frame makes it feel isolated and peaceful. The guide to negative space explains how empty areas strengthen a subject.
- Place it with care. A tree placed slightly off center often feels natural, with space in the direction its branches lean. A centered tree can feel formal and still. Both work; choose on purpose. The guide to the rule of thirds covers off-center placement.
- Watch the horizon. A low horizon gives a big sky and a feeling of openness. A high horizon puts the emphasis on the land the tree grows from.
- Step back and zoom. A longer lens from further away keeps the tree’s shape natural and simplifies the background.
The photo at the top of this page shows how little a lone tree needs: an open field, a plain sky and a careful frame. The guide to minimalist photography has more on simplifying a scene.
Drawn to simple, open frames like this? The guide to minimalist photography explains how to strip a scene back to one strong subject.
Groups, rows and avenues
Trees do not have to stand alone to make good pictures. Small groups and lines of trees offer their own patterns.
- Pairs and small groups. Two or three trees together can suggest a relationship or a family. Look for groups with varied heights or a clear arrangement.
- Rows and avenues. Trees planted along a road or path create leading lines and a strong sense of depth.
- Trunks in a line. Seen from the side, a row of trunks makes a rhythm of vertical lines. The guide to patterns and repetition explains how to use them.
- Layers in mist. Trees at different distances fade to lighter tones in fog, creating layered scenes.
Light on trees
Light changes how a tree looks more than anything else. The same tree can be cheerful, dramatic, mysterious or calm depending on the light.
- Backlight. With the sun behind a tree, leaves glow and the outline is rimmed with light. Low backlight in autumn or spring is especially beautiful. Hide the sun behind the trunk or a branch to control flare.
- Silhouettes. Against a bright sunrise or sunset, a tree becomes a dark shape. This suits trees with strong, distinctive outlines. The guide to silhouettes explains exposure.
- Side light. Low sun from the side brings out the texture of bark and the shape of the canopy, with light on one side and shadow on the other.
- Overcast light. Soft, even light shows leaf color richly and reveals detail in dense branches. It is ideal for blossom, autumn color and bark close-ups.
- Fog and mist. Mist simplifies backgrounds and turns trees into soft, graphic shapes. The guide to fog photography covers exposing for mist.
- Harsh midday light. Usually the least flattering, but it can work for bold shadows on the ground beneath a tree or for black and white.
The guide to direction of light explains how front, side and back light change the look of any subject.
Trees through the seasons
Photographing one tree across a year is one of the most rewarding projects a beginner can start. Each season shows a different side.
| Season | What to look for | Good light |
|---|---|---|
| Spring | Blossom, fresh pale leaves, new growth | Soft overcast or gentle backlight |
| Summer | Full canopy, deep green, shade and shadow | Early morning or evening, when light is low |
| Autumn | Changing color, falling leaves, leaf carpets | Overcast for color, backlight for glow |
| Winter | Bare branches, snow, frost, clear outlines | Low sun, fog or a plain bright sky |
To make a seasonal series, stand in the same spot each time and use the same framing. Mark the place on a map or note a nearby landmark. The finished set, shown side by side, can be striking. The guides to fall photography and winter photography have more seasonal ideas.
Details: bark, leaves, roots and branches
Move closer and a tree becomes a world of textures, patterns and colors.
- Bark. Peeling, cracked, ridged or smooth, bark makes strong abstract pictures. Side light reveals its texture.
- Leaves. A single backlit leaf, a cluster of autumn leaves or raindrops on a leaf all make simple, colorful close-ups. The guide to macro photography covers very close work.
- Roots. Roots gripping rock or spreading across the ground show strength and age.
- Branches against the sky. Looking up through bare branches creates natural patterns, like lace or veins.
- Blossom and fruit. Flowers and fruit add color and a sense of season.
- Signs of life. Moss, lichen, birds’ nests and insects all live on trees and add interest.
Unusual angles
Most tree pictures are taken standing at eye level. A change of position can give a familiar subject new energy.
- Look straight up. Stand at the base of a tall tree, or among several, and point the camera straight up. Trunks converge toward the sky in a striking pattern. A wide lens exaggerates the effect.
- Lie down. A low angle makes a tree tower over the viewer, and lets you include flowers or grass in the foreground.
- Climb a hill. From above, you can see the shape of a tree’s canopy against the land beneath.
- Frame with branches. Use overhanging branches to frame a view or another tree in the distance.
- Use reflections. A tree beside still water gives you a second, mirrored tree.
Lenses, settings and wind
Trees do not run away, but they do move. Wind is the most common cause of soft tree pictures.
- Lens choice. A standard or longer lens keeps a tree’s shape natural and simplifies the background. A wide lens works for looking up and for trees with dramatic surroundings. See the guides to the telephoto lens and the wide angle lens.
- Aperture. f/8 to f/11 keeps a whole tree and its surroundings sharp. For a single leaf or blossom, a wider aperture softens the background.
- Shutter speed for wind. In a breeze, use 1/250 or faster to freeze leaves. Raise the ISO if needed.
- Embrace the wind. On a tripod, a slow shutter speed of a second or more turns moving leaves into a soft, painterly blur while the trunk stays sharp.
- Exposure. Bright skies behind trees can fool the meter. Check the histogram and use exposure compensation to keep detail where you want it.
Calm days are best for sharp leaves. Wind is often lightest early in the morning and around sunset.
Black and white trees
Trees are natural subjects for black and white. Without color, the eye focuses on shape, line, texture and light.
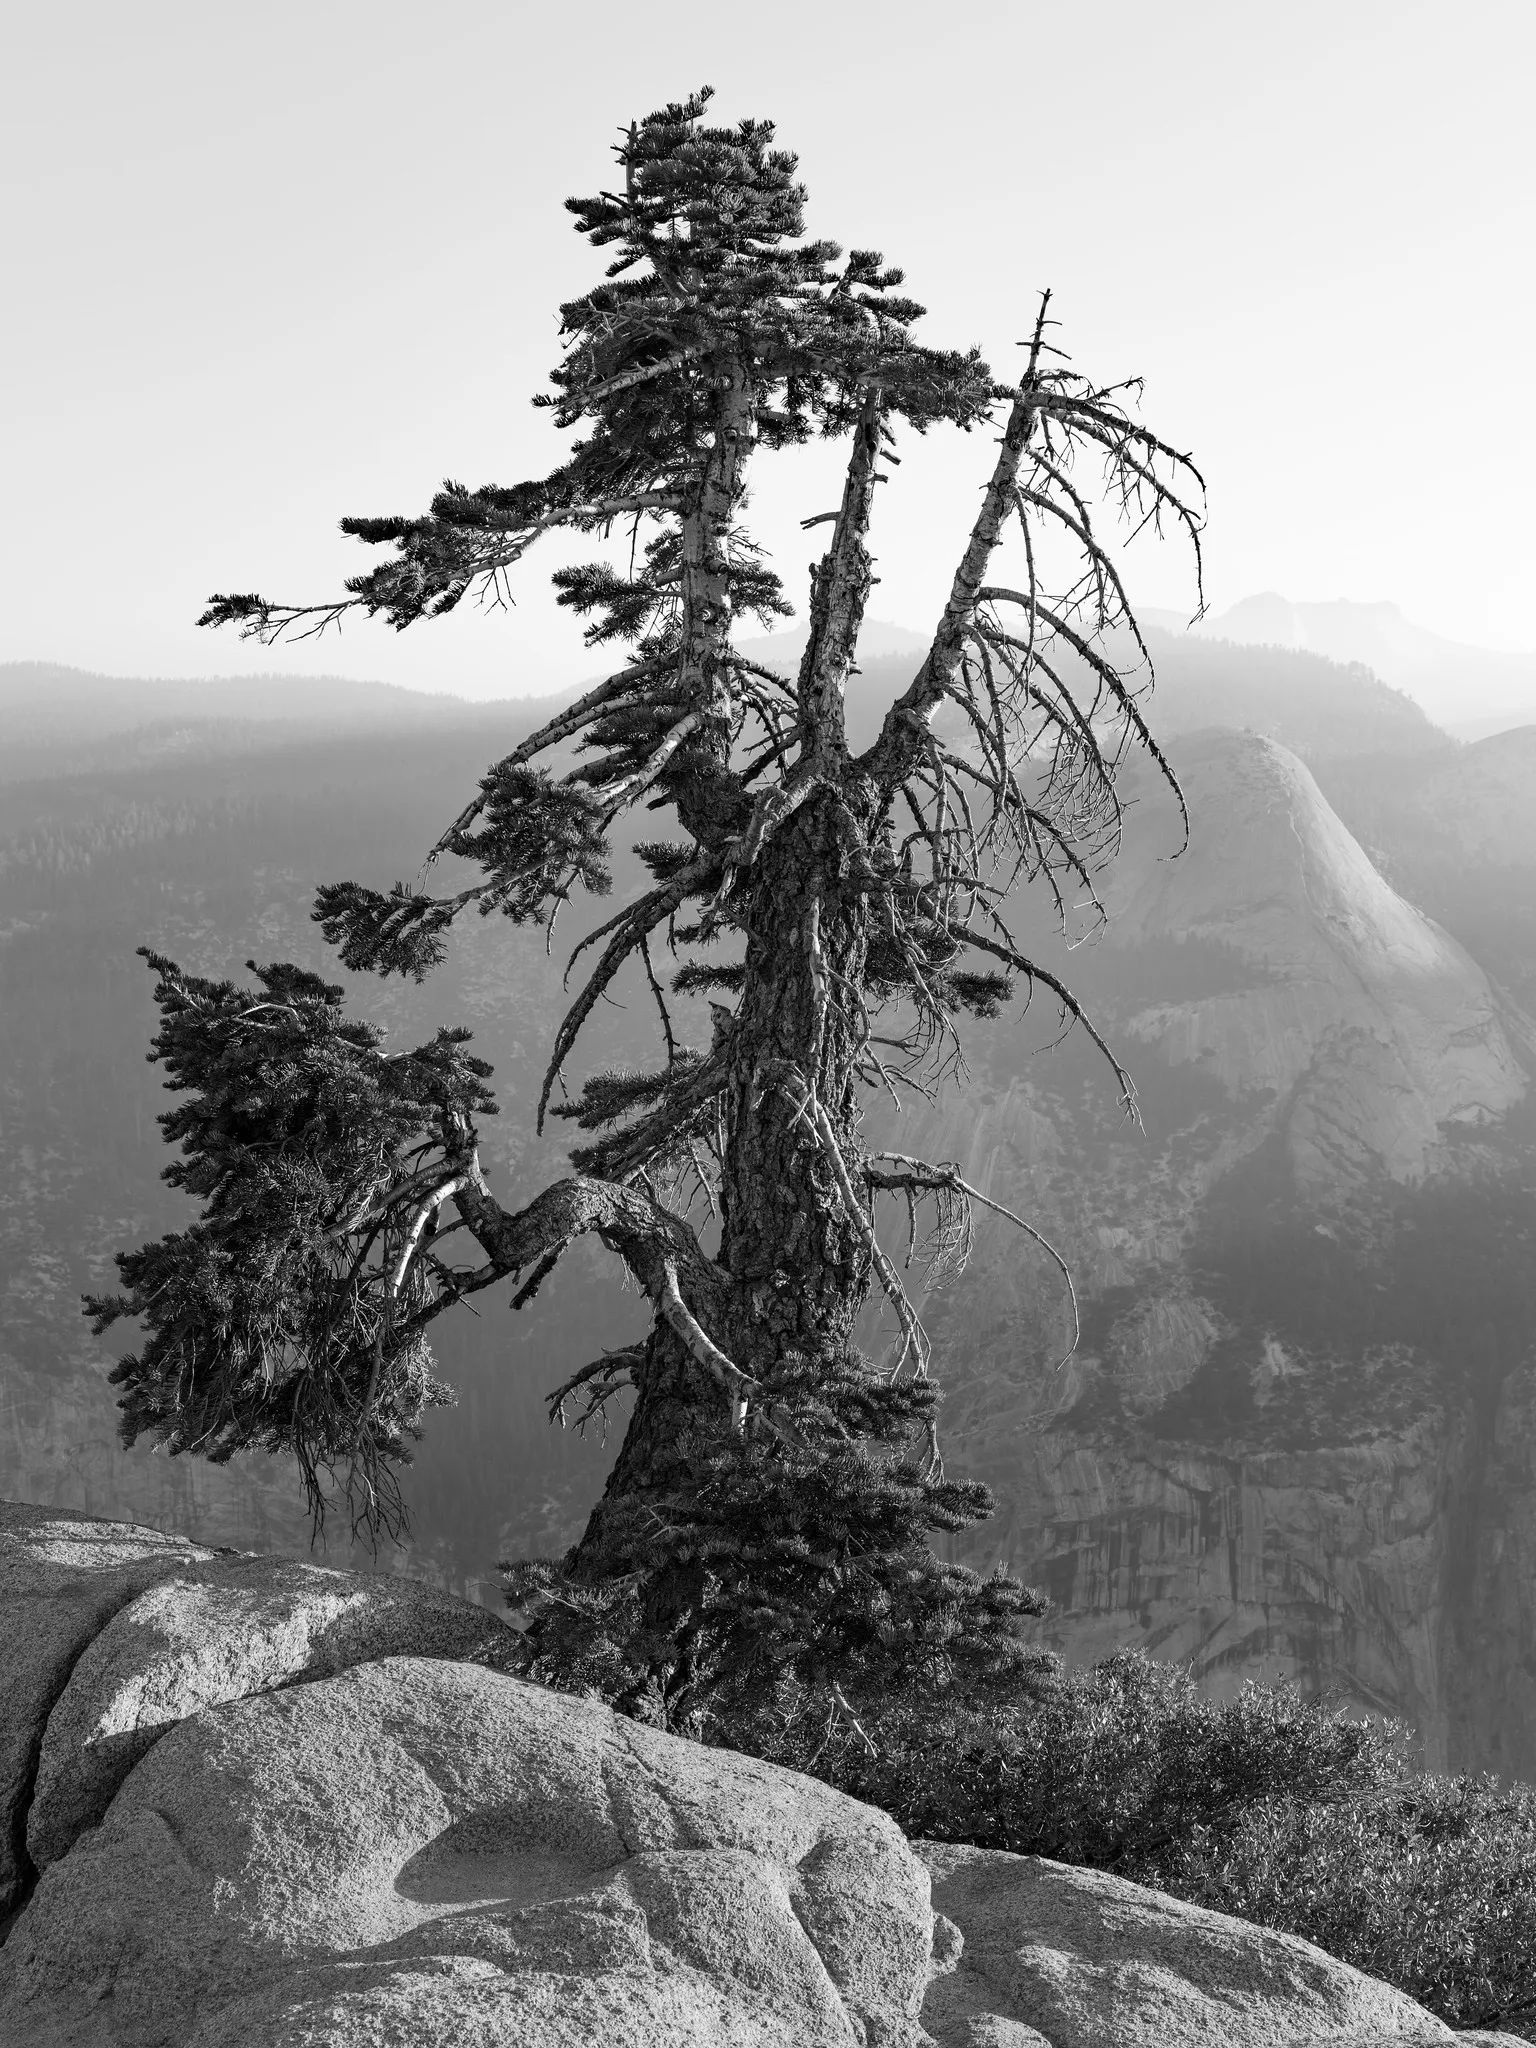
- Choose strong outlines. Bare winter trees, windswept pines and old twisted trunks are ideal.
- Look for contrast. A dark trunk against snow or a pale sky gives a bold result.
- Use texture. Bark and branches carry black and white pictures well.
- Darken the sky. In editing, darkening blue tones makes clouds stand out behind a tree.
The second photo on this page shows how black and white can turn a windswept tree on a cliff into a study of shape and survival. The guide to black and white photography covers conversion and contrast.
Want to try more black and white work? The guide to black and white photography explains how to see in tones.
Trees in the wider landscape
Sometimes a tree is not the whole subject but the anchor of a bigger scene. A single tree can give a vast landscape a focal point, a sense of scale and a reason for the eye to stop.
- Use a tree as foreground. A trunk or overhanging branch close to the camera adds depth to a mountain, lake or valley view. The guide to foreground interest explains how near objects pull the viewer in.
- Use a tree for scale. A small tree on a distant ridge or at the edge of a canyon shows how big the land really is. The page on scale covers how size comparisons work.
- Frame a view. Two trees, or a single arching branch, can frame a distant subject such as a peak, a building or a sunset.
- Place it against the sky at night. A tree with a strong outline makes an excellent foreground for stars. Find the spot and the composition in daylight, then return after dark. The guide on how to photograph stars explains settings and focus.
- Show a tree’s struggle. Trees growing on cliffs, in deserts or on windswept coasts tell a story of survival. Include enough of the harsh setting to make that story clear.
When a tree shares the frame with a big landscape, keep it in a clear spot, such as against the sky or a plain hillside, so it does not get lost among other shapes. A small but clearly separated tree often carries more weight than a large one tangled with its surroundings.
Want to build bigger scenes around a strong anchor like this? The guide to landscape photography covers composition, light and planning for wide views.
Common mistakes
- A cluttered background. Other trees, buildings and wires compete with the subject. Fix: move until the background is plain sky, field or hillside.
- Cutting off the top or base. Fix: leave space around the whole tree, or crop in close on purpose for a detail.
- Blurred leaves. Wind moved the branches. Fix: raise the shutter speed or wait for a calm moment.
- Flat midday pictures. Fix: come back in low light, fog or overcast weather.
- A blown-out sky. Fix: expose for the sky, or use a silhouette on purpose.
- Only one view. Fix: walk around the tree and try several sides, angles and distances.
Try this: a 10-minute tree study
Choose one tree near you, in a park, street or garden.
- Minutes 1 to 2: Walk all the way around it and pick the side where its shape looks best.
- Minutes 3 to 4: Make a picture of the whole tree with a clean background.
- Minutes 5 to 6: Move close and photograph the bark in side light.
- Minutes 7 to 8: Stand under the canopy and photograph looking straight up.
- Minutes 9 to 10: Find a leaf, flower or detail and photograph it with a soft background.
Come back in a different season or light and repeat the same five pictures. You will be surprised how much changes.
Frequently asked questions
What is the best time of day to photograph trees?
Early morning and late afternoon give low, warm light and calm air. Overcast days suit color and detail, and fog gives a soft, simple mood.
How do I make a tree stand out from the background?
Move until the background is plain, such as the sky or an open field. A longer lens from a distance and a lower angle can help.
How do I keep leaves sharp in the wind?
Use a fast shutter speed, such as 1/250 or faster, and raise the ISO if you need to. Wait for a lull between gusts.
What lens is best for photographing trees?
A standard zoom covers most trees. A longer lens simplifies backgrounds, and a wide lens suits looking up through tall trunks.
Can I photograph trees with a phone?
Yes. Trees are ideal phone subjects. Use the wide lens to look up through branches, tap to expose for the sky and try the close focus mode for leaves and bark.
For terms such as negative space, silhouette, histogram and texture, see the photography glossary.