To photograph fire, switch to manual exposure and expose for the flames, not the darkness around them, usually one to two stops darker than your meter suggests. Set a fixed white balance so the camera does not drain the orange out of the fire, then choose your shutter speed on purpose: fast to freeze the shape of each flame, slow to turn moving fire into glowing trails. Around performers and big fires, your distance and position matter as much as your settings.
Why flames fool your meter
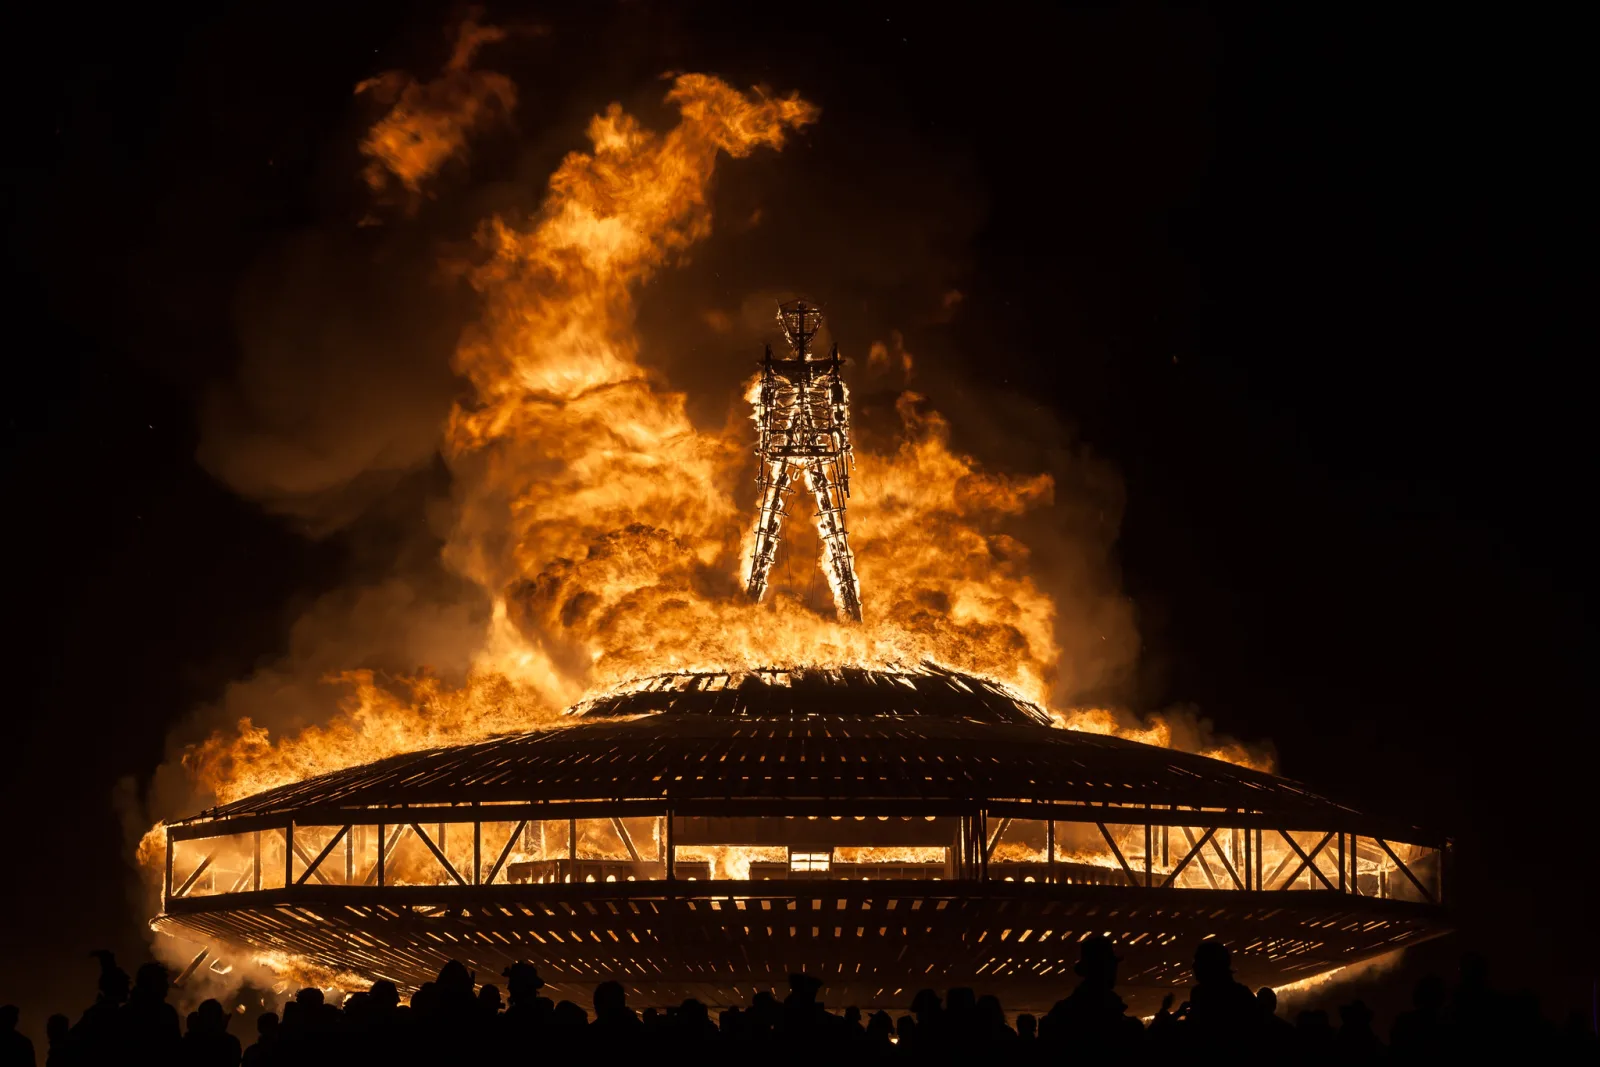
A camera meter is built on one assumption: that the scene, averaged out, should come out as a middle gray. Fire breaks that assumption in two opposite ways.
- Small fire, big darkness. A fire dancer or a campfire at night fills a small part of the frame with the rest nearly black. The meter sees mostly darkness and brightens the whole exposure, so the flames blow out into flat yellow-white shapes with no detail.
- Fire filling the frame. Close up on a bonfire and the meter sees mostly bright flame. Now it darkens the exposure toward gray, and the fire looks dull and muddy.
The fix is to take the decision away from the meter. Use manual mode, or at least lock exposure, and judge by the result. A good starting point for most fire at night is to expose so the brightest flames sit just below the right edge of the histogram, then check the image zoomed in. The yellow cores of flames will always be close to clipping; what you want is orange and red detail in the tongues of flame around them. If you shoot in an automatic mode, dial in -1 to -2 stops of exposure compensation for small fires in dark scenes, or use spot metering on a bright part of the flame and add about one stop.
Fire is strongly red and yellow, and a camera sensor can clip the red channel well before the overall histogram touches the edge. If your camera can show a color histogram, watch the red channel. When red clips, flames lose their gradation and turn into flat orange blobs. Blown highlights in fire cannot be recovered later, even from RAW, so protect them at capture.
Do not try to rescue the surroundings at the same time. A frame where the flames are rich and the rest falls to black almost always looks better than a compromise where the scene is visible and the fire is white.
White balance: keep the warmth
Firelight is very warm. A candle flame or a wood fire has a color temperature somewhere around 1,800 to 2,000 kelvin, far warmer than household bulbs. Auto white balance sees all that orange and tries to correct it toward neutral, which leaves fire looking pale and skin looking gray. Setting the white balance yourself keeps the color the way you remember it.
| White balance setting | How fire looks | Use it for |
|---|---|---|
| Daylight (about 5,500K) | Deep, saturated orange and amber | Fire as the subject: performers, bonfires, burns |
| About 3,500 to 4,000K | Warm but not overwhelming | People lit by fire, where skin should still look like skin |
| Tungsten (about 3,200K) | Mildly warm, close to neutral | Candlelit faces when you want a softer, less orange look |
| Auto | Often washed out and inconsistent from frame to frame | Rarely the best choice for fire |
Note the direction: a lower kelvin setting makes the picture cooler, because it tells the camera the light is warm and needs correcting. So daylight white balance gives the most orange fire, and tungsten the least. Shoot RAW, and white balance becomes a slider you can adjust afterward with no loss of quality. It still pays to set it in the camera, because the preview on the screen then shows you the color you are aiming for.
Freeze the flame or let it draw: choosing a shutter speed
Flames flicker and move constantly, so the shutter speed decides what fire looks like more than any other setting. There is no correct answer, only different pictures.
| Shutter speed | What fire looks like | Good for |
|---|---|---|
| 1/500 s and faster | Crisp, individual tongues of flame, frozen mid-flicker | Fire breathing, flame effects, sharp performers |
| 1/125 to 1/250 s | Mostly frozen, with a little softness in the fastest flames | Performers moving at normal speed, fire-lit faces |
| 1/30 to 1/8 s | Smooth, glowing flames; short arcs from moving fire | Campfires, candles, a hint of movement in spinning fire |
| 1/4 to 2 s | Spinning fire becomes circles and ribbons | Poi, staff and hoop trails, on a tripod or steady support |
| Several seconds | Complete patterns; sparks become streaks; people vanish into blur | Spark showers, whole routines as one shape |
The fast end needs light, and fire usually provides plenty of it on its own. If the flames are the subject, a fast shutter at ISO 800 to 3200 and a moderate aperture is often enough, because you are exposing for something very bright. The slow end needs stability. At half a second or longer, use a tripod or brace the camera on something solid, or the fire trails will wobble along with your hands.
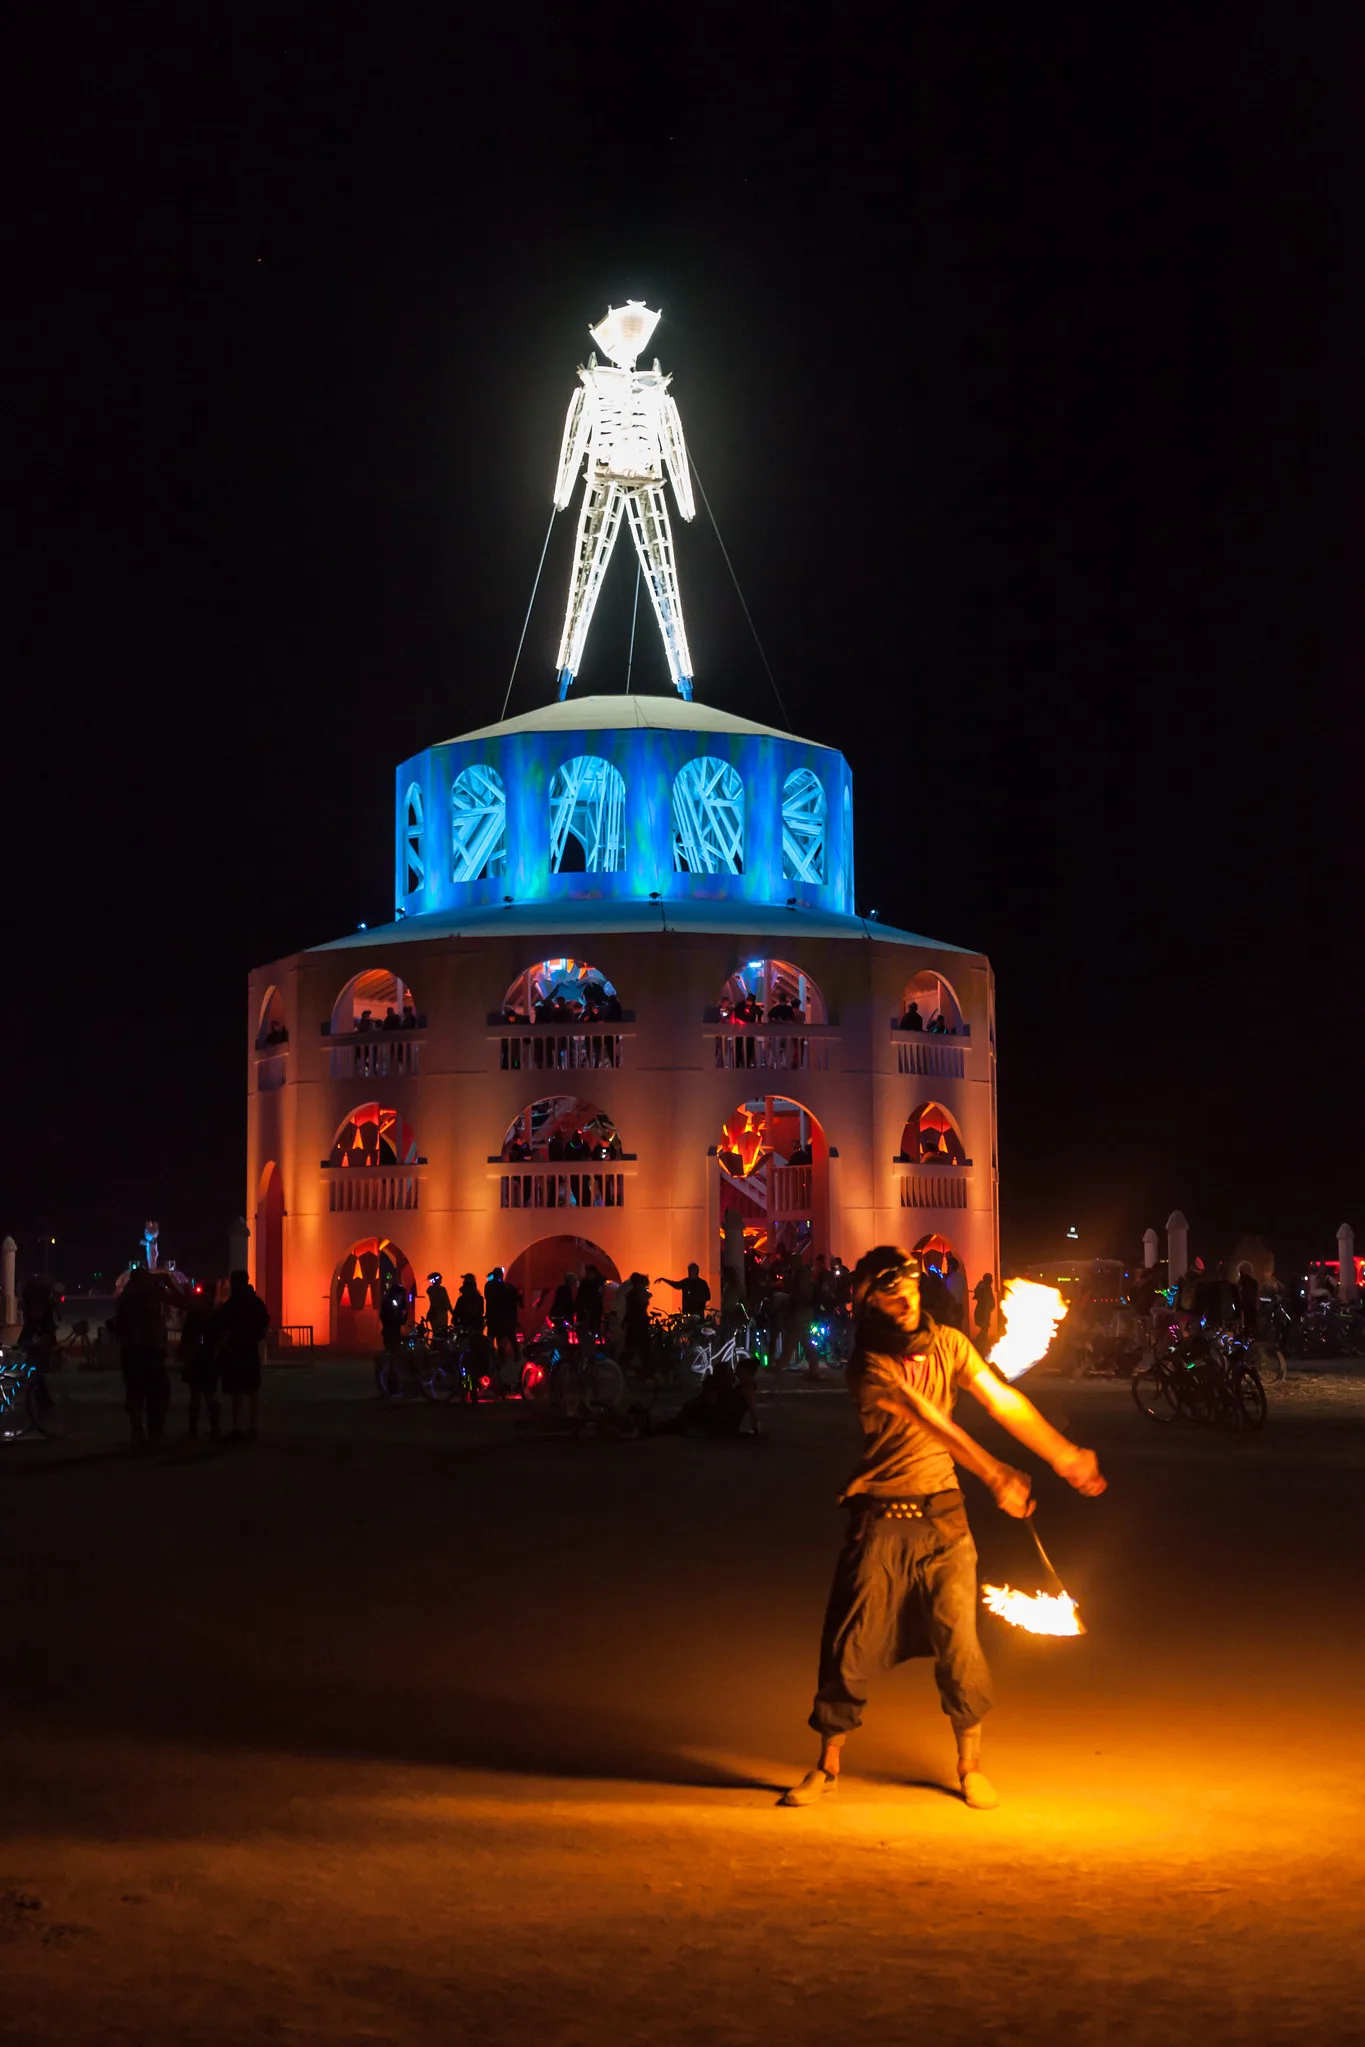
Slow shutter fire is a close cousin of light painting: the moving light draws on the sensor while everything dark leaves no trace. The difference is that a performer, not you, is holding the light, so you need to understand their routine to time it.
Photographing fire performers
Fire spinners (poi, staff, hoop, rope dart), fire fans and fire breathers are some of the most exciting subjects in night photography, and they are also working with real danger. Your first job is not to become part of that danger.
Safety distance comes first
- Stay outside the performance circle. Performers and their safety crew mark or manage a clear area. Stay behind the line or the audience edge, and never step in to get closer.
- Use focal length instead of feet. A short to medium telephoto lets you fill the frame from a safe distance. Spinning fire needs more room than you expect; a poi head on a chain sweeps a wide circle, and a staff can extend in any direction.
- Know where the wind is going. For fire breathing especially, stand upwind or to the side, never downwind. The fuel mist and fireball travel with the wind.
- No flash unless the performer asked for it. A sudden burst of light can dazzle someone who is spinning or breathing fire. Ask first, every time.
- Ask about photography. Many performers love good pictures of their work and will tell you the best moment to shoot. Offer to send them the images.
Settings for performers
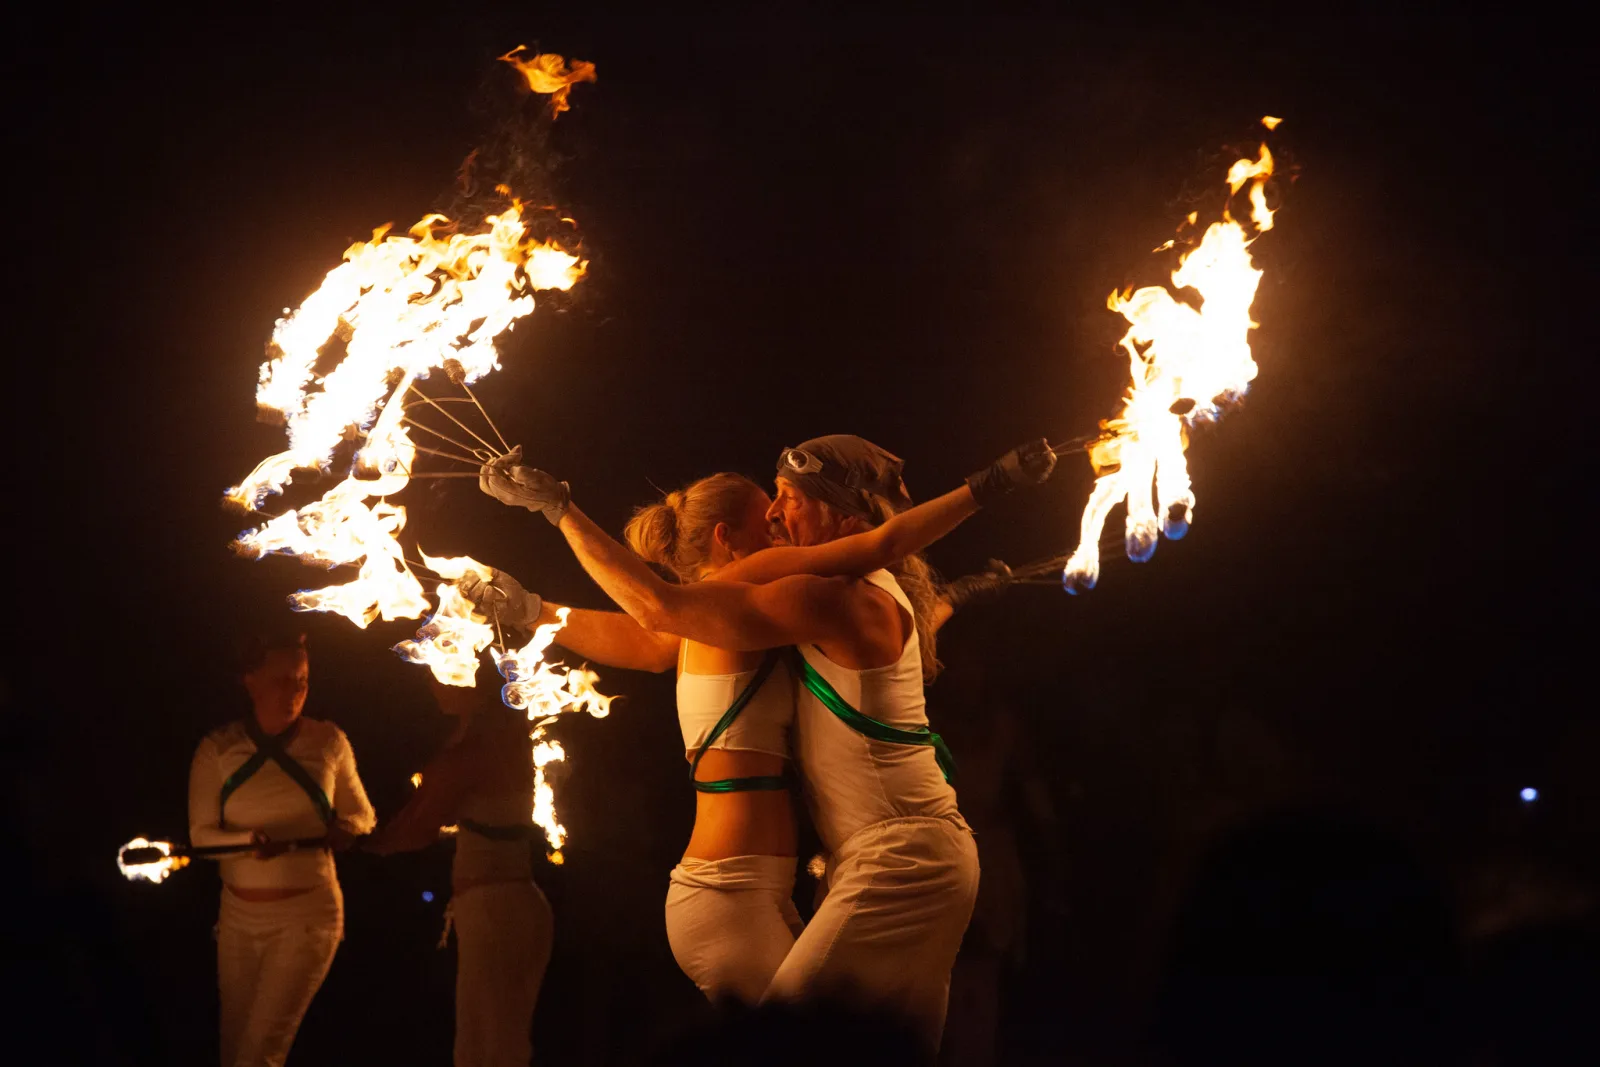
Fire lights the performer and little else, so expose for the flames and accept that the performer’s body will be lit only where the fire is close to it. A useful starting point: manual mode, 1/250 second, a wide to moderate aperture, and ISO 1600 to 3200, then adjust by reviewing the histogram after the first few frames. For trails, drop to 1/4 to 1 second on a tripod and lower the ISO to keep the exposure the same.
Autofocus struggles because the bright flames move and the performer is dark. Focus on the performer’s face or torso when a flame passes close, then lock focus (switch to manual focus, or use back button focus) if they stay at the same distance. A moderate aperture such as f/4 to f/5.6 gives you a little depth of field to absorb small focusing errors.
Timing
- Lighting up. The moment the wicks catch, with a face lit from below, is often the most intimate picture of the set.
- Peak of a move. Watch for a pattern that repeats, then shoot in short bursts as it comes around.
- Fire breathing. The fireball lasts only a moment. Pre-focus on the performer, frame with room above and in front of them, and shoot a burst as they lean forward.
- Burn-out. As the fuel runs low the flames become thin and wispy, which suits slower shutter speeds.
Bonfires and campfires with people
A fire with people around it is two exposures in one frame: the flames, which are very bright, and the faces, which are lit only by the fire and are several stops darker. Decide which one matters.
- Fire-lit faces. Expose for the faces and let the fire clip a little, keeping the flames small in the frame or partly hidden behind someone. Position yourself so the fire is beside the camera, lighting the faces from the side, rather than between you and the people. Warm, flickering light on faces is the picture.
- Silhouettes. Put the fire behind the people and expose for the flames. Everyone becomes a dark shape against the glow, which also protects their privacy. This is silhouette photography with fire as the backlight.
- Sparks. On a tripod at 1 to 4 seconds, sparks lifting off a fire draw bright upward streaks. Anyone moving blurs, so ask the group to hold still, or embrace the ghosting.
Fire-lit faces need a lot of ISO because firelight falls off quickly with distance. Expect ISO 1600 to 6400 at a wide aperture and a shutter speed around 1/60 second. Some noise is fine; it suits the mood and cleans up well with noise reduction.
Watch the space between you and a large fire. Hot air rising from flames bends light, so shooting across a fire at a long focal length gives shimmering, soft results. Move so the fire is beside your line of sight rather than under it.
Candlelight portraits
A single candle is one of the most flattering light sources there is: small, warm and soft on skin at close range. It is also very dim, so candlelight portraits are a test of how far you can push your camera.
- Bring the candle close. Light from a small source falls off quickly, so a candle a little way from the face gives several times more light than one at arm’s length. Keep it a safe distance from hair, scarves and anything loose.
- Use several candles if needed. A cluster of candles is a larger, brighter and softer source than one.
- Open up. Use your widest aperture (f/1.4 to f/2.8), a shutter speed around 1/60 to 1/125 second so the flicker and your hands do not blur the picture, and whatever ISO that requires. ISO 3200 to 6400 is normal.
- Decide if the flame is in the frame. A visible flame tells the story but will be the brightest point in the picture. Expose for the face, and the flame will clip to a small bright shape, which is fine. Out of frame, the face glows with no obvious source, which is subtler.
- Turn off every other light. Mixed sources spoil the warm, single-source look. If you want a little detail in the shadows, a white card or wall on the dark side of the face bounces some candlelight back.
Candle flames can still clip in a candlelit portrait if you expose generously for the face. That is expected. What matters is that the skin looks warm and the eyes are sharp. For the look, try a white balance around 3,200 to 4,000K; it keeps the glow without turning skin a uniform orange.
Protecting yourself and your gear from heat, sparks and smoke
Radiant heat from a large fire can be felt from a surprising distance, and it does not need to touch the camera to cause trouble. Sparks and embers travel on the wind. Smoke carries fine oily ash that settles on glass.
- If it is too hot for your face, it is too hot for the camera. Back off and use a longer lens.
- Use a lens hood and a protective filter. The hood blocks some sparks and ash; a cheap filter takes the pitting instead of your lens coating.
- Stay upwind. Sparks, smoke and fuel vapor all travel downwind. Upwind keeps you and your gear clean.
- Keep bags closed and away from the fire. Do not set a bag down near a fire pit, and never leave gear where embers can land on it.
- Dress for it. Natural fibers such as cotton and wool are safer near sparks than many synthetics, which can melt.
- Clean gently afterward. Blow ash off before wiping, then clean with a lens cloth and a little lens cleaner. Oily smoke residue smears if you wipe it dry.
For large ceremonial burns, organizers set a perimeter for a reason. Respect it, and expect the heat to push the crowd back further as the fire grows.
Common mistakes
- Trusting the meter. The flames blow out to white. Fix: manual exposure, or -1 to -2 stops of compensation, and check the histogram.
- Leaving white balance on auto. Fire goes pale and inconsistent. Fix: daylight for fire as the subject, 3,500 to 4,000K for fire-lit people.
- Using one shutter speed for everything. Fix: decide whether you want frozen flames or trails, and set the shutter speed for that.
- Getting too close to performers. Fix: stay outside the performance area and use a longer lens.
- Using flash on fire performers. It can dazzle them and flattens the fire’s own light. Fix: shoot with the firelight, and ask before any flash.
- Shooting across a big fire with a long lens. Heat shimmer softens everything behind it. Fix: move so the fire is beside the line of sight.
Try this
Light a single candle in a dark room and set your camera on a table or tripod about half a meter away. In manual mode, take the same frame at 1/1000, 1/125, 1/15 and 1/2 second, adjusting ISO or aperture to keep the exposure roughly the same, and gently blow on the flame for each shot. Then repeat one frame at daylight, 4,000K and auto white balance. Put all seven side by side. In twenty minutes you will know exactly how shutter speed shapes a flame and how white balance changes its color, and you will have starting settings for every fire you shoot after.
Frequently asked questions
What are good starting settings for photographing fire at night?
Manual mode, 1/250 second, f/4, ISO 1600, daylight white balance. Take a frame, check the histogram and the flames zoomed in, and adjust. Darken if the flames are white, brighten if the orange looks muddy.
How do I get circles of fire from a spinner?
Use a shutter speed between about 1/4 second and 2 seconds with the camera on a tripod or steady support. Shorter gives arcs, longer gives full circles and overlapping patterns.
Why does my fire look yellow-white instead of orange?
Usually overexposure. The brightest parts of a flame clip first, and clipped color becomes flat and pale. Reduce exposure by a stop or two, and check that white balance is not set to auto or tungsten.
Is fireworks photography the same as fire photography?
Related but different. Fireworks are distant bursts that you capture over several seconds from a tripod, while fire is usually close, continuous and often moving with a person. See how to photograph fireworks for that technique.
Related guides
- How to Photograph Fireworks: bursts, bulb mode and timing for fireworks displays.
- Light Painting Photography: drawing with moving light on a long exposure.
- Night Photography: tripods, focusing and exposure after dark.
- White Balance: how the camera decides what is neutral, and how to overrule it.
- Shutter Speed: freezing and blurring motion of every kind.
- Festival Photography: consent, dust and night light at big gatherings, where much fire photography happens.
- Metering Modes: why the meter gets high-contrast scenes wrong, and which mode to use.