Hiking photography works when the camera rides where one hand can reach it: on a shoulder strap, the chest or the hip belt, not inside the pack. Carry one body and one or two lenses chosen for what the route offers, keep a roll-top dry bag and a dry cloth within reach, keep spare batteries warm against your body, and brace on rocks, trekking poles or the pack instead of hauling a full tripod.
This guide covers the walking side of outdoor photography: carrying, packing, weather, power, support, group pace, midday light and trail compositions. For the scenery itself, how to photograph mountains covers light on peaks, haze and settings for big distances, and landscape photography covers general technique. This page goes further on the logistics that decide whether you take any pictures at all.
Where the camera rides decides how many pictures you take
A camera inside the main compartment is cargo. Reaching it means stopping, unbuckling, taking the pack off, digging, shooting, repacking and catching up, and after the third time you stop bothering. The test for any carrying method is simple: with the hip belt still buckled, can you go from walking to pressing the shutter in about five seconds, and put the camera away again just as fast?
| Where it rides | Access | Protection | What to watch |
|---|---|---|---|
| Clip on a shoulder strap | One hand, seconds | None | Weight sits on one shoulder; balance it with a water bottle on the other strap |
| Chest pouch on both shoulder straps | Fast | Padded, sheds showers | Hides your feet on steep descents |
| Holster on the hip belt | Fast | Padded | Knocks on rock and sits low in river crossings |
| Strap across the body | Instant | None | Swings into rock when you bend and tangles with the harness |
| Inside the pack | Pack off | Best | You only shoot at rest stops |
- Leave the lens cap off and the hood on. The hood guards the front element against branches and rock, and removes a step between seeing and shooting.
- Stow the camera when you need your hands. On scrambles, ladders, steep snow and loose descents it goes inside the pack.
- Add a short tether from the camera to the pack strap, in case a clip is not fully locked or a zip is left open.
Choosing what to bring: weight against what the route offers
Every item is carried for every step of the climb, so camera gear has to earn its place the way food and clothing do. Weigh the kit and write the number down. One litre of water weighs one kilogram, so a second lens of 500 grams costs the same effort as half a litre of water, all day.
Then ask what the route will put in front of you, because that decides which focal lengths are useful and which are ballast.
| What the route offers | What that means for the kit |
|---|---|
| Forest, gorges and waterfalls | Close subjects and dim light: wide to normal focal lengths, plus a way to steady slow shutter speeds |
| Open ridges and summits | Wide views need a wide lens and a foreground; distant ridges and tiny walkers need a short telephoto |
| Wildlife likely | Animals stay far off, and should. A long lens is worth its weight only if wildlife is a real aim of the trip |
| A clear night under dark sky | A wide lens with a large maximum aperture, and a support that holds still for many seconds |
On the trail, zoom or prime is mostly a weather question. One zoom running from wide to short telephoto means the camera is never opened in rain or blowing dust. A single small prime is the lightest choice and often lets in more light, but you frame by walking, which a narrow path may not allow. The trade-offs are set out in prime lens vs zoom lens.
Count the phone as a second camera, and remember that it is usually the map too, so navigation gets first call on its battery. After each trip, list what you carried without using. Anything listed twice in a row stays home. Never make room for camera gear by cutting water, warm layers, a headlamp or first aid.
Keeping gear dry in rain, river crossings and tents
Water protection works in layers, because the fast-access carry that gets you pictures also leaves the camera exposed.
- In reach: a roll-top dry bag big enough for the camera with its lens on. When rain arrives the camera drops in and the top is rolled at least three times.
- Inside the pack: a liner. A rain cover leaves the harness side open, so water runs down your back and pools in the bottom of the pack.
- Small sealed bags for cards, batteries and a microfibre cloth. A damp cloth smears water across the glass instead of lifting it.
In light rain you can keep shooting: hood on, lens pointed down between frames, front element checked before each picture. Weather sealing lowers the risk, but its limits vary between cameras, so treat it as a margin. Before any river crossing where a slip is possible, the camera goes into the dry bag, high inside the pack.
Condensation forms when a cold camera meets warm, humid air: walking into a heated hut, climbing into a tent full of breath and wet clothing, or tucking a cold camera inside your jacket against a sweaty base layer. Seal it in the dry bag first and let it warm up inside the bag. Keep it bagged overnight too, since tent walls drip.
What if the lens has already fogged or the camera got wet? Camera care in the field covers condensation when moving between cold and warm, rain, spray and salt, and cleaning a lens without scratching it.
Cold mornings and dusty trails
Cold mainly affects the battery. Camera batteries deliver less of their capacity when cold, so one that lasts a full summer day may read empty by mid-morning on a frosty ridge. Keep the spares in an inside pocket close to your body and rotate them. A battery that reads empty in the cold will often give more frames once it has warmed up again.
- Do not breathe on the camera. In freezing air your breath frosts the viewfinder, the screen and the front element.
- Blow snow off, do not rub it. A warm finger melts it into water that refreezes on the glass.
- Add exposure on snow. A meter turns bright snow grey. Plus one to plus two stops of compensation is the usual range, checked on the histogram.
On dry trails the problem is dust, especially behind other walkers, horses or vehicles. Change lenses as rarely as you can. When you must, turn your back to the wind, point the camera opening downward, have the other lens ready with its rear cap loosened, and make the swap in seconds. If grit lands on the front element, blow it off before you wipe: dragging dry grit across glass is how coatings get scratched.
Batteries and memory cards on multi-day trips
Work out a power budget before the trip. Charge a battery, shoot the way you really shoot on a walk, reviewing and video included, and note how long it lasts. Multiply by the days you will be out, then add a spare for cold and for the day when the light is extraordinary. Each charge goes further with wireless and location tagging off, a short auto power-off time and reviewing saved for camp.
For recharging, a power bank is the predictable option on trips of a few days. Many cameras can charge a battery inside the body over a USB cable; check that yours does before relying on it. A solar panel only delivers when it sits in direct sun for hours, which rarely matches a day of walking under trees or cloud.
Do not charge lithium-ion cells, whether camera batteries or power banks, while they are below freezing, because that can damage them. Warm the battery inside your jacket or sleeping bag first.
Storage needs the same arithmetic: frames per day, times days, times the size of one file, plus a margin. Then spread the risk.
- Carry several cards instead of one large one, and change card every day or two. A failed or lost card then costs part of the trip, not all of it.
- Do not delete or format in the field. Tired fingers make mistakes.
- Keep used cards apart from the camera, in a waterproof case in a zipped pocket. If the camera goes into a river, the pictures already taken are safe.
How do you keep a second copy when there is no computer for a week? How to back up photos explains the 3-2-1 rule, what each copy protects against, and backing up phones and photos on the road.
Sharp pictures without a full tripod
Most trail pictures are taken in daylight at shutter speeds that need no support, so the first tools are a fast enough shutter speed, stabilization and a steady hold, all covered in camera shake. Hiking adds one complication: after a climb your chest is heaving and your pulse shows in the viewfinder. Wait twenty or thirty seconds, breathe out gently, and shoot a burst of three or four frames.
When the light is low, or you want a slow shutter speed for moving water, build a support from what you have:
- A rock or log with the pack on top. Press the camera into the pack or a folded jacket, frame on the rear screen, and use the two-second self-timer so your finger is off the camera when the shutter opens. This holds for exposures of a second or more.
- A trekking pole as a monopod. Plant the tip, grip the handle and rest the camera on your hand. Some poles have a camera thread under the top of the grip. It helps at moderately slow speeds but will not hold a multi-second exposure.
- A pocket-sized tabletop tripod. Set on a rock, it holds a small camera for long exposures, night scenes and group pictures with you in them.
A full-height tripod earns its weight on trips built around stars, long exposures or dawn and dusk at a high camp. Decide trip by trip.
Photographing while moving with a group
Twenty stops of two minutes add forty minutes to a day. The group cools down, the pace breaks, and your photography becomes everyone’s problem. Aim for many short stops that cost nobody else anything.
- Set the camera before you set off. Aperture priority at f/5.6 to f/8, with Auto ISO and a minimum shutter speed of 1/250, freezes people walking and forgives your own movement.
- Say what you are doing. Tell the group you will stop often and briefly, that they should keep walking, and that you will catch up. Agree to regroup at every junction.
- Get ahead, then turn round. The default hiking picture is a row of backpacks. On a climb, push ahead to a bend, turn, and photograph the group coming toward you with the valley behind them.
- Use the switchbacks. At a hairpin, the people above or below you are side-on and separated, with the slope as background.
- Shoot the stops everyone makes anyway: water, map checks, boots off at a stream, the stove at camp.
Do not stop on narrow or exposed sections, and step aside onto rock or bare ground, not onto plants, to let others pass.
Working with the light hikers actually get
Most hikers are on the trail between mid-morning and late afternoon, and reach the high point around midday, when the sun is highest and hardest. That is no reason to put the camera away. It is a reason to match the subject to the light.
| Light | What to point the camera at |
|---|---|
| High sun on open ground | People with the sun to one side or behind them, close details, cloud shadows crossing slopes, lakes and sky through a polarizer |
| High sun in forest | Backlit leaves, scenes wholly in shade, or the moment a cloud covers the sun. Expose so the bright patches keep detail |
| Overcast | Forest, streams, waterfalls, flowers and faces. Frame out the blank sky |
| Low sun from a high camp or an early start | The wide views: side light and long shadows show the shape of the ground |
Terrain sets the timing. Ridges and summits catch the first and last direct sun, while deep valleys get it late in the morning and lose it early in the afternoon. The only way to have low light in high places is to be there early or late: leave before sunrise with a headlamp, or camp high.
A polarizing filter earns its few grams at midday. It darkens blue sky most strongly at a right angle to the sun, so with the sun high the effect is strongest toward the horizon, where distant views are. It also cuts glare on wet leaves, rock and water, at a cost of one to two stops of light.
What can you do when the sun is overhead and there is no cloud? How to shoot photos in harsh daylight sets out six strategies, including finding shade, backlighting, exposing for highlights and choosing subjects that suit hard light.
Trail and summit compositions, with people for scale
The path is the strongest line you have. Let it enter the frame from a lower corner and run toward a walker, a pass or a peak. A low camera makes the near stretch of path large and textured; stepping up onto a bank shows the shape the path draws across the land.
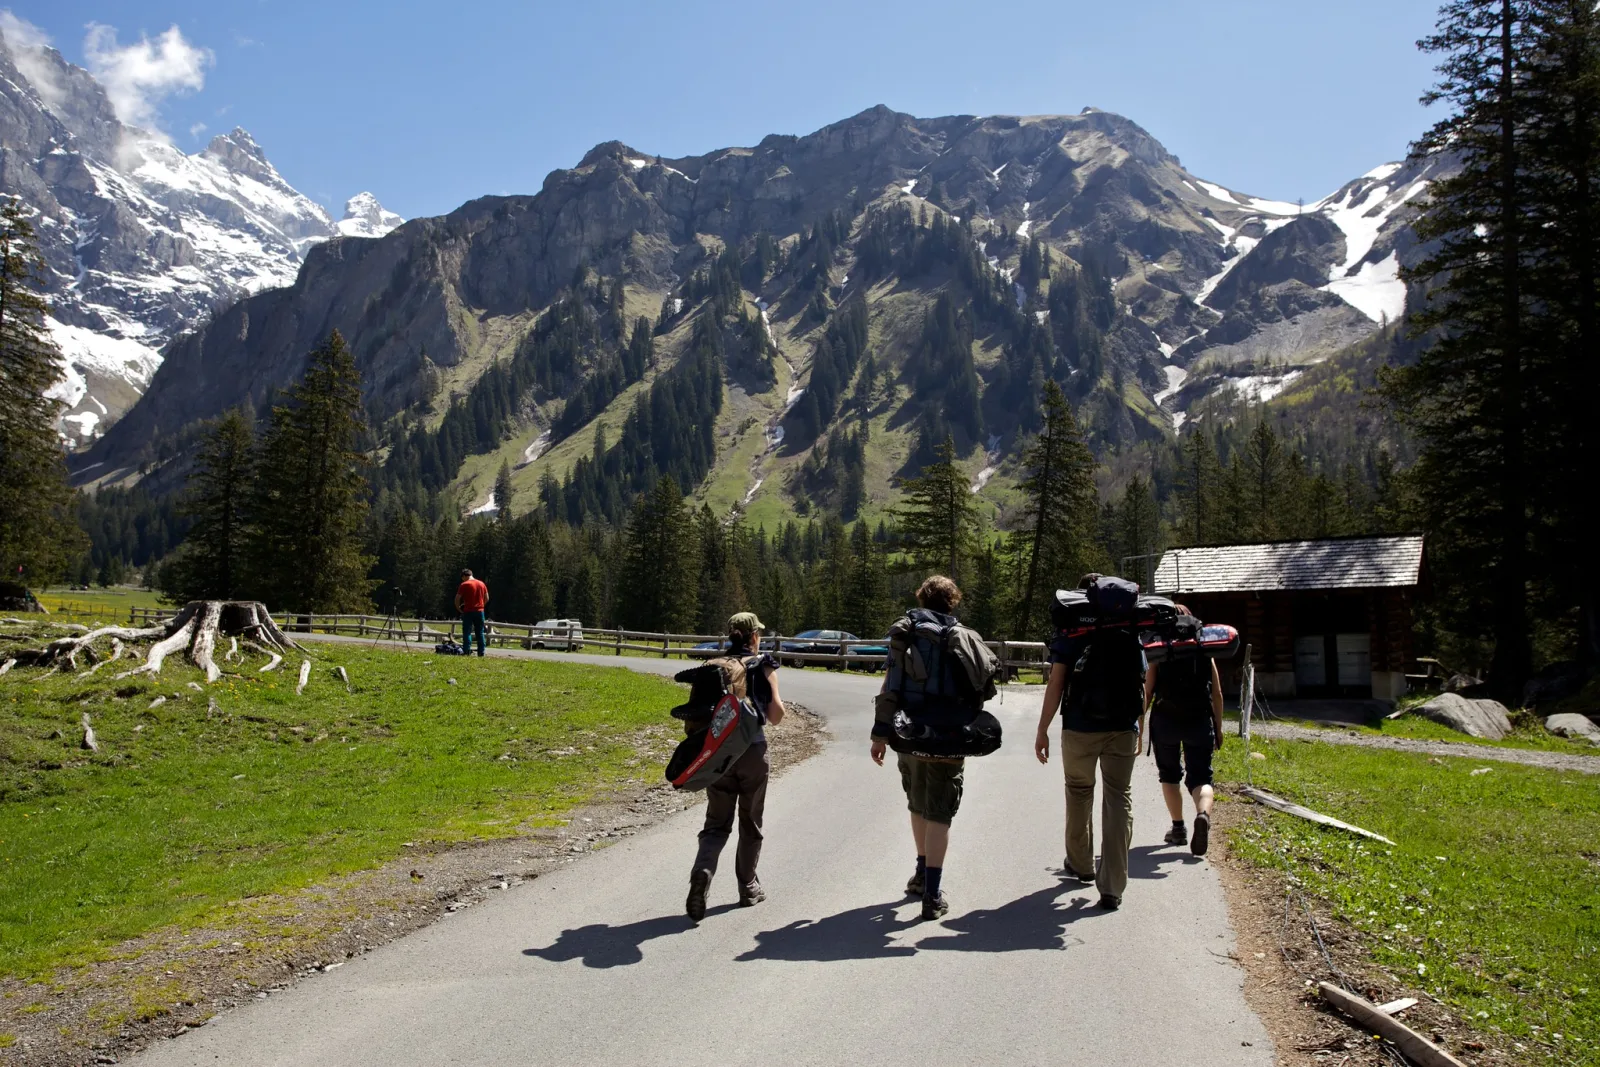
Mountains look smaller in a photograph than they felt, because nothing in the frame says how big they are. A person does, provided the figure reads as a person at a glance:
- Place the figure against something plain and of a different tone: sky, snow, a lake, pale rock. A dark jacket against dark forest disappears.
- A red, orange or yellow jacket stands out against green, grey and blue.
- Catch the stride with daylight between the legs, and leave space in front of the walker.
- Put the figure where the eye will find it: on a skyline, at a bend, or at the end of the path.
Look behind you often: the view back down the trail is in different light, and you will not see it again. On the summit, take the group picture, then keep going:
- Give the view a foreground. Get the wide lens low and close to summit rocks or the line of the ridge.
- Use the longer focal length to pick out ridges stepping away in paler and paler tones, or another party on a neighbouring ridge.
- Step off the top. Walk a short way back along the ridge and photograph a companion on the summit against the sky.
- Shoot a handheld panorama. Turn the camera upright, lock exposure and focus, and overlap each frame with the last by about a third.
How do the separate frames become one picture? Panorama photography covers how much overlap you need, handheld panorama tips and the options for stitching software.
Safety and leaving no trace
- Stop, then shoot. Do not walk with your eye to the viewfinder, and never step backward while composing.
- Stay back from edges. On snow, a cornice can overhang thin air and break well back from its lip.
- Keep the turnaround time. Light that is about to improve is a common reason photographers are late off a mountain. Come down from summits and ridges when thunderstorms threaten.
- Give animals distance. Do not approach, feed or follow wildlife, and follow the distances the park sets.
- Stay on the path and on durable ground. Do not trample plants to reach a foreground; alpine vegetation can take years to recover. Do not pick flowers or move rocks to tidy a composition.
- Carry everything out, including dead batteries and lens wipes, and check local rules before packing a drone.
Common mistakes
- The camera lives in the pack. You come home with pictures of lunch stops only. Fix: move it to a shoulder strap, chest pouch or hip belt.
- Trusting the rain cover. Water runs down the back of the pack. Fix: a liner inside and a roll-top dry bag in reach.
- A fogged lens in the hut or tent. A cold camera met warm, damp air. Fix: seal it in the dry bag before going in.
- Every picture shows backs. You were always behind. Fix: get ahead on climbs and turn round.
- Views with nothing to measure them by. The mountain looks like a hill. Fix: put a person, a tent or a hut in the frame, small and clearly separated.
Try this
Spend fifteen minutes on a rehearsal in a park. Load your pack to its real weight and fit the camera where you plan to carry it. First, time yourself five times from walking to a taken picture and back to walking, with the hip belt buckled. If it takes much more than five seconds each way, change the carry. Second, set the shutter speed to 1/8 and photograph one subject four ways: handheld, braced against a tree, resting on the pack with the two-second timer, and on a trekking pole. Zoom in on the results at home to see which supports you can trust.
Frequently asked questions
What is the best way to carry a camera while hiking?
Anywhere you can reach with one hand while the pack stays on: a clip on the shoulder strap, a chest pouch or a hip-belt holster. Keep a roll-top dry bag within reach for rain, and move the camera inside the pack for scrambles and river crossings.
Is a tripod worth carrying on a hike?
Only if the trip is built around pictures that need one: stars, long exposures of water, or dawn and dusk from a high camp. For daylight walking, a fast shutter speed, stabilization and bracing on rocks, poles or the pack cover almost everything.
What lens should I take hiking?
Decide by the route. Forest and gorge walks mostly need wide to normal focal lengths, and open ridges reward a range from wide to short telephoto. One zoom covering that range avoids lens changes in rain and dust.
How many batteries do I need for a multi-day hike?
Measure how long one battery lasts on a normal day of your own shooting, multiply by the number of days, and add one for cold weather and heavy days. A power bank reduces the number of spares if your camera can charge over USB.
Related guides
- How to photograph mountains: light on peaks, haze, scale and settings for big distances.
- Forest and woodland photography: finding order among trees and the light that suits them.
- How to photograph waterfalls: shutter speeds for moving water and dealing with spray.
- Sunrise photography: the pre-dawn timeline and focusing before you can see.
- Image stabilization: what it corrects, what it cannot, and when to turn it off.
- How to take photos of yourself when travelling alone: timers, supports and the small figure in a big scene.
- Winter photography: exposing for snow and protecting gear and yourself in the cold.
- Sharing photos online: location data, geotags and places that cannot cope with crowds.