Lighthouses are among the most loved subjects in photography. Standing alone on rocky headlands, at the end of long piers or on tiny islands, they combine elegant architecture with wild settings and a romantic history of keepers, storms and ships saved from the rocks. They are easy to recognize, they look good in almost any weather and they offer a lifetime of different pictures.
This guide covers how to plan a visit, how to find the best viewpoints, how to compose a lighthouse with the coast around it, the light and weather that suit lighthouses best, photographing the beam at night, details and interiors, and how to stay safe on cliffs, rocks and piers. For the wider coast and the sea itself, see the guide to seascape photography.
Why lighthouses make great subjects
A lighthouse gives a photographer a ready-made focal point in a dramatic place, which is a rare combination.
- A clear subject. A tall tower, often white or striped, stands out against sea and sky. It gives the eye an obvious place to rest in even the widest coastal scene.
- Dramatic settings. Lighthouses are built where the coast is most dangerous, which usually means cliffs, rocks, reefs and wild water. The setting is half the picture.
- Character. Each lighthouse has its own shape, color and history. Some are tall stone towers, others small iron beacons at the end of a breakwater.
- Light. Many still flash at night, adding a beam or a point of light to dusk and night pictures.
- Story. Lighthouses suggest safety, solitude and endurance. Even a simple picture carries those feelings.
Because they are so recognizable, lighthouses also make good subjects for practicing composition. You can try many different arrangements of the same tower and quickly see which work best.
Planning a lighthouse visit
Lighthouses are often in remote places, so a little planning goes a long way.
- Check access. Some lighthouses are open to visitors, some are reached only by footpath, and some stand on private or restricted land. Look up access, opening times and parking before you go.
- Look at a map. Find the headlands, beaches and piers around the lighthouse that might give a good view. A spot along the coast often shows the tower better than standing right beside it.
- Know where the sun will be. A lighthouse facing west catches sunset light; one on an east-facing coast suits sunrise. The page on planning around the sun, moon and tides explains how to predict light.
- Check the tide. Tides change the foreground dramatically, exposing rocks and pools at low water and bringing waves close at high water. Some lighthouses can only be reached at low tide, so know when the water returns.
- Check the weather. Clear skies, storms and fog all suit lighthouses, but each gives a different picture. Decide what mood you want and watch the forecast.
Scouting in daylight, especially if you plan to return for sunset or night, saves time and keeps you safe. The guide to location scouting has more ideas.
Finding the best viewpoint
The most obvious view, usually from the car park or the path to the door, is rarely the best. Spend time walking around.
- Look from along the coast. A view from a nearby headland or beach shows the lighthouse standing on its cliffs or rocks, which gives a sense of place.
- Get low on the rocks. A low viewpoint with rocks, pools or waves in the foreground adds depth and drama. Watch the sea and stay well above the waves.
- Use a path or wall. A footpath, fence or wall leading toward the lighthouse makes a natural leading line.
- Step back with a long lens. From a distance, a telephoto lens compresses the lighthouse against waves, cliffs or the sky and makes it look more imposing. The page on lens compression explains why.
- Look up from the base. Close to the tower, a wide lens pointed upward makes it soar into the sky. This works well with clouds or a blue sky.
Try at least three viewpoints on every visit: one wide with the setting, one tight with a longer lens and one close or unusual. The variety will help you see what makes that lighthouse special.
Want to add depth with rocks and waves in front of the lighthouse? The guide to foreground interest explains how to choose and place a foreground.
Take time to simply watch, too. Light moves across a headland quickly on changeable days, and waiting ten minutes for a break in the clouds to light the tower can transform an ordinary picture into a memorable one.
Composing a lighthouse
A lighthouse is a tall, narrow subject in a wide landscape, which raises a few composition questions.
- Vertical or horizontal. A vertical frame suits the tower itself and close views. A horizontal frame suits the lighthouse in its coastline. Try both.
- Placement. Placing the lighthouse off center, with space toward the sea, often feels natural. A centered lighthouse can feel strong and formal, especially with symmetrical surroundings. The guide to the rule of thirds covers off-center placement.
- Keep it straight. A leaning lighthouse looks wrong immediately. Keep the camera level and use the grid, or correct the lines in editing.
- Give it room. A small lighthouse surrounded by sea and sky can say more about isolation than a frame-filling one. The guide to negative space explains how emptiness strengthens a subject.
- Watch the horizon. Keep the sea horizon level and avoid placing it so it cuts through the lighthouse lamp.
Including a person on a coastal path or a boat on the water can also help, giving scale to the tower and a small sense of life in a wild place.
Light and weather
Lighthouses suit almost any weather, which makes them perfect subjects for unpredictable coastal days.
- Golden hour. Low sun lights a white tower with warm color and makes the coast glow. The guide to golden hour photography explains why.
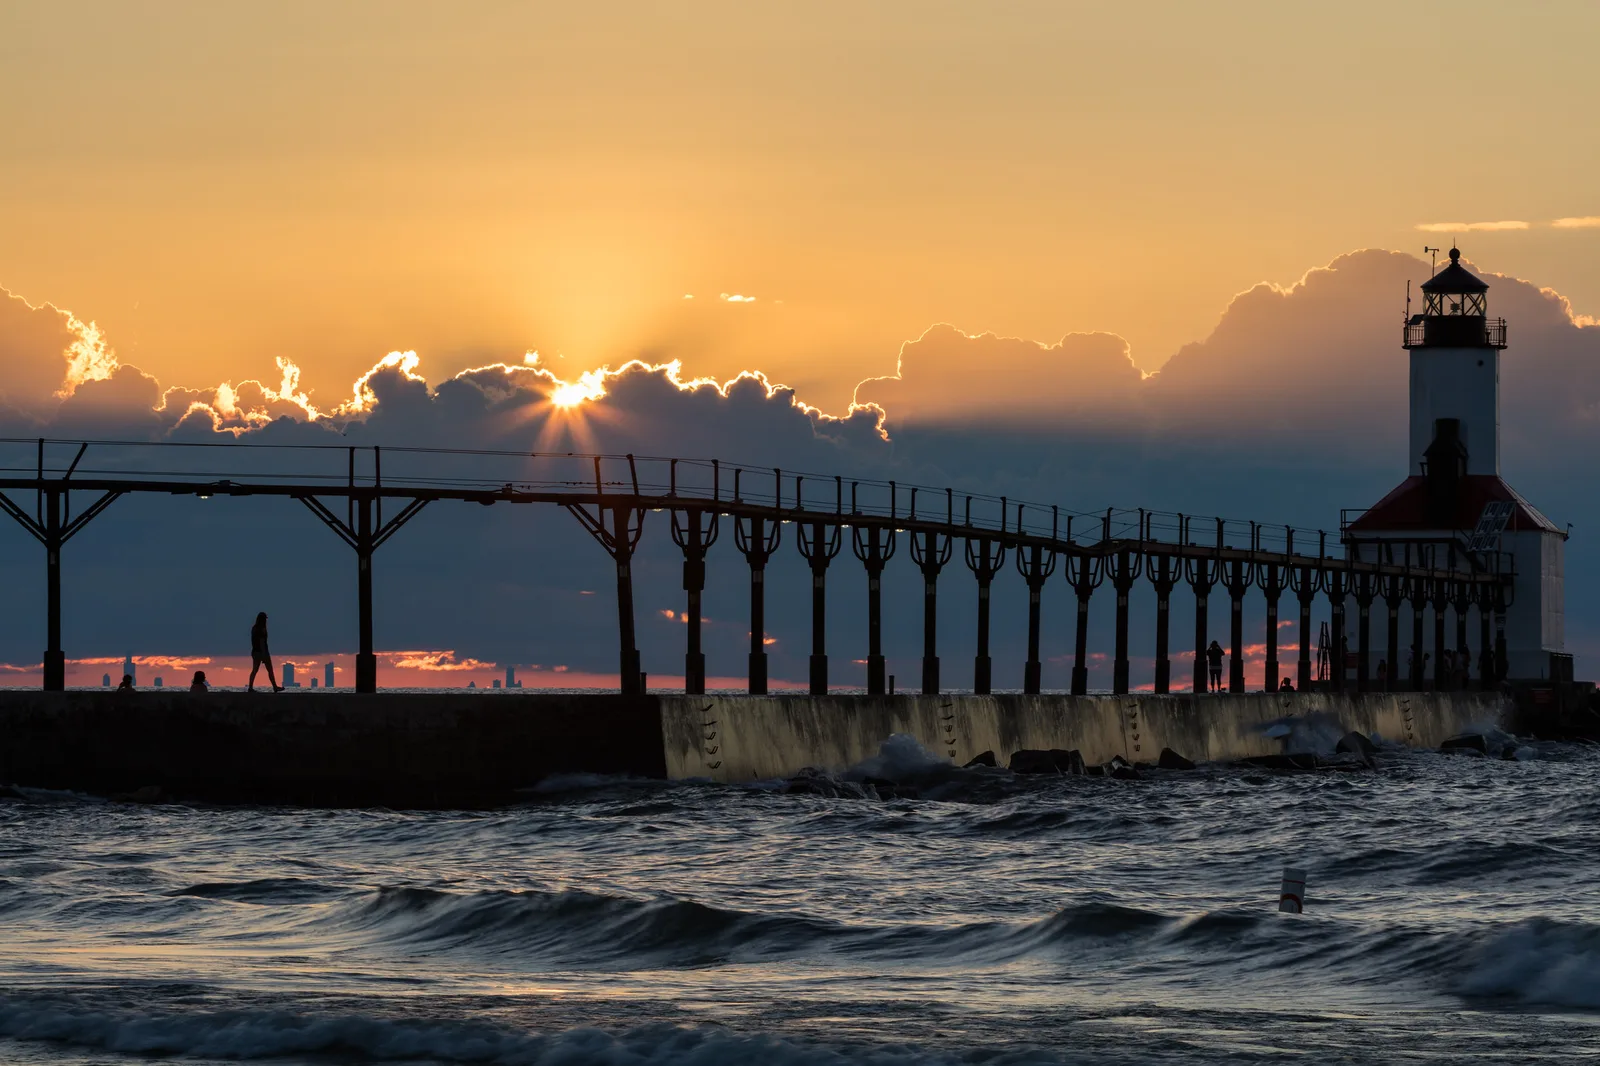
- Sunset silhouettes. With the sun behind it, a lighthouse becomes a simple shape against a colorful sky, as in the second photo on this page. Expose for the sky and let the tower go dark. The guide to silhouettes covers exposure.
- Storms. Waves breaking against the rocks below a lighthouse are one of the classic coastal pictures. Shoot from a safe, high and sheltered place, never from an exposed pier or rock. See storm photography.
- Fog. A lighthouse half hidden in fog, or its light glowing through mist, is moody and quiet. The guide to fog photography explains how to expose for it.
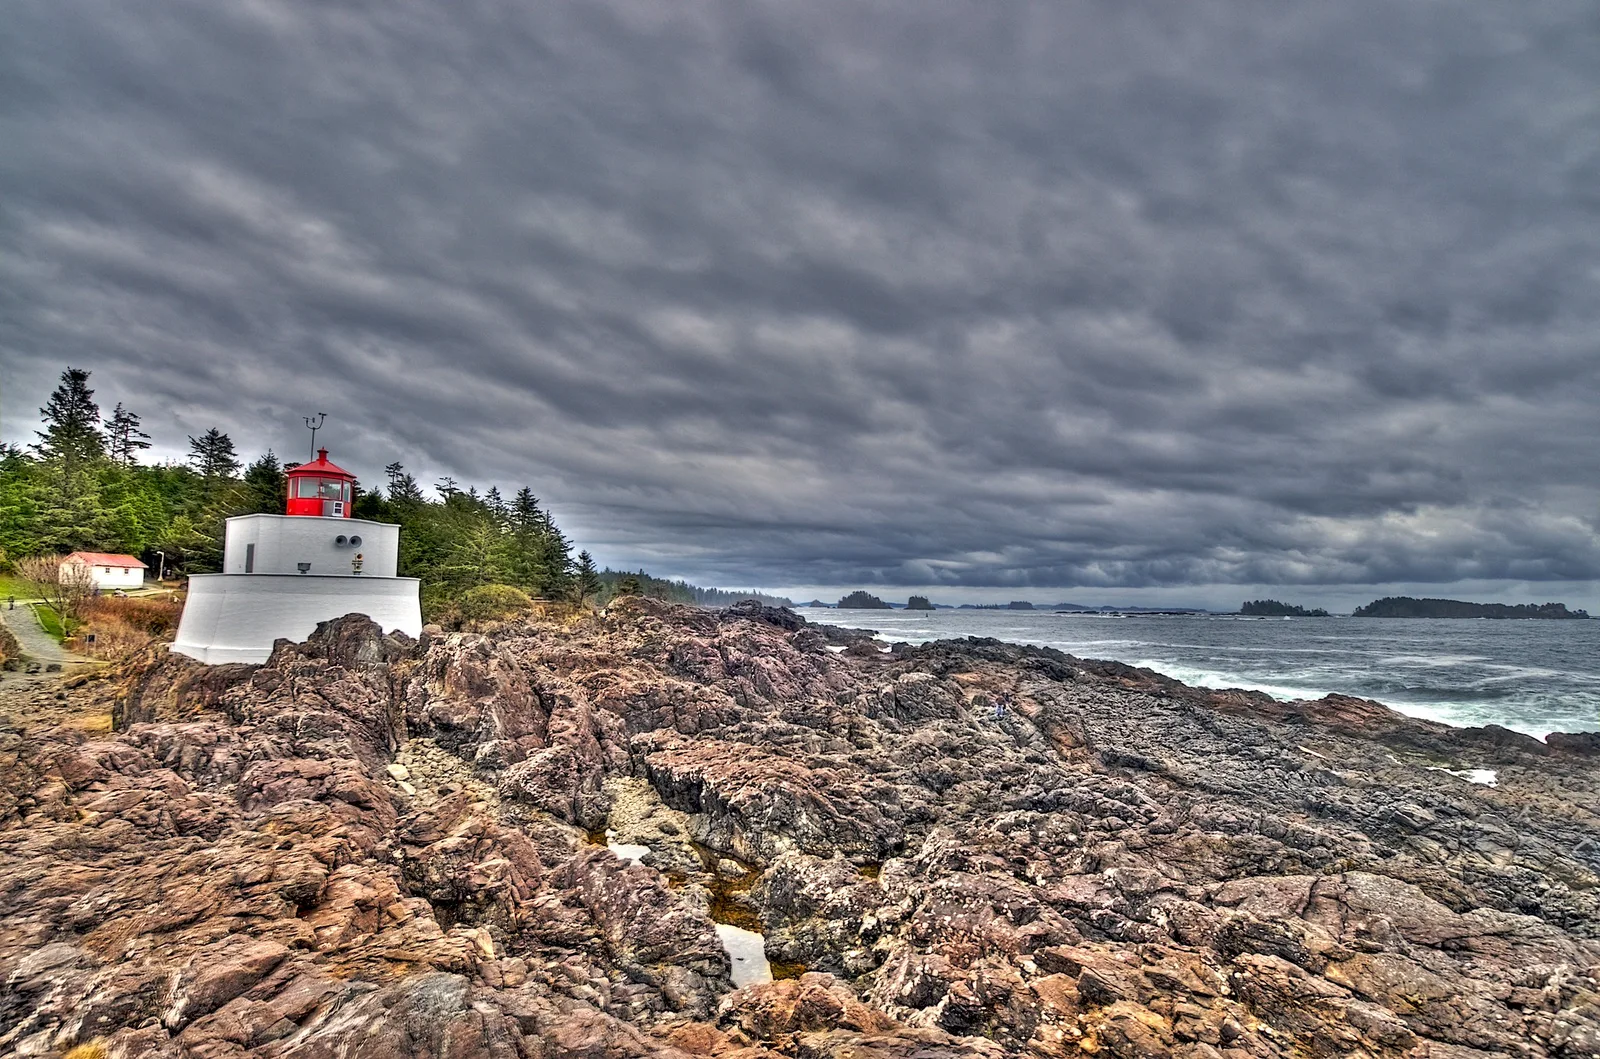
- Overcast skies. Soft, even light shows the colors and details of a lighthouse clearly, as in the picture at the top of this page.
- Clear blue skies. A white or striped tower against deep blue is bold and cheerful. A polarizing filter deepens the blue.
Lighthouses at dusk and night
Many working lighthouses flash at night, which adds a magical element to dusk pictures.
- Start at blue hour. The short time after sunset, when the sky is deep blue and the lamp is lit, often makes the best pictures. The guide to blue hour photography explains this window.
- Use a tripod. Exposures of several seconds are needed as light fades. Set up on solid ground well away from waves.
- Time the flash. Watch the light’s rhythm and make several exposures so at least one catches the lamp lit. Longer exposures may record several flashes or the sweep of the beam.
- Look for beams. On misty or humid nights, the beam may be visible as a ray of light across the sky.
- Add stars. Remote lighthouses often have dark skies. A lighthouse makes a superb foreground for stars or star trails. See the guide on how to photograph stars.
Bright lamps can burn out to white. Check the histogram, and if needed blend two exposures: one for the lamp and one for the sky and land.
Details, keepers’ houses and interiors
Close views and interiors tell the story of a lighthouse in a different way.
- The lantern room. If a lighthouse is open to visitors, the lens and lantern room at the top can be extraordinary, with glass prisms catching light.
- Spiral stairs. Looking up or down a spiral staircase inside a tower makes a dramatic, patterned picture.
- Keepers’ cottages. Many lighthouses have small houses, sheds and walls beside them, which add life and history to wider pictures.
- Textures. Peeling paint, iron railings, weathered doors and brass fittings all make good close-ups.
- Signs and plaques showing the lighthouse’s name and history are useful for captions.
Interiors are often dim, so raise the ISO and use a wide lens. Ask staff whether tripods are allowed.
When editing interiors and night pictures, keep the white tower white. Mixed light from lamps, sky and streetlights can turn it yellow or blue, so adjust white balance until the paint looks natural.
Pier and harbor lighthouses
Not every lighthouse stands on a wild cliff. Many small lights sit at the end of piers and breakwaters, guiding boats into harbors.
- Use the pier as a leading line. A long pier running toward a small light pulls the eye straight through the frame.
- Use the harbor. Boats, moorings and town lights around a harbor light give a sense of place. The guide to boat and harbor photography has more ideas.
- Stay safe in waves. Breakwaters and piers can be swept by waves in rough weather. Never walk out on them in storms.
Staying safe on the coast
Lighthouses are built in dangerous places, and that danger applies to photographers too.
- Stay away from cliff edges, especially in wind or wet conditions, and keep to marked paths.
- Watch the sea. Large waves can arrive without warning, even on calm days. Never turn your back on the water on low rocks.
- Know the tide. Make sure you will not be cut off on rocks or causeways.
- Carry a light when shooting at dusk or night, and know the way back.
- Tell someone where you are going if the lighthouse is remote.
Heading out in wild coastal weather? The guide to bad weather photography explains how to protect yourself and your gear.
Building a lighthouse collection
Many photographers find that one lighthouse leads to another. Because each tower is different, a collection becomes a satisfying long-term project, and planning trips around lighthouses takes you to some of the most beautiful stretches of coast.
- Photograph each one consistently. A similar framing for every lighthouse, such as a vertical portrait of the tower against the sky, makes a collection look unified when shown together.
- Add a context picture for each one, showing its coastline, so the set shows places as well as towers.
- Record the details. Note the name, location and a little history. Lighthouse stories of keepers, shipwrecks and storms make wonderful captions.
- Return in different seasons. The same lighthouse in summer sun, autumn storms and winter snow shows how its setting changes.
- Look for small lights too. Harbor lights, river beacons and range lights are less famous but often charming.
A collection like this can grow over many years. Even a handful of lighthouses photographed well makes a lovely set for a wall, a small book or a slideshow.
Looking for more long-term ideas like this? The list of photography project ideas has themes to follow for months or years.
Common mistakes
- The postcard view only. Fix: walk along the coast and look for different angles.
- A leaning lighthouse. Fix: keep the camera level and correct verticals in editing.
- A tiny lighthouse lost in the frame. Fix: use a longer lens or place it against a clean sky.
- A blown-out lamp at night. Fix: shorten the exposure or blend two frames.
- Missing the flash. Fix: make several exposures and time them to the light’s rhythm.
- Taking risks near waves. Fix: stay high, sheltered and aware of the sea.
Try this: a 10-minute lighthouse study
- Minutes 1 to 2: Make one wide picture showing the lighthouse in its coastline.
- Minutes 3 to 4: Find a leading line, such as a path, wall or pier, and use it to guide the eye.
- Minutes 5 to 6: Use a longer lens to isolate the tower against the sky.
- Minutes 7 to 8: Get low with rocks or plants in the foreground.
- Minutes 9 to 10: Photograph one detail: a door, a railing or the lantern.
Frequently asked questions
What is the best time to photograph a lighthouse?
Golden hour and blue hour, when the light is warm or the lamp is lit. Stormy and foggy days also give dramatic results.
How do I photograph a lighthouse beam?
On a misty night, use a tripod and an exposure of several seconds. Make several frames to catch the beam sweeping across the sky.
What lens is best for lighthouses?
A wide lens suits close views and dramatic foregrounds. A telephoto lens is excellent from a distance, compressing the lighthouse with waves or cliffs.
How do I stop a lighthouse leaning in my photos?
Keep the camera level and step back rather than tilting up. Correct small leans in editing.
Can I photograph lighthouses with a phone?
Yes. Use the grid to keep the tower straight, the zoom to compress distant lighthouses and night mode for dusk pictures.
How do I photograph waves crashing near a lighthouse?
Stand well back on high, safe ground and use a longer lens. A shutter speed of 1/1000 or faster freezes spray, while a slower speed of around half a second gives soft, flowing water. Never go onto exposed rocks or piers in rough seas.
Can I go inside a lighthouse to photograph it?
Some lighthouses open to visitors as museums, and many allow photography inside. Check opening times and rules before you go, and ask staff about tripods.
How do I make a familiar lighthouse look fresh?
Visit in unusual conditions, such as fog, storms or snow, try a different viewpoint along the coast and use foreground elements that others overlook.
For terms such as silhouette, blue hour, lens compression and leading lines, see the photography glossary.